horn GMC SIERRA 2020 Get To Know Guide
[x] Cancel search | Manufacturer: GMC, Model Year: 2020, Model line: SIERRA, Model: GMC SIERRA 2020Pages: 24, PDF Size: 4.75 MB
Page 4 of 24

4F Optional equipment
KEYLESS ACCESS SYSTEMF
REMOTE KEYLESS ENTRY TRANSMITTER (KEY FOB)F
The Keyless Access System enables operation of the doors and tailgate without
removing the Remote Keyless Entry (RKE) transmitter from your pocket or purse. The transmitter must be within 3 feet of the tailgate or the door being unlocked.
KEYLESS UNLOCKING
With the transmitter within range:
Press the button on the driver’s door handle to unlock the driver’s door; press it again within 5 seconds to unlock all doors and tailgate.
Press the button on a passenger door handle to unlock all doors and tailgate.
Press the lower button on the tailgate to lower the standard tailgate.
KEYLESS LOCKING
With the ignition off, the transmitter removed from the vehicle, and all doors closed:
Press the button on any door handle to lock all doors and tailgate immediately.
If Passive Locking is turned on, all doors will lock automatically after a short delay.
Note: To change the door lock and unlock settings, go to Settings > Vehicle > Remote Lock, Unlock, Start.See Keys, Doors and Windows in your Owner’s Manual.
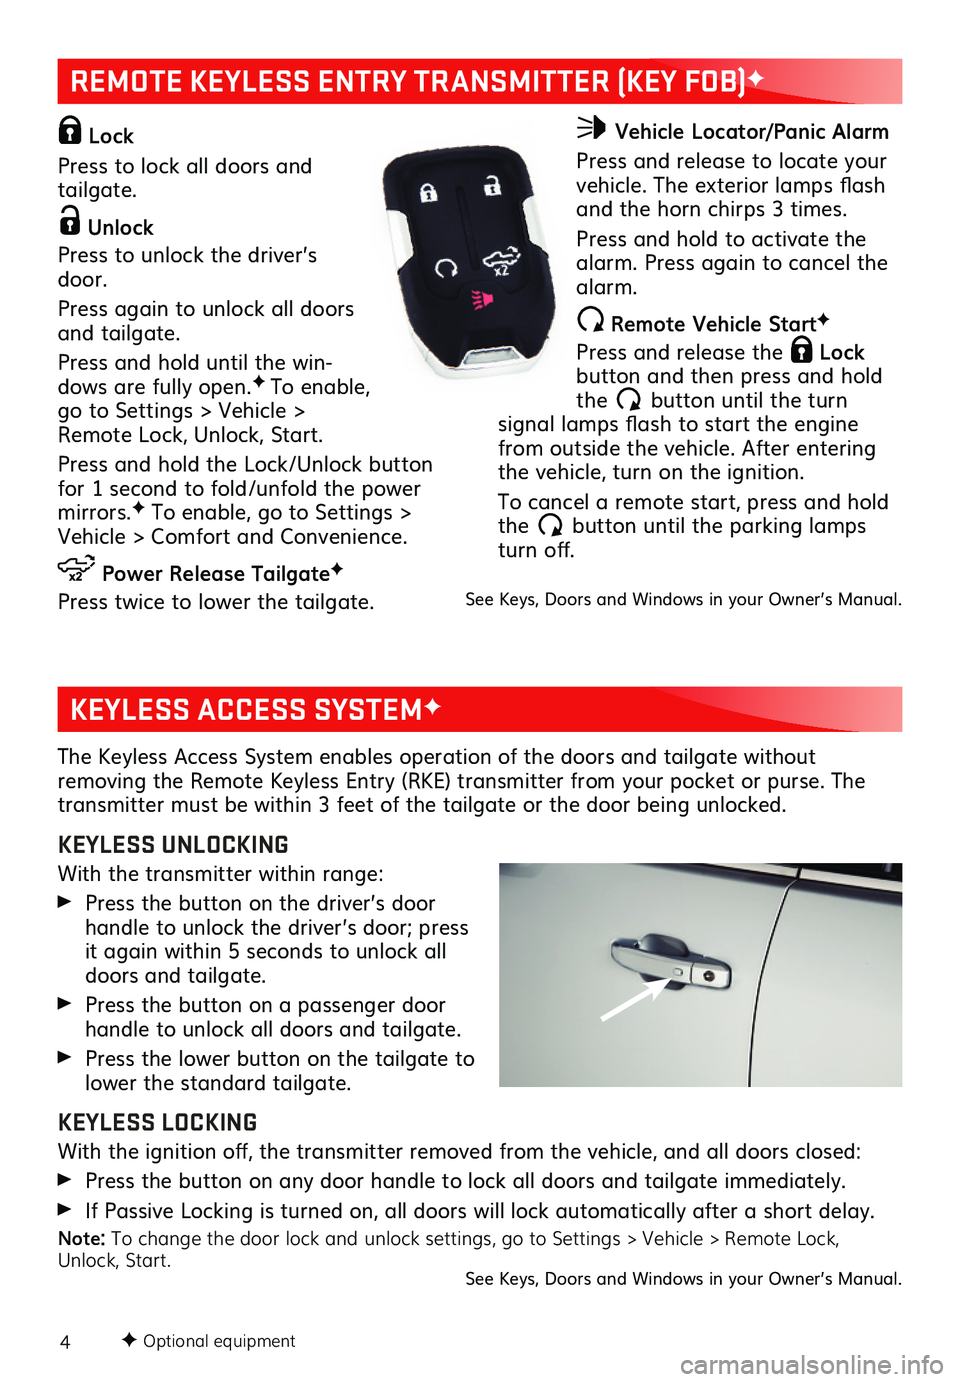
Lock
Press to lock all doors and tailgate.
Unlock
Press to unlock the driver’s door.
Press again to unlock all doors and tailgate.
Press and hold until the win-dows are fully open.F To enable, go to Settings > Vehicle > Remote Lock, Unlock, Start.
Press and hold the Lock/Unlock button for 1 second to fold/unfold the power mirrors.F To enable, go to Settings > Vehicle > Comfort and Convenience.
Power Release TailgateF
Press twice to lower the tailgate.
Vehicle Locator/Panic Alarm
Press and release to locate your vehicle. The exterior lamps flash and the horn chirps 3 times.
Press and hold to activate the alarm. Press again to cancel the alarm.
Remote Vehicle StartF
Press and release the Lock button and then press and hold the button until the turn
signal lamps flash to start the engine from outside the vehicle. After entering the vehicle, turn on the ignition.
To cancel a remote start, press and hold the button until the parking lamps turn off.
See Keys, Doors and Windows in your Owner’s Manual.
Page 21 of 24

21F Optional equipment
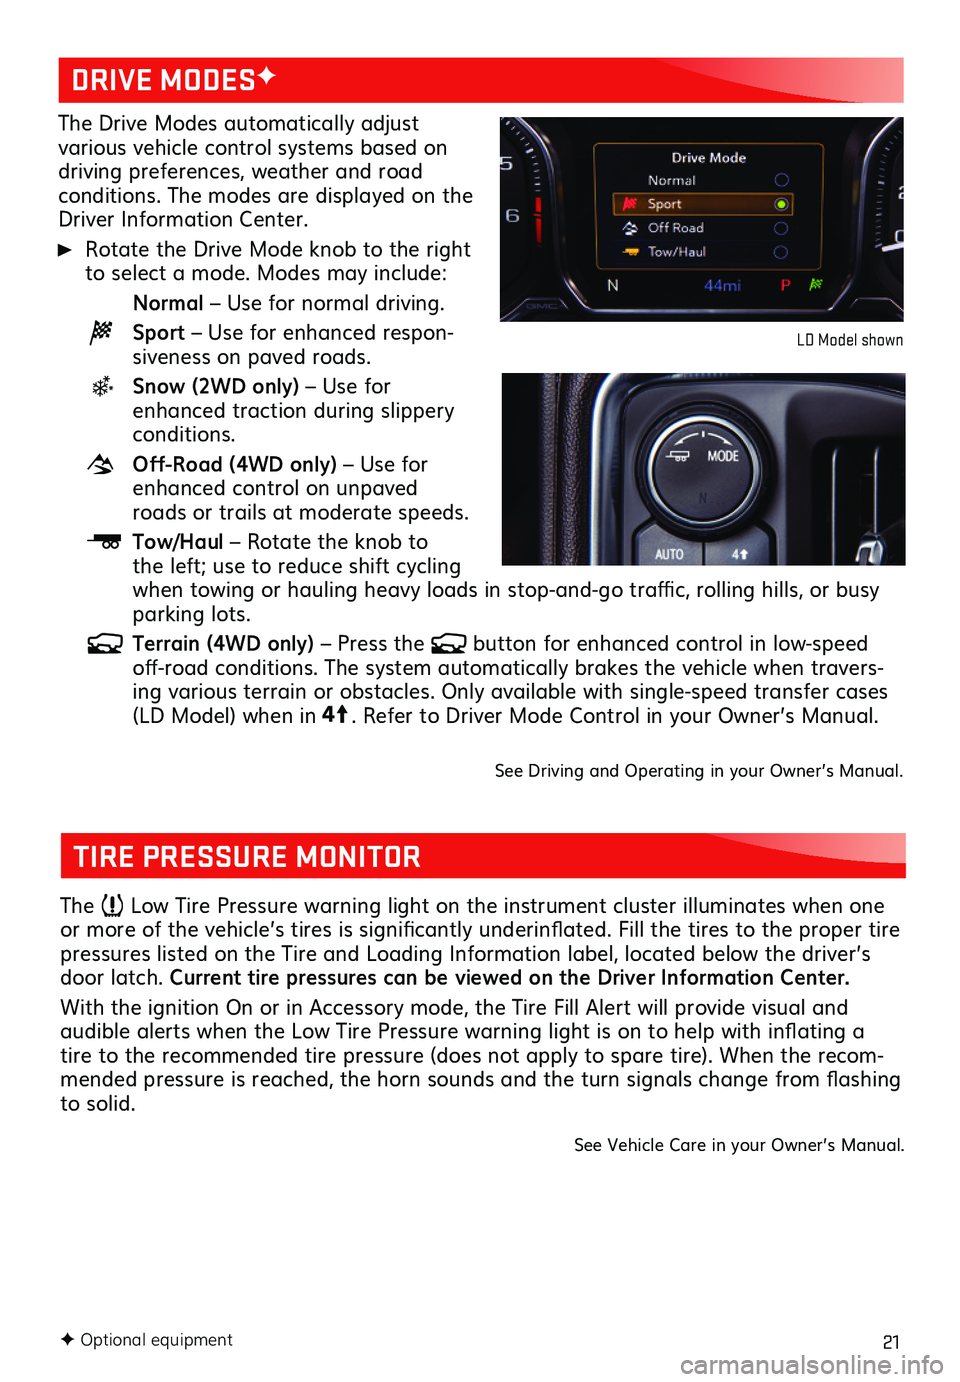
The Drive Modes automatically adjust various vehicle control systems based on driving preferences, weather and road conditions. The modes are displayed on the Driver Information Center.
Rotate the Drive Mode knob to the right to select a mode. Modes may include:
Normal – Use for normal driving.
Sport – Use for enhanced respon-siveness on paved roads.
Snow (2WD only) – Use for enhanced traction during slippery conditions.
Off-Road (4WD only) – Use for enhanced control on unpaved roads or trails at moderate speeds.
Tow/Haul – Rotate the knob to the left; use to reduce shift cycling when towing or hauling heavy loads in stop-and-go traffic, rolling hills, or busy parking lots.
Terrain (4WD only) – Press the button for enhanced control in low-speed off-road conditions. The system automatically brakes the vehicle when travers-ing various terrain or obstacles. Only available with single-speed transfer cases (LD Model) when in4
4
2
. Refer to Driver Mode Control in your Owner’s Manual.
See Driving and Operating in your Owner’s Manual.
DRIVE MODESF
LD Model shown
TIRE PRESSURE MONITOR
The Low Tire Pressure warning light on the instrument cluster illuminates when one or more of the vehicle’s tires is significantly underinflated. Fill the tires to the proper tire pressures listed on the Tire and Loading Information label, located below the driver’s door latch. Current tire pressures can be viewed on the Driver Information Center.
With the ignition On or in Accessory mode, the Tire Fill Alert will provide visual and
audible alerts when the Low Tire Pressure warning light is on to help with inflating a tire to the recommended tire pressure (does not apply to spare tire). When the recom-mended pressure is reached, the horn sounds and the turn signals change from flashing to solid.
See Vehicle Care in your Owner’s Manual.