ECO mode GMC SIERRA 2022 Owner's Manual
[x] Cancel search | Manufacturer: GMC, Model Year: 2022, Model line: SIERRA, Model: GMC SIERRA 2022Pages: 474, PDF Size: 15.09 MB
Page 233 of 474
GMC Sierra/Sierra Denali 1500 Owner Manual (GMNA-Localizing-U.S./
Canada/Mexico-15883563) - 2022 - CRC - 11/19/21
232 Driving and Operating
{Warning
If equipped with four-wheel drive, the
vehicle will be free to roll if the transfer
case is in N (Neutral), even when the shift
lever is in P (Park). You or someone else
could be seriously injured. Be sure the
transfer case is in a drive gear—2
m, 4m,
or 4
n— or set the parking brake before
placing the transfer case in N (Neutral).
See Four-Wheel Drive 0240.
R : Use this gear to back up.
Caution
Shifting to R (Reverse) while the vehicle is
moving forward could damage the
transmission. The repairs would not be
covered by the vehicle warranty. Shift to
R (Reverse) only after the vehicle is
stopped.
To rock the vehicle back and forth to get
out of snow, ice, or sand without damaging
the transmission, see If the Vehicle Is Stuck
0 214. N :
In this position, the engine does not
connect with the wheels. To restart the
engine when the vehicle is already moving,
use N (Neutral) only.
Also, use N (Neutral) when the vehicle is
being towed.
{Warning
Shifting into a drive gear while the
engine is running at high speed is
dangerous. Unless your foot is firmly on
the brake pedal, the vehicle could move
very rapidly. You could lose control and
hit people or objects. Do not shift into a
drive gear while the engine is running at
high speed.
Caution
Shifting out of P (Park) or N (Neutral) with
the engine running at high speed may
damage the transmission. The repairs
would not be covered by the vehicle
warranty. Be sure the engine is not
running at high speed when shifting the
vehicle.
Caution
A transmission hot message may display
if the automatic transmission fluid is too
hot. Driving under this condition can
damage the vehicle. Stop and idle the
engine to cool the automatic
transmission fluid. This message clears
when the transmission fluid has cooled
sufficiently.
D : This position is for normal driving.
It provides the best fuel economy. If more
power is needed for passing, press the
accelerator pedal down.
.When going less than about 55 km/h (35
mph), push the accelerator pedal about
halfway down.
.When going about 55 km/h (35 mph) or
more, push the accelerator all the
way down.
By doing this, the vehicle shifts down to
the next gear and has more power.
Use D (Drive) and Tow/Haul Mode when
towing a trailer, carrying a heavy load,
driving on steep hills, or driving off-road.
Shift the transmission to a lower gear if the
transmission shifts too often.
Page 240 of 474
GMC Sierra/Sierra Denali 1500 Owner Manual (GMNA-Localizing-U.S./
Canada/Mexico-15883563) - 2022 - CRC - 11/19/21
Driving and Operating 239
10-Speed Automatic TransmissionGear before shifting from D (Drive) to L (Manual Mode) 10th 9th 8th 7th 6th 5th 4th 3rd 2nd 1st
Range after shifting from D (Drive) to L (Manual
Mode) –Tow/Haul not engaged L7 L7 L7 L6 L5 L4 L3 L3 L2 L1
Range after shifting from D (Drive) to L (Manual
Mode) –Tow/Haul engaged L7 L7 L6 L5 L4 L3 L3 L3 L2 L1
Manual Mode (Electronic Shifter)
Electronic Range Select (ERS)
Caution
Driving with the engine at a high rpm
without upshifting while using Manual
Mode, could damage the vehicle. Always
upshift when necessary while using
Manual Mode.
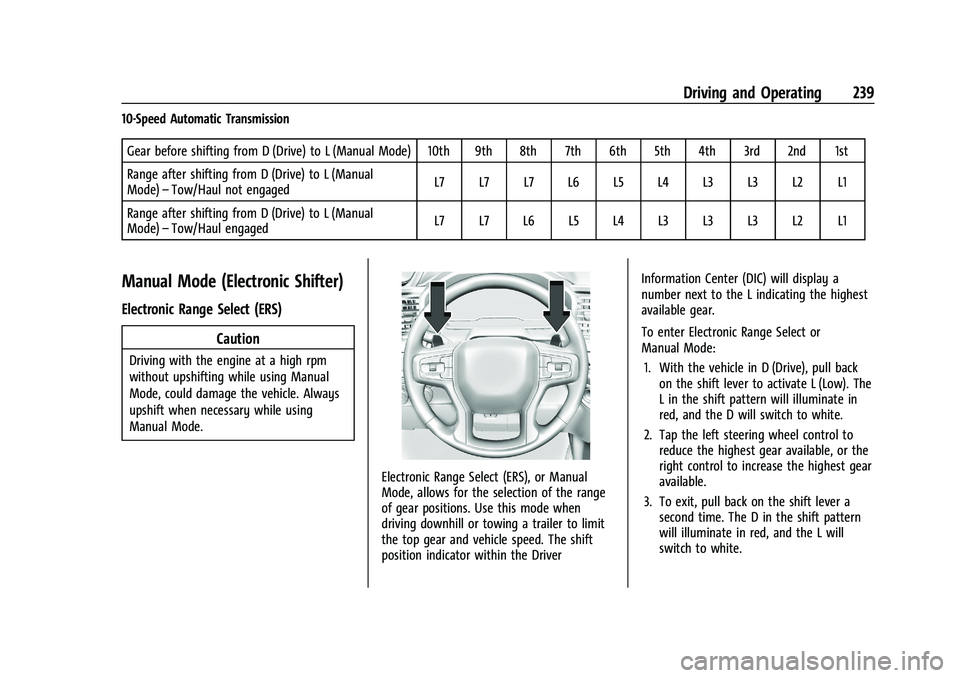
Electronic Range Select (ERS), or Manual
Mode, allows for the selection of the range
of gear positions. Use this mode when
driving downhill or towing a trailer to limit
the top gear and vehicle speed. The shift
position indicator within the Driver Information Center (DIC) will display a
number next to the L indicating the highest
available gear.
To enter Electronic Range Select or
Manual Mode:
1. With the vehicle in D (Drive), pull back on the shift lever to activate L (Low). The
L in the shift pattern will illuminate in
red, and the D will switch to white.
2. Tap the left steering wheel control to reduce the highest gear available, or the
right control to increase the highest gear
available.
3. To exit, pull back on the shift lever a second time. The D in the shift pattern
will illuminate in red, and the L will
switch to white.
Page 241 of 474
GMC Sierra/Sierra Denali 1500 Owner Manual (GMNA-Localizing-U.S./
Canada/Mexico-15883563) - 2022 - CRC - 11/19/21
240 Driving and Operating
When shifting to L (Low), the transmission
will shift to a preset lower gear range. For
this preset range, the highest gear available
will be displayed next to the L in the DIC.
SeeDriver Information Center (DIC) (Base
Level) 0128 orDriver Information Center
(DIC) (Uplevel) 0130. All gears below that
number are available to use. For example,
when 4 (Fourth) is shown next to the L,
1 (First) through 4 (Fourth) gears are shifted
automatically. To shift to 5 (Fifth) gear, tap
the right steering wheel control or shift into
D (Drive).
L (Low) will prevent shifting to a lower gear
range if the engine speed is too high. If the
vehicle speed is not reduced within the time
allowed, the lower gear range shift will not
be completed. Slow the vehicle, then tap the
left steering wheel control to the desired
lower gear range.
Cruise control can be used while in ERS.
Tow/Haul Mode
The Tow/Haul Mode adjusts the
transmission shift pattern to reduce shift
cycling. This provides increased performance,
vehicle control, and enhanced transmission
and engine cooling when driving down steep
hills or mountain grades, when towing, or when hauling heavy loads. See
Driver
Mode Control 0249 to activate Tow/
Haul Mode.
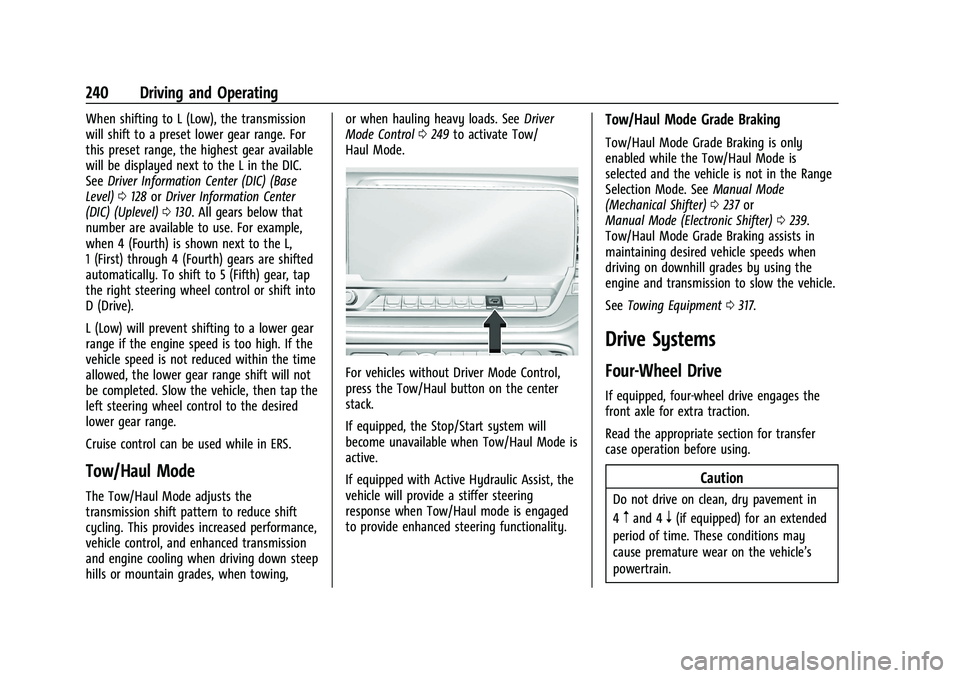
For vehicles without Driver Mode Control,
press the Tow/Haul button on the center
stack.
If equipped, the Stop/Start system will
become unavailable when Tow/Haul Mode is
active.
If equipped with Active Hydraulic Assist, the
vehicle will provide a stiffer steering
response when Tow/Haul mode is engaged
to provide enhanced steering functionality.
Tow/Haul Mode Grade Braking
Tow/Haul Mode Grade Braking is only
enabled while the Tow/Haul Mode is
selected and the vehicle is not in the Range
Selection Mode. See Manual Mode
(Mechanical Shifter) 0237 or
Manual Mode (Electronic Shifter) 0239.
Tow/Haul Mode Grade Braking assists in
maintaining desired vehicle speeds when
driving on downhill grades by using the
engine and transmission to slow the vehicle.
See Towing Equipment 0317.
Drive Systems
Four-Wheel Drive
If equipped, four-wheel drive engages the
front axle for extra traction.
Read the appropriate section for transfer
case operation before using.
Caution
Do not drive on clean, dry pavement in
4
mand 4n(if equipped) for an extended
period of time. These conditions may
cause premature wear on the vehicle’s
powertrain.
Page 244 of 474
GMC Sierra/Sierra Denali 1500 Owner Manual (GMNA-Localizing-U.S./
Canada/Mexico-15883563) - 2022 - CRC - 11/19/21
Driving and Operating 243
Caution
Shifting the transmission into gear before
the requested mode indicator light has
stopped flashing could damage the
transfer case.
If the transmission is not shifted into
N (Neutral) or the vehicle has not slowed to
5 km/h (3 mph) within 20 seconds, the
transfer case will remain in its original state.
This will be indicated in the instrument
cluster.
With the vehicle moving less than
5 km/h (3 mph) and the transmission in
N (Neutral), attempt the shift again.
Shifting Out of 4
n
1. The vehicle must be stopped or moving less than 5 km/h (3 mph) with the
transmission in N (Neutral) and the
ignition on. It is best for the vehicle to
be moving 1.6 to 3.2 km/h (1 to 2 mph).
2. Press 4
m, AUTO, or 2m. The actual 4x4
shift request is only made after the
button is released. The 4x4 graphic will
remain flashing until the shift request
has completed. A DIC message displays
to indicate the state of the request. Once the 4x4 shift has completed, the
DIC message disappears, the 4x4 graphic
stops flashing, and the current setting is
indicated.
If vehicle speed is higher when shift
request occurs, a DIC message displays.
Reduce vehicle speed.
If the transmission is not in N (Neutral)
when shift request occurs, DIC messages will
display. The vehicle will allow 20 seconds for
this shift to occur. After this time, a graphic
in the instrument cluster will indicate that
the transfer case is in 4
n.
Caution
Shifting the transmission into gear before
the requested mode indicator light has
stopped flashing could damage the
transfer case.
If the transmission is not shifted into
N (Neutral) or the vehicle has not slowed to
5 km/h (3 mph) within 20 seconds, the
transfer case will remain in its original state.
This will be indicated in the instrument
cluster.
With the vehicle moving less than 5 km/h
(3 mph), and the transmission in N (Neutral),
attempt the shift again. Shifting Into N (Neutral)
To shift into N (Neutral):
1. Start the vehicle.
2. Shift the transmission to N (Neutral).
3. Shift the transfer case to 2
m.
4. Apply the parking brake and/or brake pedal.
5. Press 2
mfive times in 10 seconds until
the N (Neutral) graphic starts flashing in
the instrument cluster. When the shift is
complete, the graphic stops flashing.
If the parking brake and/or brake pedal
is not applied within 20 seconds, the
transfer case will remain in the original
state.
6. If the transmission is not shifted into N (Neutral) or the vehicle has not slowed
to 5 km/h (3 mph) within 20 seconds,
the transfer case will remain in its
original state. This will be indicated in
the instrument cluster.
Shifting Out of N (Neutral)
To shift out of N (Neutral): 1. Start the vehicle.
2. Set the parking brake. See Electric
Parking Brake 0245.
Page 250 of 474
GMC Sierra/Sierra Denali 1500 Owner Manual (GMNA-Localizing-U.S./
Canada/Mexico-15883563) - 2022 - CRC - 11/19/21
Driving and Operating 249
Hill Descent Control (HDC)
If equipped, Hill Descent Control (HDC) sets
and maintains vehicle speed while driving
down steep grades in a forward or reverse
gear. The HDC switch is on the center stack,
below the climate controls.
Press
5to enable or disable HDC. Vehicle
speed must be below 50 km/h (31 mph).
When enabled, the HDC light displays on
the instrument cluster.
A blinking HDC light indicates the system is
actively applying the brakes to maintain
vehicle speed. HDC can maintain vehicle
speeds between 1 and 22 km/h (1 and
14 mph) on grades greater than or equal
to 10%.
If HDC is to be used for more than
three minutes or on grades steeper than
25%, the transfer case should be put into
Four-Wheel Drive Low (4
n) to reduce the
possibility of brake overheating. Noise from the Electronic Brake Control
Module (EBCM) is normal when HDC is
active.
When HDC is activated, the initial HDC
speed is set to the current driving speed.
It can be increased or decreased by pressing
+RES or SET- on the steering wheel, or by
applying the accelerator or brake pedal. This
adjusted speed becomes the new set speed.
HDC will remain enabled between 30 and
60 km/h (19 and 37 mph); however, vehicle
speed cannot be set or maintained in this
range. HDC will automatically disable if the
vehicle speed is above 80 km/h (50 mph) or
above 60 km/h (37 mph) for at least
30 seconds.
5must be pressed again to re-enable HDC.
HDC may disable after an extended period
of use. If this happens, HDC will require
time to cool down. The length of time HDC
remains active depends on road conditions,
grade, set speed, vehicle loading, and
outside temperature.
When enabled, if the vehicle speed is above
30 km/h (19 mph) and below 60 km/h
(37 mph), a DIC message will display.
Driver Mode Control
Driver Mode Control (DMC) allows the driver
to adjust the overall driving experience to
better suit preference by adjusting multiple
systems to fit specific driving needs. Drive
mode availability and affected vehicle
subsystems are dependent upon vehicle trim
level, region, and optional features.
Mode Activation
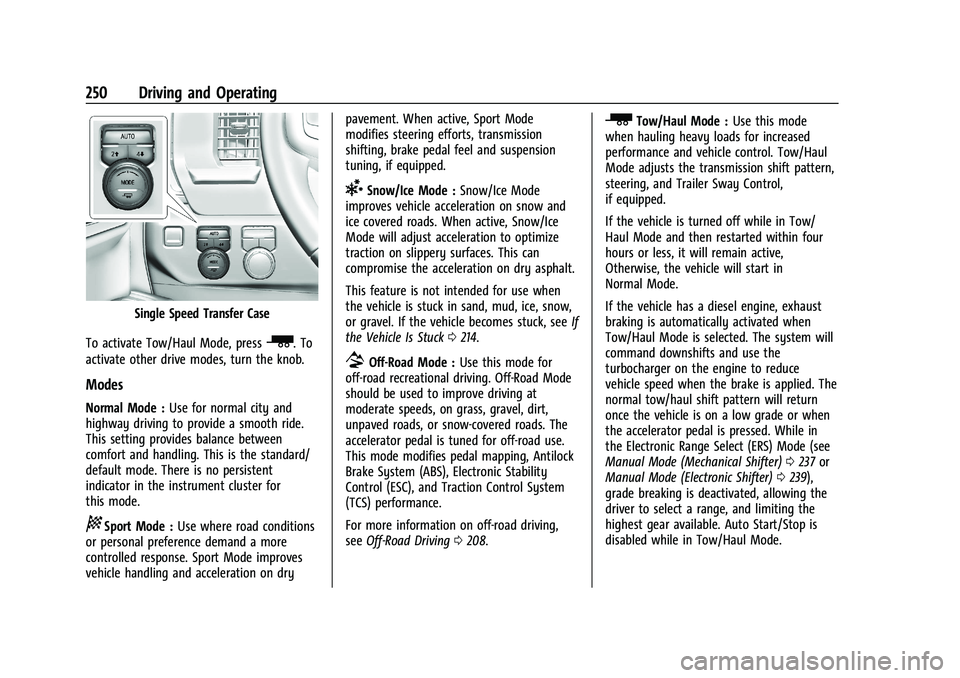
Two-Speed Transfer Case
Page 251 of 474
GMC Sierra/Sierra Denali 1500 Owner Manual (GMNA-Localizing-U.S./
Canada/Mexico-15883563) - 2022 - CRC - 11/19/21
250 Driving and Operating
Single Speed Transfer Case
To activate Tow/Haul Mode, press
_. To
activate other drive modes, turn the knob.
Modes
Normal Mode : Use for normal city and
highway driving to provide a smooth ride.
This setting provides balance between
comfort and handling. This is the standard/
default mode. There is no persistent
indicator in the instrument cluster for
this mode.
8Sport Mode : Use where road conditions
or personal preference demand a more
controlled response. Sport Mode improves
vehicle handling and acceleration on dry pavement. When active, Sport Mode
modifies steering efforts, transmission
shifting, brake pedal feel and suspension
tuning, if equipped.
6Snow/Ice Mode :
Snow/Ice Mode
improves vehicle acceleration on snow and
ice covered roads. When active, Snow/Ice
Mode will adjust acceleration to optimize
traction on slippery surfaces. This can
compromise the acceleration on dry asphalt.
This feature is not intended for use when
the vehicle is stuck in sand, mud, ice, snow,
or gravel. If the vehicle becomes stuck, see If
the Vehicle Is Stuck 0214.
7Off-Road Mode : Use this mode for
off-road recreational driving. Off-Road Mode
should be used to improve driving at
moderate speeds, on grass, gravel, dirt,
unpaved roads, or snow-covered roads. The
accelerator pedal is tuned for off-road use.
This mode modifies pedal mapping, Antilock
Brake System (ABS), Electronic Stability
Control (ESC), and Traction Control System
(TCS) performance.
For more information on off-road driving,
see Off-Road Driving 0208.
_Tow/Haul Mode : Use this mode
when hauling heavy loads for increased
performance and vehicle control. Tow/Haul
Mode adjusts the transmission shift pattern,
steering, and Trailer Sway Control,
if equipped.
If the vehicle is turned off while in Tow/
Haul Mode and then restarted within four
hours or less, it will remain active,
Otherwise, the vehicle will start in
Normal Mode.
If the vehicle has a diesel engine, exhaust
braking is automatically activated when
Tow/Haul Mode is selected. The system will
command downshifts and use the
turbocharger on the engine to reduce
vehicle speed when the brake is applied. The
normal tow/haul shift pattern will return
once the vehicle is on a low grade or when
the accelerator pedal is pressed. While in
the Electronic Range Select (ERS) Mode (see
Manual Mode (Mechanical Shifter) 0237 or
Manual Mode (Electronic Shifter) 0239),
grade breaking is deactivated, allowing the
driver to select a range, and limiting the
highest gear available. Auto Start/Stop is
disabled while in Tow/Haul Mode.
Page 287 of 474
GMC Sierra/Sierra Denali 1500 Owner Manual (GMNA-Localizing-U.S./
Canada/Mexico-15883563) - 2022 - CRC - 11/19/21
286 Driving and Operating
4. Hitch View
Displays a zoomed-in view of the hitch
area to assist with aligning the
vehicle’s hitch ball with the trailer
coupler and monitoring the trailer
connection. To view, select Hitch View
on the infotainment display when the
Camera App is active. To access this
view when in a forward gear above
12 km/h (8 mph), select CAMERA on
the infotainment display and select
Hitch View. The view will close after
eight seconds and can be closed early
by selecting X, Home or Back. Shifting
into P (Park) while in this view will
automatically engage the Electric
Parking Brake (EPB).
5. Surround View
Displays an image of the area
surrounding the vehicle. Surround
View is displayed alongside the
currently selected view when below
12 km/h (8 mph). Surround View is
disabled when above 12 km/h (8 mph).
6. Camera App Guidance Lines
The Camera App supports three
possible guidance modes: No
Guidance, Vehicle Guidance and
Trailering Guidance. To changeguidance mode, select the appropriate
guidance icon. Depending on the
guidance mode and view selected,
different guidance lines may appear.
A grayed-out icon indicates that
guidance lines are not available.
Certain views do not support Guidance
lines.
.Standard Guidance Lines are
available in Front/Rear Standard
Views, Front/Rear Top-Down Views
and Surround View when the
vehicle guidance mode is selected.
Standard Guidance Lines show
current and intended vehicle path.
.Hitch Guidance Line is available in
Rear Standard View or Cargo Bed
View when the Trailering Guidance
mode is selected. Hitch Guidance
displays a single centered guidance
line on the infotainment display to
assist with aligning the vehicle’s
hitch with a trailer coupler. Align
the Hitch Guidance Line with the
trailer coupler by continuously
steering the vehicle to keep the
guidance line centered on the
coupler when backing. Park Assist
overlays will not display when the
Hitch Guidance Line is active.
.Rear Trailer Guidance Lines are
available in the Rear Trailer View
when the Trailering Guidance
mode is selected and the rear
trailer camera calibration has been
successfully completed. Rear Trailer
Guidance Lines show the intended
path (yellow) and the current path
(blue) of the trailer. The current
path guidance lines will converge
with the intended path guidance
lines.
7. Camera App Guidance Lines
Duplicate of item 6.
8. Interior Trailer View
Displays a view of the interior of the
trailer. The feature is available when a
trailer is connected. The feature
requires user installation of an
accessory trailer camera on the
interior of the trailer per the accessory
trailer camera installation instructions
(see your dealer for accessory trailer
camera(s) and information). To view,
select Interior Trailer View on the
infotainment display when the Camera
App is active. To access this view
when in a forward gear above
12 km/h (8 mph), select CAMERA on
the infotainment display and select
Page 307 of 474
GMC Sierra/Sierra Denali 1500 Owner Manual (GMNA-Localizing-U.S./
Canada/Mexico-15883563) - 2022 - CRC - 11/19/21
306 Driving and Operating
Filling the Tank (Pickup Model)
If the vehicle has a diesel engine, see the
Duramax diesel supplement.
An arrow on the fuel gauge indicates which
side of the vehicle the fuel door is on. See
Fuel Gauge0113.
{Warning
Fuel vapors and fuel fires burn violently
and can cause injury or death.
Follow these guidelines to help avoid
injuries to you and others:
.Read and follow all the instructions on
the fuel pump island.
.Turn off the engine when refueling.
.Keep sparks, flames, and smoking
materials away from fuel.
.Do not leave the fuel pump
unattended.
.Avoid using electronic devices while
refueling.
.Do not re-enter the vehicle while
pumping fuel.
(Continued)
Warning (Continued)
.Keep children away from the fuel
pump and never let children
pump fuel.
.Before touching the fill nozzle, touch a
metallic object to discharge static
electricity from your body.
.Fuel can spray out if the fill nozzle is
inserted too quickly. This spray can
happen if the tank is nearly full, and is
more likely in hot weather. Insert the
fill nozzle slowly and wait for any hiss
noise to stop before beginning to
flow fuel.
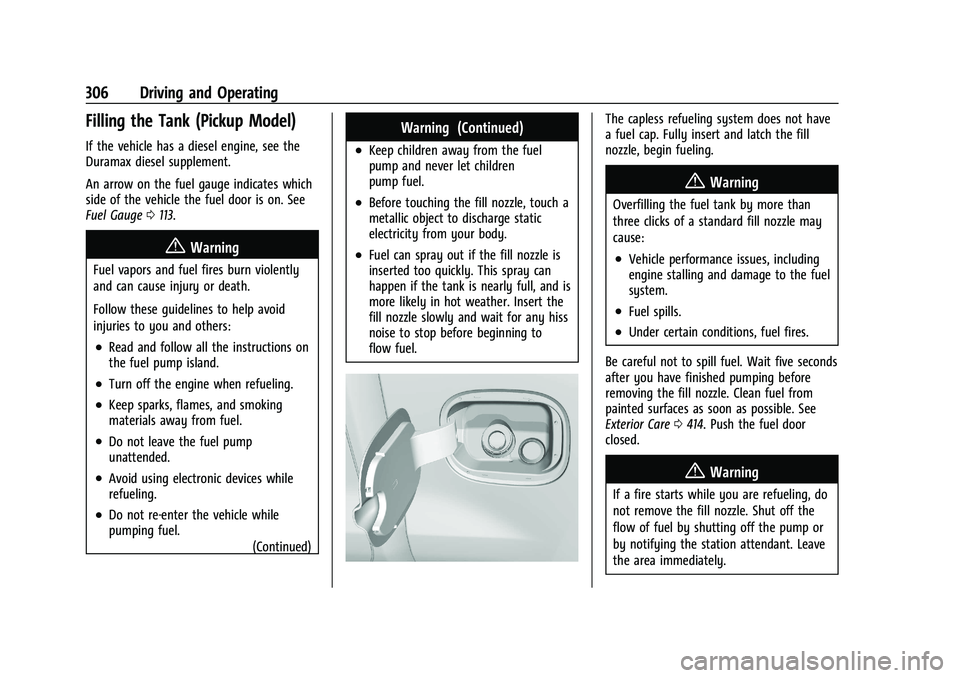
The capless refueling system does not have
a fuel cap. Fully insert and latch the fill
nozzle, begin fueling.
{Warning
Overfilling the fuel tank by more than
three clicks of a standard fill nozzle may
cause:
.Vehicle performance issues, including
engine stalling and damage to the fuel
system.
.Fuel spills.
.Under certain conditions, fuel fires.
Be careful not to spill fuel. Wait five seconds
after you have finished pumping before
removing the fill nozzle. Clean fuel from
painted surfaces as soon as possible. See
Exterior Care 0414. Push the fuel door
closed.
{Warning
If a fire starts while you are refueling, do
not remove the fill nozzle. Shut off the
flow of fuel by shutting off the pump or
by notifying the station attendant. Leave
the area immediately.
Page 310 of 474
GMC Sierra/Sierra Denali 1500 Owner Manual (GMNA-Localizing-U.S./
Canada/Mexico-15883563) - 2022 - CRC - 11/19/21
Driving and Operating 309
Trailer Towing
General Towing Information
Only use towing equipment that has been
designed for the vehicle. Contact your dealer
or trailering dealer for assistance with
preparing the vehicle to tow a trailer. Read
the entire section before towing a trailer.
To tow a disabled vehicle, seeTowing the
Vehicle 0409. To tow the vehicle behind
another vehicle such as a motor home, see
Recreational Vehicle Towing 0411.
Driving Characteristics and
Towing Tips
{Warning
You can lose control when towing a
trailer if the correct equipment is not
used or the vehicle is not driven properly.
For example, if the trailer is too heavy or
the trailer brakes are inadequate for the
load, the vehicle may not stop as
expected. You and others could be
seriously injured. The vehicle may also be
damaged, and the repairs would not be
covered by the vehicle warranty. Pull a
(Continued)
Warning (Continued)
trailer only if all the steps in this section
have been followed. Ask your dealer for
advice and information about towing a
trailer with the vehicle.
Driving with a Trailer
Trailering is different than just driving the
vehicle by itself. Trailering means changes in
handling, acceleration, braking, durability,
and fuel economy. Successful, safe trailering
takes correct equipment, and it has to be
used properly.
The following information has many
time-tested, important trailering tips and
safety rules. Many of these are important
for your safety and that of your passengers.
Read this section carefully before pulling a
trailer.
When towing a trailer:
.Become familiar with and follow all state
and local laws that apply to trailer
towing. These requirements vary from
state to state.
.State laws may require the use of
extended side view mirrors. Even if not
required, you should install extended side
view mirrors if your visibility is limited or
restricted while towing.
.Do not tow a trailer during the first
800 km (500 mi) of vehicle use to prevent
damage to the engine, axle, or other
parts.
.It is recommended to perform the first oil
change before heavy towing.
.During the first 800 km (500 mi) of trailer
towing, do not drive over 80 km/h
(50 mph) and do not make starts at full
throttle.
.Vehicles can tow in D (Drive). Tow/Haul
Mode is recommended for heavier trailers.
SeeTow/Haul Mode 0240. If the
transmission downshifts too often, a
lower gear may be selected using Manual
Mode. See Manual Mode (Mechanical
Shifter) 0237 orManual Mode (Electronic
Shifter) 0239.
Page 314 of 474
GMC Sierra/Sierra Denali 1500 Owner Manual (GMNA-Localizing-U.S./
Canada/Mexico-15883563) - 2022 - CRC - 11/19/21
Driving and Operating 313
Pulling the Trailer from the Water
To pull the trailer out of the water:1. Press and hold the brake pedal.
2. Start the engine and shift into gear.
3. Release the parking brake.
4. Let up on the brake pedal.
5. Drive slowly until the tires are clear of the chocks.
6. Stop and have someone pick up and store the chocks.
7. Slowly pull the trailer from the water.
8. Once the vehicle and trailer have been driven from the sloped part of the boat
ramp, the vehicle can be shifted from
four-wheel-drive high. Shift into the drive
mode that is appropriate for the road
conditions.
Caution
If the vehicle tires begin to spin and the
vehicle begins to slide toward the water,
remove your foot from the accelerator
pedal and apply the brake pedal. Seek
help to have the vehicle towed up
the ramp.
Maintenance when Trailer Towing
The vehicle needs service more often when
used to tow trailers. See Maintenance
Schedule 0425. It is especially important to
check the engine oil, axle lubricant, belts,
cooling system, and brake system before
and during each trip.
Check periodically to see that all nuts and
bolts on the trailer hitch are tight.
Engine Cooling When Trailer Towing
The cooling system may temporarily
overheat during severe operating conditions.
See Engine Overheating 0356.
Trailer Towing
If equipped with a diesel engine, see the
Duramax diesel supplement.
Caution
Towing a trailer improperly can damage
the vehicle and result in costly repairs
not covered by the vehicle warranty. To
tow a trailer correctly, follow the
directions in this section and see your
dealer for important information about
towing a trailer with the vehicle. Trailering is different than just driving the
vehicle by itself. Trailering means changes in
handling, acceleration, braking, durability,
and fuel economy. Successful, safe trailering
takes correct equipment, and it has to be
used properly.
The following information has many
time-tested, important trailering tips and
safety rules. Many of these are important
for your safety and that of your passengers.
Read this section carefully before pulling a
trailer.
Trailer Weight
{Warning
Never exceed the towing capacity for
your vehicle.
Safe trailering requires monitoring the
weight, speed, altitude, road grades, outside
temperature, and how frequently the vehicle
is used to tow a trailer.