120 GMC SIERRA 2024 Owners Manual
[x] Cancel search | Manufacturer: GMC, Model Year: 2024, Model line: SIERRA, Model: GMC SIERRA 2024Pages: 440, PDF Size: 9.21 MB
Page 59 of 440

GMC Sierra/Sierra Denali 2500 HD/3500 HD Owner Manual (GMNA-
Localizing-U.S./Canada-16908340) - 2024 - CRC - 12/7/22
Seats and Restraints 57
This feature turns on at the highest setting.
With each press of the button, the heated
seat changes to the next lower setting, and
then the off setting. Three lights indicate
the highest setting, and one light indicates
the lowest. If the heated seats are on high,
the level may automatically be lowered
after approximately 30 minutes.
Remote Start Heated Seats
If equipped, the heated seats will turn on
automatically during a remote start if it is
cold outside. The heated seat indicators may
come on during this operation. The heated
seats may cancel when the vehicle is
started. These features can be manually
selected with the heated seat buttons after
the vehicle is turned on.
The temperature performance of an
unoccupied seat may be reduced. This is
normal.
To enable or disable remote start heated
seats, select Settings > Vehicle > Remote
Lock, Unlock, and Start > Remote Start Auto
Heat Seats > ON or OFF. SeeRemote Vehicle
Start 021.Seat Belts
This section describes how to use seat belts
properly, and some things not to do.
{Warning
Do not let anyone ride where a seat belt
cannot be worn properly. In a crash,
if you or your passenger(s) are not
wearing seat belts, injuries can be much
worse than if you are wearing seat belts.
You can be seriously injured or killed by
hitting things inside the vehicle harder or
by being ejected from the vehicle. In
addition, anyone who is not buckled up
can strike other passengers in the vehicle.
It is extremely dangerous to ride in a
cargo area, inside or outside of a vehicle.
In a collision, passengers riding in these
areas are more likely to be seriously
injured or killed. Do not allow passengers
to ride in any area of the vehicle that is
not equipped with seats and seat belts.
Always wear a seat belt, and check that
all passenger(s) are restrained
properly too. This vehicle has indicators as a reminder to
buckle the seat belts. See
Seat Belt
Reminders 0120.
Why Seat Belts Work
When riding in a vehicle, you travel as fast
as the vehicle does. If the vehicle stops
suddenly, you keep going until something
stops you. It could be the windshield, the
instrument panel, or the seat belts!
When you wear a seat belt, you and the
vehicle slow down together. There is more
time to stop because you stop over a longer
distance and, when worn properly, your
strongest bones take the forces from the
seat belts. That is why wearing seat belts
makes such good sense.
Page 60 of 440
GMC Sierra/Sierra Denali 2500 HD/3500 HD Owner Manual (GMNA-
Localizing-U.S./Canada-16908340) - 2024 - CRC - 12/7/22
58 Seats and Restraints
Questions and Answers About Seat Belts
Q: Will I be trapped in the vehicle after acrash if I am wearing a seat belt?
A: You could be— whether you are
wearing a seat belt or not. Your chance
of being conscious during and after a
crash, so you canunbuckle and get out,
is much greater if you are belted.
Q: If my vehicle has airbags, why should I have to wear seat belts?
A: Airbags are supplemental systems only.
They work withseat belts —not instead
of them. Whether or not an airbag is
provided, all occupants still have to
buckle up to get the most protection.
Also, in nearly all states and in all
Canadian provinces, the law requires
wearing seat belts.
Buckle To Drive
If equipped, this feature delays the vehicle
from shifting out of P (Park) when the driver
seat belt is not buckled. The Buckle to Drive
feature must be turned ON in the
infotainment system to work. To turn the
Buckle to Drive feature on or off, select
Settings > Vehicle > Buckle to Drive. See
Teen Driver 0185, if equipped. If the vehicle is on and the brake pedal is
pressed with the vehicle in P (Park) but the
driver seat belt is not buckled, a message
displays in the Driver Information
Center (DIC) and the vehicle will be delayed
from shifting out of P (Park). Buckle the
driver seat belt to clear the message and
shift out of P (Park). Shifting from P (Park)
will be delayed once for each time the
vehicle is started.
For some fleet vehicles, the feature is
always ON and cannot be turned OFF in the
infotainment system. The vehicle will be
delayed from shifting from P (Park) each
time the driver attempts to do so while the
driver seat belt is not buckled. Turning the
vehicle off then on will not change this
condition.
On some models, Buckle to Drive may also
delay shifting out of P (Park) if a front
passenger seat belt is unbuckled. A message
displays in the DIC. Buckle the front
passenger seat belt to shift out of P (Park).
This feature may delay the vehicle from
shifting out of P (Park) if an object, such as
a briefcase, handbag, grocery bag, laptop,
or other electronic device, is on the front
passenger seat. If this happens, remove the
object from the seat or buckle the seat belt
to shift out of P (Park).
If the driver, or on some vehicles, the
present front passenger remains unbuckled,
the DIC message will turn off after several
seconds and the vehicle can be shifted out
of P (Park). See
“Seat Belts”and“Child
Restraints” in the Index for information
about the importance of proper
restraint use.
If the driver seat belt or the front passenger
seat belt is unbuckled when driving, the seat
belt reminder chime and light(s) will come
on. See Seat Belt Reminders 0120. This
feature may not function properly if the
airbag readiness light is on. See Airbag
Readiness Light 0121.
How to Wear Seat Belts Properly
Follow these rules for everyone's protection.
There are additional things to know about
seat belts and children, including smaller
children and infants. If a child will be riding
in the vehicle, see Older Children075 or
Infants and Young Children 076. Review
and follow the rules for children in addition
to the following rules.
Page 66 of 440
GMC Sierra/Sierra Denali 2500 HD/3500 HD Owner Manual (GMNA-
Localizing-U.S./Canada-16908340) - 2024 - CRC - 12/7/22
64 Seats and Restraints
Torn or frayed seat belts can rip apart under
impact forces. If a belt is torn or frayed,
have it replaced immediately. If a belt is
twisted, it may be possible to untwist by
reversing the latch plate on the webbing.
If the twist cannot be corrected, ask your
dealer to fix it.
Make sure the seat belt reminder light is
working. SeeSeat Belt Reminders 0120.
Keep seat belts clean and dry. See Seat Belt
Care 064.
Seat Belt Care
Keep belts clean and dry.
Seat belts should be properly cared for and
maintained.
Seat belt hardware should be kept dry and
free of dust or debris. As necessary, exterior
hard surfaces and seat belt webbing may be
lightly cleaned with mild soap and water.
Ensure there is not excessive dust or debris
in the mechanism. If dust or debris exists in
the system please see the dealer. Parts may
need to be replaced to ensure proper
functionality of the system.
{Warning
Do not bleach or dye seat belt webbing.
It may severely weaken the webbing. In
a crash, they might not be able to
provide adequate protection. Clean and
rinse seat belt webbing only with mild
soap and lukewarm water. Allow the
webbing to dry.
Replacing Seat Belt System Parts
after a Crash
{Warning
A crash can damage the seat belt system
in the vehicle. A damaged seat belt
system may not properly protect the
person using it, resulting in serious injury
or even death in a crash. To help make
sure the seat belt systems are working
properly after a crash, have them
inspected and any necessary
replacements made as soon as possible.
After a minor crash, replacement of seat
belts may not be necessary. But the seat
belt assemblies that were used during any crash may have been stressed or damaged.
See your dealer to have the seat belt
assemblies inspected or replaced.
New parts and repairs may be necessary
even if the seat belt system was not being
used at the time of the crash.
Have the seat belt pretensioners checked if
the vehicle has been in a crash, or if the
airbag readiness light stays on after you
start the vehicle or while you are driving.
See
Airbag Readiness Light 0121.
Airbag System
The vehicle has the following airbags:
.A frontal airbag for the driver
.A frontal airbag for the front outboard
passenger
.A seat-mounted side impact airbag for the
driver
.A seat-mounted side impact airbag for the
front outboard passenger
.A roof-rail airbag for the driver and the
passenger seated directly behind the
driver
Page 106 of 440
GMC Sierra/Sierra Denali 2500 HD/3500 HD Owner Manual (GMNA-
Localizing-U.S./Canada-16908340) - 2024 - CRC - 12/15/22
104 Instruments and Controls
Instruments and Controls
Controls
Steering Wheel Adjustment . . . . . . . . . . . 105
Heated Steering Wheel . . . . . . . . . . . . . . . . 105
Horn . . . . . . . . . . . . . . . . . . . . . . . . . . . . . . . . . . 106
Windshield Wiper/Washer . . . . . . . . . . . . 106
Compass . . . . . . . . . . . . . . . . . . . . . . . . . . . . . . . 107
Clock . . . . . . . . . . . . . . . . . . . . . . . . . . . . . . . . . . 107
Power Outlets . . . . . . . . . . . . . . . . . . . . . . . . . 107
Wireless Charging . . . . . . . . . . . . . . . . . . . . . 109
Warning Lights, Gauges, and Indicators
Warning Lights, Gauges, andIndicators . . . . . . . . . . . . . . . . . . . . . . . . . . . . . 111
Instrument Cluster (Base Level) . . . . . . . . 112
Instrument Cluster (Uplevel) . . . . . . . . . . . 113
Speedometer . . . . . . . . . . . . . . . . . . . . . . . . . . 116
Odometer . . . . . . . . . . . . . . . . . . . . . . . . . . . . . . 116
Trip Odometer . . . . . . . . . . . . . . . . . . . . . . . . . 116
Tachometer . . . . . . . . . . . . . . . . . . . . . . . . . . . . 116
Fuel Gauge . . . . . . . . . . . . . . . . . . . . . . . . . . . . 116
Engine Oil Pressure Gauge . . . . . . . . . . . . . 117
Engine Coolant Temperature Gauge . . . . 118
Transmission Temperature Gauge (Uplevel only) . . . . . . . . . . . . . . . . . . . . . . . . 119
Voltmeter Gauge . . . . . . . . . . . . . . . . . . . . . . 119
Seat Belt Reminders . . . . . . . . . . . . . . . . . . . 120
Airbag Readiness Light . . . . . . . . . . . . . . . . . 121
Passenger Airbag Status Indicator . . . . . . 121 Charging System Light . . . . . . . . . . . . . . . . . 122
Malfunction Indicator Lamp (Check
Engine Light) . . . . . . . . . . . . . . . . . . . . . . . . . 122
Brake System Warning Light . . . . . . . . . . 124
Electric Parking Brake Light . . . . . . . . . . . . 124
Service Electric Parking Brake Light . . . . 124
Antilock Brake System (ABS) Warning Light . . . . . . . . . . . . . . . . . . . . . . . . . . . . . . . . . 125
Four-Wheel-Drive Light . . . . . . . . . . . . . . . . . 125
Tow/Haul Mode Light . . . . . . . . . . . . . . . . . 125
Hill Descent Control Light . . . . . . . . . . . . . 126
Lane Departure Warning (LDW) Light . . . . . . . . . . . . . . . . . . . . . . . . . . . . . . . . . 126
Automatic Emergency Braking (AEB) Disabled Light . . . . . . . . . . . . . . . . . . . . . . . 126
Vehicle Ahead Indicator . . . . . . . . . . . . . . . . 126
Pedestrian Ahead Indicator . . . . . . . . . . . . 126
Traction Off Light . . . . . . . . . . . . . . . . . . . . . . 127
Traction Control System (TCS)/Electronic Stability Control Light . . . . . . . . . . . . . . . . 127
Electronic Stability Control (ESC) Off Light . . . . . . . . . . . . . . . . . . . . . . . . . . . . . . . . . 127
Engine Coolant Temperature Warning Light . . . . . . . . . . . . . . . . . . . . . . . . . . . . . . . . . 128
Driver Mode Control Light . . . . . . . . . . . . . 128
Tire Pressure Light . . . . . . . . . . . . . . . . . . . . . 129
Engine Oil Pressure Light (Uplevel Cluster) . . . . . . . . . . . . . . . . . . . . . . . . . . . . . . 129
Low Fuel Warning Light . . . . . . . . . . . . . . . 129
Security Light . . . . . . . . . . . . . . . . . . . . . . . . . . 130 High-Beam On Light . . . . . . . . . . . . . . . . . . . 130
Front Fog Lamp Light . . . . . . . . . . . . . . . . . . 130
Lamps On Reminder . . . . . . . . . . . . . . . . . . . 130
Cruise Control Light . . . . . . . . . . . . . . . . . . . . 131
Door Ajar Light . . . . . . . . . . . . . . . . . . . . . . . . . 131
Information Displays
Driver Information Center (DIC) (Base
Level) . . . . . . . . . . . . . . . . . . . . . . . . . . . . . . . . 131
Driver Information Center (DIC) (Uplevel) . . . . . . . . . . . . . . . . . . . . . . . . . . . . . 133
Head-Up Display (HUD) . . . . . . . . . . . . . . . . 135
Vehicle Messages
Vehicle Messages . . . . . . . . . . . . . . . . . . . . . . 139
Engine Power Messages . . . . . . . . . . . . . . . 139
Vehicle Speed Messages . . . . . . . . . . . . . . . 139
Universal Remote System
Universal Remote System . . . . . . . . . . . . . 140
Universal Remote System Programming . . . . . . . . . . . . . . . . . . . . . . . . 140
Universal Remote System Operation . . . 141
Page 110 of 440
GMC Sierra/Sierra Denali 2500 HD/3500 HD Owner Manual (GMNA-
Localizing-U.S./Canada-16908340) - 2024 - CRC - 12/15/22
108 Instruments and Controls
Caution
Leaving electrical equipment plugged in
for an extended period of time while the
vehicle is off will drain the battery.
Always unplug electrical equipment when
not in use and do not plug in equipment
that exceeds the maximum 15 amp
rating.
Certain power accessory plugs may not be
compatible with the accessory power outlet
and could overload vehicle or adapter fuses.
If a problem is experienced, see your dealer.
When adding electrical equipment, be sure
to follow the proper installation instructions
included with the equipment. See Add-On
Electrical Equipment 0306.
Caution
Hanging heavy equipment from the
power outlet can cause damage not
covered by the vehicle warranty. The
power outlets are designed for accessory
power plugs only, such as cell phone
charge cords.
Power Outlet 110/120-Volt Alternating
Current
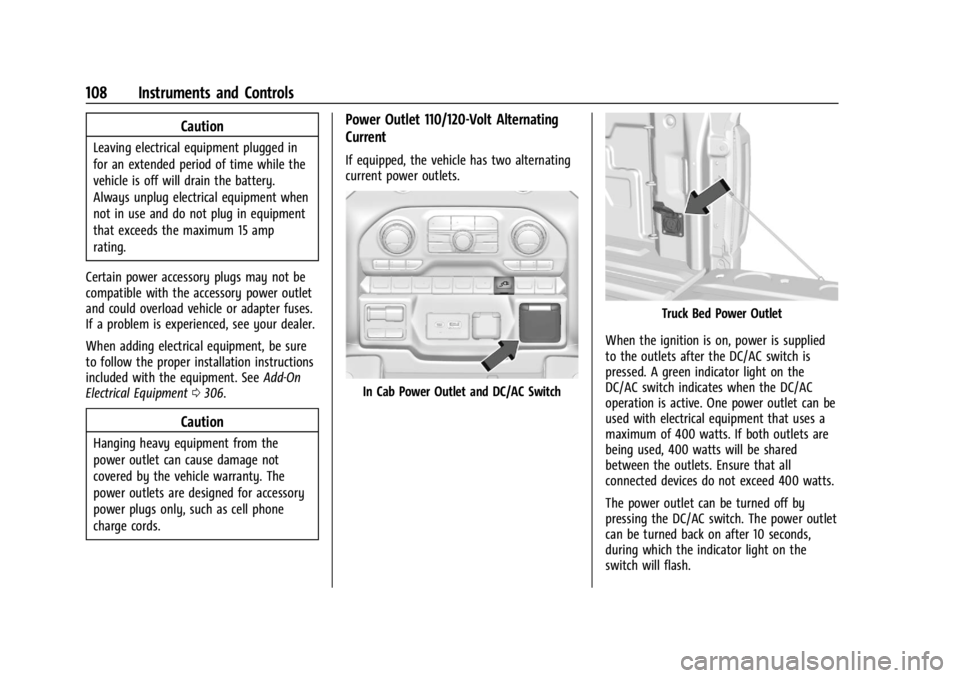
If equipped, the vehicle has two alternating
current power outlets.
In Cab Power Outlet and DC/AC Switch
Truck Bed Power Outlet
When the ignition is on, power is supplied
to the outlets after the DC/AC switch is
pressed. A green indicator light on the
DC/AC switch indicates when the DC/AC
operation is active. One power outlet can be
used with electrical equipment that uses a
maximum of 400 watts. If both outlets are
being used, 400 watts will be shared
between the outlets. Ensure that all
connected devices do not exceed 400 watts.
The power outlet can be turned off by
pressing the DC/AC switch. The power outlet
can be turned back on after 10 seconds,
during which the indicator light on the
switch will flash.
Page 122 of 440
GMC Sierra/Sierra Denali 2500 HD/3500 HD Owner Manual (GMNA-
Localizing-U.S./Canada-16908340) - 2024 - CRC - 12/15/22
120 Instruments and Controls
correct itself as higher engine speeds allow
the charging system to create maximum
power.
The vehicle can only be driven for a short
time with the readings outside the normal
operating range. If the vehicle must be
driven, turn off all accessories, such as the
radio and air conditioner.
Readings outside the normal operating
range indicate a possible problem in the
electrical system. Have the vehicle serviced
as soon as possible.
Uplevel
This gauge displays while the lower gauges
are configured to display four gauges. When
the vehicle is in the Tow/Haul driver mode
this gauge is replaced by the transmission
temperature gauge. To change gauge
configurations, see“Options”under
Instrument Cluster (Base Level) 0112 or
Instrument Cluster (Uplevel) 0113.
Seat Belt Reminders
Driver Seat Belt Reminder Light
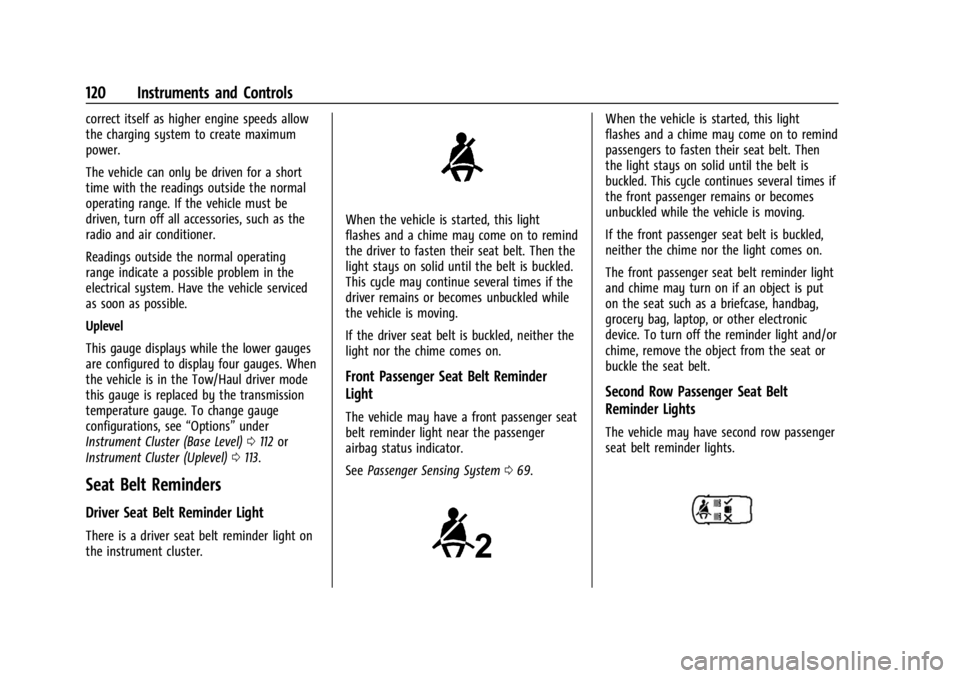
There is a driver seat belt reminder light on
the instrument cluster.
When the vehicle is started, this light
flashes and a chime may come on to remind
the driver to fasten their seat belt. Then the
light stays on solid until the belt is buckled.
This cycle may continue several times if the
driver remains or becomes unbuckled while
the vehicle is moving.
If the driver seat belt is buckled, neither the
light nor the chime comes on.
Front Passenger Seat Belt Reminder
Light
The vehicle may have a front passenger seat
belt reminder light near the passenger
airbag status indicator.
See Passenger Sensing System 069.
When the vehicle is started, this light
flashes and a chime may come on to remind
passengers to fasten their seat belt. Then
the light stays on solid until the belt is
buckled. This cycle continues several times if
the front passenger remains or becomes
unbuckled while the vehicle is moving.
If the front passenger seat belt is buckled,
neither the chime nor the light comes on.
The front passenger seat belt reminder light
and chime may turn on if an object is put
on the seat such as a briefcase, handbag,
grocery bag, laptop, or other electronic
device. To turn off the reminder light and/or
chime, remove the object from the seat or
buckle the seat belt.
Second Row Passenger Seat Belt
Reminder Lights
The vehicle may have second row passenger
seat belt reminder lights.
Page 234 of 440
GMC Sierra/Sierra Denali 2500 HD/3500 HD Owner Manual (GMNA-
Localizing-U.S./Canada-16908340) - 2024 - CRC - 12/13/22
232 Driving and Operating
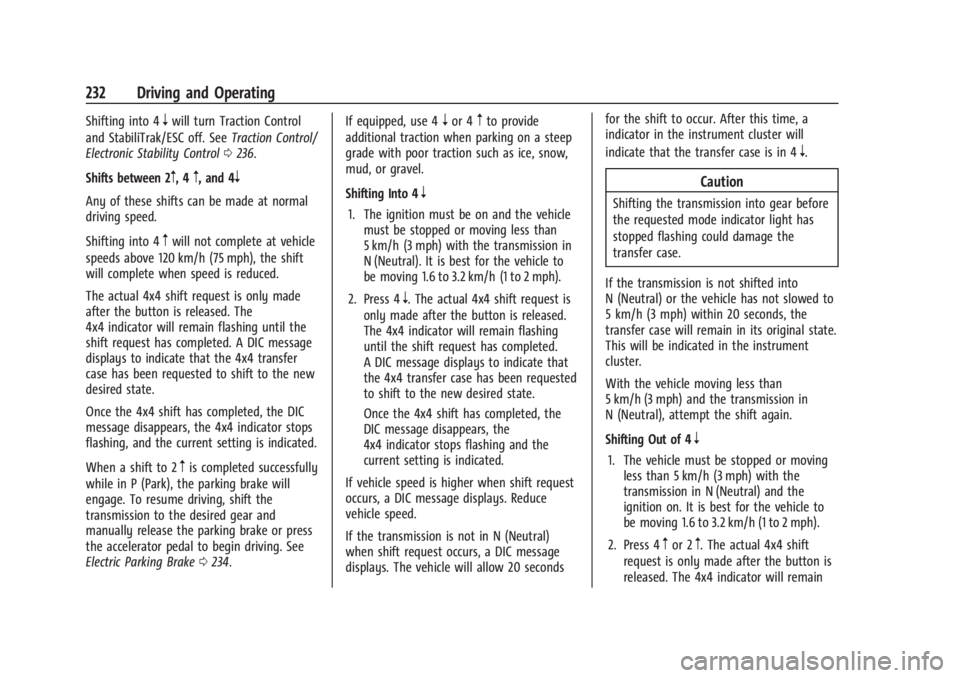
Shifting into 4nwill turn Traction Control
and StabiliTrak/ESC off. See Traction Control/
Electronic Stability Control 0236.
Shifts between 2
m, 4m, and 4n
Any of these shifts can be made at normal
driving speed.
Shifting into 4
mwill not complete at vehicle
speeds above 120 km/h (75 mph), the shift
will complete when speed is reduced.
The actual 4x4 shift request is only made
after the button is released. The
4x4 indicator will remain flashing until the
shift request has completed. A DIC message
displays to indicate that the 4x4 transfer
case has been requested to shift to the new
desired state.
Once the 4x4 shift has completed, the DIC
message disappears, the 4x4 indicator stops
flashing, and the current setting is indicated.
When a shift to 2
mis completed successfully
while in P (Park), the parking brake will
engage. To resume driving, shift the
transmission to the desired gear and
manually release the parking brake or press
the accelerator pedal to begin driving. See
Electric Parking Brake 0234. If equipped, use 4
nor 4mto provide
additional traction when parking on a steep
grade with poor traction such as ice, snow,
mud, or gravel.
Shifting Into 4
n
1. The ignition must be on and the vehicle must be stopped or moving less than
5 km/h (3 mph) with the transmission in
N (Neutral). It is best for the vehicle to
be moving 1.6 to 3.2 km/h (1 to 2 mph).
2. Press 4
n. The actual 4x4 shift request is
only made after the button is released.
The 4x4 indicator will remain flashing
until the shift request has completed.
A DIC message displays to indicate that
the 4x4 transfer case has been requested
to shift to the new desired state.
Once the 4x4 shift has completed, the
DIC message disappears, the
4x4 indicator stops flashing and the
current setting is indicated.
If vehicle speed is higher when shift request
occurs, a DIC message displays. Reduce
vehicle speed.
If the transmission is not in N (Neutral)
when shift request occurs, a DIC message
displays. The vehicle will allow 20 seconds for the shift to occur. After this time, a
indicator in the instrument cluster will
indicate that the transfer case is in 4
n.
Caution
Shifting the transmission into gear before
the requested mode indicator light has
stopped flashing could damage the
transfer case.
If the transmission is not shifted into
N (Neutral) or the vehicle has not slowed to
5 km/h (3 mph) within 20 seconds, the
transfer case will remain in its original state.
This will be indicated in the instrument
cluster.
With the vehicle moving less than
5 km/h (3 mph) and the transmission in
N (Neutral), attempt the shift again.
Shifting Out of 4
n
1. The vehicle must be stopped or moving less than 5 km/h (3 mph) with the
transmission in N (Neutral) and the
ignition on. It is best for the vehicle to
be moving 1.6 to 3.2 km/h (1 to 2 mph).
2. Press 4
mor 2m. The actual 4x4 shift
request is only made after the button is
released. The 4x4 indicator will remain
Page 301 of 440
GMC Sierra/Sierra Denali 2500 HD/3500 HD Owner Manual (GMNA-
Localizing-U.S./Canada-16908340) - 2024 - CRC - 12/13/22
Driving and Operating 299
.Trailer Width: 120 cm (47.2 in)–260 cm
(102.3 in). Measure from the left edge of
the trailer to the right edge.
.Trailer Height: 1 cm (0.39 in) –450 cm
(177.1 in). Measure from the ground to
tallest point of the trailer.
.Hitching Point Length: 180 cm (70.8 in) –
970 cm (381.8 in). Measure from the
center of the coupler to the middle of
tires.
.Trailer Tongue Length: 50 cm (19.6 in) –
220 cm (86.6 in). Measure from the center
of the coupler to the trailer front wall if
trailer has a flat front. If it does not have
a flat front, measure from the center of
the coupler to the point where the taper
meets the full width of the trailer.
.Vehicle Hitch Height: 10 cm (3.9 in) –
100 cm (39.3 in). Measure from the
ground to the top of coupler.
.Vehicle Hitch Length: 10 cm (3.9 in) –
100 cm (39.3 in). Measure from the hitch
receiver to the center of ball.
Dimensions for a bed hitch (gooseneck or
fifth wheel) trailer:
.Trailer Length: 300 cm (118.1 in) –2500 cm
(984.2 in). Measure from the front bottom
corner of the trailer to the furthest rear
point of the trailer.
.Trailer Box Width: 3 cm (1 in) –300 cm
(118.1 in). Measure the flat width at the
front bottom corners of the trailer.
.Hitching Point Length: 3 cm (1 in) –
1524 cm (600 in). Measure from the center
of the king pin (for fifth wheel) or coupler
(for gooseneck) to the middle of tires.
.Vehicle Cab to Trailer Length: 3 cm (1 in) –
610 cm (240.2 in). Measure from the back
of the vehicle cab to the front bottom
corner of the trailer.
.Vehicle Cab to Hitch Length: 3 cm (1 in) –
305 cm (120.1 in). Measure from the back
of vehicle cab to the center of the king
pin (for fifth wheel) or coupler (for
gooseneck).
Rear Trailer Guidance Setup
If equipped, a rear trailer camera must be
mounted on the trailer and electrically
connected to the vehicle before rear trailer
guidance feature can be used. See Assistance
Systems for Parking or Backing 0253.
Follow the on-screen instructions to enter
trailer dimensions.
Trailer dimensions must be in range to
enable this feature.
.Trailer Length: 300 cm (118.1 in) –1300 cm
(511.8 in). Measure from center of coupler
to furthest rear point on the trailer.
1. If trailer dimensions are out of range, this feature will be unavailable.
2. Ensure rear trailer camera is connected.
3. Follow the on-screen instructions to drive forward to complete calibration.
Jack-Knife Alert Setup
If equipped, follow the on-screen instructions
to drive forward to complete calibration.
Trailer Length Indicator Setup
If equipped, follow the on-screen instructions
to drive forward to complete calibration.
Trailer Side Blind Zone Alert Setup
If equipped, trailer dimensions must be in
range to enable this feature.
Follow the on-screen instructions to enter
trailer dimensions.
.Trailer Length: 300 cm (118.1 in) –1200 cm
(472.4 in). Measure from center of coupler
to furthest rear point on the trailer.
.Vehicle Hitch Length: 10 cm (3.9 in) –
100 cm (839.3 in). Measure from the hitch
receiver to the center of ball.
Page 350 of 440
GMC Sierra/Sierra Denali 2500 HD/3500 HD Owner Manual (GMNA-
Localizing-U.S./Canada-16908340) - 2024 - CRC - 12/7/22
348 Vehicle Care
(4) Construction Code:A letter code is
used to indicate the type of ply
construction in the tire. The letter R
means radial ply construction; the
letter D means diagonal or bias ply
construction.
(5) Rim Diameter
:Diameter of the
wheel in inches.
(6) Load Range
:Load Range.
(7) Service Description
:The service
description indicates the load index and
speed rating of a tire. If two numbers
are given as in the example, 120/116,
then this represents the load index for
single versus dual wheel usage (single/
dual). The speed rating is the maximum
speed a tire is certified to carry a load.
Tire Terminology and Definitions
Air Pressure:The amount of air inside
the tire pressing outward on each
square inch of the tire. Air pressure is
expressed in kPa (kilopascal) or psi
(pounds per square inch).
Aspect Ratio
:The relationship of a
tire's height to its width. Belt
:A rubber coated layer of cords
that is located between the plies and
the tread. Cords may be made from
steel or other reinforcing materials.
Bead
:The tire bead contains steel
wires wrapped by steel cords that hold
the tire onto the rim.
Bias Ply Tire
:A pneumatic tire in which
the plies are laid at alternate angles
less than 90 degrees to the centerline
of the tread.
Cold Tire Pressure
:The amount of air
pressure in a tire, measured in kPa
(kilopascal) or psi (pounds per square
inch) before a tire has built up heat
from driving. See Tire Pressure0350.
DOT Markings
:A code molded into the
sidewall of a tire signifying that the tire
is in compliance with the U.S.
Department of Transportation (DOT)
Motor Vehicle Safety Standards. The
DOT code includes the Tire Identification
Number (TIN), an alphanumeric
designator which can also identify the
tire manufacturer, production plant,
brand, and date of production. GVWR
:Gross Vehicle Weight Rating.
See Vehicle Load Limits 0210.
GAWR FRT
:Gross Axle Weight Rating
for the front axle. See Vehicle Load
Limits 0210.
GAWR RR
:Gross Axle Weight Rating
for the rear axle. See Vehicle Load
Limits 0210.
Intended Outboard Sidewall
:The side
of an asymmetrical tire, that must
always face outward when mounted on
a vehicle.
Kilopascal (kPa)
:The metric unit for air
pressure.
Light Truck (LT-Metric) Tire
:A tire used
on light duty trucks and some
multipurpose passenger vehicles.
Load Index
:An assigned number
ranging from 1 to 279 that corresponds
to the load carrying capacity of a tire.
Maximum Inflation Pressure
:The
maximum air pressure to which a cold
tire can be inflated. The maximum air
pressure is molded onto the sidewall.
Page 416 of 440
GMC Sierra/Sierra Denali 2500 HD/3500 HD Owner Manual (GMNA-
Localizing-U.S./Canada-16908340) - 2024 - CRC - 12/7/22
414 Customer Information
Reporting Safety Defects
Reporting Safety Defects to the
United States Government
If you believe that your vehicle has a
defect which could cause a crash or
could cause injury or death, you should
immediately inform the National
Highway Traffic Safety Administration
(NHTSA) in addition to notifying General
Motors.
If NHTSA receives similar complaints, it
may open an investigation, and if it
finds that a safety defect exists in a
group of vehicles, it may order a recall
and remedy campaign. However, NHTSA
cannot become involved in individual
problems between you, your dealer,
or General Motors.
To contact NHTSA, you may call the
Vehicle Safety Hotline toll-free at
1-888-327-4236 (TTY: 1-800-424-9153); go
to
https://www.safercar.gov;or write to:Administrator, NHTSA
1200 New Jersey Avenue, S.E.
Washington, D.C. 20590
You can also obtain other information
about motor vehicle safety from
https://www.safercar.gov.
Reporting Safety Defects to the
Canadian Government
If you live in Canada, and you believe
that the vehicle has a safety defect,
notify Transport Canada immediately,
and notify General Motors of Canada
Company. Call Transport Canada at
1-800-333-0510; go to:
www.tc.gc.ca/recalls (English)
www.tc.gc.ca/rappels (French)
or write to:
Transport Canada
Motor Vehicle Safety Directorate
Defect Investigations and Recalls
Division
80 Noel Street
Gatineau
,QC J8Z 0A1
Reporting Safety Defects to
General Motors
In addition to notifying NHTSA (or Transport
Canada) in a situation like this, notify
General Motors.
In the U.S., call 1-800-462-8782, or write:
GMC Customer Assistance Center
P.O. Box 33172
Detroit, MI 48232-5172
In Canada, call 1-800-263-3777 (English) or
1-800-263-7854 (French), or write:
Customer Care Centre
General Motors of Canada Company
500 Wentworth Street W
Oshawa, ON L1J 0C5
In Mexico, call 800-466-0812 or
800-466-0801.
In other Central America and Caribbean
Countries, call 52-555-901-2369.