mirror GMC SIERRA DENALI 2003 User Guide
[x] Cancel search | Manufacturer: GMC, Model Year: 2003, Model line: SIERRA DENALI, Model: GMC SIERRA DENALI 2003Pages: 428, PDF Size: 20.35 MB
Page 113 of 428
Outside Curb View Assist Mirrors
If your vehicle has the optional memory package
you may have this feature.
The vehicle’s mirrors are capable of performing the curb
view assist mirror function. This feature will cause the
passenger’s and/or driver’s mirror to tilt to a preselected
position when the vehicle is in REVERSE (R). This
feature may be useful in allowing you to view the curb
when you are parallel parking. When the vehicle
is
shifted out of REVERSE (R) and a short delay
has occurred, the passenger’s and/or driver’s mirror will
return to its original position.
To change the preselected tilt position, adjust the
mirrors to the desired position while the vehicle is in
REVERSE (R). When the vehicle is shifted out of
REVERSE (R), this new position is saved in memory as
the tilt position.
You may be able to enabled/disable this feature through
the Driver Information Center. See
Driver Information
Center (DIC) on page
3-43.
Outside Convex Mirror
Your passenger’s side mirror is convex. A convex
mirror’s surface is curved
so you can see more from the
driver’s seat.
A convex mirror can make things (like other
vehicles)
look farther away than they really are.
If you cut too sharply into the right lane, you
could hit a vehicle on your right. Check your
inside mirror or glance over your shoulder
before changing lanes.
Outside Heated Mirrors
The outside rearview mirrors with this option have a
defrost mode.
To turn on the defrost feature, press the rear window
defogger button. See “Rear Window Defogger”
under
Dual Automatic Climate Control System on
page 3-18 for further information.
2-32
Page 123 of 428
Vehicle Personalization
Memory Seat
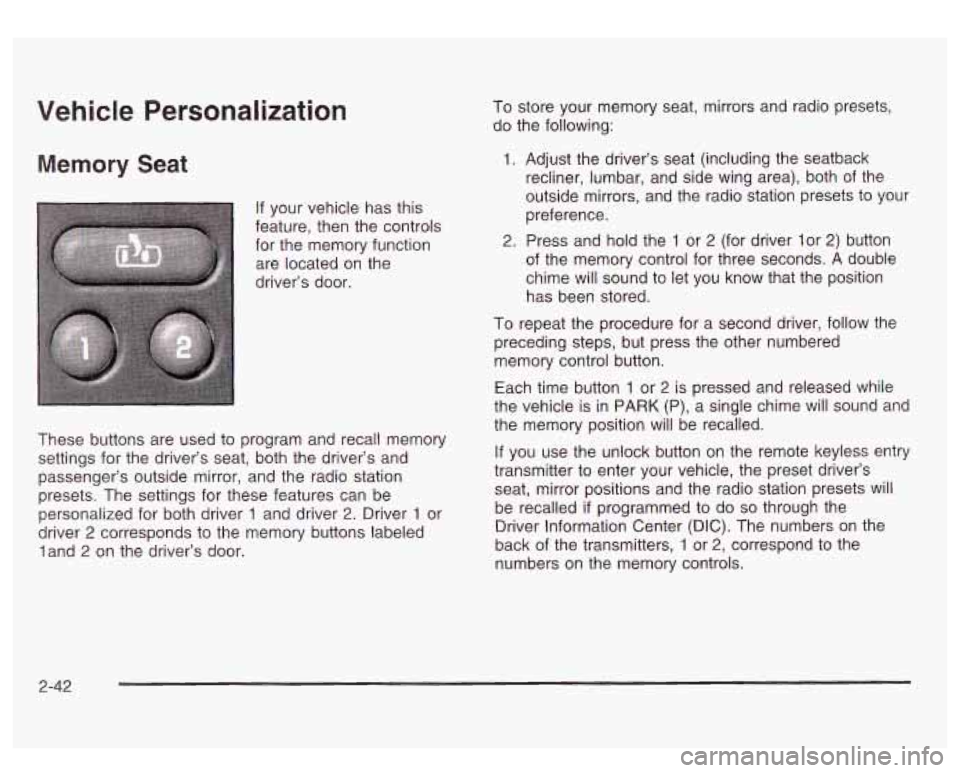
If your vehicle has this
feature, then the controls for the memory function
are located on the
driver’s door.
I
~
These buttons are used to program and recall memory
settings for the driver’s seat, both the driver’s and
passenger’s outside mirror, and the radio station
presets. The settings for these features can be
personalized for both driver
1 and driver 2. Driver 1 or
driver
2 corresponds to the memory buttons labeled
land
2 on the driver’s door. To store
your memory seat, mirrors and radio presets,
do the following:
1. Adjust the driver’s seat (including the seatback
recliner, lumbar, and side wing area), both of the
outside mirrors, and the radio station presets to your
preference.
2. Press and hold the 1 or 2 (for driver lor 2) button
of the memory control for three seconds.
A double
chime will sound to let you know that the position
has been stored.
To repeat the procedure for a second driver, follow the
preceding steps, but press the other numbered
memory control button.
Each time button
1 or 2 is pressed and released while
the vehicle is in PARK (P), a single chime will sound and
the memory position will be recalled.
If you use the unlock button on the remote keyless entry
transmitter to enter your vehicle, the preset driver’s
seat, mirror positions and the radio station presets will
be recalled
if programmed to do so through the
Driver Information Center (DIC). The numbers on the
back of the transmitters,
1 or 2, correspond to the
numbers on the memory controls.
2-42
Page 124 of 428
The seat and mirror positions can also be recalled when
placing the key in the ignition
if programmed to do so
through the Driver Information Center (DIC).
To stop recali movement of the
memory seat feature at
any time, press one of the memory buttons or power
seat controls.
Easy Exit Seat
The controls for this memory function are located on the
driver’s door.
li’)T) This button is used to program and recall the
desired driver’s seat position when exiting/entering the
vehicle. The seat position, can be personalized for
both driver
1 and driver 2.
To store the seat exit position for driver 1 or 2, do the
following:
1. Select the desired driver number by pressing and
releasing the
1 or 2 button. The seat will move to
the stored memory position.
2. Adjust the seat to the desired exit position.
3. Press and hold the exit button of the memory
control for three seconds.
A double chime will sound
to let you know that the position has been stored for the identified driver
(1 or 2).
To use the seat exit position, do one of the following:
Press the exit button on the memory control.
Or, if this feature is enabled (active) in the DIC,
then removing the key from the ignition will
cause the seat to move
to the exit position.
2-43
Page 143 of 428
Climate Controls
Dual Automatic Climate Control
System
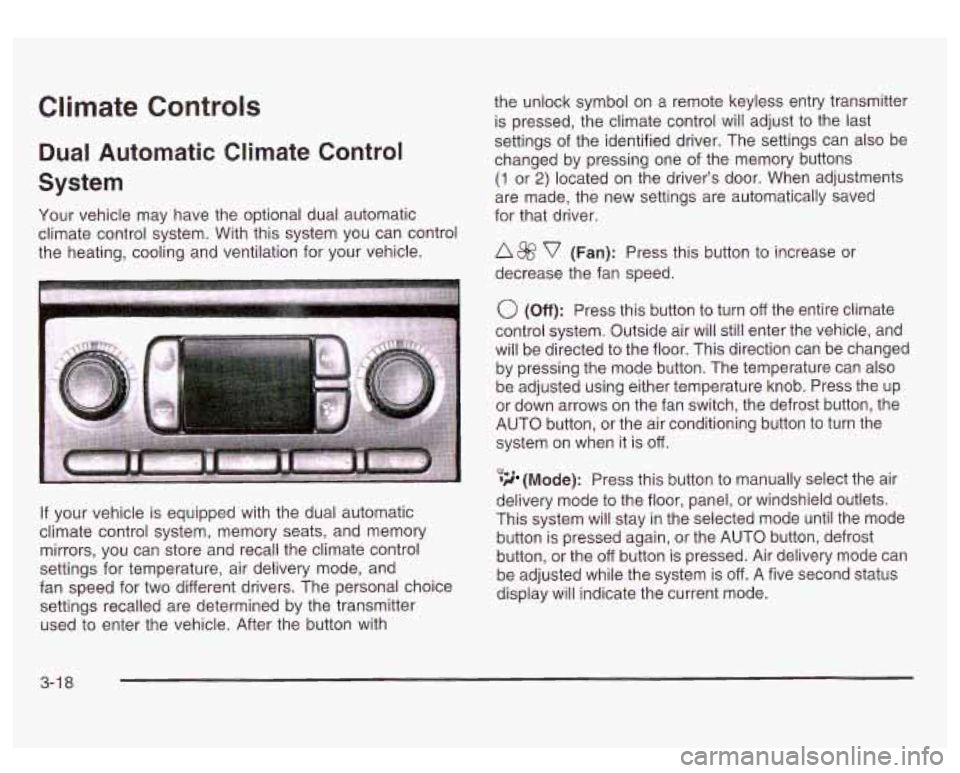
Your vehicle may have the optional dual automatic
climate control system. With this system you can control
the heating, cooling and ventilation for your vehicle.
If your vehicle is equipped with the dual automatic
climate control system, memory seats, and memory
mirrors, you can store and recall the climate control
settings for temperature, air delivery mode, and
fan speed for two different drivers. The personal choice
settings recalled are determined by the transmitter
used to enter the vehicle. After the button with the
unlock symbol on a remote keyless entry transmitter
is pressed, the climate control will adjust to the last
settings of the identified driver. The settings can also be
changed by pressing one of the memory buttons
(1 or 2) located on the driver’s door. When adjustments
are made, the new settings are automatically saved
for that driver.
A 8fj? v (Fan): Press this button to increase or
decrease the fan speed.
0 (Off): Press this button to turn off the entire climate
control system. Outside air will still enter the vehicle, and
will be directed to the floor. This direction can be changed
by pressing the mode button. The temperature can also
be adjusted using either temperature knob. Press the up
or down arrows on the fan switch, the defrost button, the
AUTO button, or the air conditioning button to turn the
system on when it is
off.
,% 4d (Mode): Press this button to manually select the air
delivery mode to the floor, panel, or windshield outlets.
This system will stay in the selected mode until the mode
button is pressed again, or the AUTO button, defrost
button, or the off button is pressed. Air delivery mode can
be adjusted while the system is off. A five second status
display will indicate the current mode.
3-1 8
Page 147 of 428
Defogging and Defrosting
You can use either defog or front defrost to clear fog or
frost from your windshield. Use the defog mode to
clear the windows
of fog or moisture. Use the front
defrost button to defrost the front windshield.
@ (Defog): Use this setting to clear the windows of fog
or moisture. Press the mode button to select this
setting. This setting will deliver air to the floor and
windshield outlets.
@ (Front Defrost): Press the front defrost button to
defrost the windshield. The system will automatically
control the fan speed
if you select defrost from AUTO
mode.
If the outside temperature is 40°F (4°C) or warmer,
your air conditioning compressor will automatically run to
help dehumidify the air and dry the windshield.
Rear Window Defogger
The lines you see on the rear window warm the glass.
The rear window defogger uses a warming grid to
remove fog from the rear window.
(Rear): Press this button to turn the rear window
defogger on or
off. An indicator light in the button
will come on to let you know that the rear window
defogger is activated.
The rear window defogger will turn
off approximately
10 minutes after the button is pressed. If you need
additional warming time, press the button again.
If you vehicle is equipped with heated mirrors this button
will activate them.
Notice: Don’t use a razor blade or something else
sharp on the inside
of the rear window. If you
do, you could cut or damage the defogger and the
repairs
would not be covered by your warranty.
Do not attach a temporary vehicle license, tape, a
decal or anything similar to the defogger grid.
3-22
Page 155 of 428
If the right front passenger’s air bag is turned
off for a person who isn’t in a risk group
identified by the national government, that
person won’t have the extra protection of an
air bag.
In a crash, the air bag wouldn’t be able
to inflate and help protect the person sitting
there. Don’t
turn off the passenger’s air bag
unless the person
sitting there is in a risk
group. See
”Air Bag Off Switch” in the Index
for more on this, including important safety
information.
I he air bag readiness I r. It ever comes ~ 7
when you have turned off the air bag, it means
that something may be wrong with the air bag
system. The right front passenger’s air bag
CAUTION: (Continued)
wuld inflate even though the svvl;ch is off. If
this ever happens, don’t let anyone whom the
national government has identified as a
member of a passenger air bag risk group
sit
in the right front passenger’s position (for
example, don’t secure a rear-facing child
restraint
in your vehicle) until you have your
vehicle serviced.
Passenger Air Bag Status Indicator
If your vehicle has the passenger sensing system your
rearview mirror will have a passenger air bag status
indicator.
Passenger Air Bag Status Indicator
- United States
3-30
Page 176 of 428
Headlamps on at Exit Curb View Assist
Press the personalization button until HEADLAMPS ON
AT EXIT appears in the display. To select your
personalization for how long the headlamps will stay on
when you turn
off the vehicle, press the select button
while HEADLAMPS
ON AT EXIT is displayed on
the DIC. Pressing the select button will scroll through
the following choices:
HEADLAMPS DELAY: 10 SEC (default)
HEADLAMPS DELAY: 20 SEC
0 HEADLAMPS DELAY: 40 SEC
HEADLAMPS DELAY: 60 SEC
HEADLAMPS DELAY: 120 SEC
HEADLAMPS BELAY: 180 SEC
HEADLAMPS DELAY OFF
The amount of time you choose will be the amount of
time that the headlamps stay on after you turn
off
the vehicle. If you choose off, the headlamps will turn
off as soon as you turn off the vehicle.
Choose one of the seven options and press the
personalization button while it
is displayed on the DIC to
select it and move on to the next feature. Press the personalization button until CURB
VIEW
ASSIST appears
in the display. To select your
personalization for curb view assist, press the select
button while CURB VIEW ASSIST is displayed on
the DIC. Pressing the select button will scroll through
the following choices:
CURB VIEW:
OFF (default): Neither outside mirror will
be tilted down when the vehicle is shifted into
REVERSE (R).
CURB VIEW: PASSENGER: The passenger’s outside
mirror will be tilted down when the vehicle is shifted
into REVERSE (R).
CURB VIEW: DRIVER: The driver’s outside mirror will
be tilted down when the vehicle is shifted into
REVERSE (R).
CURB VIEW: BOTH: The driver’s and passenger’s
outside mirror will be tilted down when the vehicle
is shifted into REVERSE
(R).
Choose one of the four options and press the
personalization button while it is displayed on the DIC to
select it and move on to the next feature. For more
information on curb view assist, see Curb View Assist
Mirrors in the index.
3-5 1
Page 224 of 428
a
Check your mirrors, glance over your shoulder and
start your left lane change signal before moving out
of the right lane
to pass. When you are far enough
ahead of the passed vehicle to see its front in your
inside mirror, activate your right lane change signal
and move back into the right lane. (Remember that
if
your right outside mirror is convex, the vehicle you
just passed may seem
to be farther away from you
than it really is.)
Try not to pass more than one vehicle at a time on
two-lane roads. Reconsider before passing the next
vehicle.
Don’t overtake a slowly moving vehicle too rapidly.
Even though the brake lamps are not flashing, it may
be slowing down or starting to turn.
If you’re being passed, make
it easy for the following
driver to get ahead
of you. Perhaps you can ease a
little
to the right.
Loss of Control
Let’s review what driving experts say about what
happens when the three control systems (brakes,
steering and acceleration) don’t have enough friction
where the tires meet the road to do what the driver
has asked.
In any emergency, don’t give up. Keep trying
to steer
and constantly seek an escape route or area of
less danger.
Skidding
In a skid, a driver can lose control of the vehicle.
Defensive drivers avoid most skids by taking reasonable
care suited
to existing conditions, and by not
“overdriving” those conditions. But skids are always
possible.
The three types of skids correspond to your vehicle’s
three control systems. In the braking skid, your wheels
aren’t rolling. In the steering or cornering skid, too
much speed or steering
in a curve causes tires to slip
and lose cornering force. And in the acceleration
skid, too much throttle causes the driving wheels
to spin.
A cornering skid is best handled by easing your foot
off
the accelerator pedal.
If your vehicle starts to slide, ease your foot off the
accelerator pedal and quickly steer the way you want
the vehicle
to go. If you start steering quickly enough,
your vehicle may straighten out. Always be ready
for a second skid
if it occurs.
Of course, traction is reduced when water, snow, ice,
gravel or other material
is on the road. For safety, you’ll
want to slow down and adjust your driving
to these
conditions.
It is important to slow down on slippery
surfaces because stopping distance will be longer and
vehicle control more limited.
4-1 5
Page 225 of 428
While driving on a surface with reduced traction, try
your best to avoid sudden steering, acceleration
or braking (including engine braking by shifting to a
lower gear). Any sudden changes could cause the tires
to slide. You may not realize the surface is slippery
until your vehicle
is skidding. Learn to recognize warning
clues
- such as enough water, ice or packed snow
on the road to make a “mirrored surface”
- and slow
down when you have any doubt.
Remember: Any anti-lock brake system (ABS) helps
avoid only the braking skid.
Operating Your All-Wheel-Drive
Vehicle
Off Paved Roads
Many of the same design features that help make your
vehicle responsive on paved roads during poor
weather conditions
- features like the locking rear axle
and all-wheel drive
- help make it much better
suited for off-road use than a conventional passenger
car. Its higher ground clearance also helps your vehicle
step over some off-road obstacles. But your vehicle
doesn’t have features like special underbody shielding
and a transfer case low gear range, things that are
usually thought necessary for extended or sever off-road
service. This guide
is for operating your vehicle off
paved roads.
Also, see Braking on page 4-6.
Off-road driving can be great fun. But it does have
some definite hazards. The greatest of these is
the terrain itself.
“Off-roading” means you’ve left the great North American\
road system behind. Traffic lanes aren’t marked.
Curves aren’t banked. There are no road signs.
Surfaces can be slippery, rough, uphill or downhill. In
short, you’ve gone right back to nature.
Off-road driving involves some new skills. And that’s
why it’s very important that
you read this guide.
You’ll find many driving tips and suggestions. These will
help make your off-road driving safer and more
enjoyable.
Before You Go Off-Roading
There are some things to do before you go out. For
example, be sure to have all necessary maintenance
and service work done. Check to make sure all
underbody shields (if
so equipped) are properly
attached.
Is there enough fuel? Is the spare tire fully
inflated? Are the fluid levels up where they should be?
What are the local laws that apply to off-roading
where you’ll be driving?
If you don’t know, you should
check with law enforcement people in the area. Will you
be on someone’s private land? If
so, be sure to get
the necessary permission.
4-1 6
Page 238 of 428
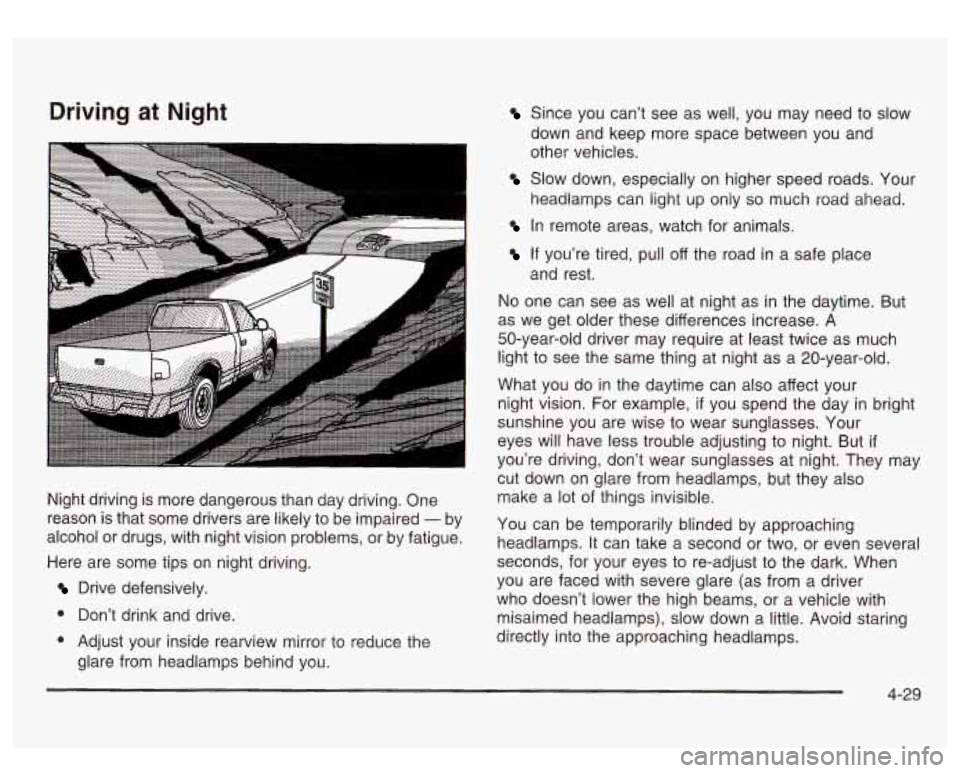
Driving at Night
Night driving is more dangerous than day driving. One
reason is that some drivers are likely to be impaired
- by
alcohol or drugs, with night vision problems, or by fatigue.
Here are some tips on night driving.
Drive defensively.
0 Don’t drink and drive.
0 Adjust your inside rearview mirror to reduce the
glare from headlamps behind you.
Since you can’t see as well, you may need to slow
down and keep more space between you and
other vehicles.
Slow down, especially on higher speed roads. Your
headlamps can light up only
so much road ahead.
In remote areas, watch for animals.
If you’re tired, pull off the road in a safe place
and rest.
No one can see as well at night as
in the daytime. But
as we get older these differences increase.
A
50-year-old driver may require at least twice as much
light to see the same thing at night as a 20-year-old.
What you do in the daytime can also affect your
night vision. For example,
if you spend the day in bright
sunshine you are wise to wear sunglasses. Your
eyes will have less trouble adjusting to night. But
if
you’re driving, don’t wear sunglasses at night. They may
cut down on glare from headlamps, but they also
make a lot of things invisible.
You can be temporarily blinded by approaching
headlamps. It can take a second
or two, or even several
seconds, for your eyes to re-adjust to the dark. When
you are faced with severe glare (as from a driver
who doesn’t lower the high beams, or a vehicle with
misaimed headlamps), slow down a little. Avoid staring
directly into the approaching headlamps.
4-29