display GMC SIERRA DENALI 2003 Workshop Manual
[x] Cancel search | Manufacturer: GMC, Model Year: 2003, Model line: SIERRA DENALI, Model: GMC SIERRA DENALI 2003Pages: 428, PDF Size: 20.35 MB
Page 200 of 428
3 REV (Reverse): Press and hold this pushbutton to
reverse quickly within a track. Press and hold this
pushbutton for less than two seconds to reverse at six
times the normal playing speed. Press and hold it
for more than two seconds to reverse at
17 times the
normal playing speed. Release it to play the passage.
The display will show
ET and the elapsed time.
4 FWD (Forward): Press and hold this pushbutton to
advance quickly within a track. Press and hold this
pushbutton for less than two seconds to advance at six
times the normal playing speed. Press and hold it for
more than two seconds to advance at
17 times the
normal playing speed. Release it to play the passage.
The display will show
ET and the elapsed time.
6 RDM (Random): Press this pushbutton to hear the
tracks in random, rather than sequential, order. RDM ON
will appear on the display. RDM T and the track
number will appear on the display when each track
starts to play. Press this pushbutton again to turn
off random play. RDM OFF will appear on the display.
4 SEEK b : Press the left arrow to go to the start
of the current or to the previous track. Press the right
arrow to go to the start of the next track. If either
arrow is held or pressed more then once, the player will
continue moving backward or forward through the CD.
4 SCAN b : To scan the disc, press and hold either
SCAN arrow for more than two seconds until SCAN
appears on the display and you hear a beep. Use this
feature to listen to
10 seconds of each track of the disc.
Press either
SCAN arrow again, to stop scanning.
DlSP (Display): Press this knob to see how long the
current track has been playing. ET and the elapsed time
will appear on the display. To change the default on
the display (track or elapsed time), push the knob until
you see the display you want, then hold the knob
for two seconds. The radio will produce one beep and
selected display will now be the default.
BAND: Press this button to listen to the radio when a
CD is playing. The CD will stop but remain in the player.
TAPE DISC: Press this button to play a tape when
listening to the radio. Press this button to switch
between the tape and compact disc
if both are loaded.
The inactive tape or CD will remain safely inside the
radio for future listening.
& (Eject): Press this button to stop a CD when it is
playing or to eject a CD when
it is not playing. Eject
may be activated with either the ignition or radio
off. CDs
may be loaded with the radio and ignition
off if this
button is pressed first.
3-75
Page 205 of 428
CD Functions
1 PREV (Previous): Press this pushbutton to go to the
previous track
if the current track has been playing
for less than eight seconds. If pressed when the current
track has been playing for more than eight seconds,
it will go to the beginning of the current track. If you hold
or press this pushbutton more than once, the player
will continue moving back through the CD.
2 NEXT: Press this pushbutton to go to the next track.
If you hold this pushbutton or press it more than
once, the player will continue moving forward through
the CD.
3 REV (Reverse): Press and hold this pushbutton to
reverse quickly through a track. Release it to resume
playing.
4 FWD (Forward): Press and hold this pushbutton to
advance quickly through a track. Release it to resume
playing.
5 Q: Press this pushbutton to select a CD. The CD
number and track number will be displayed.
6 RDM (Random): Press this button to hear the tracks
in random, rather than sequential, order. RDM ALL
will appear on the radio display, which will randomly play
all of the loaded CDs. Press and hold this button until
you hear a beep and the radio will display RDM ONE, which
will randomly play the tracks on the current
CD. Press this button again
to turn off random play,
RDM
OFF will appear on the radio display.
4 SEEK b : Press the right or the left SEEK arrow to
go to the next or to the previous track on the CD.
BAND: Press BAND
to listen to the radio when a CD is
playing.
TAPE DISC: Press this button
if you have a CD loaded
in the changer and the radio is turned on,
to play a
CD. Press this button
to switch between playing a tape
and the CD changer
if all are loaded.
Compact Disc Changer Errors
CHK CD (Check): If this message appears on the
display, it could be for one of the following reasons:
You are driving on a very rough road. The CD
should play when the road gets smoother.
A CD is upside down.
It is dirty, scratched or wet.
0 It is very humid. If so, wait about an hour and try
The CD player is very hot.
again.
If any error
occurs repeatedly or if an error cannot be
corrected, contact your dealership.
3-80
Page 206 of 428
Theft-Deterrent Feature
THEFTLOCK@ is designed to discourage theft of your
radio. The feature works automatically by learning
a portion of the Vehicle Identification Number (VIN).
If
the radio is moved to a different vehicle, it will not
operate and LOCKED will be displayed.
When the radio and vehicle are turned
off, the blinking
red light indicates that THEFTLOCK@ is armed.
With THEFTLOCK@ activated, your radio will not operate
if stolen.
Audio Steering Wheel Controls
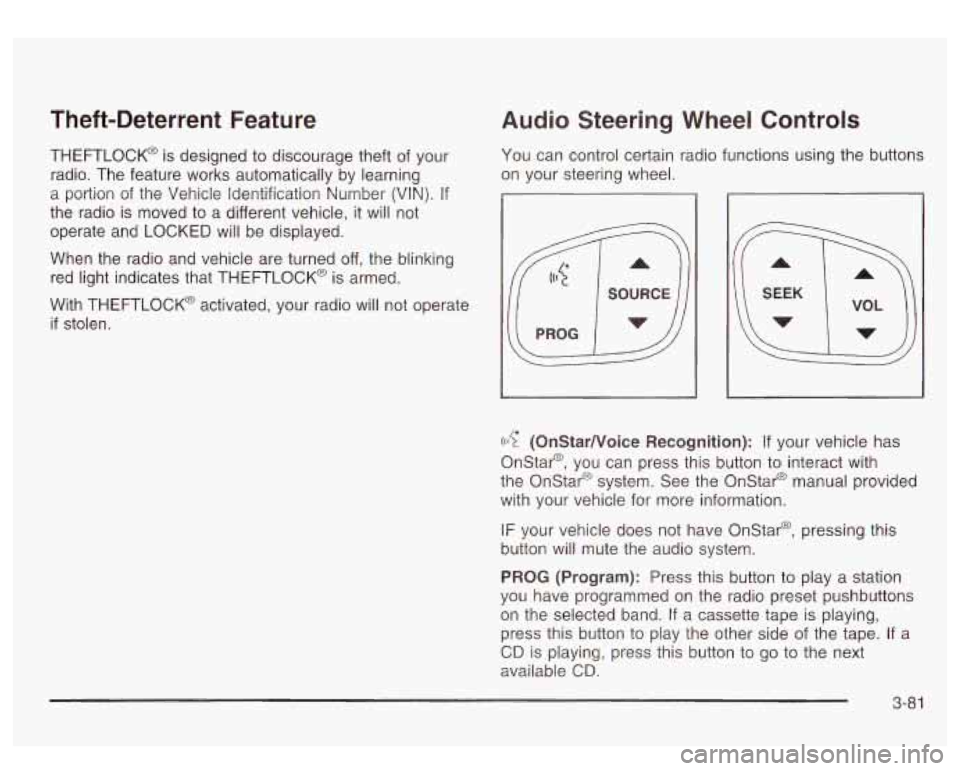
You can control certain radio functions using the buttons
on your steering wheel.
((17 (OnStarNoice Recognition): If your vehicle has
Onstar@, you can press this button to interact with
the Onstar@ system. See the Onstar@ manual provided
with your vehicle for more information.
IF your vehicle does not have Onstar@, pressing this
button will mute the audio system.
PROG (Program): Press this button to play a station
you have programmed on the radio preset pushbuttons
on the selected band.
If a cassette tape is playing,
press this button to play the other side of the tape. If a
CD is playing, press this button to go to the next
available
CD.
3-8 1
Page 207 of 428
A SOURCE v: Press this button to select AM, FMI,
FM2, or XMI or XM2,
(if your vehicle is equipped
with the XMTM Satellite Radio Service), or DAB1 or
DAB2
(if your vehicle is equipped with DAB), or a
cassette tape or CD. The cassette or CD must be loaded
to play. Available loaded sources are shown on the
display as a tape or a CD symbol.
A SEEK 7: Press the up or the down arrow to seek
to the next or
to the previous radio station and stay
there.
A VOLv : Press the up or the down arrow to increase
or
to decrease volume.
Understanding Radio Reception
AM
The range for most AM stations is greater than for FM,
especially at night. The longer range, however, can
cause stations
to interfere with each other. AM can pick
up noise from things like storms and power lines. Try
reducing the treble
to reduce this noise if you ever get it.
FM Stereo
FM stereo will give you the best sound, but FM signals
will reach only about
10 to 40 miles (1 6 to 65 km).
Tall buildings or hills can interfere with FM signals,
causing the sound to come and go.
XMTM Satellite Radio Service
XMTM Satellite Radio gives you digital radio reception
from coast to coast. Just as with FM, tall buildings
or hills can interfere with Satellite radio signals, causing
the sound
to come and go. Your radio may display
“NO SIGNAL” to indicate interference.
DAB Radio
DAB gives you digital radio reception. Just as with FM,
tall buildings or hills can interfere with radio signals,
causing the sound to come and go. Your radio
may display “NO SIGNAL” to indicate interference.
3-82
Page 208 of 428
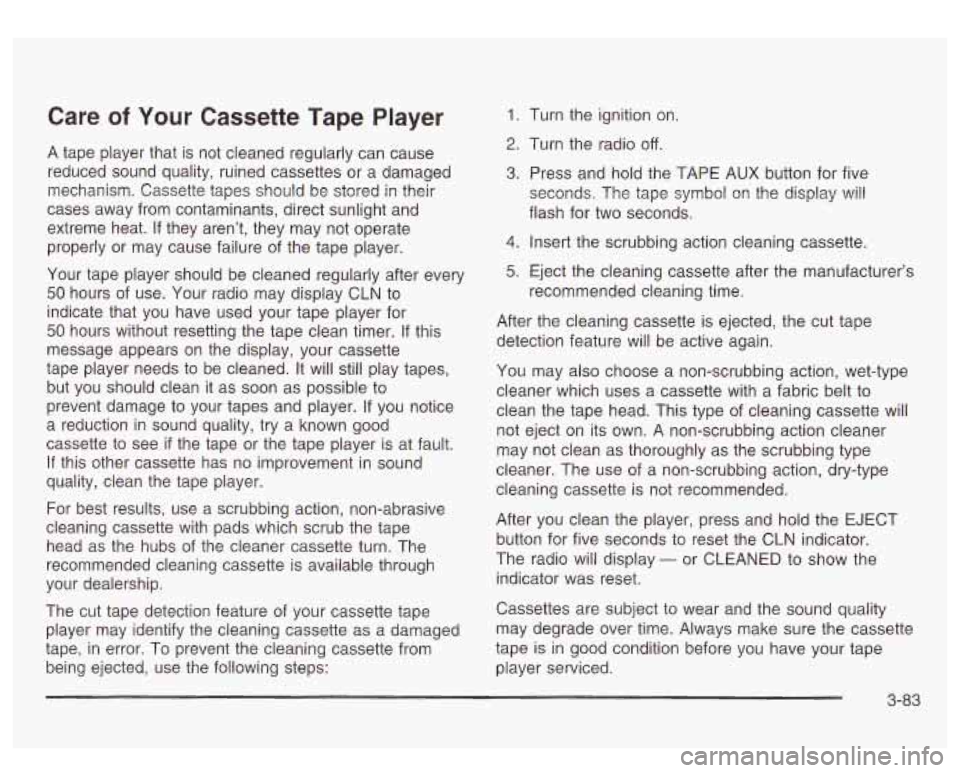
Care of Your Cassette Tape Player
A tape player that is not cleaned regularly can cause
reduced sound quality, ruined cassettes or a damaged
mechanism. Cassette tapes should be stored in their
cases away from contaminants, direct sunlight and
extreme heat.
If they aren’t, they may not operate
properly or may cause failure of the tape player.
Your tape player should be cleaned regularly after every
50 hours of use. Your radio may display CLN to
indicate that you have used your tape player for
50 hours without resetting the tape clean timer. If this
message appears on the display, your cassette
tape player needs to be cleaned. It will still play tapes,
but you should clean it as soon as possible to
prevent damage to your tapes and player.
If you notice
a reduction in sound quality, try a known good
cassette to see
if the tape or the tape player is at fault.
If this other cassette has
no improvement in sound
quality, clean the tape player.
For best results, use a scrubbing action, non-abrasive
cleaning cassette with pads which scrub the tape
head as the hubs of the cleaner cassette turn. The
recommended cleaning cassette is available through
your dealership.
The cut tape detection feature of your cassette tape
player may identify the cleaning cassette as a damaged
tape, in error. To prevent the cleaning cassette from
being ejected, use the following steps:
1. Turn the ignition on.
2. Turn the radio off.
3. Press and hold the TAPE AUX button for five
seconds. The tape symbol
on the display will
flash for two seconds.
4. Insert the scrubbing action cleaning cassette.
5. Eject the cleaning cassette after the manufacturer’s
recommended cleaning time.
After the cleaning cassette is ejected, the cut tape
detection feature will be active again.
You may also choose a non-scrubbing action, wet-type
cleaner which uses a cassette with a fabric belt to
clean the tape head. This type of cleaning cassette will
not eject on its own. A non-scrubbing action cleaner
may not clean as thoroughly as the scrubbing type
cleaner. The use of a non-scrubbing action, dry-type
cleaning cassette is not recommended.
After you clean the player, press and hold the EJECT
button for five seconds to reset the CLN indicator.
The radio will display
- or CLEANED to show the
indicator was reset.
Cassettes are subject to wear and the sound quality
may degrade over time. Always make sure the cassette
tape is in good condition before you have your tape
player serviced.
3-83
Page 296 of 428
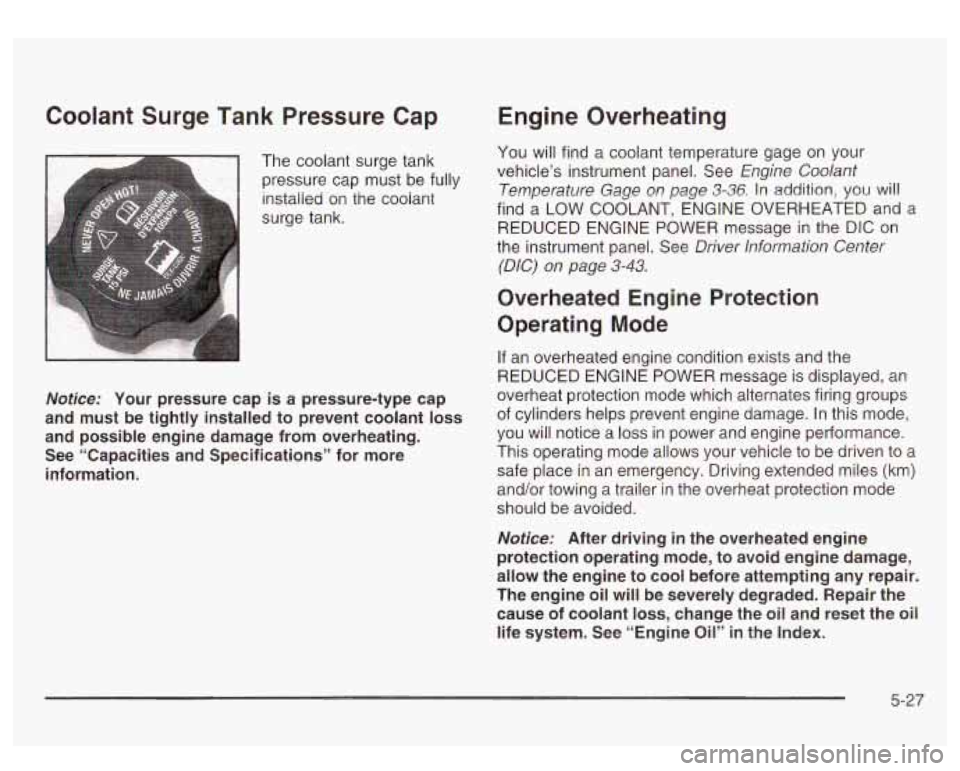
Coolant Surge Tank Pressure Cap
The coolant surge tank
pressure cap must be fully
installed on the coolant
surge tank.
Nofice: Your pressure cap is a pressure-type cap
and must be tightly installed to prevent coolant loss
and possible engine damage from overheating. See “Capacities and Specifications” for more
information.
Engine Overheating
You will find a coolant temperature gage on your
vehicle’s instrument panel. See
Engine Coolant
Temperature Gage
on page 3-36. In addition, you will
find a LOW COOLANT, ENGINE OVERHEATED and a
REDUCED ENGINE POWER message in the DIC on
the instrument panel. See
Driver lnformation Center
(DIC)
on page 3-43.
Overheated Engine Protection
Operating Mode
If an overheated engine condition exists and the
REDUCED ENGINE POWER message is displayed, an
overheat protection mode which alternates firing groups
of cylinders helps prevent engine damage. In this mode,
you will notice a
loss in power and engine performance.
This operating mode allows your vehicle to be driven to
a
safe place in an emergency. Driving extended miles (km)
and/or towing a trailer in the overheat protection mode
should be avoided.
Nofice: After driving in the overheated engine
protection operating mode, to avoid engine damage,
allow the engine to cool before attempting any repair.
The engine oil will be severely degraded. Repair the
cause of coolant
loss, change the oil and reset the oil
life system. See “Engine
Oil” in the Index.
5-27
Page 413 of 428
Compact Disc Changer Errors .......................... 3-80
Compact Disc Messages
.................................. 3-76
Compass Calibration
....................................... 2-30
Compass Variance
.......................................... 2-29
Content Theft-Deferrent
.................................... 2-1 3
Control of a Vehicle
.......................................... 4-5
Coolant
Engine Temperature Gage
............................ 3-36
Heater, Engine
............................................ 2-17
Surge Tank Pressure Cap
............................. 5-27
Cooling System
.............................................. 5-30
Cruise Control
.................................................. 3-8
Cruise Control Light
........................................ 3-41
Cupholder(s)
............................................... 2-39
Current and Past Model Order Forms
..... .... 7-11
Customer Assistance Information
Courtesy Transportation
.................................. 7-7
Customer Assistance for Text
Telephone (TTY) Users
............................... 7-4
Customer Assistance
Off ices ........................... 7-4
Customer Satisfaction Procedure
..................... 7-2
GM Mobility Program for Persons with
Disabilities
................................................ 7-5
Reporting Safety Defects to General Motors ...... 7-9
Reporting Safety Defects to the Canadian
Government
.............................................. 7-9
Reporting Safety Defects to the United States
Government
.............................................. 7-9
Roadside Assistance Program
......................... 7-5
Service Publications Ordering Information
........ 7-1 0
D
DAB Radio .................................................... 3-82
Defensive Driving
............................................. 4-2
Defogging and Defrosting
................................. 3-22
Doing Your Own Service Work
........................... 5-4
Dome Lamps
................................................. 3-16
Door
Daytime Running Lamps
.................................. 3-13
Locks
.......................................................... 2-6
Power Door Locks
......................................... 2-7
Rear Doors
.................................................. 2-8
Position, Safety Belt
..................................... 1-13
Driver Information Center (DIC)
......................... 3-43
Driver
DRIVER DOOR AJAR
..................................... 3-60
DIC Operation and Displays
.......................... 3-43
DIC Warnings and Messages
........................ 3-53
Driving At Night
..................................................... 4-29
City
........................................................... 4-33
Defensive
..................................................... 4-2
Drunken
....................................................... 4-2
Freeway
..................................................... 4-34
Hill and Mountain Roads
.............................. 4-36
In Rain and on Wet Roads
........................... 4-30
Winter
........................................................ 4-38
Driving On Grades
.......................................... 4-58
Driving on Snow or Ice
.................................... 4-39
Driving Through Deep Standing Water
............... 4-32
4
Page 414 of 428
Driving Through Flowing Water ..................... 4-32
Driving with a Trailer
....................................... 4-56
Dual Automatic Climate Control System
.......... 3-18
E
Easy Exit Seat .................... .... 2-43
Electrical System
Add-on Equipment
...................................... 5-95
Fuses and Circuit Breakers
........................... 5-95
Power Windows and Other Power Options
...... 5-95
Windshield Wiper Fuses
............................... 5-95
Electrochromic Mirror Operation
........................ 2-28
Maintenance Programs
................................. 3-40
Air CleanedFilter
......................................... 5-1 9
Battery
....................................................... 5-42
Check and Service Engine Soon Light
............ 3-38
Coolant
...................................................... 5-24
Coolant Heater
............................................ 2-17
Coolant Temperature Gage
........................ 3-36
Cooling System Inspection
......................... 6-14
Engine Compartment Overview
...................... 5-1 2
Exhaust
..................................................... 2-26
Fan Noise
.................................................. 5-36
Oil
............................................................. 5-13
Overheating
................................................ 5-27
Starting
...................................................... 2-1 6
Emissions
Inspection and
Engine ENGINE COOLANT HOT
................................. 3-54
Engine Coolant Level Check
............................. 6-10
Engine Hour Meter Display
............................... 3-26
Engine
Oil and Chassis Lubrication Scheduled
Engine
Oil Additives
........................................ 5-17
Engine Oil Level Check
................................... 6-10
Entry Lighting
......................... ............. 3-15
Maintenance
................................................. 6-5
ENGINE OVERHEATED
.................................. 3-54
Erasing HomeLink@ Buttons
...... ......... 2-38
Exit Lighting
............................... ............. 3-15
Express-Down Windows
................................... 2-11
Extender, Safety Belt
....................................... 1-29
Exterior Lamps
............................................... 3-11
F
FabridCarpet ................................................. 5-87
Engine Air Cleaner
...................................... 5-19
Filter
Finding
a PTY Station
(RDS, XMTM and DAB)
................................. 3-67
Finding a Station
............................................ 3-64
Finish Care
.................................................... 5-89
Finish Damage
............................................... 5-91
Fixed Mast Antenna
........................................ 3-84
Flash-To-Pass Feature
....................................... 3-6
Flat Tire
........................................................ 5-68
Flat Tire, Changing
......................................... 5-69
Page 418 of 428
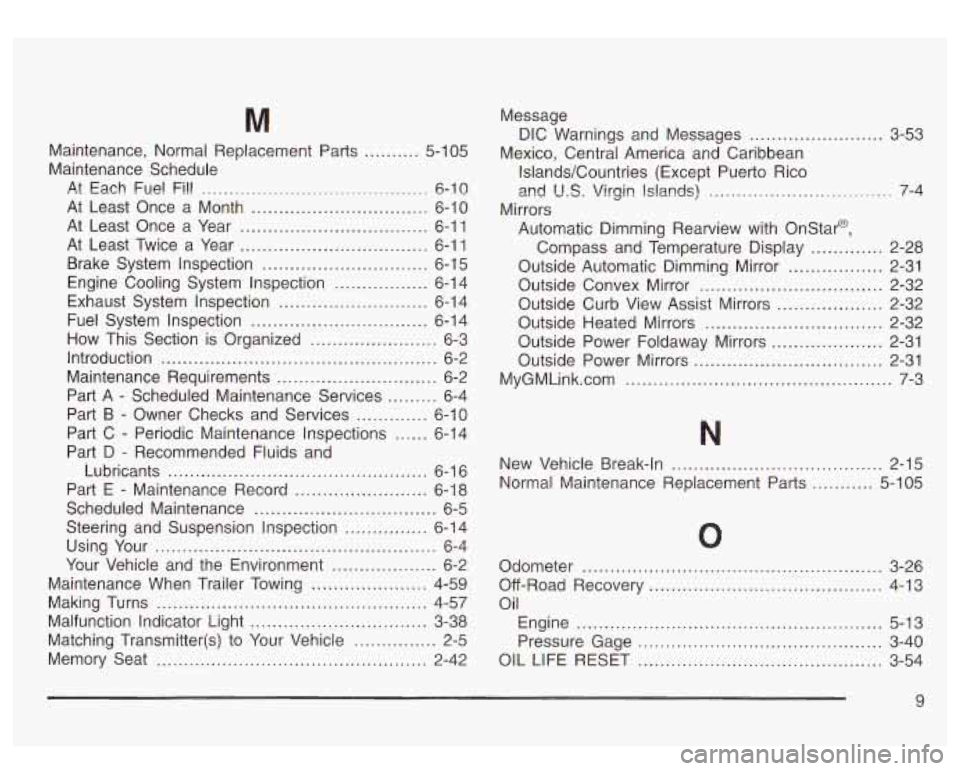
M
Maintenance. Normal Replacement Parts .......... 5-1 05
Maintenance Schedule
At Each Fuel Fi!!
......................................... 6-10
At Least Once a Month ................................ 6-10
At Least Once a Year
.................................. 6-1 1
At Least Twice a Year .................................. 6-1 1
Brake System Inspection
.............................. 6-15
Engine Cooling System Inspection
................. 6-14
Exhaust System Inspection
........................... 6-1 4
How This Section is Organized
....................... 6-3
Introduction
.................................................. 6-2
Maintenance Requirements
............................. 6-2
Part
A - Scheduled Maintenance Services ......... 6-4
Part
B - Owner Checks and Services ............. 6-10
Part C
- Periodic Maintenance Inspections ...... 6-1 4
Part D
- Recommended Fluids and
Lubricants
............................................... 6-1 6
Part E
- Maintenance Record ........................ 6-1 8
Scheduled Maintenance
................................. 6-5
Steering and Suspension Inspection
............... 6-14
Your Vehicle and the Environment
................... 6-2
Maintenance When Trailer Towing
..................... 4-59
Fuel
System Inspection
................................ 6-14
Using Your
................................................... 6-4
Making Turns
................................................. 4-57
Malfunction Indicator Light
................................ 3-38
Matching Transmitter(s) to Your Vehicle
............... 2-5
Memory Seat ................................................. 2-42
..... 3-53
Message
DIC Warnings and Messages ...............
Mexico. Central America and Caribbean
Islands/Countries (Except Puerto Rico
and
U.S. Virgin Islands) ................................. 7-4
Mirrors Automatic Dimming Rearview with Onstar@,
Compass and Temperature Display
............. 2-28
Outside Automatic Dimming Mirror
................. 2-31
Outside Convex Mirror
................................. 2-32
Outside Curb View Assist Mirrors
................... 2-32
Outside Heated Mirrors
............... ......... 2-32
Outside Power Foldaway Mirrors
.................... 2-31
Outside Power Mirrors
.................................. 2-31
MyGMLink.com
................................................ 7-3
New Vehicle Break-In
.........................
Normal Maintenance Replacement Parts ....
..... 2-15
.... 5-105
Odometer ...................................................... 3-26
Off-Road Recovery
.......................................... 4-13
Oil Engine
....................................................... 5-13
Pressure Gage
............................................ 3-40
OIL LIFE RESET
............................................ 3-54
9
Page 423 of 428
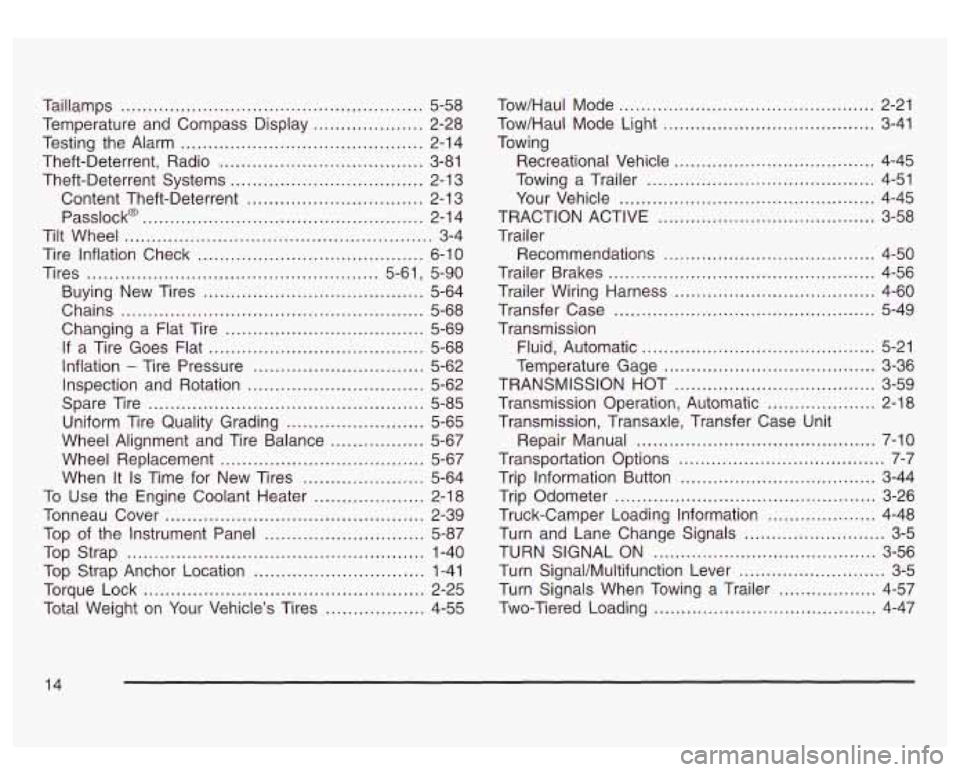
Taillamps ....................................................... 5-58
Temperature and Compass Display
.................... 2-28
Testing the Alarm
............................................ 2-14
Theft.Deterrent. Radio
..................................... 3-81
Theft-Deterrent Systems
................................... 2-1 3
Content Theft-Deterrent
................................ 2-1 3
Passlock@
................................................... 2-1 4
Tilt Wheel
........................................................ 3-4
Tire Inflation Check
......................................... 6-10
Tires
..................................................... 5.61. 5-90
Buying New Tires
........................................ 5-64
Chains
....................................................... 5-68
Changing a Flat Tire
.................................... 5-69
If a Tire Goes Flat ....................................... 5-68
Inflation
- Tire Pressure ............................... 5-62
Inspection and Rotation
................................ 5-62
Spare Tire
.................................................. 5-85
Uniform Tire Quality Grading
......................... 5-65
Wheel Alignment and Tire Balance
................. 5-67
Wheel Replacement
..................................... 5-67
When It
Is Time for New Tires ...................... 5-64
To Use the Engine Coolant Heater .................... 2-18
Tonneau Cover
............................................ 2-39
Top of the Instrument Panel
.......... ........ 5-87
Top Strap
...................................................... 1-40
Top Strap Anchor Location
............................... 1-41
Torque Lock
................................................... 2-25
Total Weight on Your Vehicle’s Tires
.................. 4-55 Tow/Haul
Mode
............................................... 2-21
Tow/Haul Mode Light
....................................... 3-41
Towing Recreational Vehicle
..................................... 4-45
Towing a Trailer
.......................................... 4-51
Your Vehicle
............................................... 4-45
TRACTION ACTIVE
.................................... 3-58
Trailer Recommendations
....................................... 4-50
Trailer Brakes
................................................. 4-56
Trailer Wiring Harness
..................................... 4-60
Transfer Case
................................................ 5-49
Transmission Fluid, Automatic
.......................... ......... 5-21
Temperature Gage
....................................... 3-36
TRANSMISSION HOT
..................................... 3-59
Transmission Operation, Automatic
.................... 2-18
Transmission, Transaxle, Transfer Case Unit Repair Manual
............................................ 7-10
Transportation Options
...................................... 7-7
Trip Information Button
....................... ..... 3-44
Trip Odometer
................................................ 3-26
Truck-Camper Loading Information
.................... 4-48
Turn and Lane Change Signals
.......................... 3-5
Turn SignaVMultifunction Lever ........................... 3-5
Turn Signals When Towing a Trailer
.................. 4-57
Two-Tiered Loading
......................................... 4-47
TURN
SIGNAL ON
......................................... 3-56
14