odometer GMC SIERRA DENALI 2003 Owners Manual
[x] Cancel search | Manufacturer: GMC, Model Year: 2003, Model line: SIERRA DENALI, Model: GMC SIERRA DENALI 2003Pages: 428, PDF Size: 20.35 MB
Page 126 of 428
Section 3 Instrument Panel
I~s~Pu~~~IP Panel OWWV~~W ............................... 3.2
Hazard Warning Flashers
................................ 3.3
Other Warning Devices ................................... 3.4
Horn
............................................................. 3.4
Tilt Wheel
..................................................... 3.4
Turn SignaVMultifunction Lever
......................... 3.5
Exterior Lamps
............................................. 3.11
Interior Lamps
.............................................. 3.15
Accessory Power Outlets
............................... 3.16
Ashtrays and Cigarette Lighter
........................ 3.17
Climate Controls
............................................ 3.18
Dual Automatic Climate Control System
........... 3.18
Warning Lights, Gages and Indicators
............. 3.24
Instrument Panel Cluster
................................ 3.25
Speedometer and Odometer
........................... 3.26
Tachometer
................................................ -3-26
Safety Belt Reminder Light
............................. 3.26
Air Bag Readiness Light
................................ 3-27
Passenger Air Bag Status Indicator
................. 3.30
Battery Warning Light
.................................... 3.33
Brake System Warning Light
.......................... 3.34
Anti-Lock Brake System Warning Light
............. 3.35
Air
Bag
Off Light .......................................... 3-28
Voltmeter Gage
............................................ 3-33
Engine Coolant Temperature Gage
..... ..... 3.36 Transmission Temperature
Gage
..................... 3.36
Malfunction Indicator Lamp
............................. 3.38
Oil Pressure Gage
........................................ 3-40
Cruise Control Light
...................................... 3.41
Tow/Haul Mode Light
.................................... 3-41
Fuel Gage
................................................... 3.42
Driver Information Center (DIC)
....................... 3.43
DIC Operation and Displays
........................... 3.43
DIC Warnings and Messages
......................... 3.53
Audio System(s)
............................................. 3.61
Setting the Time
...................... .......... 3.6 1
Radio with Cassette and CD ..... .............. 3.62
Rear Seat Audio (RSA)
............................. 3.76
CD Changer
................................................ 3-78
Theft-Deterrent Feature
................................. -3-81
Audio Steering Wheel Controls
....................... 3.81
Understanding Radio Reception
...................... 3-82
Care of Your Cassette Tape Player
................ -3-83
Care of Your CDs
......................................... 3.84
Care of Your CD Player
................................ 3.84
Fixed Mast Antenna
...................................... 3.84
XMTM Satellite Radio Antenna System
............. 3.84
DAB Radio Antenna System
........................... 3.84
Low Fuel Warning Light
................................. 3-42
Page 151 of 428
Speedometer and Odometer
Your speedometer lets you see your speed in both
miles per hour (mph) and kilometers per hour (km/h).
Your odometer shows how far your vehicle has
been driven, in either miles (used in the United States)
or kilometers (used in Canada).
Trip Odometer
The trip odometer can tell you how far your vehicle has
been driven since you last set the trip odometer
to zero.
Press the reset button, located on the instrument panel
cluster next to the trip odometer display, to toggle
between the trip odometer and the regular odometer.
Holding the reset button for two seconds while the
trip odometer is displayed will reset it.
To display the odometer reading with the ignition
off,
press the reset button.
Engine Hour Meter Display
The odometer can also display the number of hours the
engine has run. To display the hour meter, turn the
ignition
off, press and hold the reset button for at least
four seconds. The hour meter will be displayed for
up to
30 seconds, or until the ignition is turned on.
Tachometer
Your tachometer displays the engine speed ip
revolutions per minute (rpm).
Notice: Do not operate the engine with the
tachometer in the red area,
or engine damage may
occur.
Safety Belt Reminder Light
When the key is turned to RUN or START, a chime will
come on for several seconds to remind people to
fasten their safety belts, unless the driver’s safety belt is
already buckled.
The safety belt light will also come on and stay on
for several seconds, then it will flash for
several more.
If the driver’s belt is already buckled, neither the chime
nor the light will come on.
3-26
Page 168 of 428
Driver Information Center (DIC)
The DIC display is located on the instrument panel
cluster above the steering wheel. The DIC can display
information such as the trip odometer, fuel economy and
personalization features.
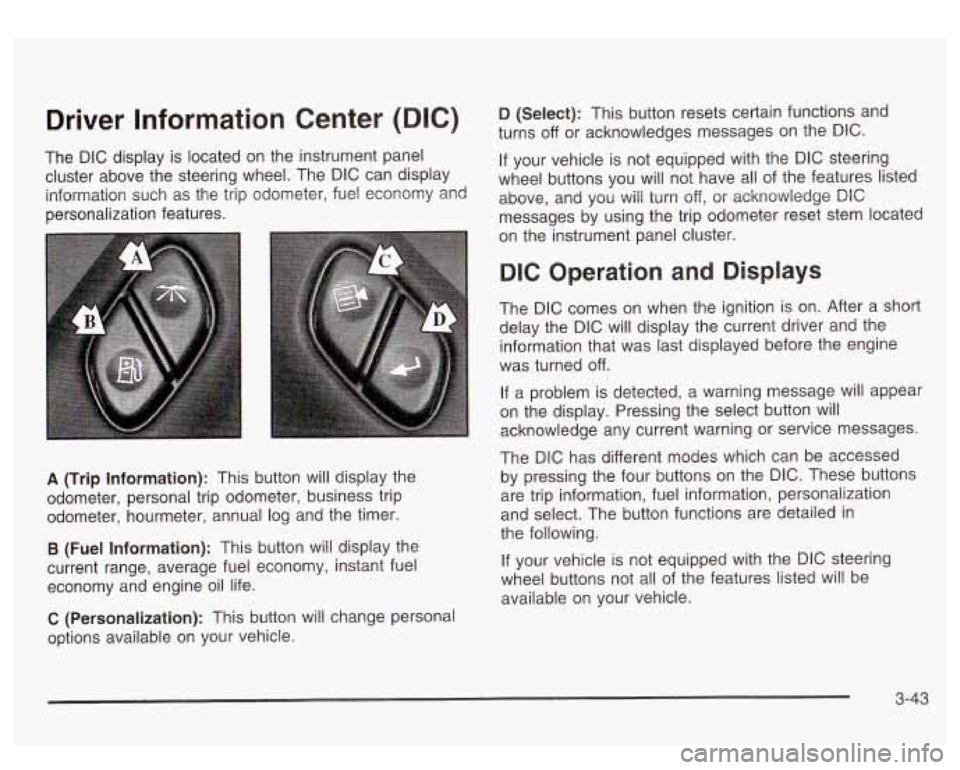
A (Trip Information): This button will display the
odometer, personal trip odometer, business trip
odometer, hourmeter, annual log and the timer.
B (Fuel Information): This button will display the
current range, average fuel economy, instant fuel
economy and engine oil life.
C (Personalization): This button will change personal
options available on your vehicle.
D (Select): This button resets certain functions and
turns
off or acknowledges messages on the DIC.
If your vehicle is not equipped with the DIC steering
wheel buttons you will not have all of the features listed
above, and you will turn off,
or acknowledge DIC
messages by using the trip odometer reset stem located
on the instrument panel cluster.
DIC Operation and Displays
The DIC comes on when the ignition is on. After a short
delay the DIC will display the current driver and the
information that was last displayed before the engine
was turned
off.
If a problem is detected, a warning message will appear
on the display. Pressing the select button will
acknowledge any current warning or service messages.
The DIC has different modes which can be accessed
by pressing the four buttons on the DIC. These buttons
are trip information, fuel information, personalization
and select. The button functions are detailed in
the following.
If your vehicle is not equipped with the DIC steering
wheel buttons not all of the features listed will be
available on your vehicle.
3-43
Page 169 of 428
Trip Information Button
Use the trip information button to scroll through the
SEASON ODOMETER, PERSONAL TRIP ON/OFF,
BUSINESS TRIP ON/OFF, HOURMETER, ANNUAL
LOG and TIMER.
If the personal trip and/or the business
trip are set to ON, you will also be able to scroll
through more messages. See
Personal Trip and
Business Trip next for more information.
If your vehicle is not equipped with the DIC steering
wheel buttons you can select the trip information
by pressing the trip odometer reset stem
on the
instrument panel cluster.
Personal Trip
If the PERSONAL TRIP is on (turn it on or off by
pressing the select button) you will also be able to scroll
through the following:
e
e
e
PERSONAL: XX MI - This shows the current
distance traveled since the last reset for the
personal trip odometer in either miles or kilometers.
PERSONAL: XX.X MPG
- This shows the amount
of fuel used for the personal trip.
PERSONAL: AVG ECONOMY
- This shows how
many miles per gallon of fuel your vehicle is
getting for the personal trip based on current and
past driving conditions.
PERSONAL: AVG MPH - This shows the vehicle’s
average speed for the personal trip.
PERSONAL: % ANNUAL - This shows the ratio of
personal trip miles to annual miles as a percent.
You can reset the personal trip odometer by pressing
and holding the trip odometer reset stem.
Business Trip
If the BUSINESS TRIP is on (turn it on or off by
pressing the select button) you will also be able
to scroll
through the following:
e
e
e
BUSINESS: XX MI - This shows the current
distance traveled since the last reset for the
business trip odometer in either miles or kilometers.
BUSINESS: XX.X MPG
- This shows the amount
of fuel used for the business trip.
BUSINESS: AVG ECONOMY
- This shows how
many miles per gallon
of fuel your vehicle is
getting for the business trip based on current and
past driving conditions.
BUSINESS: AVG MPH
- This shows the vehicle’s
average speed for the business trip.
BUSINESS:
Yo ANNUAL - This shows the ratio of
business trip miles to annual miles as a percent.
3-44
Page 170 of 428
To reset the personal or business trip information, do
the following: press and hold select button for two
seconds while in one of the personal or business trip
modes. This will reset all of the information for the
personal or business trip, or
if your vehicle does not
have the DIC steering wheel control buttons, press the
reset stem on the instrument panel cluster.
You can also reset the PERSONAL:
XX MI, or
BUSINESS:
XX MI, while they are displayed by pressing
the reset stem on the cluster.
If you press and hold
the reset stem or select button for four seconds,
the display
will show the distance traveled since the last
ignition cycle for the personal or business trip.
Season Odometer
Press the trip information button, or the trip odometer
reset step, until SEASON ODOMETER appears on
the display. This shows the total distance the vehicle has
been driven in either miles or kilometers. Pressing the
reset stem located on the instrument cluster with
the vehicle
off will also display the season odometer.
Hourmeter
Press the trip button to scroll to the hourmeter. The
hourmeter shows the total number of hours the engine
has run. Pressing the reset stem on the instrument
cluster will also display the hourmeter after the season
odometer is displayed.
Annual Log
Press the trip button, or the reset stem on the instrument
panel cluster, to scroll to the annual
log. The annual
log shows the mileage accumulated since
it was
last reset.
Po reset the annual log, press and hold the
select button, or the trip odometer reset stem for
approximately two seconds.
Timer
The DIC can be used as a stopwatch. Press the select
button, or the trip odometer reset stem, while TIMER
is displayed to start the timer. The display will show the
amount of time that has passed since the timer was
last reset (not including time the ignition is
off). Time will
continue to be counted as long as the ignition is on,
even
if another display is being shown on the DIC. The
timer will record up to 99 hours, 59 minutes and
59 seconds (99:59:59) after which the display will roll
back to zero.
To stop the counting of time, press the select button
briefly while TIMER is displayed.
To reset the timer to zero, press and hold the select
button, or the trip odometer reset stem, while TIMER is
displayed.
3-45
Page 178 of 428
Display Language Select Button
To select your personalization for display language,
press the select button while DISPLAY LANGUAGE is
displayed on the DIC. Pressing the select button
will scroll through the following languages:
English
French
0 Spanish
You can also scroll through the different languages by
pressing and holding the trip reset stem for four
seconds, as long as you are in the season
odometer mode.
Choose one of the three options and press the
personalization button while it
is displayed on the DIC to
select it.
If you accidentally choose a language that you don’t
want or understand, press and hold the personalization
button and the trip information button at the same
time. The DIC will begin scrolling through the languages
in their particular language. English will be in English,
French
will be in French and so on. When you see
the language that you would like, release both buttons.
The
DIC will then display the information in the
language you chose. The
select button is used to reset certain functions and
turn
off or acknowledge messages on the DIC display.
The select button also toggles through the options
available in each personalization menu. For example, this
button will reset the trip odometers, turn
off the FUEL
LEVEL LOW message, and toggle through the languages
you can select the DIC
to display information in.
DIC Warnings and Messages
Warning messages are displayed on the DIC to notify
the driver that the status of the vehicle has changed and
that some action may be needed by the driver to
correct the condition. If there is more than one message
that needs to be displayed they will appear one after
another. Some messages may not require immediate
action but you should press the select button to
acknowledge that you received the message and clear it
from the display because they are more urgent. These
messages require action before they can be removed
from the DIC display. The following are the possible
messages that can be displayed and some information
about them.
3-53
Page 336 of 428
Wheel Alignment and Tire Balance
The wheels on your vehicle were aligned and balanced
carefully at the factory to give you the longest tire life
and best overall performance.
Scheduled wheel alignment and wheel balancing are
not needed. However,
if you notice unusual tire wear or
your vehicle pulling one way or the other, the alignment
may need to be reset.
If you notice your vehicle
vibrating when driving on a smooth road, your wheels
may need to be rebalanced.
Wheel Replacement
Replace any wheel that is bent, cracked, or badly rusted
or corroded.
If wheel nuts keep coming loose, the
wheel, wheel bolts and wheel nuts should be replaced.
If the wheel leaks air, replace it (except some
aluminum wheels, which can sometimes be repaired).
See your dealer
if any of these conditions exist.
Your dealer will know the kind of wheel you need.
Each new wheel should have the same load-carrying
capacity, diameter, width, offset and be mounted
the same way as the one it replaces.
If you need to replace any
of your wheels, wheel bolts
or wheel nuts, replace them only with new
GM
original equipment parts. This way, you will be sure to
have the right wheel, wheel bolts and wheel nuts
for your vehicle. Usin,
__ __ wrong replacement wheels,
whc
bolts or wheel nuts on your vehicle can be
dangerous.
It could affect the braking and
handling
of your vehicle, make your tires lose
air and make you
lose control. You could have
a collision
in which you or others could be
injured. Always use the correct wheel, wheel
bolts and wheel nuts
for replacement.
Notice: The wrong wheel can also cause problems
with bearing life, brake cooling, speedometer or
odometer calibration, headlamp aim, bumper height,
vehicle ground clearance and tire clearance to the
body and chassis.
See
Changing a Flat Tire on page 5-69 for more
information.
5-67
Page 381 of 428
If the system is ever reset accidentally, you must
change your oil at
3,000 miles (5 000 km) since your
last oil change. Remember to reset the oil life system
whenever the oil is changed. See
Engine Oil on
page 5-73
for information on resetting the system.
An Emission Control Service.
Lubricate chassis components with each engine oil
and filter change.
Lubricate the front suspension, ball joints, steering
linkage, transmission shift linkage, transfer case shift
linkage and parking brake cable guides. Ball joints
should not be lubricated unless their temperature is
10°F (-12°C) or higher or they could be damaged.
After the services are performed, record the date,
odometer reading and who performed the service on the
maintenance record pages in Part
E of this schedule.
7,500 Miles (12 500 km)
0 Check readfront axle fluid level and add fluid as
needed. Check constant velocity joints and axle seals
for leaking.
page 5-62 for proper rotation pattern and additional
information.
(See footnote +.)
0 Rotate tires. See Tire Inspection and Rotation on
15,000 Miles (25 000 km)
0 Inspect engine air cleaner filter if you are driving in
dusty conditions. Replace filter
if necessary. An
Emission Control Service. (See footnote
t.)
0 Check readfront axle fluid level and add fluid as
needed. Check constant velocity joints and axle seals
for leaking.
0 Rotate tires. See Tire Inspection and Rotation on
page 5-62
for proper rotation pattern and additional
information.
(See footnote +.)
6-6
Page 393 of 428
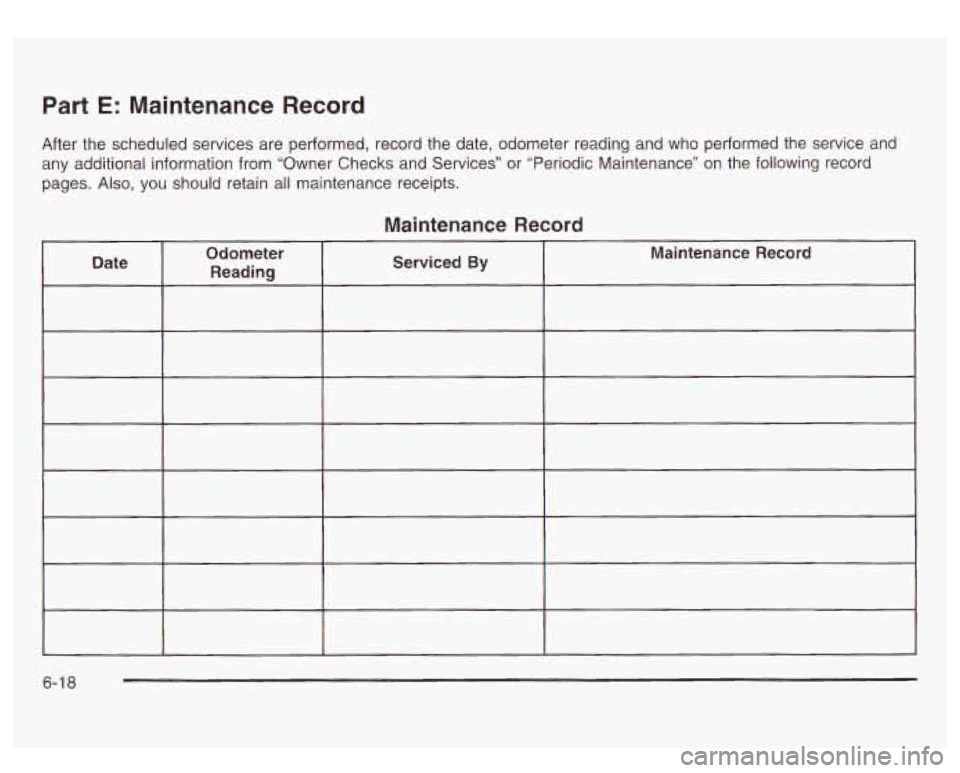
Part E: Maintenance Record
After the scheduled services are performed, record the date, odometer reading and who performed the service and
any additional information from “Owner Checks and Services” or “Periodic Maintenance” on the following record
pages. Also, you should retain all maintenance receipts.
Maintenance Record
6-1 8
Page 418 of 428
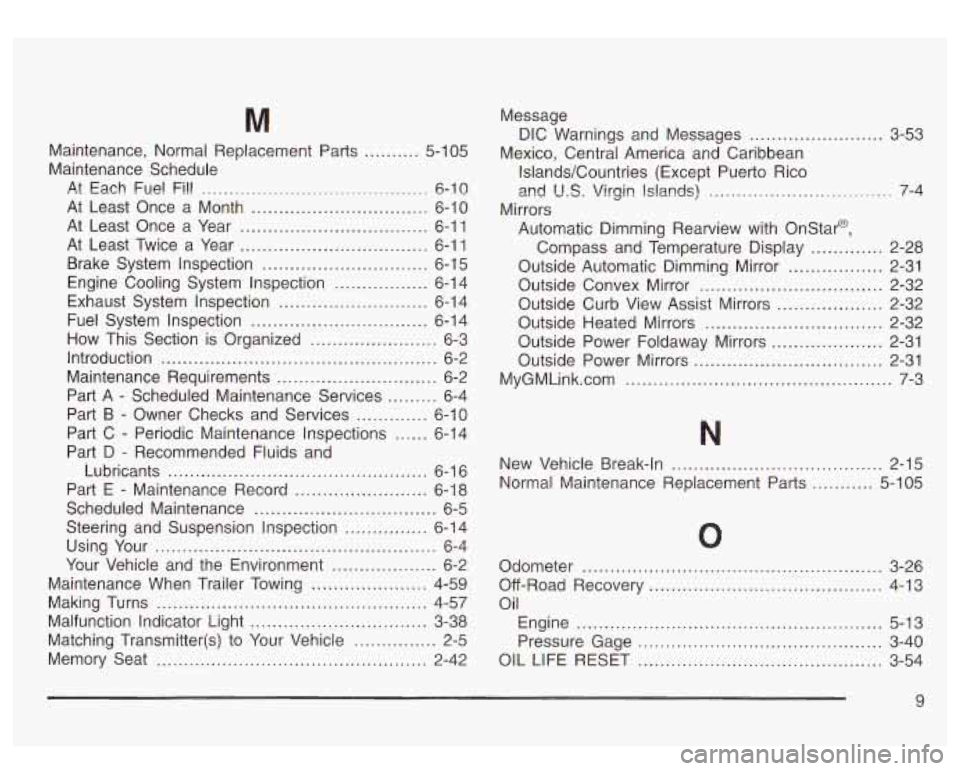
M
Maintenance. Normal Replacement Parts .......... 5-1 05
Maintenance Schedule
At Each Fuel Fi!!
......................................... 6-10
At Least Once a Month ................................ 6-10
At Least Once a Year
.................................. 6-1 1
At Least Twice a Year .................................. 6-1 1
Brake System Inspection
.............................. 6-15
Engine Cooling System Inspection
................. 6-14
Exhaust System Inspection
........................... 6-1 4
How This Section is Organized
....................... 6-3
Introduction
.................................................. 6-2
Maintenance Requirements
............................. 6-2
Part
A - Scheduled Maintenance Services ......... 6-4
Part
B - Owner Checks and Services ............. 6-10
Part C
- Periodic Maintenance Inspections ...... 6-1 4
Part D
- Recommended Fluids and
Lubricants
............................................... 6-1 6
Part E
- Maintenance Record ........................ 6-1 8
Scheduled Maintenance
................................. 6-5
Steering and Suspension Inspection
............... 6-14
Your Vehicle and the Environment
................... 6-2
Maintenance When Trailer Towing
..................... 4-59
Fuel
System Inspection
................................ 6-14
Using Your
................................................... 6-4
Making Turns
................................................. 4-57
Malfunction Indicator Light
................................ 3-38
Matching Transmitter(s) to Your Vehicle
............... 2-5
Memory Seat ................................................. 2-42
..... 3-53
Message
DIC Warnings and Messages ...............
Mexico. Central America and Caribbean
Islands/Countries (Except Puerto Rico
and
U.S. Virgin Islands) ................................. 7-4
Mirrors Automatic Dimming Rearview with Onstar@,
Compass and Temperature Display
............. 2-28
Outside Automatic Dimming Mirror
................. 2-31
Outside Convex Mirror
................................. 2-32
Outside Curb View Assist Mirrors
................... 2-32
Outside Heated Mirrors
............... ......... 2-32
Outside Power Foldaway Mirrors
.................... 2-31
Outside Power Mirrors
.................................. 2-31
MyGMLink.com
................................................ 7-3
New Vehicle Break-In
.........................
Normal Maintenance Replacement Parts ....
..... 2-15
.... 5-105
Odometer ...................................................... 3-26
Off-Road Recovery
.......................................... 4-13
Oil Engine
....................................................... 5-13
Pressure Gage
............................................ 3-40
OIL LIFE RESET
............................................ 3-54
9