battery GMC SIERRA DENALI 2010 Owners Manual
[x] Cancel search | Manufacturer: GMC, Model Year: 2010, Model line: SIERRA DENALI, Model: GMC SIERRA DENALI 2010Pages: 550, PDF Size: 4.17 MB
Page 29 of 550
Rear Vision Camera (RVC)
The rear vision camera displays a view of the area
behind the vehicle when the vehicle is shifted into
R (Reverse) on the inside rear view mirror or the
navigation screen, if equipped.
To clean the camera lens, located in the bezel for the
tailgate handle, rinse it with water and wipe it with a soft
cloth.
For more information, seeRear Vision Camera (RVC)
on page 3‑45.
Ultrasonic Parking Assist
This feature uses sensors on the rear bumper to detect
objects while parking the vehicle. It operates at speeds
less than 8 km/h (5 mph). URPA uses audio beeps to
provide distance and system information.
Keep the sensors on the vehicle's rear bumper clean to
ensure proper operation.
The system can be disabled by pressing the rear park
aid disable button located next to the radio.
SeeUltrasonic Rear Parking Assist (URPA)
on
page 3‑43for more information.
Power Outlets
Accessory power outlets can be used to connect
auxiliary electrical equipment, such as a cellular
telephone.
There are two accessory power outlets on the
instrument panel, one inside the center floor console
and one on the rear of the center floor console.
The accessory power outlets are powered, even when
the ignition is in LOCK/OFF. Continuing to use power
outlets while the ignition is in LOCK/OFF may cause the
vehicle's battery to run down.
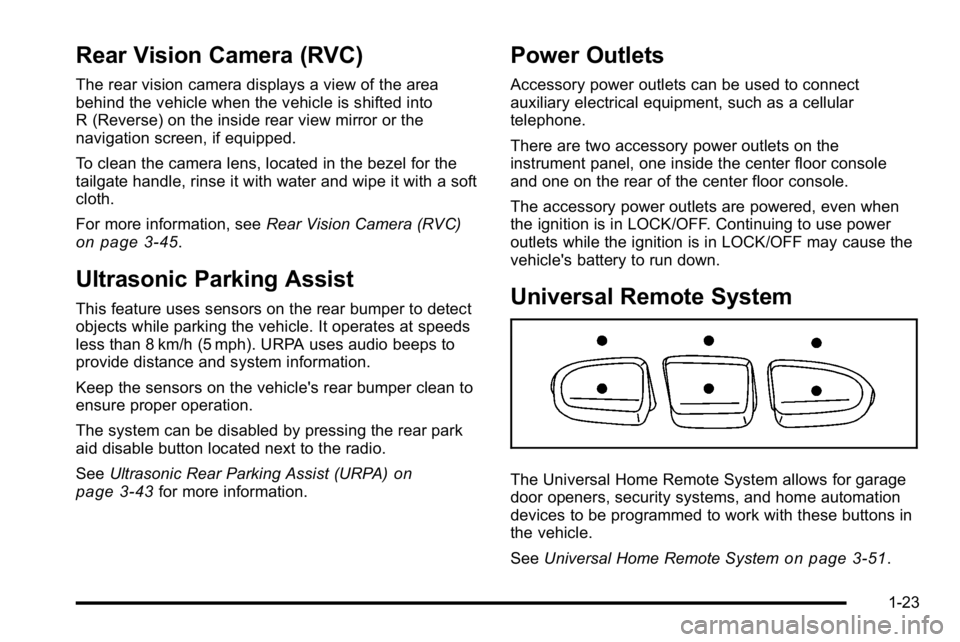
Universal Remote System
The Universal Home Remote System allows for garage
door openers, security systems, and home automation
devices to be programmed to work with these buttons in
the vehicle.
See Universal Home Remote System
on page 3‑51.
1-23
Page 35 of 550
The vehicle must have a working electrical system,
including adequate battery power, for the OnStar
equipment to operate. There are other problems OnStar
cannot control that may prevent OnStar from providing
OnStar service at any particular time or place. Some
examples are damage to important parts of the vehicle
in a crash, hills, tall buildings, tunnels, weather or
wireless phone network congestion.
OnStar Steering Wheel Controls
This vehicle may have a Talk/Mute button that can be
used to interact with OnStar hands-free calling. See
Audio Steering Wheel Controls
on page 4‑137for more
information.
On some vehicles, the mute button can be used to dial
numbers into voice mail systems, or to dial phone
extensions. See the OnStar Owner's Guide for more
information.
Your Responsibility
Increase the volume of the radio if the OnStar advisor
cannot be heard.
If the light next to the OnStar buttons is red, the system
may not be functioning properly. Press
Qand request a
vehicle diagnostic. If the light appears clear (no light is
appearing), your OnStar subscription has expired and
all services have been deactivated. Press
Qto confirm
that the OnStar equipment is active.
1-29
Page 107 of 550
If the shoulder portion of the belt is pulled out all the
way, the child restraint locking feature will be engaged.
This may unintentionally cause the passenger sensing
system to turn the airbag off for some adult size
occupants. If this happens, let the belt go back all the
way and start again.
A thick layer of additional material, such as a blanket or
cushion, or aftermarket equipment such as seat covers,
seat heaters, and seat massagers can affect how well
the passenger sensing system operates. We
recommend that you not use seat covers or other
aftermarket equipment except when approved by GM
for your specific vehicle. SeeAdding Equipment to Your
Airbag-Equipped Vehicle
on page 2‑72for more
information about modifications that can affect how the
system operates.
The on indicator may be lit if an object, such as a
briefcase, handbag, grocery bag, laptop or other
electronic device, is put on an unoccupied seat. If this is
not desired remove the object from the seat.
{WARNING:
Stowing of articles under the passenger seat or
between the passenger seat cushion and
seatback may interfere with the proper operation
of the passenger sensing system.
Servicing Your Airbag-Equipped
Vehicle
Airbags affect how the vehicle should be serviced.
There are parts of the airbag system in several places
around the vehicle. Your dealer/retailer and the service
manual have information about servicing the vehicle
and the airbag system. To purchase a service manual,
see Service Publications Ordering Information
on
page 8‑17.
{WARNING:
For up to 10 seconds after the ignition is turned off
and the battery is disconnected, an airbag can still
inflate during improper service. You can be injured
if you are close to an airbag when it inflates. Avoid
yellow connectors. They are probably part of the
airbag system. Be sure to follow proper service
procedures, and make sure the person performing
work for you is qualified to do so.
2-71
Page 114 of 550
If you are locked out of the vehicle, call the Roadside
Assistance Center. SeeRoadside Assistance Program
on page 8‑7.
Remote Keyless Entry (RKE) System
SeeRadio Frequency Statementon page 8‑20for
information regarding Part 15 of the Federal
Communications Commission (FCC) Rules and
RSS-210/211 of Industry and Science Canada.
Changes or modifications to this system by other than
an authorized service facility could void authorization to
use this equipment.
If there is a decrease in the RKE operating range,
try this:
.Check the distance. The transmitter may be too far
from the vehicle. Stand closer during rainy or
snowy weather.
.Check the location. Other vehicles or objects may
be blocking the signal. Take a few steps to the left
or right, hold the transmitter higher, and try again.
.Check the transmitter's battery. See “Battery
Replacement” later in this section.
.If the transmitter is still not working correctly, see
your dealer/retailer or a qualified technician for
service.
Remote Keyless Entry (RKE) System
Operation
The Remote Keyless Entry (RKE) transmitter functions
work up to 195 feet (60 m) away from the vehicle.
There are other conditions which can affect the
performance of the transmitter. See Remote Keyless
Entry (RKE) System on page 3‑4.
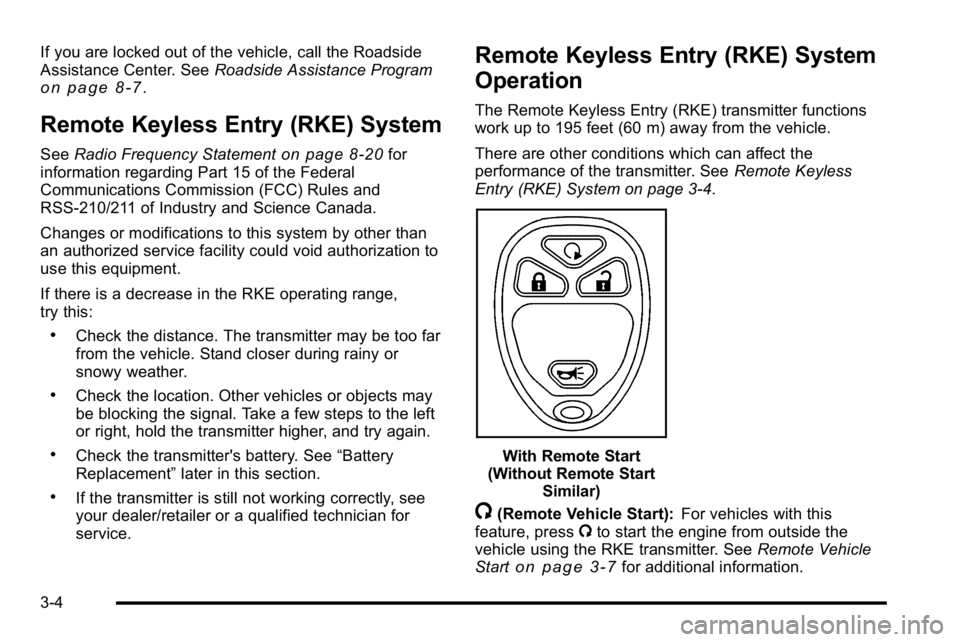
With Remote Start
(Without Remote Start Similar)
/(Remote Vehicle Start): For vehicles with this
feature, press /to start the engine from outside the
vehicle using the RKE transmitter. See Remote Vehicle
Start
on page 3‑7for additional information.
3-4
Page 116 of 550
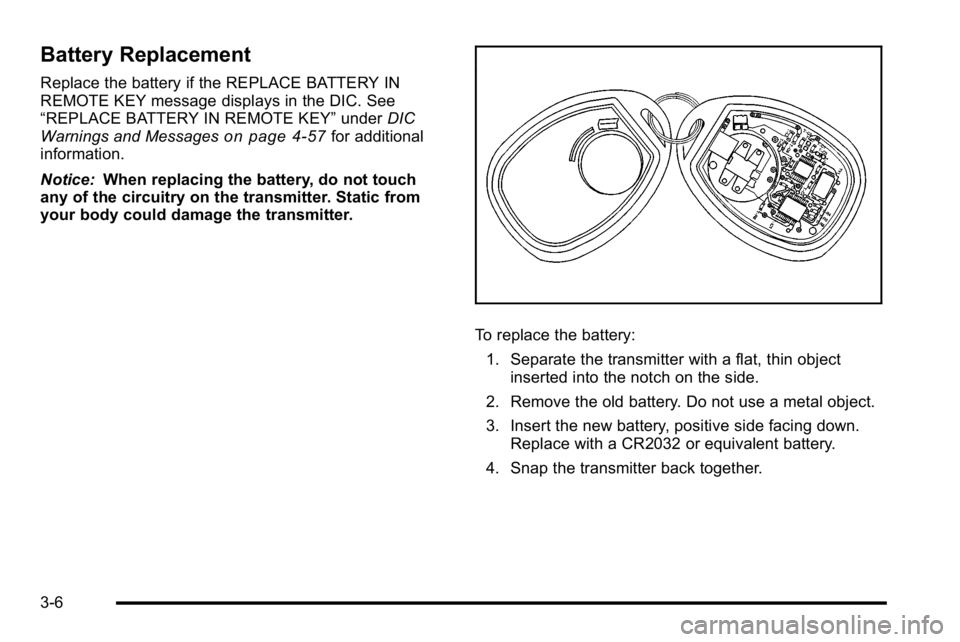
Battery Replacement
Replace the battery if the REPLACE BATTERY IN
REMOTE KEY message displays in the DIC. See
“REPLACE BATTERY IN REMOTE KEY”underDIC
Warnings and Messages
on page 4‑57for additional
information.
Notice: When replacing the battery, do not touch
any of the circuitry on the transmitter. Static from
your body could damage the transmitter.
To replace the battery:
1. Separate the transmitter with a flat, thin object inserted into the notch on the side.
2. Remove the old battery. Do not use a metal object.
3. Insert the new battery, positive side facing down. Replace with a CR2032 or equivalent battery.
4. Snap the transmitter back together.
3-6
Page 128 of 550
Theft-Deterrent Systems
Vehicle theft is big business, especially in some cities.
This vehicle has theft-deterrent features, however, they
do not make it impossible to steal.
Content Theft-Deterrent
Your vehicle may have a content theft-deterrent alarm
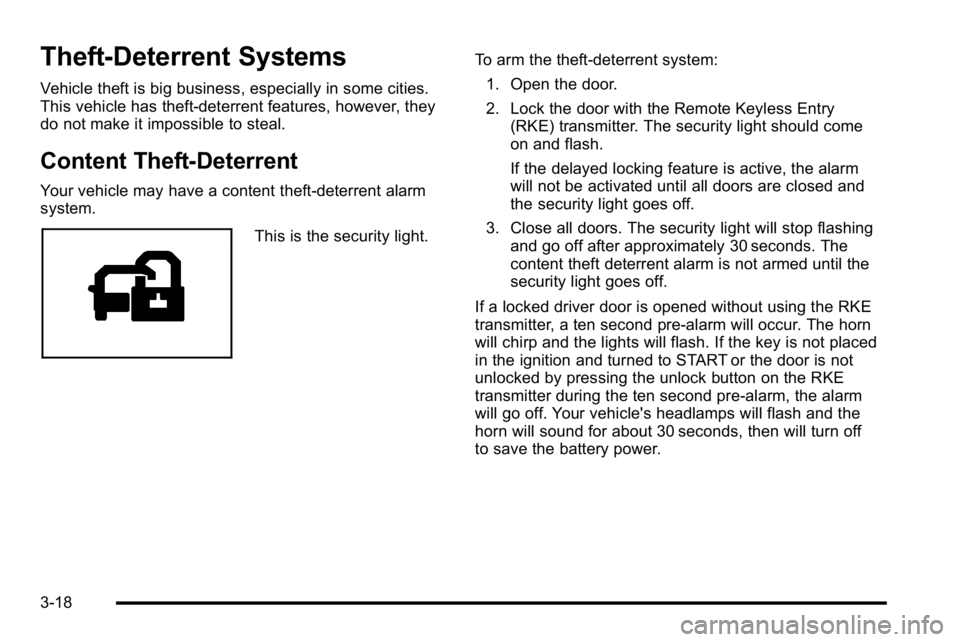
system.
This is the security light.To arm the theft-deterrent system:
1. Open the door.
2. Lock the door with the Remote Keyless Entry (RKE) transmitter. The security light should come
on and flash.
If the delayed locking feature is active, the alarm
will not be activated until all doors are closed and
the security light goes off.
3. Close all doors. The security light will stop flashing and go off after approximately 30 seconds. The
content theft deterrent alarm is not armed until the
security light goes off.
If a locked driver door is opened without using the RKE
transmitter, a ten second pre-alarm will occur. The horn
will chirp and the lights will flash. If the key is not placed
in the ignition and turned to START or the door is not
unlocked by pressing the unlock button on the RKE
transmitter during the ten second pre-alarm, the alarm
will go off. Your vehicle's headlamps will flash and the
horn will sound for about 30 seconds, then will turn off
to save the battery power.
3-18
Page 134 of 550

C (ON/RUN) :This position can be used to operate the
electrical accessories and to display some instrument
panel cluster warning and indicator lights. The switch
stays in this position when the engine is running. The
transmission is also unlocked in this position on
automatic transmission vehicles.
If you leave the key in the ACC/ACCESSORY or ON/
RUN position with the engine off, the battery could be
drained. You may not be able to start the vehicle if the
battery is allowed to drain for an extended period
of time.
D (START) : This is the position that starts the engine.
When the engine starts, release the key. The ignition
switch returns to ON/RUN for driving.
A warning tone will sound when the driver door is
opened, the ignition is in ACC/ACCESSORY or LOCK/
OFF and the key is in the ignition.Retained Accessory Power (RAP)
The following vehicle accessories can be used for up to
10 minutes after the engine is turned off:
.Audio System
.Power Windows
.OnStar®System (if equipped)
.Sunroof (if equipped)
These features work when the key is in ON/RUN or
ACC/ACCESSORY. Once the key is turned from ON/
RUN to LOCK/OFF, the windows and sunroof continue
to work up to 10 minutes until any door is opened. The
radio continues to work for up to 10 minutes or until the
driver door is opened.
Starting the Engine
Move the shift lever to P (Park) or N (Neutral). The
engine will not start in any other position. To restart the
engine when the vehicle is already moving, use
N (Neutral) only.
Notice: Do not try to shift to P (Park) if the vehicle is
moving. If you do, you could damage the
transmission. Shift to P (Park) only when the vehicle
is stopped.
3-24
Page 135 of 550
Starting Procedure
1. With your foot off the accelerator pedal, turn theignition to START. When the engine starts, let go of
the key. The idle speed will slow down as the
engine warms. Do not race the engine immediately
after starting it. Operate the engine and
transmission gently to allow the oil to warm up and
lubricate all moving parts.
The vehicle has a Computer-Controlled Cranking
System. This feature assists in starting the engine
and protects components. If the ignition key is
turned to the START position, and then released
when the engine begins cranking, the engine will
continue cranking for a few seconds or until the
vehicle starts. If the engine does not start and the
key is held in START, cranking will be stopped
after 15 seconds to prevent cranking motor
damage. To prevent gear damage, this system also
prevents cranking if the engine is already running.
Engine cranking can be stopped by turning the
ignition switch to the ACC/ACCESSORY or LOCK/
OFF position.
Notice: Cranking the engine for long periods of
time, by returning the key to the START position
immediately after cranking has ended, can overheat
and damage the cranking motor, and drain the
battery. Wait at least 15 seconds between each try,
to let the cranking motor cool down. 2. If the engine does not start after 5‐10 seconds,
especially in very cold weather (below 0°F or
−18°C), it could be flooded with too much gasoline.
Try pushing the accelerator pedal all the way to the
floor and holding it there as you hold the key in
START for up to a maximum of 15 seconds. Wait at
least 15 seconds between each try, to allow the
cranking motor to cool down. When the engine
starts, let go of the key and accelerator. If the
vehicle starts briefly but then stops again, repeat
these steps. This clears the extra gasoline from the
engine. Do not race the engine immediately after
starting it. Operate the engine and transmission
gently until the oil warms up and lubricates all
moving parts.
Notice: The engine is designed to work with the
electronics in the vehicle. If you add electrical
parts or accessories, you could change the way
the engine operates. Before adding electrical
equipment, check with your dealer/retailer. If you
do not, the engine might not perform properly. Any
resulting damage would not be covered by the
vehicle warranty.
3-25
Page 146 of 550
Torque Lock
If you are parking on a hill and you do not shift the
transmission into P (Park) properly, the weight of the
vehicle can put too much force on the parking pawl in
the transmission. It might be difficult to pull the shift
lever out of P (Park). This is called torque lock. To
prevent torque lock, set the parking brake and then shift
into P (Park) properly before you leave the driver seat.
To find out how, seeShifting Into Park on page 3‑35.
When you are ready to drive, move the shift lever out of
P (Park) before releasing the parking brake.
If torque lock does occur, you might need to have
another vehicle push yours a little uphill to take some of
the pressure from the parking pawl in the transmission.
Then you should be able to pull the shift lever out of
P (Park).
Shifting Out of Park
This vehicle is equipped with an electronic shift lock
release system. The shift lock release is designed to:
.Prevent ignition key removal unless the shift lever
is in P (Park) with the shift lever button fully
released, and
.Prevent movement of the shift lever out of P (Park),
unless the ignition is in ON/RUN or ACC/
ACCESSORY and the regular brake pedal is
applied. The shift lock release is always functional except in the
case of an uncharged or low voltage (less than 9 volt)
battery.
If the vehicle has an uncharged battery or a battery
with low voltage, try charging or jump starting the
battery. See
Jump Starting
on page 6‑44for more
information.
To shift out of P (Park) use the following:
1. Apply the brake pedal.
2. Move the shift lever to the desired position.
If you still are unable to shift out of P (Park): 1. Ease the pressure on the shift lever.
2. While holding down the brake pedal, press the shift lever all the way into P (Park).
3. Move the shift lever to the desired position.
If you are still having a problem shifting, then have the
vehicle serviced soon.
3-36
Page 164 of 550
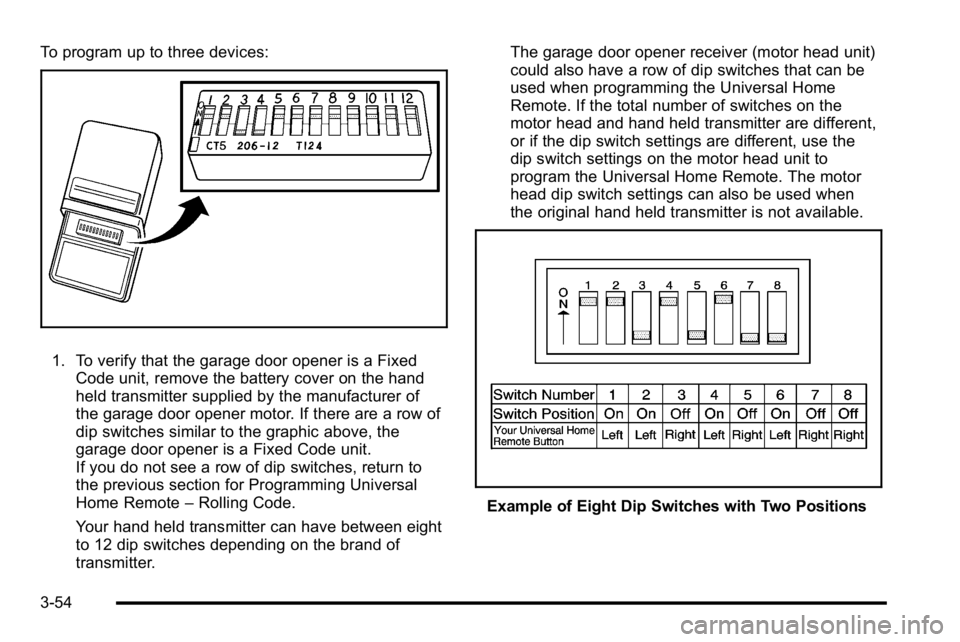
To program up to three devices:
1. To verify that the garage door opener is a FixedCode unit, remove the battery cover on the hand
held transmitter supplied by the manufacturer of
the garage door opener motor. If there are a row of
dip switches similar to the graphic above, the
garage door opener is a Fixed Code unit.
If you do not see a row of dip switches, return to
the previous section for Programming Universal
Home Remote –Rolling Code.
Your hand held transmitter can have between eight
to 12 dip switches depending on the brand of
transmitter. The garage door opener receiver (motor head unit)
could also have a row of dip switches that can be
used when programming the Universal Home
Remote. If the total number of switches on the
motor head and hand held transmitter are different,
or if the dip switch settings are different, use the
dip switch settings on the motor head unit to
program the Universal Home Remote. The motor
head dip switch settings can also be used when
the original hand held transmitter is not available.
Example of Eight Dip Switches with Two Positions
3-54