flat tire GMC SIERRA DENALI 2010 Owners Manual
[x] Cancel search | Manufacturer: GMC, Model Year: 2010, Model line: SIERRA DENALI, Model: GMC SIERRA DENALI 2010Pages: 550, PDF Size: 4.17 MB
Page 31 of 550
Tire Pressure Monitor
This vehicle may have a Tire Pressure Monitor
System (TPMS).
The Tire Pressure Monitor
alerts you when a
significant reduction in
pressure occurs in one or
more of the vehicle’s tires
by illuminating the low tire
pressure warning light on
the instrument cluster.
The warning light will remain on until the tire pressure is
corrected. The proper tire pressures for your vehicle are
listed on the Tire and Loading Information label located
on the driver side center pillar (B pillar). See Loading
the Vehicle
on page 5‑31. You may notice during cooler conditions that the low tire
pressure warning light will appear when the vehicle is
first started and then turn off as you drive. This may be
an early indicator that your tire pressures are getting
low and the tires need to be inflated to the proper
pressure.
Note:
The Tire Pressure Monitor can alert you about
low tire pressure, but it does not replace normal monthly
tire maintenance. It is the driver ’s responsibility to
maintain correct tire pressures.
See Tire Pressure Monitor System
on page 6‑73and
Tire Pressure Monitor Operation on page 6‑74.
Engine Oil Life System
The engine oil life system calculates engine oil life
based on vehicle use and, on most vehicles, displays a
DIC message when it is necessary to change the
engine oil and filter. The oil life system should be reset
to 100% only following an oil change.
1-25
Page 32 of 550
Resetting the Oil Life System
To reset the Engine Oil Life System on most vehicles:1. Display the OIL LIFE REMAINING on the DIC. If the vehicle does not have DIC buttons, the
vehicle must be in P (Park) to access this display.
2. Press and hold the SET/RESET button on the DIC, or the trip odometer reset stem if the vehicle does
not have DIC buttons, for more than five seconds.
The oil life will change to 100%.
On all vehicles, the Engine Oil Life System can be reset
as follows: 1. Turn the ignition to ON/RUN with the engine off
2. Fully press the accelerator pedal slowly three times within five seconds.
3. Display the OIL LIFE REMAINING on the DIC. If the display shows 100%, the system is reset.
See Engine Oil Life System on page 6‑20.
Fuel E85 (85% Ethanol)
This vehicle has a yellow fuel cap and can use either
unleaded gasoline or ethanol fuel containing up to 85%
ethanol (E85). See Gasoline Octane
on page 6‑7and
Fuel E85 (85% Ethanol) on page 6‑9.
Driving for Better Fuel Economy
Driving habits can affect fuel mileage. Here are some
driving tips to get the best fuel economy possible.
.Avoid fast starts and accelerate smoothly.
.Brake gradually and avoid abrupt stops.
.Avoid idling the engine for long periods of time.
.When road and weather conditions are
appropriate, use cruise control, if equipped.
.Always follow posted speed limits or drive more
slowly when conditions require.
.Keep vehicle tires properly inflated.
.Combine several trips into a single trip.
.Replace the vehicle's tires with the same TPC
Spec number molded into the tire's sidewall near
the size.
.Follow recommended scheduled maintenance.
1-26
Page 209 of 550
Engine Coolant Temperature Gage
United StatesCanada
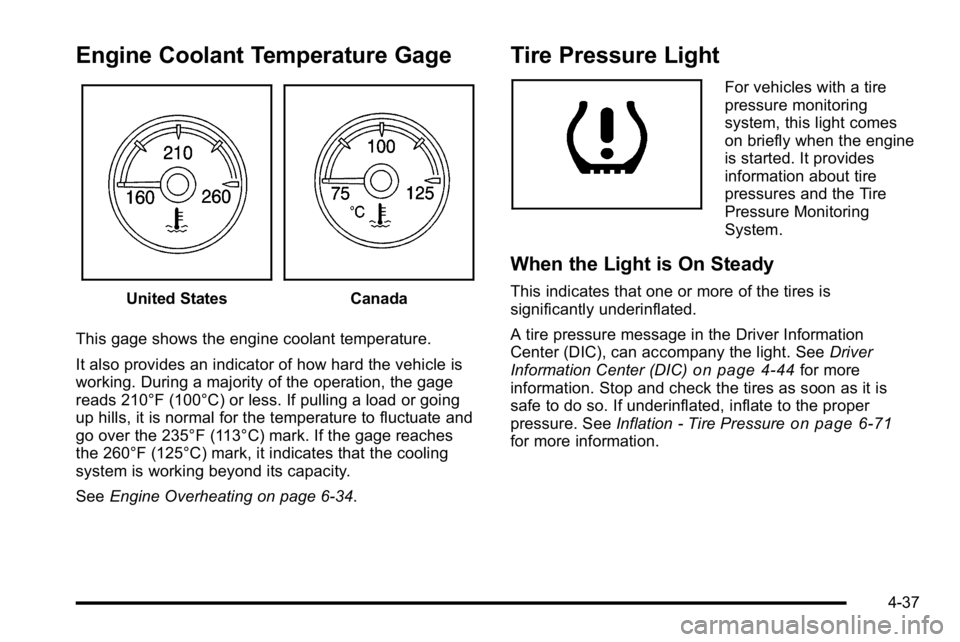
This gage shows the engine coolant temperature.
It also provides an indicator of how hard the vehicle is
working. During a majority of the operation, the gage
reads 210°F (100°C) or less. If pulling a load or going
up hills, it is normal for the temperature to fluctuate and
go over the 235°F (113°C) mark. If the gage reaches
the 260°F (125°C) mark, it indicates that the cooling
system is working beyond its capacity.
See Engine Overheating on page 6‑34.
Tire Pressure Light
For vehicles with a tire
pressure monitoring
system, this light comes
on briefly when the engine
is started. It provides
information about tire
pressures and the Tire
Pressure Monitoring
System.
When the Light is On Steady
This indicates that one or more of the tires is
significantly underinflated.
A tire pressure message in the Driver Information
Center (DIC), can accompany the light. See Driver
Information Center (DIC)
on page 4‑44for more
information. Stop and check the tires as soon as it is
safe to do so. If underinflated, inflate to the proper
pressure. See Inflation - Tire Pressure
on page 6‑71for more information.
4-37
Page 224 of 550
Remember, you must reset the OIL LIFE display
yourself after each oil change. It will not reset itself.
Also, be careful not to reset the OIL LIFE display
accidentally at any time other than when the oil has just
been changed. It cannot be reset accurately until the
next oil change. To reset the engine oil life system, see
Engine Oil Life System on page 6‑20.
Units
Press the vehicle information button until UNITS
displays. This display allows you to select between
English or Metric units of measurement. Once in this
display, press the set/reset button to select between
ENGLISH or METRIC units. All of the vehicle
information will then be displayed in the unit of
measurement selected.
Tire Pressure
If your vehicle has the Tire Pressure Monitor System
(TPMS), the pressure for each tire can be viewed in the
DIC. The tire pressure will be shown in either pounds
per square inch (psi) or kilopascals (kPa). Press the
vehicle information button until the DIC displays FRONT
TIRES PSI (kPa) LEFT ## RIGHT ##. Press the vehicle
information button again until the DIC displays REAR
TIRES PSI (kPa) LEFT ## RIGHT ##.If a low tire pressure condition is detected by the
system while driving, a message advising you to add
pressure in a specific tire will appear in the display. See
Inflation - Tire Pressure
on page 6‑71and
DIC
Warnings and Messageson page 4‑57for more
information.
If the tire pressure display shows dashes instead of a
value, there may be a problem with your vehicle. If this
consistently occurs, see your dealer/retailer for service.
Trailer Gain and Output
On vehicles with the Integrated Trailer Brake Control
(ITBC) system, the trailer brake display appears in the
DIC. Press the vehicle information button until TRAILER
GAIN and OUTPUT display.
TRAILER GAIN shows the trailer gain setting. This
setting can be adjusted from 0.0 to 10.0 with either a
trailer connected or disconnected. To adjust this setting,
see “Integrated Trailer Brake Control System” under
Towing a Trailer
on page 5‑42for more information.
OUTPUT shows the power output to the trailer anytime
a trailer with electric brakes is connected. Output is
displayed in 0 to 10 bars. Dashes may appear in the
OUTPUT display. See “Integrated Trailer Brake Control
System” underTowing a Trailer
on page 5‑42for more
information.
4-52
Page 237 of 550
TIGHTEN GAS CAP
This message may display along with the check engine
light on the instrument panel cluster if the vehicle's fuel
cap is not tightened properly. SeeMalfunction Indicator
Lamp
on page 4‑38. Reinstall the fuel cap fully. See
Filling the Tankon page 6‑10. The diagnostic system
can determine if the fuel cap has been left off or
improperly installed. A loose or missing fuel cap allows
fuel to evaporate into the atmosphere. A few driving
trips with the cap properly installed should turn this light
and message off.
TIRE LEARNING ACTIVE
If your vehicle has the Tire Pressure Monitor System
(TPMS), this message displays when the system is
re-learning the tire positions on your vehicle. The tire
positions must be re-learned after rotating the tires or
after replacing a tire or sensor. See Tire Inspection and
Rotation
on page 6‑78, Tire Pressure Monitor Systemon page 6‑73, and Inflation - Tire Pressureon
page 6‑71for more information.
TIRE LOW ADD AIR TO TIRE
If your vehicle has the Tire Pressure Monitor System
(TPMS), this message displays when the pressure in
one or more of the vehicle's tires is low. This message
also displays LEFT FRT (left front), RIGHT FRT (right
front), LEFT RR (left rear), or RIGHT RR (right rear) to
indicate the location of the low tire. The low tire
pressure warning light will also come on. See Tire
Pressure Light
on page 4‑37. You can receive more
than one tire pressure message at a time. To read the
other messages that may have been sent at the same
time, press the set/reset button or the trip odometer
reset stem. If a tire pressure message appears on the
DIC, stop as soon as you can. Have the tire pressures
checked and set to those shown on the Tire Loading
Information label. See Tires
on page 6‑62,Loading the
Vehicleon page 5‑31, and Inflation - Tire Pressureon
page 6‑71. The DIC also shows the tire pressure
values. See “DIC Operation and Displays (Using DIC
Buttons)” earlier in this section.
4-65
Page 325 of 550
Before You Go Off-Roading
.Have all necessary maintenance and service
work done.
.Make sure there is enough fuel, that fluid levels are
where they should be, and that the spare tire is
fully inflated.
.Be sure to read all the information about
all-wheel-drive vehicles in this manual.
.Make sure all underbody shields, if the vehicle has
them, are properly attached.
.Know the local laws that apply to off-roading where
you will be driving or check with law enforcement
people in the area.
.Be sure to get the necessary permission if you will
be on private land.
If you think you will need some more ground clearance
at the front of your vehicle, you can remove the front
fascia lower air dam. The air dam is held in place by
two bolts and 10 snaps accessible from underneath the
front fascia. To remove the air dam:
1. Remove the two outboard air dam bolts.
2. With a flat‐blade tool, disengage the snaps.
3. After the bolts are removed and the snaps are disengaged, push forward on the air dam until it
is free.
Notice: Operating your vehicle for extended periods
without the front fascia lower air dam installed can
cause improper air flow to the engine. Always be
sure to replace the front fascia air dam when you
are finished off-road driving.
After off-roading , be sure to reinstall the air dam:
1. Line up the snaps and push the air dam rearward to engage the snaps.
2. Install the two outboard bolts.
5-13
Page 337 of 550
Hydroplaning
Hydroplaning is dangerous. Water can build up under
your vehicle's tires so they actually ride on the water.
This can happen if the road is wet enough and you are
going fast enough. When your vehicle is hydroplaning, it
has little or no contact with the road.
There is no hard and fast rule about hydroplaning. The
best advice is to slow down when the road is wet.
Other Rainy Weather Tips
Besides slowing down, other wet weather driving tips
include:
.Allow extra following distance.
.Pass with caution.
.Keep windshield wiping equipment in good shape.
.Keep the windshield washer fluid reservoir filled.
.Have good tires with proper tread depth. SeeTireson page 6‑62.
.Turn off cruise control.
Before Leaving on a Long Trip
To prepare your vehicle for a long trip, consider having
it serviced by your dealer/retailer before departing.
Things to check on your own include:
.Windshield Washer Fluid:Reservoir full? Windows
clean —inside and outside?
.Wiper Blades: In good shape?
.Fuel, Engine Oil, Other Fluids: All levels checked?
.Lamps:Do they all work and are lenses clean?
.Tires:Are treads good? Are tires inflated to
recommended pressure?
.Weather and Maps: Safe to travel? Have
up-to-date maps?
5-25
Page 338 of 550
Highway Hypnosis
Always be alert and pay attention to your surroundings
while driving. If you become tired or sleepy, find a safe
place to park your vehicle and rest.
Other driving tips include:
.Keep the vehicle well ventilated.
.Keep interior temperature cool.
.Keep your eyes moving—scan the road ahead
and to the sides.
.Check the rearview mirror and vehicle instruments
often.
Hill and Mountain Roads
Driving on steep hills or through mountains is different
than driving on flat or rolling terrain. Tips for driving in
these conditions include:
.Keep the vehicle serviced and in good shape.
.Check all fluid levels and brakes, tires, cooling
system, and transmission.
.Going down steep or long hills, shift to a
lower gear.
{WARNING:
If you do not shift down, the brakes could get so
hot that they would not work well. You would then
have poor braking or even none going down a hill.
You could crash. Shift down to let the engine
assist the brakes on a steep downhill slope.
5-26
Page 344 of 550
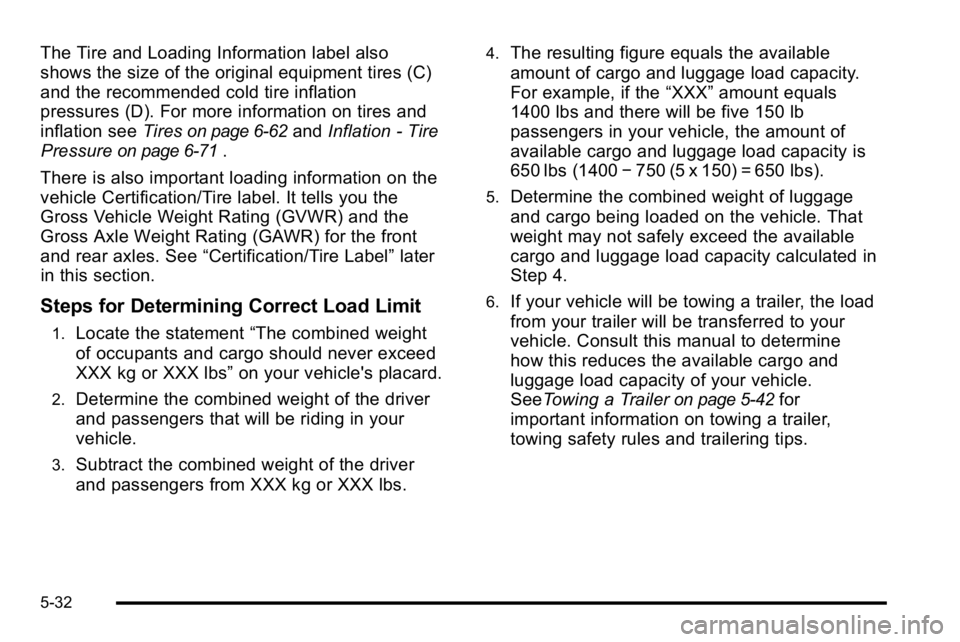
The Tire and Loading Information label also
shows the size of the original equipment tires (C)
and the recommended cold tire inflation
pressures (D). For more information on tires and
inflation seeTires
on page 6‑62andInflation - Tire
Pressure
on page 6‑71.
There is also important loading information on the
vehicle Certification/Tire label. It tells you the
Gross Vehicle Weight Rating (GVWR) and the
Gross Axle Weight Rating (GAWR) for the front
and rear axles. See “Certification/Tire Label” later
in this section.
Steps for Determining Correct Load Limit
1.Locate the statement “The combined weight
of occupants and cargo should never exceed
XXX kg or XXX lbs” on your vehicle's placard.
2.Determine the combined weight of the driver
and passengers that will be riding in your
vehicle.
3.Subtract the combined weight of the driver
and passengers from XXX kg or XXX lbs.
4.The resulting figure equals the available
amount of cargo and luggage load capacity.
For example, if the“XXX”amount equals
1400 lbs and there will be five 150 lb
passengers in your vehicle, the amount of
available cargo and luggage load capacity is
650 lbs (1400 −750 (5 x 150) = 650 lbs).
5.Determine the combined weight of luggage
and cargo being loaded on the vehicle. That
weight may not safely exceed the available
cargo and luggage load capacity calculated in
Step 4.
6.If your vehicle will be towing a trailer, the load
from your trailer will be transferred to your
vehicle. Consult this manual to determine
how this reduces the available cargo and
luggage load capacity of your vehicle.
SeeTowing a Trailer
on page 5‑42for
important information on towing a trailer,
towing safety rules and trailering tips.
5-32
Page 346 of 550
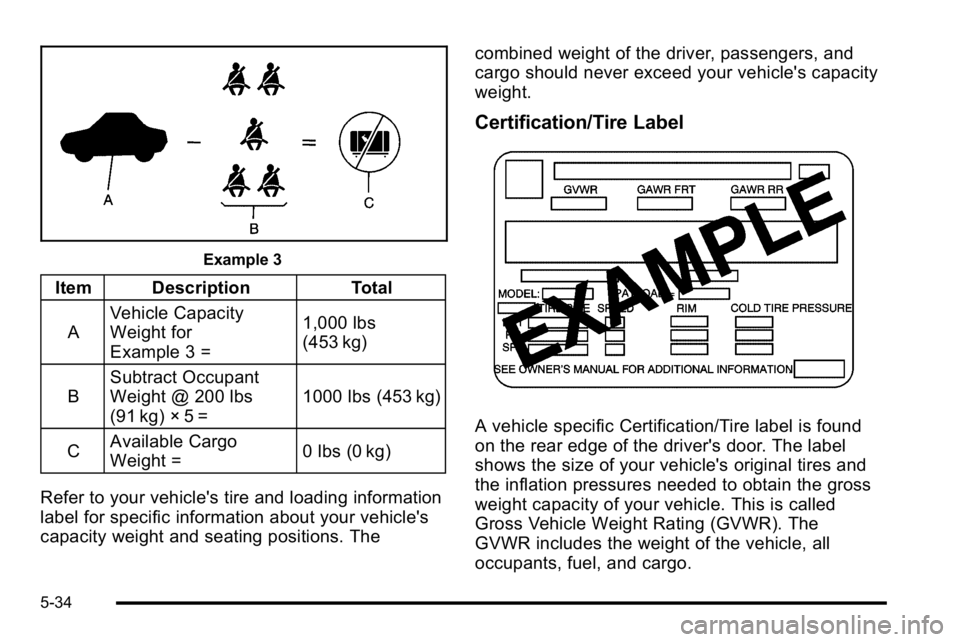
Example 3
Item DescriptionTotal
A Vehicle Capacity
Weight for
Example 3 = 1,000 lbs
(453 kg)
B Subtract Occupant
Weight @ 200 lbs
(91 kg) × 5 = 1000 lbs (453 kg)
C Available Cargo
Weight =
0 lbs (0 kg)
Refer to your vehicle's tire and loading information
label for specific information about your vehicle's
capacity weight and seating positions. The combined weight of the driver, passengers, and
cargo should never exceed your vehicle's capacity
weight.
Certification/Tire Label
A vehicle specific Certification/Tire label is found
on the rear edge of the driver's door. The label
shows the size of your vehicle's original tires and
the inflation pressures needed to obtain the gross
weight capacity of your vehicle. This is called
Gross Vehicle Weight Rating (GVWR). The
GVWR includes the weight of the vehicle, all
occupants, fuel, and cargo.
5-34