check transmission fluid GMC SIERRA DENALI 2015 Owners Manual
[x] Cancel search | Manufacturer: GMC, Model Year: 2015, Model line: SIERRA DENALI, Model: GMC SIERRA DENALI 2015Pages: 439, PDF Size: 4.68 MB
Page 123 of 439
Black plate (14,1)GMC 2015i Sierra Denali Owner Manual (GMNA-Localizing-U.S./Canada/
Mexico-8431500) - 2015 - crc - 6/20/14
5-14 Instruments and Controls
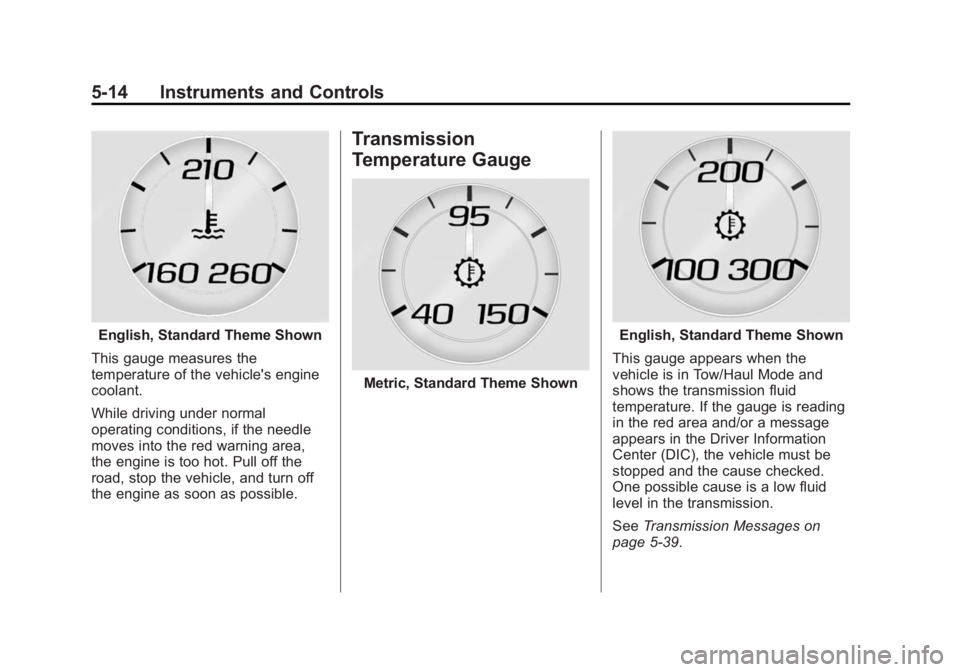
English, Standard Theme Shown
This gauge measures the
temperature of the vehicle's engine
coolant.
While driving under normal
operating conditions, if the needle
moves into the red warning area,
the engine is too hot. Pull off the
road, stop the vehicle, and turn off
the engine as soon as possible. Transmission
Temperature Gauge
Metric, Standard Theme Shown English, Standard Theme Shown
This gauge appears when the
vehicle is in Tow/Haul Mode and
shows the transmission fluid
temperature. If the gauge is reading
in the red area and/or a message
appears in the Driver Information
Center (DIC), the vehicle must be
stopped and the cause checked.
One possible cause is a low fluid
level in the transmission.
See Transmission Messages on
page 5-39 .
Page 150 of 439
Black plate (41,1)GMC 2015i Sierra Denali Owner Manual (GMNA-Localizing-U.S./Canada/
Mexico-8431500) - 2015 - crc - 6/20/14
Instruments and Controls 5-41TRANSMISSION HOT IDLE
ENGINE This message displays and a chime
may sound if the transmission fluid
in the vehicle gets hot. Driving with
the transmission fluid temperature
high can cause damage to the
vehicle. Stop the vehicle and let it
idle to allow the transmission to
cool. This message clears and the
chime stops when the fluid
temperature reaches a safe level.
When towing, use Tow/Haul Mode
to prevent damage to the engine or
transmission. See Tow/Haul Mode
on page 9-39 .
VEHICLE IN 4WD LOW This message will display if the
vehicle is driven in 4
n for about
10 minutes above 72 km/h (45 mph). Vehicle Reminder
Messages CHECK TRAILER WIRING On vehicles with the Integrated
Trailer Brake Control (ITBC) system,
this message may display and a
chime may sound when one of the
following conditions exists: .
A trailer with electric brakes
becomes disconnected from the
vehicle.
‐ If the disconnect occurs while
the vehicle is stopped, this
message clears itself after a
short time.
‐ If the disconnect occurs while
the vehicle is moving, this
message stays on until the
ignition is turned off. .
There is a short in the wiring to
the electric trailer brakes.
When this message displays, power
is no longer available to the trailer
brakes. As soon as it is safe to do so,
carefully pull the vehicle over to the
side of the road and turn the ignition
off. Check the wiring connection to
the trailer and turn the ignition back
on. This message clears if the trailer
is reconnected. This message also
clears if you acknowledge it. If this
message still displays, either the
vehicle or the trailer needs service.
See your dealer.
See “ Integrated Trailer Brake
Control System ” under Towing
Equipment on page 9-78 .
ICE POSSIBLE DRIVE
WITH CARE This message displays when ice
conditions are possible.
TRAILER CONNECTED
On vehicles with the Integrated
Trailer Brake Control (ITBC) system,
this message displays briefly when
a trailer with electric or electric over
hydraulic brakes is first connected
to the vehicle.
Page 191 of 439
Black plate (12,1)GMC 2015i Sierra Denali Owner Manual (GMNA-Localizing-U.S./Canada/
Mexico-8431500) - 2015 - crc - 6/20/14
9-12 Driving and Operating .
Check all fluid levels and brakes,
tires, cooling system, and
transmission. .
Shift to a lower gear when going
down steep or long hills.
{ WarningUsing the brakes to slow the
vehicle on a long downhill slope
can cause brake overheating, can
reduce brake performance, and
could result in a loss of braking.
Shift the transmission to a lower
gear to let the engine assist the
brakes on a steep downhill slope.
{ Warning
Coasting downhill in N (Neutral)
or with the ignition off is
dangerous. This can cause
overheating of the brakes and
(Continued) Warning (Continued) loss of steering. Always have the
engine running and the vehicle
in gear. .
Stay in your own lane. Do not
swing wide or cut across the
center of the road. Drive at
speeds that let you stay in your
own lane. .
Be alert on top of hills;
something could be in your lane
(stalled car, accident). .
Pay attention to special road
signs (falling rocks area, winding
roads, long grades, passing or
no-passing zones) and take
appropriate action.
Winter Driving Driving on Snow or Ice
Drive carefully when there is snow
or ice between the tires and the
road, creating less traction or grip. Wet ice can occur at about 0°C
(32°F) when freezing rain begins to
fall, resulting in even less traction.
Avoid driving on wet ice or in
freezing rain until roads can be
treated with salt or sand.
Drive with caution, whatever the
condition. Accelerate gently so
traction is not lost. Accelerating too
quickly causes the wheels to spin
and makes the surface under the
tires slick, so there is even less
traction.
Traction Control should be turned
on. See Traction Control/Electronic
Stability Control on page 9-49 .
The Antilock Brake System (ABS)
improves vehicle stability during
hard stops on slippery roads, but
apply the brakes sooner than when
on dry pavement. See Antilock
Brake System (ABS) on page 9-46 .
Allow greater following distance on
any slippery road and watch for
slippery spots. Icy patches can
occur on otherwise clear roads in
shaded areas. The surface of a
Page 250 of 439
Black plate (71,1)GMC 2015i Sierra Denali Owner Manual (GMNA-Localizing-U.S./Canada/
Mexico-8431500) - 2015 - crc - 6/20/14
Driving and Operating 9-717. Stop and have someone pick up
and store the chocks.
Maintenance when Trailer
Towing The vehicle needs service more
often when pulling a trailer. See
Maintenance Schedule on
page 11-3 . Things that are
especially important in trailer
operation are automatic
transmission fluid, engine oil, axle
lubricant, belts, cooling system, and
brake system. It is a good idea to
inspect these before and during
the trip.
Check periodically to see that all
hitch nuts and bolts are tight.
Trailer Towing If the vehicle has a diesel engine,
see the Duramax diesel
supplement.
If the vehicle is bi-fuel, see the
bi-fuel supplement. Do not tow a trailer during break-in.
See New Vehicle Break-In on
page 9-23 for more information.
{ WarningThe driver can lose control when
pulling a trailer if the correct
equipment is not used or the
vehicle is not driven properly. For
example, if the trailer is too
heavy, the brakes may not work
well or even at all. The driver and
passengers could be seriously
injured. The vehicle may also be
damaged; the resulting repairs
would not be covered by the
vehicle warranty. Pull a trailer
only if all the steps in this section
have been followed. Ask your
dealer for advice and information
about towing a trailer with the
vehicle. { CautionPulling a trailer improperly can
damage the vehicle and result in
costly repairs not covered by the
vehicle warranty. To pull a trailer
correctly, follow the advice in this
section and see your dealer for
important information about
towing a trailer with the vehicle.
See Vehicle Load Limits on
page 9-15 for more information
about the vehicle's maximum load
capacity.
To identify the trailering capacity of
the vehicle, read the information in
“ Weight of the Trailer ” later in this
section.
Page 272 of 439
Black plate (1,1)GMC 2015i Sierra Denali Owner Manual (GMNA-Localizing-U.S./Canada/
Mexico-8431500) - 2015 - crc - 6/20/14
Vehicle Care 10-1
Vehicle Care General Information General Information . . . . . . . . . . 10-2
California Proposition
65 Warning . . . . . . . . . . . . . . . . . 10-2
California Perchlorate
Materials Requirements . . . . 10-3
Accessories and
Modifications . . . . . . . . . . . . . . . 10-3
Vehicle Checks Doing Your Own
Service Work . . . . . . . . . . . . . . . 10-3
Hood . . . . . . . . . . . . . . . . . . . . . . . . 10-4
Engine Compartment
Overview . . . . . . . . . . . . . . . . . . . 10-5
Engine Oil . . . . . . . . . . . . . . . . . . . 10-8
Engine Oil Life System . . . . . 10-11
Automatic Transmission
Fluid (6 Speed
Transmission) . . . . . . . . . . . . . 10-12
Automatic Transmission
Fluid (8 Speed
Transmission) . . . . . . . . . . . . . 10-15
Engine Air Cleaner/Filter . . . . 10-15
Cooling System . . . . . . . . . . . . 10-17
Engine Coolant . . . . . . . . . . . . . 10-18 Engine Overheating . . . . . . . . 10-21
Overheated Engine
Protection
Operating Mode . . . . . . . . . . . 10-23
Engine Fan . . . . . . . . . . . . . . . . . 10-24
Power Steering Fluid (1500
Series) . . . . . . . . . . . . . . . . . . . . 10-24
Power Steering Fluid (2500/
3500 Series) . . . . . . . . . . . . . . 10-24
Washer Fluid . . . . . . . . . . . . . . . 10-25
Brakes . . . . . . . . . . . . . . . . . . . . . 10-26
Brake Fluid . . . . . . . . . . . . . . . . . 10-27
Battery . . . . . . . . . . . . . . . . . . . . . 10-29
Four-Wheel Drive . . . . . . . . . . . 10-29
Front Axle . . . . . . . . . . . . . . . . . . 10-30
Rear Axle . . . . . . . . . . . . . . . . . . 10-31
Noise Control System . . . . . . 10-32
Starter Switch Check . . . . . . . 10-33
Automatic Transmission Shift
Lock Control Function
Check . . . . . . . . . . . . . . . . . . . . . 10-34
Ignition Transmission Lock
Check . . . . . . . . . . . . . . . . . . . . . 10-34
Park Brake and P (Park)
Mechanism Check . . . . . . . . 10-34
Wiper Blade
Replacement . . . . . . . . . . . . . . 10-35
Glass Replacement . . . . . . . . 10-35 Headlamp Aiming Headlamp Aiming . . . . . . . . . . 10-36
Bulb Replacement Bulb Replacement . . . . . . . . . . 10-36
Halogen Bulbs . . . . . . . . . . . . . . 10-36
LED Lighting . . . . . . . . . . . . . . . 10-36
Headlamps, Front Turn
Signal, Sidemarker, and
Parking Lamps . . . . . . . . . . . . 10-36
Fog Lamps . . . . . . . . . . . . . . . . . 10-37
Taillamps, Turn Signal,
Stoplamps, and Back-Up
Lamps . . . . . . . . . . . . . . . . . . . . 10-37
Center High-Mounted
Stoplamp (CHMSL) and
Cargo Lamp . . . . . . . . . . . . . . 10-39
Replacement Bulbs . . . . . . . . . 10-40
Electrical System Electrical System
Overload . . . . . . . . . . . . . . . . . . 10-40
Fuses . . . . . . . . . . . . . . . . . . . . . . 10-41
Engine Compartment Fuse
Block . . . . . . . . . . . . . . . . . . . . . 10-41
Instrument Panel Fuse
Block (Left) . . . . . . . . . . . . . . . 10-45
Instrument Panel Fuse Block
(Right) . . . . . . . . . . . . . . . . . . . . 10-48
Page 277 of 439
Black plate (6,1)GMC 2015i Sierra Denali Owner Manual (GMNA-Localizing-U.S./Canada/
Mexico-8431500) - 2015 - crc - 6/20/14
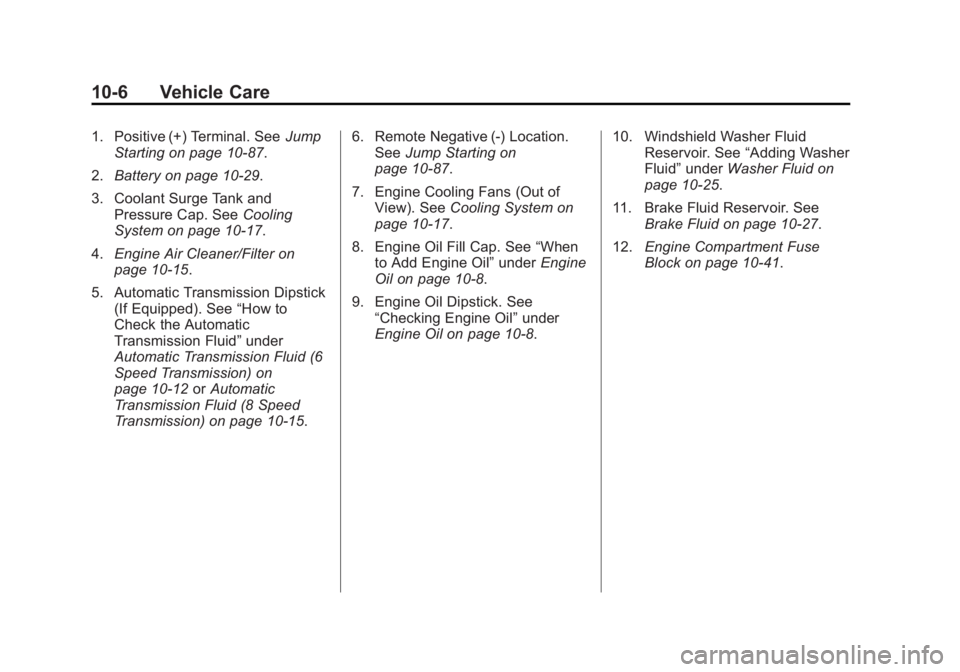
10-6 Vehicle Care 1. Positive (+) Terminal. See Jump
Starting on page 10-87 .
2. Battery on page 10-29 .
3. Coolant Surge Tank and
Pressure Cap. See Cooling
System on page 10-17 .
4. Engine Air Cleaner/Filter on
page 10-15 .
5. Automatic Transmission Dipstick
(If Equipped). See “ How to
Check the Automatic
Transmission Fluid ” under
Automatic Transmission Fluid (6
Speed Transmission) on
page 10-12 or Automatic
Transmission Fluid (8 Speed
Transmission) on page 10-15 . 6. Remote Negative (-) Location.
See Jump Starting on
page 10-87 .
7. Engine Cooling Fans (Out of
View). See Cooling System on
page 10-17 .
8. Engine Oil Fill Cap. See “ When
to Add Engine Oil ” under Engine
Oil on page 10-8 .
9. Engine Oil Dipstick. See
“ Checking Engine Oil ” under
Engine Oil on page 10-8 . 10. Windshield Washer Fluid
Reservoir. See “ Adding Washer
Fluid ” under Washer Fluid on
page 10-25 .
11. Brake Fluid Reservoir. See
Brake Fluid on page 10-27 .
12. Engine Compartment Fuse
Block on page 10-41 .
Page 279 of 439
Black plate (8,1)GMC 2015i Sierra Denali Owner Manual (GMNA-Localizing-U.S./Canada/
Mexico-8431500) - 2015 - crc - 6/20/14
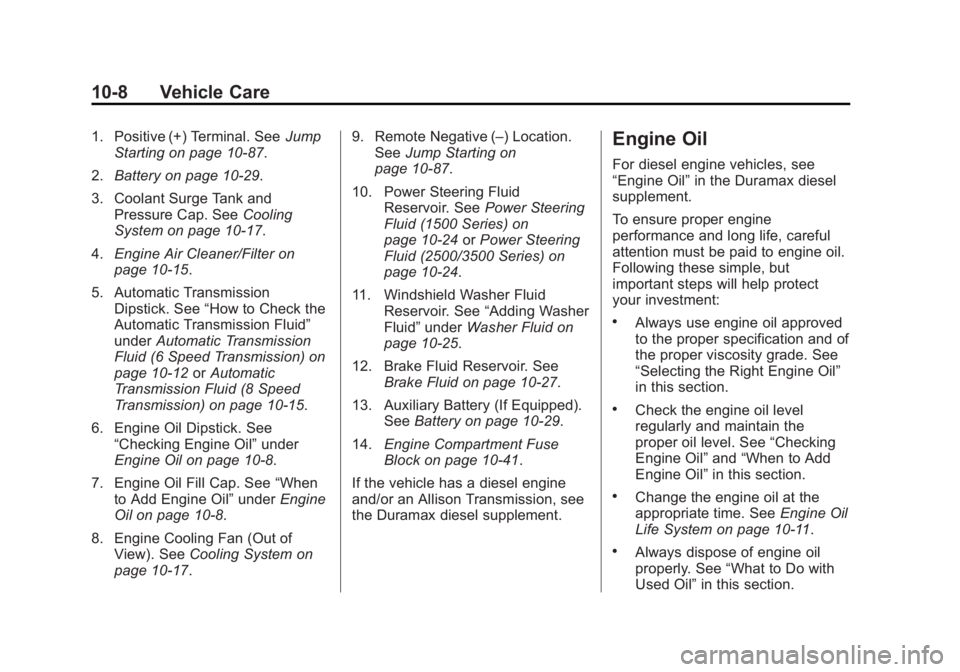
10-8 Vehicle Care 1. Positive (+) Terminal. See Jump
Starting on page 10-87 .
2. Battery on page 10-29 .
3. Coolant Surge Tank and
Pressure Cap. See Cooling
System on page 10-17 .
4. Engine Air Cleaner/Filter on
page 10-15 .
5. Automatic Transmission
Dipstick. See “ How to Check the
Automatic Transmission Fluid ”
under Automatic Transmission
Fluid (6 Speed Transmission) on
page 10-12 or Automatic
Transmission Fluid (8 Speed
Transmission) on page 10-15 .
6. Engine Oil Dipstick. See
“ Checking Engine Oil ” under
Engine Oil on page 10-8 .
7. Engine Oil Fill Cap. See “ When
to Add Engine Oil ” under Engine
Oil on page 10-8 .
8. Engine Cooling Fan (Out of
View). See Cooling System on
page 10-17 . 9. Remote Negative ( – ) Location.
See Jump Starting on
page 10-87 .
10. Power Steering Fluid
Reservoir. See Power Steering
Fluid (1500 Series) on
page 10-24 or Power Steering
Fluid (2500/3500 Series) on
page 10-24 .
11. Windshield Washer Fluid
Reservoir. See “ Adding Washer
Fluid ” under Washer Fluid on
page 10-25 .
12. Brake Fluid Reservoir. See
Brake Fluid on page 10-27 .
13. Auxiliary Battery (If Equipped).
See Battery on page 10-29 .
14. Engine Compartment Fuse
Block on page 10-41 .
If the vehicle has a diesel engine
and/or an Allison Transmission, see
the Duramax diesel supplement. Engine Oil For diesel engine vehicles, see
“ Engine Oil ” in the Duramax diesel
supplement.
To ensure proper engine
performance and long life, careful
attention must be paid to engine oil.
Following these simple, but
important steps will help protect
your investment: .
Always use engine oil approved
to the proper specification and of
the proper viscosity grade. See
“ Selecting the Right Engine Oil ”
in this section. .
Check the engine oil level
regularly and maintain the
proper oil level. See “ Checking
Engine Oil ” and “ When to Add
Engine Oil ” in this section. .
Change the engine oil at the
appropriate time. See Engine Oil
Life System on page 10-11 . .
Always dispose of engine oil
properly. See “ What to Do with
Used Oil ” in this section.
Page 283 of 439
Black plate (12,1)GMC 2015i Sierra Denali Owner Manual (GMNA-Localizing-U.S./Canada/
Mexico-8431500) - 2015 - crc - 6/20/14
10-12 Vehicle Care The oil life system can also be reset
as follows:
1. Turn the ignition to ON/RUN with
the engine off.
2. Fully press the accelerator pedal
slowly three times within
five seconds.
3. Display the OIL LIFE
REMAINING on the DIC. If the
display shows 100%, the system
is reset.
If the vehicle has a CHANGE
ENGINE OIL SOON message and it
comes back on when the vehicle is
started and/or the OIL LIFE
REMAINING is near 0%, the engine
oil life system has not been reset.
Repeat the procedure. Automatic Transmission
Fluid (6 Speed
Transmission) When to Check and Change
Automatic Transmission Fluid It is usually not necessary to check
the transmission fluid level. The only
reason for fluid loss is a
transmission leak or overheated
transmission. If a small leak is
suspected, then use the following
checking procedures to check the
fluid level. However, if there is a
large leak, then it may be necessary
to have the vehicle towed to a
dealer service department and have
it repaired before driving the vehicle
further.
{ Caution
Use of the incorrect automatic
transmission fluid may damage
the vehicle, and the damage may
(Continued) Caution (Continued) not be covered by the vehicle
warranty. Always use the
automatic transmission fluid listed
in Recommended Fluids and
Lubricants on page 11-12 .
Change the fluid and filter at the
scheduled maintenance intervals
listed in Maintenance Schedule on
page 11-3 . Be sure to use the
transmission fluid listed in
Recommended Fluids and
Lubricants on page 11-12 .
How to Check Automatic
Transmission Fluid
{ Caution
Too much or too little fluid can
damage the transmission. Too
much can mean that some of the
fluid could come out and fall on
hot engine parts or exhaust
(Continued)
Page 284 of 439
Black plate (13,1)GMC 2015i Sierra Denali Owner Manual (GMNA-Localizing-U.S./Canada/
Mexico-8431500) - 2015 - crc - 6/20/14
Vehicle Care 10-13Caution (Continued)system parts, starting a fire. Too
little fluid could cause the
transmission to overheat. Be sure
to get an accurate reading if
checking the transmission fluid.
Before checking the fluid level,
prepare the vehicle:
1. Start the engine and park the
vehicle on a level surface. Keep
the engine running.
2. Apply the parking brake and
place the shift lever in P (Park).
3. With your foot on the brake
pedal, move the shift lever
through each gear range,
pausing for about three seconds
in each range. Then, move the
shift lever back to P (Park).
4. Allow the engine to idle (500 –
800 rpm) for at least one minute.
Slowly release the brake pedal. 5. Keep the engine running and
check the transmission fluid
temperature on the Driver
Information Center (DIC). See
Driver Information Center (DIC)
on page 5-27 .
6. Using the transmission fluid
temperature reading, determine
and perform the appropriate
check procedure. If the
transmission fluid temperature
reading is not within the required
temperature ranges, allow the
vehicle to cool, or operate the
vehicle until the appropriate
transmission fluid temperature is
reached.
Cold Check Procedure
Use this procedure only as a
reference to determine if the
transmission has enough fluid to be
operated safely until a hot check
procedure can be made. The hot
check procedure is the most
accurate method to check the fluid
level. Perform the hot check
procedure at the first opportunity. Use this cold check procedure to
check fluid level when the
transmission temperature is
between 27°C and 32°C (80°F and
90°F).
1. Locate the transmission dipstick
at the rear of the engine
compartment, on the passenger
side of the vehicle.
See Engine Compartment
Overview on page 10-5 .
2. Flip the handle up, then pull out
the dipstick and wipe it with a
clean rag or paper towel.
3. Install the dipstick by pushing it
back in all the way; wait
three seconds, and then pull it
back out again.
Page 285 of 439
Black plate (14,1)GMC 2015i Sierra Denali Owner Manual (GMNA-Localizing-U.S./Canada/
Mexico-8431500) - 2015 - crc - 6/20/14
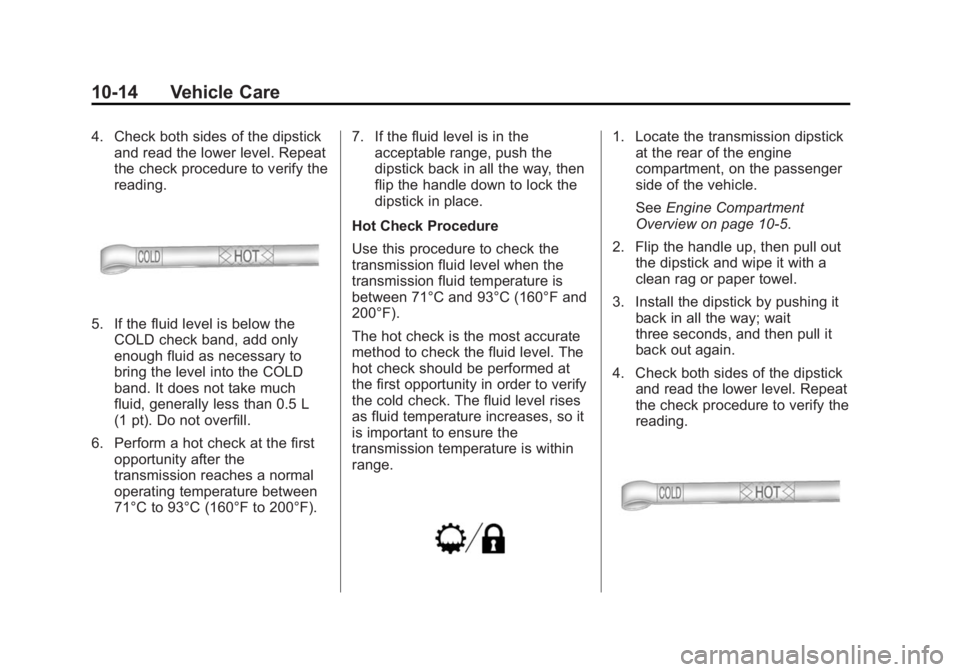
10-14 Vehicle Care 4. Check both sides of the dipstick
and read the lower level. Repeat
the check procedure to verify the
reading.
5. If the fluid level is below the
COLD check band, add only
enough fluid as necessary to
bring the level into the COLD
band. It does not take much
fluid, generally less than 0.5 L
(1 pt). Do not overfill.
6. Perform a hot check at the first
opportunity after the
transmission reaches a normal
operating temperature between
71°C to 93°C (160°F to 200°F). 7. If the fluid level is in the
acceptable range, push the
dipstick back in all the way, then
flip the handle down to lock the
dipstick in place.
Hot Check Procedure
Use this procedure to check the
transmission fluid level when the
transmission fluid temperature is
between 71°C and 93°C (160°F and
200°F).
The hot check is the most accurate
method to check the fluid level. The
hot check should be performed at
the first opportunity in order to verify
the cold check. The fluid level rises
as fluid temperature increases, so it
is important to ensure the
transmission temperature is within
range. 1. Locate the transmission dipstick
at the rear of the engine
compartment, on the passenger
side of the vehicle.
See Engine Compartment
Overview on page 10-5 .
2. Flip the handle up, then pull out
the dipstick and wipe it with a
clean rag or paper towel.
3. Install the dipstick by pushing it
back in all the way; wait
three seconds, and then pull it
back out again.
4. Check both sides of the dipstick
and read the lower level. Repeat
the check procedure to verify the
reading.