drain GMC SIERRA DENALI 2024 Owners Manual
[x] Cancel search | Manufacturer: GMC, Model Year: 2024, Model line: SIERRA DENALI, Model: GMC SIERRA DENALI 2024Pages: 440, PDF Size: 9.21 MB
Page 47 of 440
GMC Sierra/Sierra Denali 2500 HD/3500 HD Owner Manual (GMNA-
Localizing-U.S./Canada-16908340) - 2024 - CRC - 12/7/22
Keys, Doors, and Windows 45
Slide Switch
Express-Open/Express-Close :To
express-open the sunroof, fully press and
release
I(1). Press and releaseI(1) again
to stop the movement. To express-close the
sunroof, fully press and release
K(1).
Press and release
K(1) again to stop the
movement.
Open/Close (Manual Mode) : To open the
sunroof, press and hold
I(1). ReleaseI(1)
to stop the movement. Press and hold
K(1) to close the sunroof. ReleaseK(1) to stop the movement.
Tilt Switch
Vent : From the closed position, press
J(2)
to vent the sunroof. Press
K(2) to close
the vent.
When the sunroof is opened, an air deflector
will automatically raise. The air deflector will
retract when the sunroof is closed.
The sunroof also has a sunshade, which can
be pulled forward to block sun rays. The
sunshade must be opened and closed
manually.
Automatic Reversal System
The sunroof has an automatic reversal
system that is only active when the sunroof
is operated in express-close mode.
If an object is in the path while
express-closing, the reversal system will
detect an object, stop, and open the sunroof
slightly.
If frost or other conditions prevent closing,
override the feature by closing the sunroof
in manual mode. To stop movement, release
K(1).
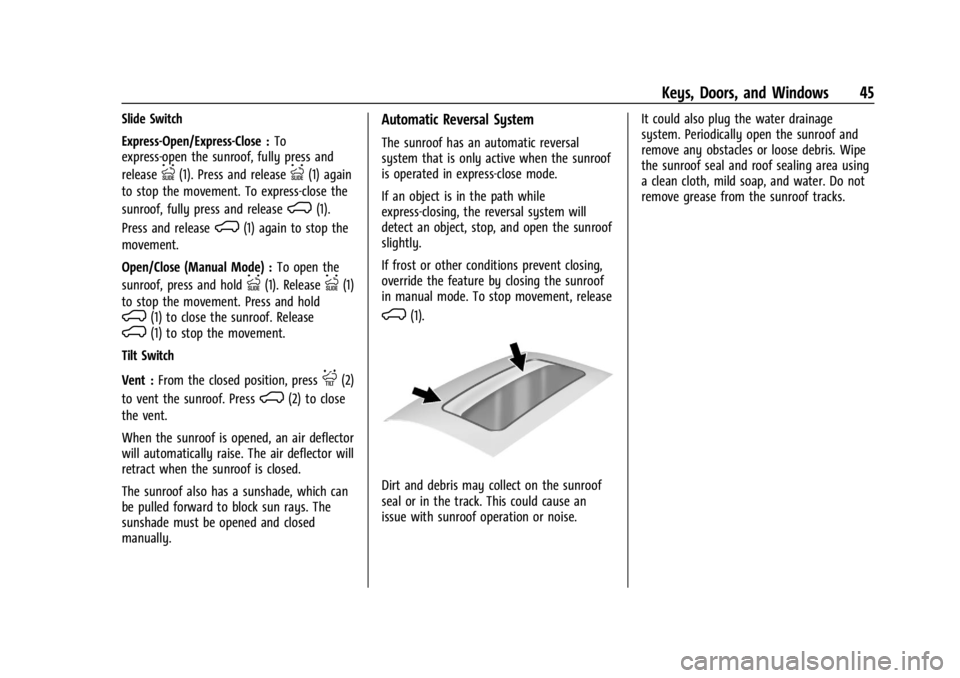
Dirt and debris may collect on the sunroof
seal or in the track. This could cause an
issue with sunroof operation or noise. It could also plug the water drainage
system. Periodically open the sunroof and
remove any obstacles or loose debris. Wipe
the sunroof seal and roof sealing area using
a clean cloth, mild soap, and water. Do not
remove grease from the sunroof tracks.
Page 110 of 440
GMC Sierra/Sierra Denali 2500 HD/3500 HD Owner Manual (GMNA-
Localizing-U.S./Canada-16908340) - 2024 - CRC - 12/15/22
108 Instruments and Controls
Caution
Leaving electrical equipment plugged in
for an extended period of time while the
vehicle is off will drain the battery.
Always unplug electrical equipment when
not in use and do not plug in equipment
that exceeds the maximum 15 amp
rating.
Certain power accessory plugs may not be
compatible with the accessory power outlet
and could overload vehicle or adapter fuses.
If a problem is experienced, see your dealer.
When adding electrical equipment, be sure
to follow the proper installation instructions
included with the equipment. See Add-On
Electrical Equipment 0306.
Caution
Hanging heavy equipment from the
power outlet can cause damage not
covered by the vehicle warranty. The
power outlets are designed for accessory
power plugs only, such as cell phone
charge cords.
Power Outlet 110/120-Volt Alternating
Current
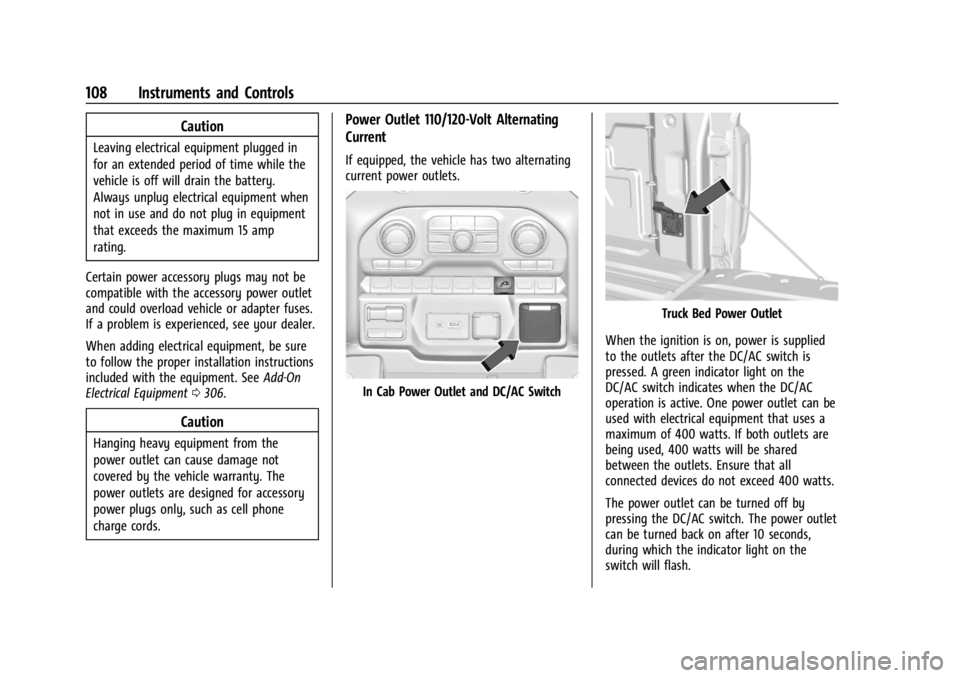
If equipped, the vehicle has two alternating
current power outlets.
In Cab Power Outlet and DC/AC Switch
Truck Bed Power Outlet
When the ignition is on, power is supplied
to the outlets after the DC/AC switch is
pressed. A green indicator light on the
DC/AC switch indicates when the DC/AC
operation is active. One power outlet can be
used with electrical equipment that uses a
maximum of 400 watts. If both outlets are
being used, 400 watts will be shared
between the outlets. Ensure that all
connected devices do not exceed 400 watts.
The power outlet can be turned off by
pressing the DC/AC switch. The power outlet
can be turned back on after 10 seconds,
during which the indicator light on the
switch will flash.
Page 124 of 440
GMC Sierra/Sierra Denali 2500 HD/3500 HD Owner Manual (GMNA-
Localizing-U.S./Canada-16908340) - 2024 - CRC - 12/15/22
122 Instruments and Controls
will light either ON or OFF, or either the on
or off symbol, to let you know the status of
the front outboard passenger frontal airbag.
If the word ON or the on symbol is lit on
the passenger airbag status indicator, it
means that the front outboard passenger
frontal airbag is allowed to inflate.
If the word OFF or the off symbol is lit on
the passenger airbag status indicator, it
means that the passenger sensing system
has turned off the front outboard passenger
frontal airbag.
If, after several seconds, both status
indicator lights remain on, or if there are no
lights at all, or if the airbag readiness light
is on, there may be a problem with the
lights or the passenger sensing system. See
your dealer for service right away.
{Warning
If the airbag readiness light ever comes
on and stays on, it means that
something may be wrong with the airbag
system. To help avoid injury to yourself
or others, have the vehicle serviced right(Continued)
Warning (Continued)
away. SeeAirbag Readiness Light 0121
for more information, including important
safety information.
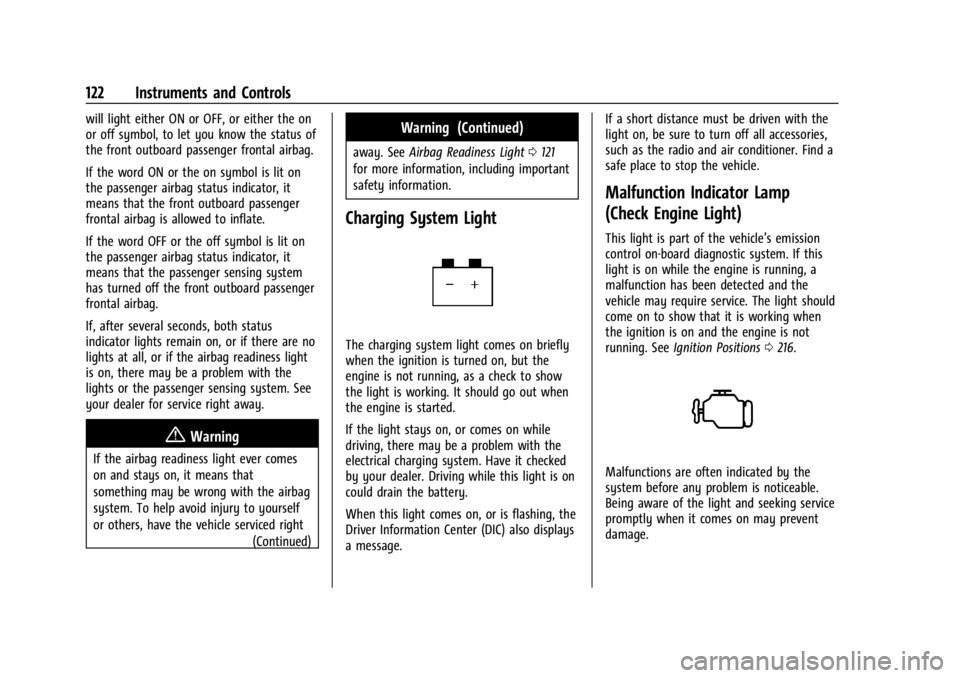
Charging System Light
The charging system light comes on briefly
when the ignition is turned on, but the
engine is not running, as a check to show
the light is working. It should go out when
the engine is started.
If the light stays on, or comes on while
driving, there may be a problem with the
electrical charging system. Have it checked
by your dealer. Driving while this light is on
could drain the battery.
When this light comes on, or is flashing, the
Driver Information Center (DIC) also displays
a message. If a short distance must be driven with the
light on, be sure to turn off all accessories,
such as the radio and air conditioner. Find a
safe place to stop the vehicle.
Malfunction Indicator Lamp
(Check Engine Light)
This light is part of the vehicle’s emission
control on-board diagnostic system. If this
light is on while the engine is running, a
malfunction has been detected and the
vehicle may require service. The light should
come on to show that it is working when
the ignition is on and the engine is not
running. See
Ignition Positions 0216.
Malfunctions are often indicated by the
system before any problem is noticeable.
Being aware of the light and seeking service
promptly when it comes on may prevent
damage.
Page 154 of 440
GMC Sierra/Sierra Denali 2500 HD/3500 HD Owner Manual (GMNA-
Localizing-U.S./Canada-16908340) - 2024 - CRC - 12/7/22
152 Lighting
Battery Load Management
The vehicle has Electric Power Management
(EPM), which estimates the battery's
temperature and state of charge. It then
adjusts the voltage for best performance
and extended life of the battery.
When the battery's state of charge is low,
the voltage is raised slightly to quickly bring
the charge back up. When the state of
charge is high, the voltage is lowered
slightly to prevent overcharging. The
voltmeter gauge or the voltage display on
the Driver Information Center (DIC),
if equipped, may show the voltage moving
up or down. This is normal. If there is a
problem, an alert will be displayed.
The battery can be discharged at idle if the
electrical loads are very high. This is true for
all vehicles. This is because the generator
(alternator) may not be spinning fast
enough at idle to produce all the power that
is needed for very high electrical loads.A high electrical load occurs when several of
the following are on, such as: headlamps,
high beams, fog lamps, rear window
defogger, climate control fan at high speed,
heated seats, engine cooling fans, trailer
loads, and loads plugged into accessory
power outlets.
EPM works to prevent excessive discharge of
the battery. It does this by balancing the
generator's output and the vehicle's
electrical needs. It can increase engine idle
speed to generate more power, whenever
needed. It can temporarily reduce the power
demands of some accessories.
Normally, these actions occur in steps or
levels, without being noticeable. In rare
cases at the highest levels of corrective
action, this action may be noticeable to the
driver. If so, a DIC message might be
displayed and it is recommended that the
driver reduce the electrical loads as much as
possible.
Battery Power Protection
This feature helps prevent the battery from
being drained, if the interior courtesy lamps
or reading lamps are accidentally left on.
If any of these lamps are left on, they
automatically turn off after 10 minutes,
if the ignition is off. The lamps will not
come back on again until one of the
following occurs:
.The ignition is turned on.
.The doors are closed and then re-opened.
Exterior Lighting Battery Saver
The exterior lamps turn off about 10 minutes
after the vehicle is turned off, if the parking
lamps or headlamps have been manually
left on. This protects against draining the
battery. To restart the 10-minute timer, turn
the exterior lamp control to the
Oposition
and then back to the
;or2position.
To keep the lamps on for more than
10 minutes, the vehicle must be on or in
accessory mode.
Page 220 of 440
GMC Sierra/Sierra Denali 2500 HD/3500 HD Owner Manual (GMNA-
Localizing-U.S./Canada-16908340) - 2024 - CRC - 12/13/22
218 Driving and Operating
The vehicle will switch from accessory mode
to off after five minutes to prevent battery
rundown.
ON/RUN/START (Green Indicator Light) :This
mode is for driving and starting. With the
vehicle off, and the brake pedal applied,
pressing ENGINE START/STOP button once
will turn the ignition on. Once engine
cranking begins, release the button. Engine
cranking will continue until the engine
starts. See Starting the Engine 0218.
Service Mode
This power mode is available for service and
diagnostics, and to verify the proper
operation of the malfunction indicator lamp
as may be required for emission inspection
purposes. With the vehicle off, and the
brake pedal not applied, pressing and
holding the ENGINE START/STOP button for
more than five seconds will place the vehicle
in Service Mode. The instruments and audio
systems will operate as they do when the
vehicle is on, but the vehicle will not be able
to be driven. The engine will not start in
Service Mode. Press the ENGINE START/STOP
button again to turn the vehicle off.Starting the Engine
If the vehicle has a diesel engine, see the
Duramax diesel supplement.
Caution
If you add electrical parts or accessories,
you could change the way the engine
operates. Any resulting damage would
not be covered by the vehicle warranty.
See Add-On Electrical Equipment 0306.
Move the shift lever to P (Park) or
N (Neutral). To restart the engine when the
vehicle is already moving, use
N (Neutral) only.
Caution
Do not try to shift to P (Park) if the
vehicle is moving. If you do, you could
damage the transmission. Shift to P (Park)
only when the vehicle is stopped.
Starting Procedure
1. The remote key must be in the vehicle. Press ENGINE START/STOP with the brake
pedal applied. When the engine begins
cranking, let go of the button. The driver may observe a minor, and
temporary, brake pedal kickback when
starting the vehicle. This is normal.
The idle speed will go down as the
engine gets warm. Do not race the
engine immediately after starting it.
Operate the engine and transmission
gently to allow the oil to warm up and
lubricate all moving parts.
When the low fuel warning light is on
and the FUEL LEVEL LOW message is
displayed in the Driver Information
Center (DIC), press ENGINE START/STOP
to continue engine cranking.
Caution
Cranking the engine for long periods of
time, by returning the ignition to the
START position immediately after
cranking has ended, can overheat and
damage the cranking motor, and drain
the battery. Wait at least 15 seconds
between each try, to let the cranking
motor cool down.
2. If the engine does not start after five to 10 seconds, especially in very cold
weather (below −18 °C or 0 °F), it could
be flooded with too much gasoline. Try
Page 236 of 440
GMC Sierra/Sierra Denali 2500 HD/3500 HD Owner Manual (GMNA-
Localizing-U.S./Canada-16908340) - 2024 - CRC - 12/13/22
234 Driving and Operating
If there is a problem with ABS, this warning
light stays on. SeeAntilock Brake System
(ABS) Warning Light 0125.
ABS does not change the time needed to
get a foot on the brake pedal and does not
always decrease stopping distance. If you
get too close to the vehicle ahead, there will
not be enough time to apply the brakes if
that vehicle suddenly slows or stops. Always
leave enough room ahead to stop, even
with ABS.
Using ABS
Do not pump the brakes. Just hold the brake
pedal down firmly. Hearing or feeling ABS
operate is normal.
Braking in Emergencies
ABS allows steering and braking at the same
time. In many emergencies, steering can
help even more than braking.
Electric Parking Brake
Work Truck Shown, Others Similar
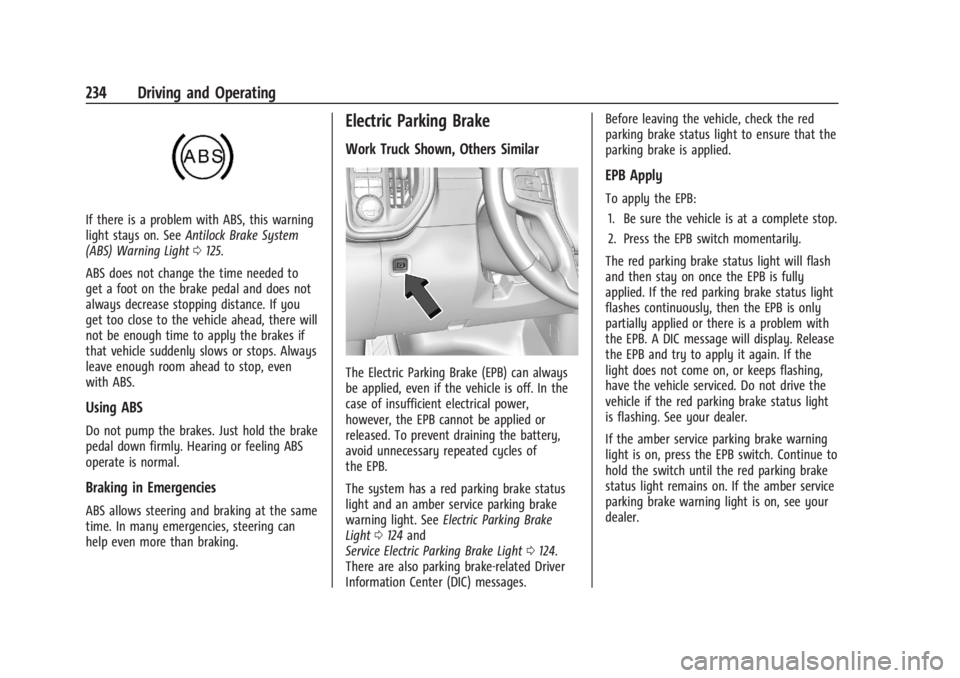
The Electric Parking Brake (EPB) can always
be applied, even if the vehicle is off. In the
case of insufficient electrical power,
however, the EPB cannot be applied or
released. To prevent draining the battery,
avoid unnecessary repeated cycles of
the EPB.
The system has a red parking brake status
light and an amber service parking brake
warning light. See Electric Parking Brake
Light 0124 and
Service Electric Parking Brake Light 0124.
There are also parking brake-related Driver
Information Center (DIC) messages. Before leaving the vehicle, check the red
parking brake status light to ensure that the
parking brake is applied.
EPB Apply
To apply the EPB:
1. Be sure the vehicle is at a complete stop.
2. Press the EPB switch momentarily.
The red parking brake status light will flash
and then stay on once the EPB is fully
applied. If the red parking brake status light
flashes continuously, then the EPB is only
partially applied or there is a problem with
the EPB. A DIC message will display. Release
the EPB and try to apply it again. If the
light does not come on, or keeps flashing,
have the vehicle serviced. Do not drive the
vehicle if the red parking brake status light
is flashing. See your dealer.
If the amber service parking brake warning
light is on, press the EPB switch. Continue to
hold the switch until the red parking brake
status light remains on. If the amber service
parking brake warning light is on, see your
dealer.
Page 290 of 440
GMC Sierra/Sierra Denali 2500 HD/3500 HD Owner Manual (GMNA-
Localizing-U.S./Canada-16908340) - 2024 - CRC - 12/13/22
288 Driving and Operating
to the attaching points on the bumper;
otherwise, safety chains should be attached
to holes on the trailer hitch.
Cross the safety chains under the tongue of
the trailer to help prevent the tongue from
contacting the road if it becomes separated
from the hitch. Always leave enough slack in
the safety chains to allow the combination
to turn. Never allow safety chains to drag
on the ground.
Trailer Brakes
Loaded trailers over 900 kg (2,000 lb) must
be equipped with brake systems and with
brakes for each axle. Trailer braking
equipment conforming to Canadian
Standards Association (CSA) requirement
CAN3-D313, or its equivalent, is
recommended.
State or local regulations may require
trailers to have their own braking system if
the loaded weight of the trailer exceeds
certain minimums that can vary from state
to state. Read and follow the instructions for
the trailer brakes so they are installed,
adjusted, and maintained properly. Never
attempt to tap into your vehicle's hydraulicbrake system. If you do, both the vehicle
antilock brakes and the trailer brakes may
not function, which could result in a crash.
Auxiliary Battery
If equipped, the vehicle's auxiliary battery
can be used to supply electrical power to
additional equipment that may be added,
such as a slide-in camper.
Locate the auxiliary battery connector under
the hood on the driver side of the vehicle,
next to the engine compartment fuse block.
Follow the proper installation instructions
included with any electrical equipment that
is installed.
Caution
To prevent draining the auxiliary battery,
always turn off electrical equipment
when not in use and do not use any
equipment that may exceed the
maximum amperage rating of 30 amps.
Trailer Wiring Harness
Basic Trailer Wiring
If the vehicle is not equipped with a trailer
connector on the rear bumper, a seven-wire
trailering harness is tied to the vehiclesframe. The harness requires the installation
of a trailer connector, which is available
through your dealer.
Use only a round, seven-wire connector with
flat blade terminals meeting SAE J2863
specifications for proper electrical
connectivity.
The seven-wire harness contains the
following trailer circuits:
Stop/Turn
Signal Left Yellow/Blue
Stop/Turn Signal
Right Green/Violet
Tail/Parking Lamps Gray/Brown
Reverse Lamps White/Green
Battery Feed Red/Green
Ground White
Electric Trailer Brake Blue
Heavy-Duty Trailer Wiring Harness Package
If equipped, the trailer wiring harness, with
a seven-pin connector and a four-pin
connector, is mounted on the vehicle's rear
bumper.
Page 302 of 440
GMC Sierra/Sierra Denali 2500 HD/3500 HD Owner Manual (GMNA-
Localizing-U.S./Canada-16908340) - 2024 - CRC - 12/13/22
300 Driving and Operating
If trailer dimensions are out of range, this
feature will be unavailable.
Status View
If a trailer is connected, the Status view
shows status information for the active
trailer profile.
If no trailer is connected, the Status view
shows the last trailer profile with a status of
Not Connected.
The Status view shows:
.Lights
.Tires
.Maintenance
.Cameras
.Checklists
.Weight
.Towing AssistScroll right or left to see more options.
Each section shows high level status
information for the feature. Selecting a
section will open up a new screen with
additional information and/or options.
Selecting a camera view will open up a new
screen to preview the camera image. The
status view displays mileage and fuel
economy information.
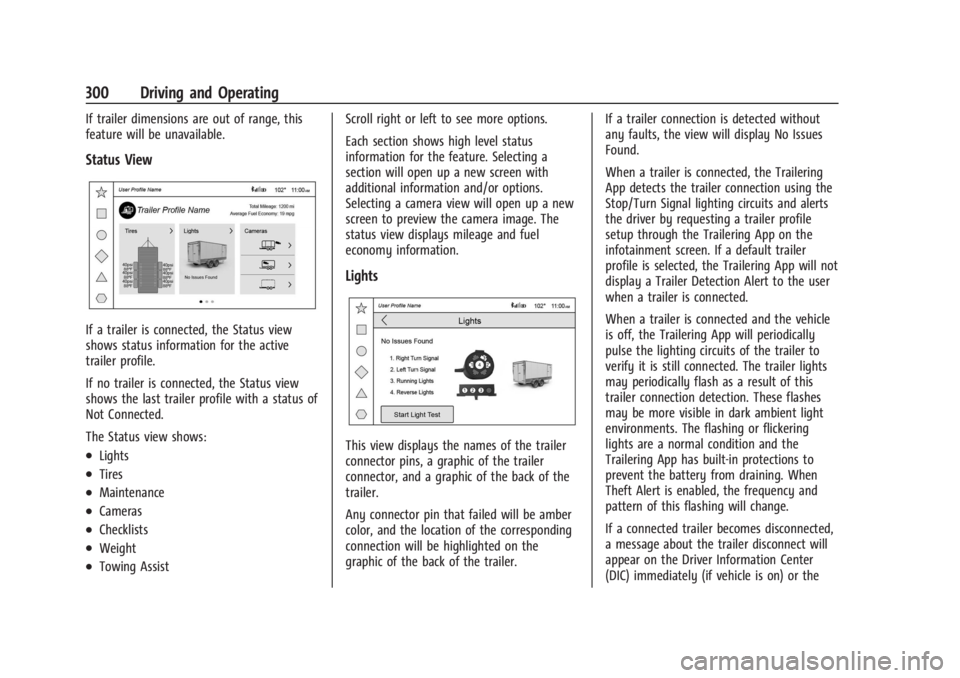
Lights
This view displays the names of the trailer
connector pins, a graphic of the trailer
connector, and a graphic of the back of the
trailer.
Any connector pin that failed will be amber
color, and the location of the corresponding
connection will be highlighted on the
graphic of the back of the trailer.
If a trailer connection is detected without
any faults, the view will display No Issues
Found.
When a trailer is connected, the Trailering
App detects the trailer connection using the
Stop/Turn Signal lighting circuits and alerts
the driver by requesting a trailer profile
setup through the Trailering App on the
infotainment screen. If a default trailer
profile is selected, the Trailering App will not
display a Trailer Detection Alert to the user
when a trailer is connected.
When a trailer is connected and the vehicle
is off, the Trailering App will periodically
pulse the lighting circuits of the trailer to
verify it is still connected. The trailer lights
may periodically flash as a result of this
trailer connection detection. These flashes
may be more visible in dark ambient light
environments. The flashing or flickering
lights are a normal condition and the
Trailering App has built-in protections to
prevent the battery from draining. When
Theft Alert is enabled, the frequency and
pattern of this flashing will change.
If a connected trailer becomes disconnected,
a message about the trailer disconnect will
appear on the Driver Information Center
(DIC) immediately (if vehicle is on) or the
Page 308 of 440
GMC Sierra/Sierra Denali 2500 HD/3500 HD Owner Manual (GMNA-
Localizing-U.S./Canada-16908340) - 2024 - CRC - 12/13/22
306 Driving and Operating
If Tow/Haul Mode is off and this setting is
on for a Trailer Profile, each time the vehicle
is turned on, a reminder will appear in the
DIC to turn on Tow/Haul Mode when the
Trailer Profile is active.
If Tow/Haul Mode is on and this setting is
on for a Trailer Profile, the reminder will not
appear when the Trailer Profile is active.
Conversions and Add-Ons
Add-On Electrical Equipment
{Warning
The Data Link Connector (DLC) is used for
vehicle service and Emission Inspection/
Maintenance testing. SeeMalfunction
Indicator Lamp (Check Engine Light) 0122.
A device connected to the DLC —such as
an aftermarket fleet or driver-behavior
tracking device —may interfere with
vehicle systems. This could affect vehicle
operation and cause a crash. Such devices
may also access information stored in the
vehicle’s systems.
Caution
Some electrical equipment can damage
the vehicle or cause components to not
work and would not be covered by the
vehicle warranty. Always check with your
dealer before adding electrical equipment.
Add-on equipment can drain the vehicle's
12-volt battery, even if the vehicle is not
operating.
The vehicle has an airbag system. Before
attempting to add anything electrical to the
vehicle, see Servicing the Airbag-Equipped
Vehicle 073 and
Adding Equipment to the Airbag-Equipped
Vehicle 073.
For information on wiring auxiliary switches,
see www.gmupfitter.com or contact your
dealer.
Adding a Snow Plow or Similar
Equipment
Caution
Do not exceed 72 km/h (45 mph) with a
snow plow mounted to the vehicle. The
vehicle could overheat and be damaged.
Before installing a snow plow on the vehicle,
follow these guidelines:
Caution
If the vehicle does not have the snow
plow prep package, RPO VYU, adding a
plow can damage the vehicle, and the
repairs would not be covered by the
vehicle warranty. Unless the vehicle was
built to carry a snow plow, do not add
one to the vehicle. If the vehicle has RPO
VYU, then the payload the vehicle can
carry will be reduced when a snow plow
is installed. The vehicle can be damaged
if either the front or rear axle ratings or
the Gross Vehicle Weight Rating (GVWR)
are exceeded.
Page 317 of 440
GMC Sierra/Sierra Denali 2500 HD/3500 HD Owner Manual (GMNA-
Localizing-U.S./Canada-16908340) - 2024 - CRC - 12/7/22
Vehicle Care 315
When to Add Engine Oil
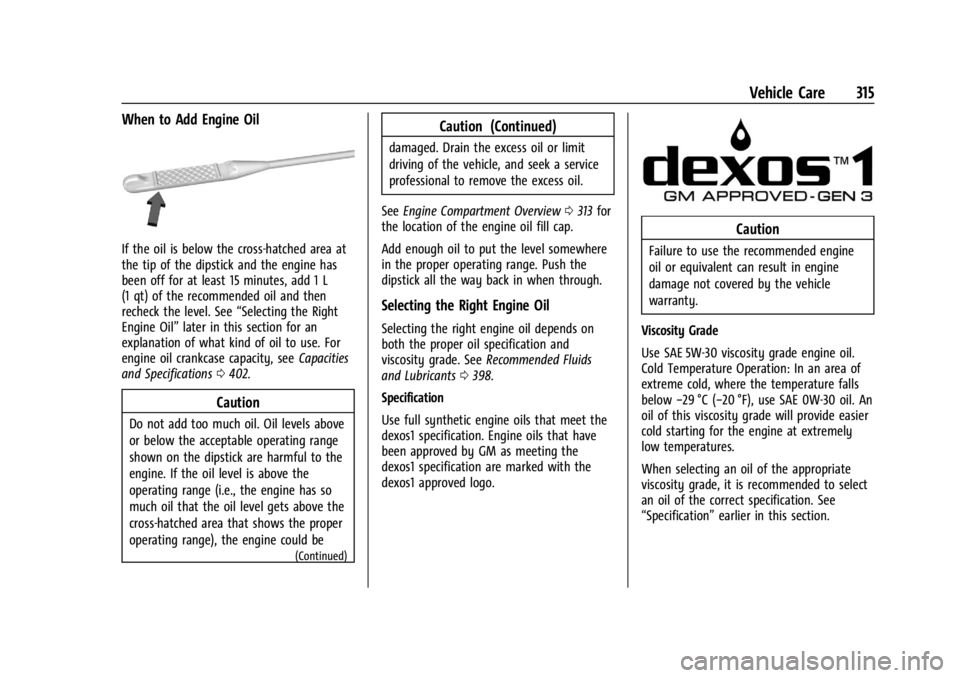
If the oil is below the cross-hatched area at
the tip of the dipstick and the engine has
been off for at least 15 minutes, add 1 L
(1 qt) of the recommended oil and then
recheck the level. See“Selecting the Right
Engine Oil” later in this section for an
explanation of what kind of oil to use. For
engine oil crankcase capacity, see Capacities
and Specifications 0402.
Caution
Do not add too much oil. Oil levels above
or below the acceptable operating range
shown on the dipstick are harmful to the
engine. If the oil level is above the
operating range (i.e., the engine has so
much oil that the oil level gets above the
cross-hatched area that shows the proper
operating range), the engine could be
(Continued)
Caution (Continued)
damaged. Drain the excess oil or limit
driving of the vehicle, and seek a service
professional to remove the excess oil.
See Engine Compartment Overview 0313 for
the location of the engine oil fill cap.
Add enough oil to put the level somewhere
in the proper operating range. Push the
dipstick all the way back in when through.
Selecting the Right Engine Oil
Selecting the right engine oil depends on
both the proper oil specification and
viscosity grade. See Recommended Fluids
and Lubricants 0398.
Specification
Use full synthetic engine oils that meet the
dexos1 specification. Engine oils that have
been approved by GM as meeting the
dexos1 specification are marked with the
dexos1 approved logo.
Caution
Failure to use the recommended engine
oil or equivalent can result in engine
damage not covered by the vehicle
warranty.
Viscosity Grade
Use SAE 5W-30 viscosity grade engine oil.
Cold Temperature Operation: In an area of
extreme cold, where the temperature falls
below −29 °C (−20 °F), use SAE 0W-30 oil. An
oil of this viscosity grade will provide easier
cold starting for the engine at extremely
low temperatures.
When selecting an oil of the appropriate
viscosity grade, it is recommended to select
an oil of the correct specification. See
“Specification” earlier in this section.