engine overheat GMC SONOMA 2004 Owner's Manual
[x] Cancel search | Manufacturer: GMC, Model Year: 2004, Model line: SONOMA, Model: GMC SONOMA 2004Pages: 412, PDF Size: 4.16 MB
Page 79 of 412
Notice:Your engine is designed to work with the
electronics in your vehicle. If you add electrical
parts or accessories, you could change the way the
engine operates. Before adding electrical equipment,
check with your dealer. If you do not, your engine
might not perform properly.
Engine Speed Control
Your vehicle is equipped with an engine overspeed
control that shuts the fuel off when the engine reaches
5,600 rpm.
Engine Coolant Heater
Your vehicle may be equipped with this feature.
In very cold weather, 0°F (–18°C) or colder, the engine
coolant heater can help. You’ll get easier starting
and better fuel economy during engine warm-up.
Usually, the coolant heater should be plugged in a
minimum of four hours prior to starting your vehicle. At
temperatures above 32°F (0°C), use of the coolant
heater is not required.
To Use the Engine Coolant Heater
1. Turn off the engine.
2. Open the hood and unwrap the electrical cord. The
cord is located in the engine compartment behind the
underhood fuse block on the driver’s side of the
vehicle.3. Plug it into a normal, grounded 110–volt AC outlet.
{CAUTION:
Plugging the cord into an ungrounded outlet
could cause an electrical shock. Also, the
wrong kind of extension cord could overheat
and cause a �re. You could be seriously
injured. Plug the cord into a properly grounded
three-prong 110-volt AC outlet. If the cord will
not reach, use a heavy-duty three-prong
extension cord rated for at least 15 amps.
4. Before starting the engine, be sure to unplug and
store the cord as it was before to keep it away
from moving engine parts. If you don’t, it could be
damaged.
How long should you keep the coolant heater plugged
in? The answer depends on the outside temperature, the
kind of oil you have, and some other things. Instead
of trying to list everything here, we ask that you contact
your dealer in the area where you’ll be parking your
vehicle. The dealer can give you the best advice for that
particular area.
2-19
Page 87 of 412
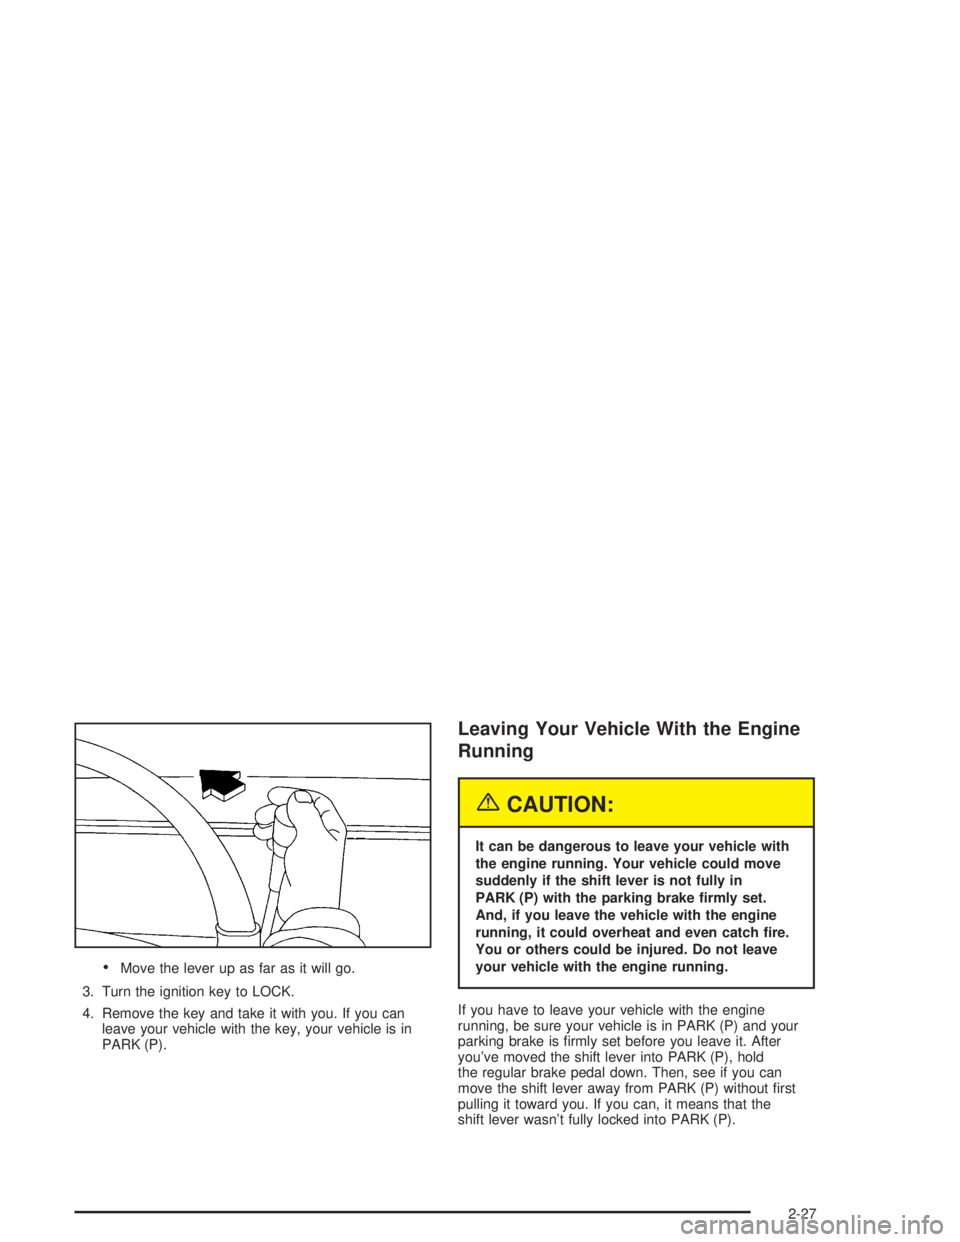
•Move the lever up as far as it will go.
3. Turn the ignition key to LOCK.
4. Remove the key and take it with you. If you can
leave your vehicle with the key, your vehicle is in
PARK (P).
Leaving Your Vehicle With the Engine
Running
{CAUTION:
It can be dangerous to leave your vehicle with
the engine running. Your vehicle could move
suddenly if the shift lever is not fully in
PARK (P) with the parking brake �rmly set.
And, if you leave the vehicle with the engine
running, it could overheat and even catch �re.
You or others could be injured. Do not leave
your vehicle with the engine running.
If you have to leave your vehicle with the engine
running, be sure your vehicle is in PARK (P) and your
parking brake is firmly set before you leave it. After
you’ve moved the shift lever into PARK (P), hold
the regular brake pedal down. Then, see if you can
move the shift lever away from PARK (P) without first
pulling it toward you. If you can, it means that the
shift lever wasn’t fully locked into PARK (P).
2-27
Page 132 of 412
Anti-Lock Brake System
Warning Light
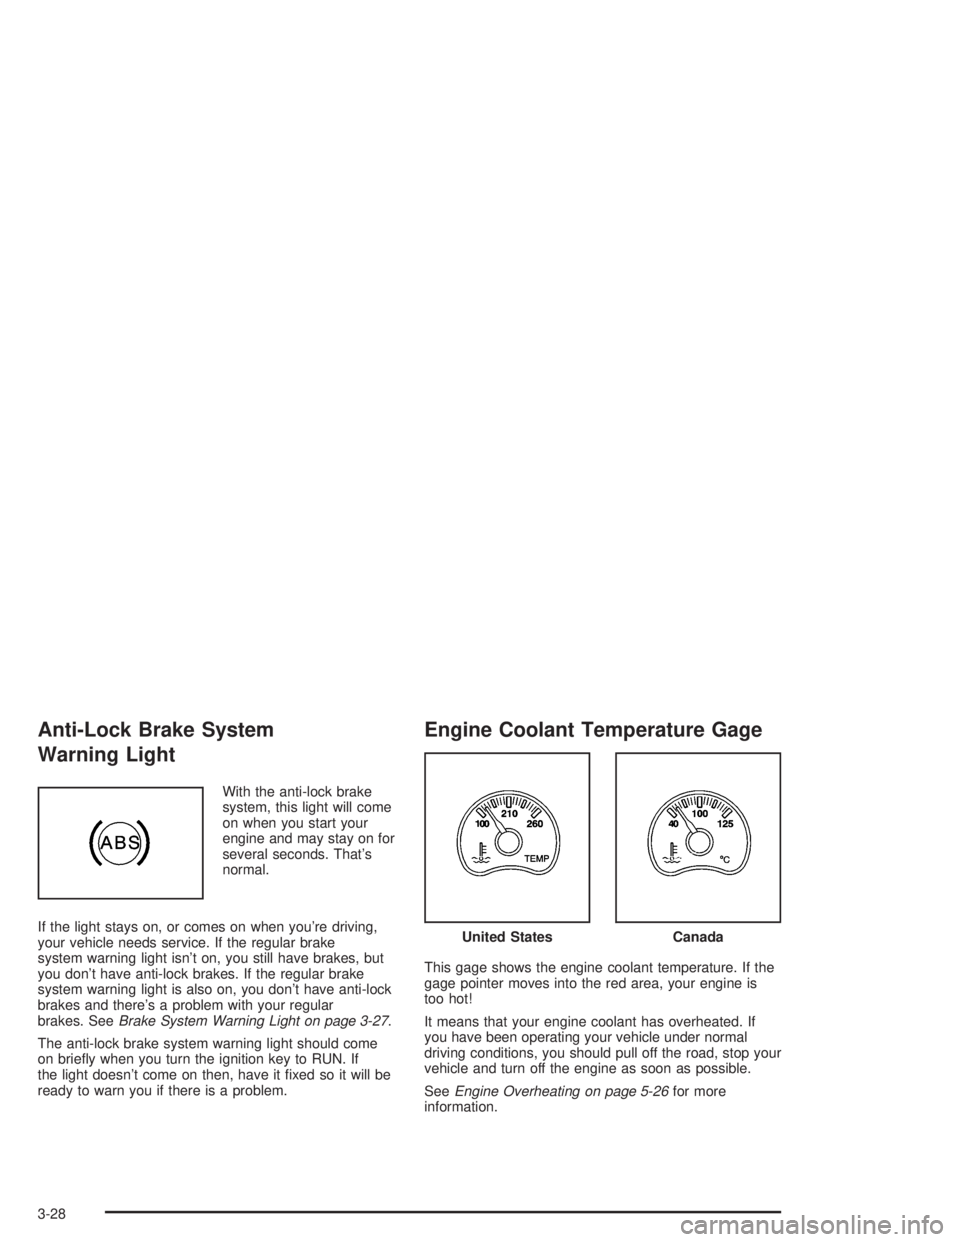
With the anti-lock brake
system, this light will come
on when you start your
engine and may stay on for
several seconds. That’s
normal.
If the light stays on, or comes on when you’re driving,
your vehicle needs service. If the regular brake
system warning light isn’t on, you still have brakes, but
you don’t have anti-lock brakes. If the regular brake
system warning light is also on, you don’t have anti-lock
brakes and there’s a problem with your regular
brakes. SeeBrake System Warning Light on page 3-27.
The anti-lock brake system warning light should come
on briefly when you turn the ignition key to RUN. If
the light doesn’t come on then, have it fixed so it will be
ready to warn you if there is a problem.
Engine Coolant Temperature Gage
This gage shows the engine coolant temperature. If the
gage pointer moves into the red area, your engine is
too hot!
It means that your engine coolant has overheated. If
you have been operating your vehicle under normal
driving conditions, you should pull off the road, stop your
vehicle and turn off the engine as soon as possible.
SeeEngine Overheating on page 5-26for more
information.
United StatesCanada
3-28
Page 201 of 412
Driving Downhill
When off-roading takes you downhill, you will want to
consider a number of things:
•How steep is the downhill? Will I be able to maintain
vehicle control?
•What is the surface like? Smooth? Rough?
Slippery? Hard-packed dirt? Gravel?
•Are there hidden surface obstacles? Ruts? Logs?
Boulders?
•What is at the bottom of the hill? Is there a hidden
creek bank or even a river bottom with large
rocks?
If you decide you can go down a hill safely, then try to
keep your vehicle headed straight down, and use a
low gear. This way, engine drag can help your brakes
and they will not have to do all the work. Descend
slowly, keeping your vehicle under control at all times.
{CAUTION:
Heavy braking when going down a hill can
cause your brakes to overheat and fade. This
could cause loss of control and a serious
accident. Apply the brakes lightly when
descending a hill and use a low gear to keep
vehicle speed under control.
4-21
Page 202 of 412
Q:Are there some things I should not do when
driving down a hill?
A:Yes! These are important because if you ignore
them you could lose control and have a serious
accident.
•When driving downhill, avoid turns that take you
across the incline of the hill. A hill that is not too
steep to drive down may be too steep to drive
across. You could roll over if you do not drive
straight down.
•Never go downhill with the transmission in
NEUTRAL (N), or with the clutch pedal pressed
down in a manual shift. This is called
“free-wheeling.” Your brakes will have to do all the
work and could overheat and fade.
Q:Am I likely to stall when going downhill?
A:It is much more likely to happen going uphill. But if
it happens going downhill, here is what to do.
•Stop your vehicle by applying the regular brakes.
Apply the parking brake.
•Shift to PARK (P) (or to neutral with the manual
transmission) and, while still braking, restart the
engine.
•Shift back to a low gear, release the parking brake,
and drive straight down.
•If the engine will not start, get out and get help.
Driving Across an Incline
Sooner or later, an off-road trail will probably go across
the incline of a hill. If this happens, you have to
decide whether to try to drive across the incline. Here
are some things to consider:
•A hill that can be driven straight up or down may be
too steep to drive across. When you go straight up
or down a hill, the length of the wheel base (the
distance from the front wheels to the rear wheels)
reduces the likelihood the vehicle will tumble
end over end. But when you drive across an incline,
the much more narrow track width (the distance
between the left and right wheels) may not prevent
the vehicle from tilting and rolling over. Also,
driving across an incline puts more weight on the
downhill wheels. This could cause a downhill
slide or a rollover.
4-22
Page 222 of 412
If You Are Stuck: In Sand, Mud,
Ice or Snow
In order to free your vehicle when it is stuck, you will
need to spin the wheels, but you do not want to
spin your wheels too fast. The method known as
“rocking” can help you get out when you are stuck, but
you must use caution.
{CAUTION:
If you let your tires spin at high speed, they
can explode, and you or others could be
injured. And, the transmission or other parts of
the vehicle can overheat. That could cause an
engine compartment �re or other damage.
When you are stuck, spin the wheels as little
as possible. Do not spin the wheels above
35 mph (55 km/h) as shown on the
speedometer.Notice:Spinning your wheels can destroy parts of
your vehicle as well as the tires. If you spin the
wheels too fast while shifting your transmission
back and forth, you can destroy your transmission.
For information about using tire chains on your
vehicle, seeTire Chains on page 5-74.
4-42
Page 242 of 412
When towing a trailer, the arrows on your instrument
panel will flash for turns even if the bulbs on the trailer
are burned out. Thus, you may think drivers behind
you are seeing your signal when they are not. It’s
important to check occasionally to be sure the trailer
bulbs are still working.
Driving On Grades
Reduce speed and shift to a lower gear before you start
down a long or steep downgrade. If you don’t shift
down, you might have to use your brakes so much that
they would get hot and no longer work well.
You should use THIRD (3) when towing a trailer.
Operating your vehicle in THIRD (3) when towing a
trailer will minimize heat buildup and extend the life of
your transmission.
When towing at high altitude on steep uphill grades,
consider the following: Engine coolant will boil at a lower
temperature than at normal altitudes. If you turn your
engine off immediately after towing at high altitude
on steep uphill grades, your vehicle may show signs
similar to engine overheating. To avoid this, let the
engine run while parked (preferably on level ground)
with the automatic transmission in PARK (P) (or
the manual transmission out of gear and the parking
brake applied) for a few minutes before turning the
engine off. If you do get the overheat warning,
seeEngine Overheating on page 5-26.
Parking on Hills
{CAUTION:
You really should not park your vehicle, with a
trailer attached, on a hill. If something goes
wrong, your rig could start to move. People
can be injured, and both your vehicle and the
trailer can be damaged.
But if you ever have to park your rig on a hill, here’s
how to do it:
1. Apply your regular brakes, but don’t shift into
PARK (P) yet, or into gear for a manual
transmission. When parking uphill, turn your wheels
away from the curb. When parking downhill, turn
your wheels into the curb.
2. Have someone place chocks under the
trailer wheels.
3. When the wheel chocks are in place, release the
regular brakes until the chocks absorb the load.
4-62
Page 245 of 412
Service............................................................5-3
Doing Your Own Service Work.........................5-3
Adding Equipment to the Outside of
Your Vehicle..............................................5-4
Fuel................................................................5-4
Gasoline Octane............................................5-4
Gasoline Specifications....................................5-5
California Fuel...............................................5-5
Additives.......................................................5-6
Fuels in Foreign Countries...............................5-6
Filling Your Tank............................................5-7
Filling a Portable Fuel Container.......................5-9
Checking Things Under
the Hood....................................................5-10
Hood Release..............................................5-10
Engine Compartment Overview.......................5-12
Engine Oil...................................................5-13
Engine Air Cleaner/Filter................................5-18
Automatic Transmission Fluid.........................5-19
Engine Coolant.............................................5-23
Radiator Pressure Cap..................................5-26
Engine Overheating.......................................5-26
Cooling System............................................5-28
Engine Fan Noise.........................................5-35
Power Steering Fluid.....................................5-35Windshield Washer Fluid................................5-36
Brakes........................................................5-37
Battery........................................................5-40
Jump Starting...............................................5-41
Rear Axle.......................................................5-46
Four-Wheel Drive............................................5-46
Front Axle......................................................5-47
Bulb Replacement..........................................5-48
Halogen Bulbs..............................................5-48
Headlamps..................................................5-49
One-Piece Front Turn Signal Lamps................5-51
Two-Piece Front Turn Signal Lamps................5-51
Center High-Mounted Stoplamp (CHMSL).........5-52
Taillamps.....................................................5-53
Replacement Bulbs.......................................5-54
Windshield Wiper Blade Replacement..............5-54
Tires..............................................................5-57
Inflation - Tire Pressure.................................5-67
Tire Inspection and Rotation...........................5-68
When It Is Time for New Tires.......................5-69
Buying New Tires.........................................5-70
Uniform Tire Quality Grading..........................5-71
Wheel Alignment and Tire Balance..................5-72
Wheel Replacement......................................5-72
Section 5 Service and Appearance Care
5-1
Page 264 of 412
How to Check the Automatic
Transmission Fluid
Because this operation can be a little difficult, you may
choose to have this done at the dealership service
department.
If you do it yourself, be sure to follow all the instructions
here, or you could get a false reading on the dipstick.
Notice:Too much or too little �uid can damage
your transmission. Too much can mean that some
of the �uid could come out and fall on hot engine
part or exhaust system parts, starting a �re.
Too little �uid could cause the transmission to
overheat. Be sure to get an accurate reading if you
check your transmission �uid.
Wait at least 30 minutes before checking the
transmission fluid level if you have been driving:
•When outside temperatures are above 90°F (32°C).
•At high speed for quite a while.
•In heavy traffic–especially in hot weather.
•While pulling a trailer.To get the right reading, the fluid should be at normal
operating temperature, which is 180°F to 200°F
(82°C to 93°C)
Get the vehicle warmed up by driving about 15 miles
(24 km) when outside temperatures are above 50°F
(10°C). If it’s colder than 50°F (10°C), drive the vehicle
in THIRD (3) until the engine temperature gage
moves and then remains steady for 10 minutes.
A cold fluid check can be made after the vehicle has
been sitting for eight hours or more with the engine off,
but this is used only as a reference. Let the engine
run at idle for five minutes if outside temperatures are
50°F (10°C) or more. If it’s colder than 50°F (10°C), you
may have to idle the engine longer. Should the fluid
level be low during this cold check, you must check the
fluid hot before adding fluid. Checking the fluid hot
will give you a more accurate reading of the fluid level.
5-20
Page 267 of 412
Engine Coolant
The cooling system in your vehicle is filled with
DEX-COOL®engine coolant. This coolant is designed
to remain in your vehicle for 5 years or 150,000 miles
(240 000 km), whichever occurs first, if you add
only DEX-COOL
®extended life coolant.
The following explains your cooling system and how to
add coolant when it is low. If you have a problem
with engine overheating, seeEngine Overheating on
page 5-26.
A 50/50 mixture of clean, drinkable water and
DEX-COOL
®coolant will:
•Give freezing protection down to−34°F (−37°C).
•Give boiling protection up to 265°F (129°C).
•Protect against rust and corrosion.
•Help keep the proper engine temperature.
•Let the warning lights and gages work as they
should.
Notice:Using coolant other than DEX-COOL
®may
cause premature engine, heater core or radiator
corrosion. In addition, the engine coolant may
require changing sooner, at 30,000 miles (50 000 km)
or 24 months, whichever occurs �rst. Any repairs
would not be covered by your warranty. Always use
DEX-COOL
®(silicate-free) coolant in your vehicle.
5-23