fuel pressure GMC SONOMA 2004 Owner's Manual
[x] Cancel search | Manufacturer: GMC, Model Year: 2004, Model line: SONOMA, Model: GMC SONOMA 2004Pages: 412, PDF Size: 4.16 MB
Page 105 of 412
Instrument Panel Overview...............................3-2
Hazard Warning Flashers................................3-4
Other Warning Devices...................................3-5
Horn.............................................................3-5
Tilt Wheel.....................................................3-5
Turn Signal/Multifunction Lever.........................3-6
Exterior Lamps.............................................3-11
Interior Lamps..............................................3-15
Accessory Power Outlets...............................3-16
Ashtrays and Cigarette Lighter........................3-17
Climate Controls............................................3-18
Climate Control System.................................3-18
Outlet Adjustment.........................................3-20
Warning Lights, Gages and Indicators.............3-21
Instrument Panel Cluster................................3-22
Speedometer and Odometer...........................3-24
Trip Odometer..............................................3-24
Tachometer.................................................3-24
Safety Belt Reminder Light.............................3-24
Air Bag Readiness Light................................3-25
Charging System Light..................................3-26
Voltmeter Gage............................................3-26
Brake System Warning Light..........................3-27
Anti-Lock Brake System Warning Light.............3-28
Engine Coolant Temperature Gage..................3-28Malfunction Indicator Lamp.............................3-29
Oil Pressure Gage........................................3-32
Security Light...............................................3-33
Service Four-Wheel Drive Warning Light..........3-33
Check Gages Warning Light...........................3-34
Fuel Gage...................................................3-34
Low Fuel Warning Light.................................3-35
Audio System(s).............................................3-35
Setting the Time for Radios without Radio
Data Systems (RDS)..................................3-35
Setting the Time for Radios with Radio
Data Systems (RDS)..................................3-36
AM-FM Radio...............................................3-36
Radio with CD..............................................3-39
Radio with Cassette and CD..........................3-49
Radio with Six-Disc CD.................................3-59
Theft-Deterrent Feature (Non-RDS Radios).......3-73
Theft-Deterrent Feature (RDS Radios).............3-73
Understanding Radio Reception......................3-74
Care of Your Cassette Tape Player.................3-74
Care of Your CDs.........................................3-75
Care of Your CD Player................................3-76
Fixed Mast Antenna......................................3-76
XM™ Satellite Radio Antenna System
(48 Contiguous US States).........................3-76
Section 3 Instrument Panel
3-1
Page 138 of 412
Check Gages Warning Light
The CHECK GAGES light
will come on briefly when
you are starting the
engine.
If this light comes and stays on while you are driving,
check your coolant temperature and engine oil pressure
gages to see if they are in the warning zones.
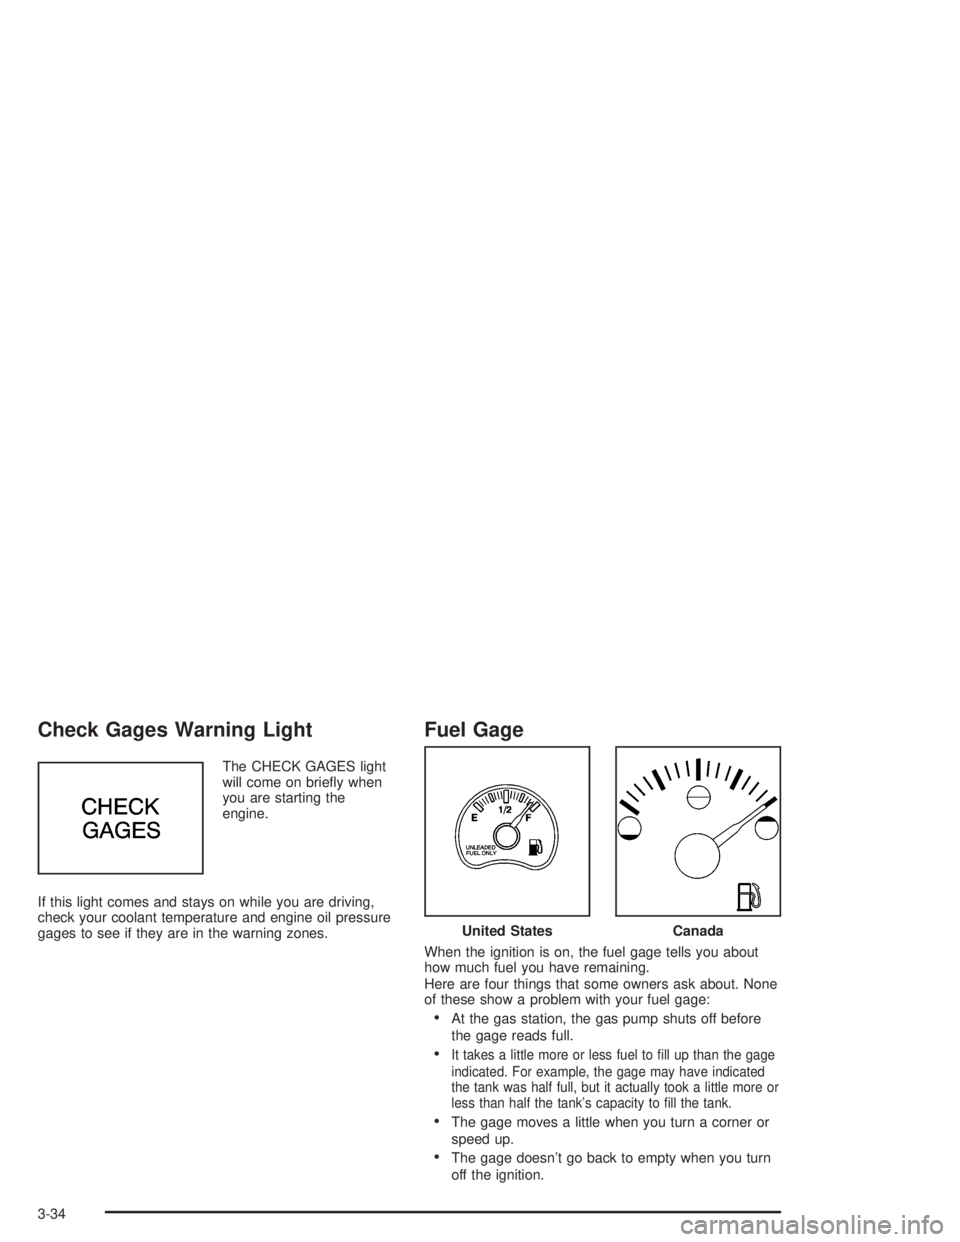
Fuel Gage
When the ignition is on, the fuel gage tells you about
how much fuel you have remaining.
Here are four things that some owners ask about. None
of these show a problem with your fuel gage:
•At the gas station, the gas pump shuts off before
the gage reads full.
•It takes a little more or less fuel to fill up than the gage
indicated. For example, the gage may have indicated
the tank was half full, but it actually took a little more or
less than half the tank’s capacity to fill the tank.
•The gage moves a little when you turn a corner or
speed up.
•The gage doesn’t go back to empty when you turn
off the ignition.
United StatesCanada
3-34
Page 229 of 412
Refer to your vehicle’s tire and loading information label
for specific information about your vehicle’s capacity
and seating positions. The combined weight of the
driver, passengers and cargo should never exceed your
vehicle’s capacity weight.Certi�cation/Tire Label
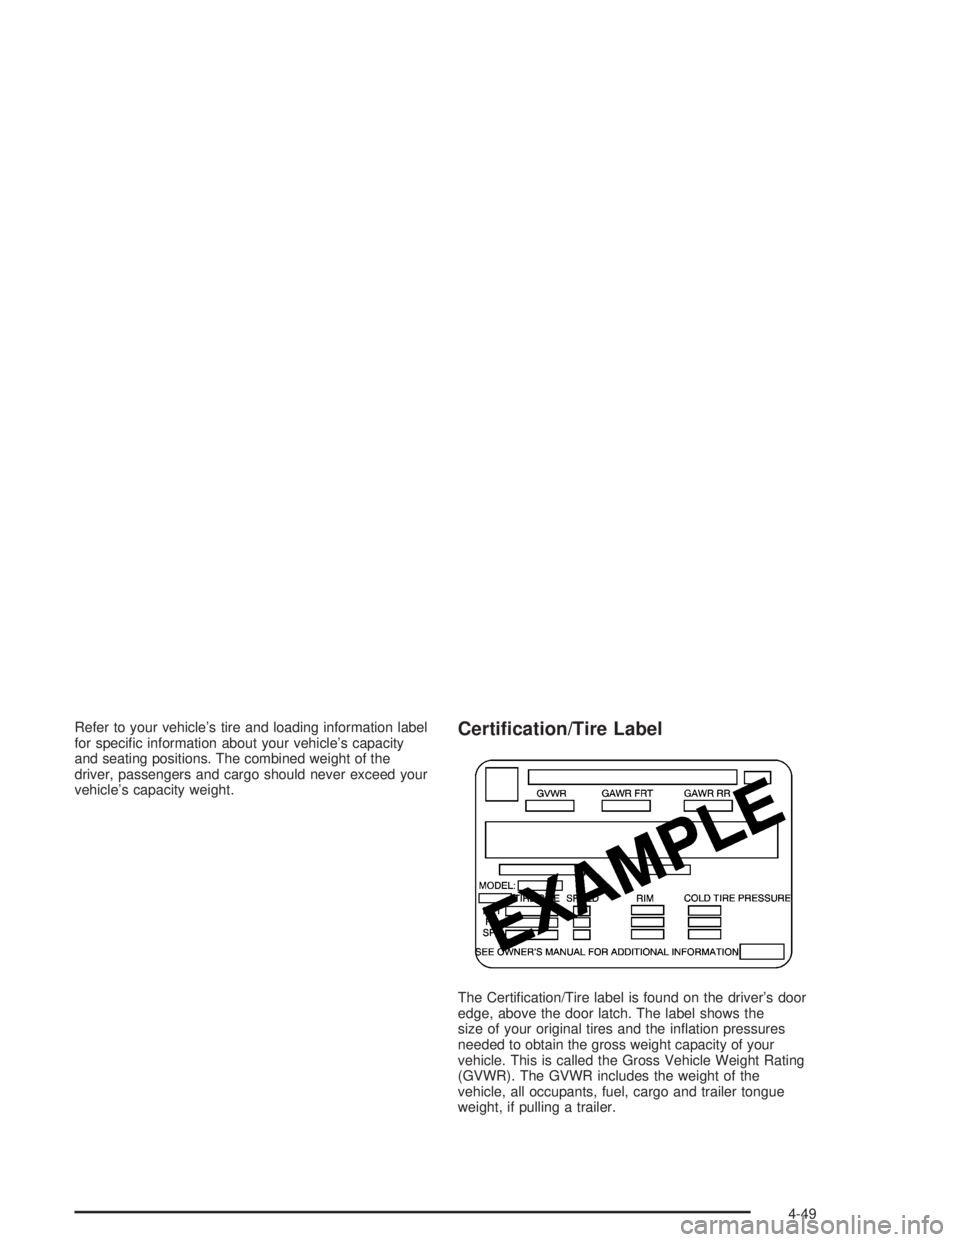
The Certification/Tire label is found on the driver’s door
edge, above the door latch. The label shows the
size of your original tires and the inflation pressures
needed to obtain the gross weight capacity of your
vehicle. This is called the Gross Vehicle Weight Rating
(GVWR). The GVWR includes the weight of the
vehicle, all occupants, fuel, cargo and trailer tongue
weight, if pulling a trailer.
4-49
Page 245 of 412
Service............................................................5-3
Doing Your Own Service Work.........................5-3
Adding Equipment to the Outside of
Your Vehicle..............................................5-4
Fuel................................................................5-4
Gasoline Octane............................................5-4
Gasoline Specifications....................................5-5
California Fuel...............................................5-5
Additives.......................................................5-6
Fuels in Foreign Countries...............................5-6
Filling Your Tank............................................5-7
Filling a Portable Fuel Container.......................5-9
Checking Things Under
the Hood....................................................5-10
Hood Release..............................................5-10
Engine Compartment Overview.......................5-12
Engine Oil...................................................5-13
Engine Air Cleaner/Filter................................5-18
Automatic Transmission Fluid.........................5-19
Engine Coolant.............................................5-23
Radiator Pressure Cap..................................5-26
Engine Overheating.......................................5-26
Cooling System............................................5-28
Engine Fan Noise.........................................5-35
Power Steering Fluid.....................................5-35Windshield Washer Fluid................................5-36
Brakes........................................................5-37
Battery........................................................5-40
Jump Starting...............................................5-41
Rear Axle.......................................................5-46
Four-Wheel Drive............................................5-46
Front Axle......................................................5-47
Bulb Replacement..........................................5-48
Halogen Bulbs..............................................5-48
Headlamps..................................................5-49
One-Piece Front Turn Signal Lamps................5-51
Two-Piece Front Turn Signal Lamps................5-51
Center High-Mounted Stoplamp (CHMSL).........5-52
Taillamps.....................................................5-53
Replacement Bulbs.......................................5-54
Windshield Wiper Blade Replacement..............5-54
Tires..............................................................5-57
Inflation - Tire Pressure.................................5-67
Tire Inspection and Rotation...........................5-68
When It Is Time for New Tires.......................5-69
Buying New Tires.........................................5-70
Uniform Tire Quality Grading..........................5-71
Wheel Alignment and Tire Balance..................5-72
Wheel Replacement......................................5-72
Section 5 Service and Appearance Care
5-1
Page 309 of 412
Belt:A rubber coated layer of cords that is located
between the plies and the tread. Cords may be made
from steel or other reinforcing materials.
Bead:The tire bead contains steel wires wrapped by
steel cords that hold the tire onto the rim.
Bias Ply Tire:A pneumatic tire in which the plies are
laid at alternate angles less than 90 degrees to the
centerline of the tread.
Cold In�ation Pressure:The amount of air pressure in
a tire, measured in pounds per square inch (psi) or
kilopascals (kPa) before a tire has built up heat
from driving. SeeIn�ation - Tire Pressure on page 5-67.
Curb Weight:This means the weight of a motor
vehicle with standard and optional equipment including
the maximum capacity of fuel, oil and coolant, but
without passengers and cargo.
DOT Markings:A code molded into the sidewall of a
tire signifying that the tire is in compliance with the U.S.
Department of Transportation motor vehicle safety
standards. The DOT code includes the Tire Identification
Number (TIN), an alphanumeric designator which can
also identify the tire manufacturer, production plant,
brand and date of production.GVWR:Gross Vehicle Weight Rating, seeLoading
Your Vehicle on page 4-45.
GAWR FRT:Gross Axle Weight Rating for the front
axle, seeLoading Your Vehicle on page 4-45.
GAWR RR:Gross Axle Weight Rating for the rear axle,
seeLoading Your Vehicle on page 4-45.
Intended Outboard Sidewall:The side of an
asymmetrical tire, that must always face outward when
mounted on a vehicle.
Kilopascal (kPa):The metric unit for air pressure.
There are 6.9 kPa’s to one psi.
Light Truck (LT-Metric) Tire:A tire used on light duty
trucks and some multipurpose passenger vehicles.
Load Index:An assigned number ranging from 1 to 279
that corresponds to the load carrying capacity of
a tire.
Maximum In�ation Pressure:The maximum air
pressure to which a cold tire may be inflated. The
maximum air pressure is molded onto the sidewall.
Maximum Load Rating:The load rating for a tire at the
maximum permissible inflation pressure for that tire.
5-65
Page 311 of 412
Vehicle Capacity Weight:The number of designated
seating positions multiplied by 150 lbs. (68 kg) plus
the rated cargo load. SeeLoading Your Vehicle
on page 4-45.
Vehicle Maximum Load on the Tire:Load on an
individual tire due to curb weight, accessory weight,
occupant weight and cargo weight.
Vehicle Placard:A label permanently attached to a
vehicle showing the original equipment tire size
and recommended inflation pressure. SeeLoading Your
Vehicle on page 4-45.
In�ation - Tire Pressure
The tire and loading information label, shows the correct
inflation pressures for your tires when they’re cold.
“Cold” means your vehicle has been sitting for at least
three hours or driven no more than 1 mile (1.6 km). See
Loading Your Vehicle on page 4-45, for the location
of your vehicle’s tire and loading information label.
Notice:Don’t let anyone tell you that underin�ation
or overin�ation is all right. It’s not. If your tires
don’t have enough air (underin�ation), you can get
the following:
Too much �exing
Too much heat
Tire overloading
Bad wear
Bad handling
Bad fuel economy
If your tires have too much air (overin�ation), you
can get the following:
Unusual wear
Bad handling
Rough ride
Needless damage from road hazards
When to Check
Check your tires once a month or more.
Also, check the tire pressure of the spare tire.
If you have a compact spare tire, it should be at
60 psi (420 kPa).
How to Check
Use a good quality pocket-type gage to check tire
pressure. You can’t tell if your tires are properly inflated
simply by looking at them. Radial tires may look
properly inflated even when they’re underinflated. Check
the tire’s inflation pressure when the tires are cold.
cold means your vehicle has been sitting for at least
three hours or driven no more than 1 mile (1.6 km).
5-67
Page 343 of 412
Fuse Usage
LT TRN Left Turn Signal Rear
RT TRN Right Turn Signal Rear
RR PRK Right Rear Parking Lamps
TRL PRK Trailer Park Lamps
LTHDLP Left Headlamp
RTHDLP Right Headlamp
FRPRK Front Parking Lamps
INT BAT Instrument Panel Fuse Block Feed
ENG I Engine Sensors/Solenoids, MAF,
CAM, PURGE, VENT
ECM B Engine Control Module, Fuel Pump
Module, Oil Pressure
ABS Anti-Lock Brake System
ECM I Engine Control Module Injectors
F/PUMP Fuel Pump
DRL Daytime Running Lamps
A/C Air Conditioning
HORN HornFuse Usage
W/W PMP Not Used
HORN Horn
BTSI Automatic Transmission Shift Lock
Control System
B/U LP Back Up Lamps
IGN B Column Feed,Ignition 2, 3, 4
STARTER Starter
RAP Retained Accessory Power
LD LEV Not Used
OXYSEN Oxygen Sensor
IGN E Engine
MIR/LKS Mirrors, Door Locks
FOG LP Fog Lamps
IGN A Starting and Charging Ignition 1
STUD #2 Accessory Feeds, Electric Brake
PARKLP Parking Lamps
LR PRK Left Rear Parking Lamps
5-99
Page 371 of 412
Part B: Owner Checks and Services
Listed in this part are owner checks and services
which should be performed at the intervals specified to
help ensure the safety, dependability and emission
control performance of your vehicle.
Be sure any necessary repairs are completed at once.
Whenever any fluids or lubricants are added to your
vehicle, make sure they are the proper ones, as shown
in Part D.
At Each Fuel Fill
It is important for you or a service station attendant to
perform these underhood checks at each fuel �ll.
Engine Oil Level Check
Check the engine oil level and add the proper oil if
necessary. SeeEngine Oil on page 5-13for further
details.
Engine Coolant Level Check
Check the engine coolant level and add DEX-COOL®
coolant mixture if necessary. SeeEngine Coolant
on page 5-23for further details.
Windshield Washer Fluid Level Check
Check the windshield washer fluid level in the windshield
washer tank and add the proper fluid if necessary.
SeeWindshield Washer Fluid on page 5-36for further
details.
At Least Once a Month
Tire In�ation Check
Visually inspect your tires and make sure tires are
inflated to the correct pressures. Do not forget to check
your spare tire. SeeTires on page 5-57for further
details.
Cassette Tape Player Service
Clean cassette tape player. Cleaning should be done
every 50 hours of tape play. SeeAudio System(s)
on page 3-35for further details.
6-25
Page 376 of 412

Part C: Periodic Maintenance
Inspections
Listed in this part are inspections and services which
should be performed at least twice a year (for instance,
each spring and fall).You should let your dealer’s
service department do these jobs. Make sure any
necessary repairs are completed at once.
Proper procedures to perform these services may be
found in a service manual. SeeService Publications
Ordering Information on page 7-11.
Steering, Suspension and Front
Drive Axle Boot and Seal Inspection
Inspect the front and rear suspension and steering
system for damaged, loose or missing parts, signs of
wear or lack of lubrication. Inspect the power steering
lines and hoses for proper hook-up, binding, leaks,
cracks, chafing, etc. Clean and then inspect the drive
axle boot seals for damage, tears or leakage. Replace
seals if necessary.
Exhaust System Inspection
Inspect the complete exhaust system. Inspect the body
near the exhaust system. Look for broken, damaged,
missing or out-of-position parts as well as open seams,
holes, loose connections or other conditions which
could cause a heat build-up in the floor pan or could let
exhaust fumes into the vehicle. SeeEngine Exhaust
on page 2-29.
Fuel System Inspection
Inspect the complete fuel system for damage or leaks.
Engine Cooling System Inspection
Inspect the hoses and have them replaced if they
are cracked, swollen or deteriorated. Inspect all pipes,
fittings and clamps; replace as needed. Clean the
outside of the radiator and air conditioning condenser.
To help ensure proper operation, a pressure test of
the cooling system and pressure cap is recommended
at least once a year.
6-30
Page 402 of 412
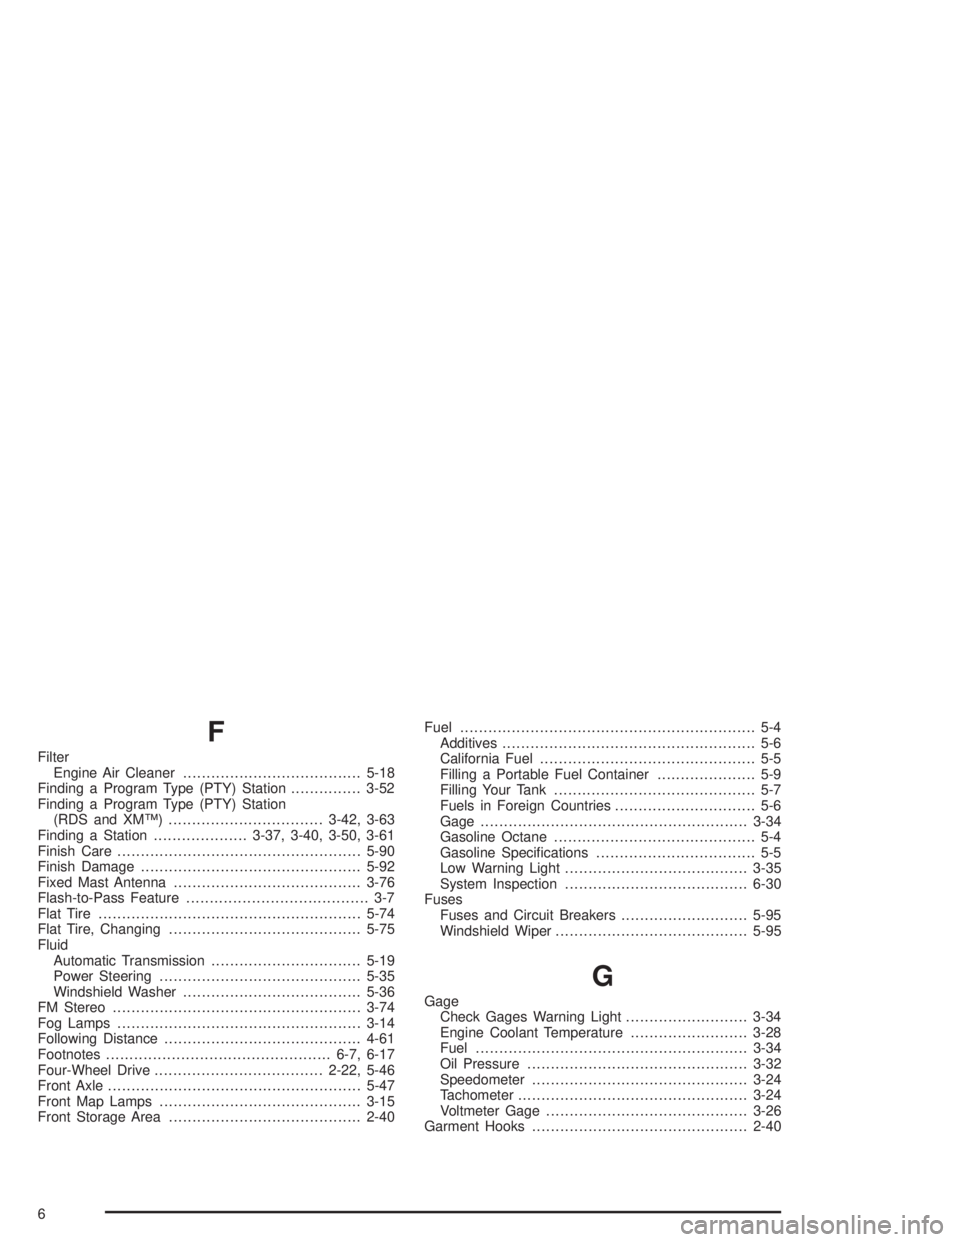
F
Filter
Engine Air Cleaner......................................5-18
Finding a Program Type (PTY) Station...............3-52
Finding a Program Type (PTY) Station
(RDS and XM™).................................3-42, 3-63
Finding a Station....................3-37, 3-40, 3-50, 3-61
Finish Care....................................................5-90
Finish Damage...............................................5-92
Fixed Mast Antenna........................................3-76
Flash-to-Pass Feature....................................... 3-7
Flat Tire........................................................5-74
Flat Tire, Changing.........................................5-75
Fluid
Automatic Transmission................................5-19
Power Steering...........................................5-35
Windshield Washer......................................5-36
FM Stereo.....................................................3-74
Fog Lamps....................................................3-14
Following Distance..........................................4-61
Footnotes................................................6-7, 6-17
Four-Wheel Drive....................................2-22, 5-46
Front Axle......................................................5-47
Front Map Lamps...........................................3-15
Front Storage Area.........................................2-40Fuel............................................................... 5-4
Additives...................................................... 5-6
California Fuel.............................................. 5-5
Filling a Portable Fuel Container..................... 5-9
Filling Your Tank........................................... 5-7
Fuels in Foreign Countries.............................. 5-6
Gage.........................................................3-34
Gasoline Octane........................................... 5-4
Gasoline Specifications.................................. 5-5
Low Warning Light.......................................3-35
System Inspection.......................................6-30
Fuses
Fuses and Circuit Breakers...........................5-95
Windshield Wiper.........................................5-95
G
Gage
Check Gages Warning Light..........................3-34
Engine Coolant Temperature.........................3-28
Fuel..........................................................3-34
Oil Pressure...............................................3-32
Speedometer..............................................3-24
Tachometer.................................................3-24
Voltmeter Gage...........................................3-26
Garment Hooks..............................................2-40
6