radio GMC SONOMA 2004 Owner's Manual
[x] Cancel search | Manufacturer: GMC, Model Year: 2004, Model line: SONOMA, Model: GMC SONOMA 2004Pages: 412, PDF Size: 4.16 MB
Page 64 of 412

Remote Keyless Entry System
If equipped, the keyless entry system operates on a
radio frequency subject to Federal Communications
Commission (FCC) Rules and with Industry Canada.
This device complies with Part 15 of the FCC Rules.
Operation is subject to the following two conditions:
1. This device may not cause interference, and
2. This device must accept any interference received,
including interference that may cause undesired
operation of the device.
This device complies with RSS-210 of Industry Canada.
Operation is subject to the following two conditions:
1. This device may not cause interference, and
2. This device must accept any interference received,
including interference that may cause undesired
operation of the device.
Changes or modifications to this system by other than
an authorized service facility could void authorization to
use this equipment.At times you may notice a decrease in range. This is
normal for any remote keyless entry system. If the
transmitter does not work or if you have to stand closer
to your vehicle for the transmitter to work, try this:
•Check the distance. You may be too far from your
vehicle. You may need to stand closer during
rainy or snowy weather.
•Check the location. Other vehicles or objects may
be blocking the signal. Take a few steps to the
left or right, hold the transmitter higher, and
try again.
•Check to determine if battery replacement is
necessary. See “Battery Replacement” under
Remote Keyless Entry System Operation on
page 2-5.
•If you are still having trouble, see your dealer or a
qualified technician for service.
2-4
Page 77 of 412
Ignition Positions
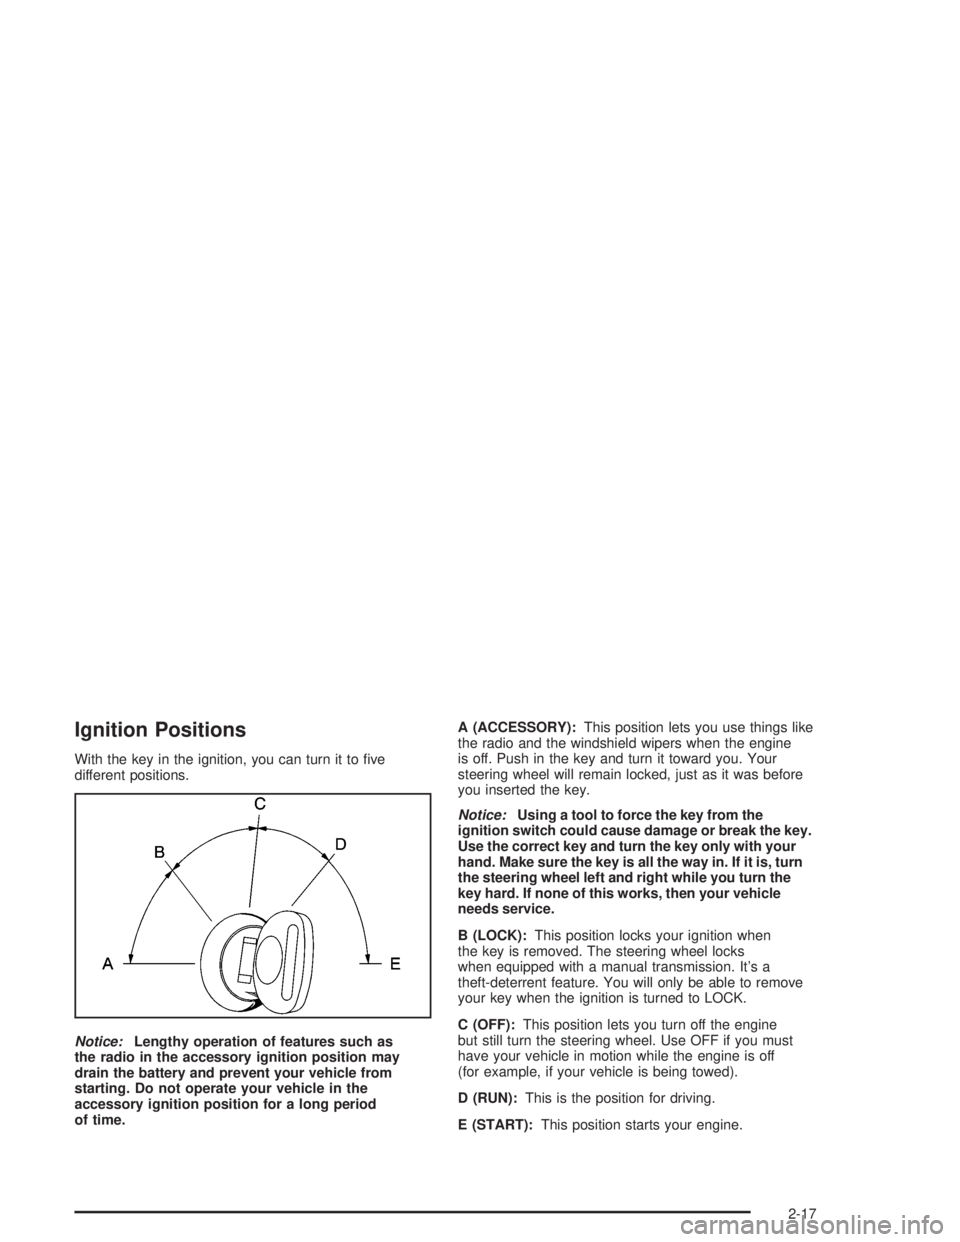
With the key in the ignition, you can turn it to five
different positions.
Notice:Lengthy operation of features such as
the radio in the accessory ignition position may
drain the battery and prevent your vehicle from
starting. Do not operate your vehicle in the
accessory ignition position for a long period
of time.A (ACCESSORY):This position lets you use things like
the radio and the windshield wipers when the engine
is off. Push in the key and turn it toward you. Your
steering wheel will remain locked, just as it was before
you inserted the key.
Notice:Using a tool to force the key from the
ignition switch could cause damage or break the key.
Use the correct key and turn the key only with your
hand. Make sure the key is all the way in. If it is, turn
the steering wheel left and right while you turn the
key hard. If none of this works, then your vehicle
needs service.
B (LOCK):This position locks your ignition when
the key is removed. The steering wheel locks
when equipped with a manual transmission. It’s a
theft-deterrent feature. You will only be able to remove
your key when the ignition is turned to LOCK.
C (OFF):This position lets you turn off the engine
but still turn the steering wheel. Use OFF if you must
have your vehicle in motion while the engine is off
(for example, if your vehicle is being towed).
D (RUN):This is the position for driving.
E (START):This position starts your engine.
2-17
Page 78 of 412
Retained Accessory Power (RAP)
Your vehicle is equipped with a Retained Accessory
Power (RAP) feature which will allow certain features of
your vehicle to continue to work for up to 20 minutes
after the ignition key is turned to OFF.
Your radio, power windows, sunroof and overhead
console will work when the ignition key is in RUN or
ACCESSORY. Once the key is turned from RUN
to OFF, these features will continue to work for up to
20 minutes or until a door is opened.
Starting Your Engine
Move your shift lever to PARK (P) or NEUTRAL (N).
Your engine won’t start in any other position–
that’s a safety feature. To restart when you’re already
moving, use NEUTRAL (N) only.
Notice:Do not try to shift to PARK (P) if your
vehicle is moving. If you do, you could damage the
transmission. Shift to PARK (P) only when your
vehicle is stopped.
1. With your foot off the accelerator pedal, turn the
ignition key to START. When the engine starts,
let go of the key. The idle speed will go down as
your engine gets warm.Notice:Holding your key in START for longer than
15 seconds at a time will cause your battery to
be drained much sooner. And the excessive heat
can damage your starter motor. Wait about
15 seconds between each try to help avoid draining
your battery or damaging your starter.
2. If it doesn’t start within 10 seconds, push the
accelerator pedal all the way to the floor, while you
hold the ignition key in START. When the engine
starts, let go of the key and let up on the accelerator
pedal. Wait about 15 seconds between each try.
When starting your engine in very cold weather (below
0°F or 18°C), do this:
1. With your foot off the accelerator pedal, turn the
ignition key to START and hold it there up to
15 seconds. When the engine starts, let go of
the key.
2. If your engine still won’t start (or starts but then
stops), it could be flooded with too much gasoline.
Try pushing your accelerator pedal all the way to the
floor and holding it there as you hold the key in
START for about three seconds. When the engine
starts, let go of the key and accelerator. If the
vehicle starts briefly but then stops again, do the
same thing, but this time keep the pedal down
for five or six seconds. This clears the extra
gasoline from the engine.
2-18
Page 105 of 412
Instrument Panel Overview...............................3-2
Hazard Warning Flashers................................3-4
Other Warning Devices...................................3-5
Horn.............................................................3-5
Tilt Wheel.....................................................3-5
Turn Signal/Multifunction Lever.........................3-6
Exterior Lamps.............................................3-11
Interior Lamps..............................................3-15
Accessory Power Outlets...............................3-16
Ashtrays and Cigarette Lighter........................3-17
Climate Controls............................................3-18
Climate Control System.................................3-18
Outlet Adjustment.........................................3-20
Warning Lights, Gages and Indicators.............3-21
Instrument Panel Cluster................................3-22
Speedometer and Odometer...........................3-24
Trip Odometer..............................................3-24
Tachometer.................................................3-24
Safety Belt Reminder Light.............................3-24
Air Bag Readiness Light................................3-25
Charging System Light..................................3-26
Voltmeter Gage............................................3-26
Brake System Warning Light..........................3-27
Anti-Lock Brake System Warning Light.............3-28
Engine Coolant Temperature Gage..................3-28Malfunction Indicator Lamp.............................3-29
Oil Pressure Gage........................................3-32
Security Light...............................................3-33
Service Four-Wheel Drive Warning Light..........3-33
Check Gages Warning Light...........................3-34
Fuel Gage...................................................3-34
Low Fuel Warning Light.................................3-35
Audio System(s).............................................3-35
Setting the Time for Radios without Radio
Data Systems (RDS)..................................3-35
Setting the Time for Radios with Radio
Data Systems (RDS)..................................3-36
AM-FM Radio...............................................3-36
Radio with CD..............................................3-39
Radio with Cassette and CD..........................3-49
Radio with Six-Disc CD.................................3-59
Theft-Deterrent Feature (Non-RDS Radios).......3-73
Theft-Deterrent Feature (RDS Radios).............3-73
Understanding Radio Reception......................3-74
Care of Your Cassette Tape Player.................3-74
Care of Your CDs.........................................3-75
Care of Your CD Player................................3-76
Fixed Mast Antenna......................................3-76
XM™ Satellite Radio Antenna System
(48 Contiguous US States).........................3-76
Section 3 Instrument Panel
3-1
Page 116 of 412
;(Parking Lamps):Turning the exterior lamps
control to this position turns on the parking lamps
together with the following:
•Sidemarker Lamps
•Taillamps
•License Plate Lamps
•Instrument Panel Lights
O(Headlamps):Turning the exterior lamps control to
this position turns on the headlamps, together with
the previously listed lamps and lights.
Automatic Headlamp System
When it is dark enough outside, your automatic
headlamp system will turn on your headlamps at the
normal brightness along with other lamps such as
the taillamps, sidemarker, parking lamps and the
instrument panel lights. The radio lights will also be dim.
Your vehicle is equipped with a light sensor on the
top of the instrument panel under the radio speaker grill.
Be sure it is not covered or the system will be on
whenever the ignition is on.
The system may also turn on your headlamps when
driving through a parking garage, heavy overcast
weather or a tunnel. This is normal.There is a delay in the transition between the daytime
and nighttime operation of the Daytime Running
Lamps (DRL) and the automatic headlamp systems so
that driving under bridges or bright overhead street
lights does not affect the system. The DRL and
automatic headlamp system will only be affected when
the light sensor sees a change in lighting lasting
longer than the delay.
To idle your vehicle with the automatic headlamp
system off, set the parking brake while the ignition is off.
Then start your vehicle. The automatic headlamp
system will stay off until you release the parking brake.
As with any vehicle, you should turn on the regular
headlamps when you need them.
You may be able to turn off your automatic headlamp
system. See “Daytime Running Lamps (DRL)” later
in this section for more information.
If you start your vehicle in a dark garage, the automatic
headlamp system will come on immediately. Once
you leave the garage, it will take approximately
one minute for the automatic headlamp system to
change to DRL if it is light outside. During that delay,
your instrument panel cluster may not be as bright
as usual. Make sure your instrument panel brightness
control is in the full bright position. See “Instrument
Panel Brightness Control” underInterior Lamps
on page 3-15.
3-12
Page 120 of 412
Dome Lamp
The dome lamp will come on when you open either
front door.
You can also turn the dome lamps on by turning the
instrument panel brightness thumbwheel, located next to
the exterior lamps control, all the way up to the second
notch. In this position, the dome lamps will remain
on whether a door is opened or closed.
You can use the DOME OVERRIDE button, located
below the exterior lamps control, to set the dome lamps
to come on automatically when either front door is
opened, or to remain off. To turn the lamps off, press
the button in. With the button in, the dome lamps will
remain off when either front door is opened. To return
the lamps to automatic operation, press the button
again and return it to the out position. With the button in
this position, the dome lamps will come on when you
open either front door. This will override the illuminated
entry feature, unless you use your remote keyless
entry transmitter (if equipped) to unlock the vehicle.
Battery Rundown Protection
This feature shuts off the dome, courtesy, vanity,
reading, glove box, cargo and underhood lamps if they
are left on for more than 20 minutes when the ignition
is off. This will keep your battery from running down.
If the battery rundown protection shuts off the interior
lamps, it may be necessary to do one of the following to
return it to normal operation:
•Shut off all lamps and close all doors, or
•turn the ignition key to RUN.
Accessory Power Outlets
Your vehicle may be equipped with an accessory power
outlet.
With accessory power outlets you can plug in auxiliary
electrical equipment such as a cellular telephone or
CB radio.
There may be an accessory power outlet located
near the center of the vehicle on the lower part of the
instrument panel. A small cap must be pulled down
to access an accessory power outlet. When not using
an outlet be sure to cover it with the protective cap.
3-16
Page 130 of 412
Charging System Light
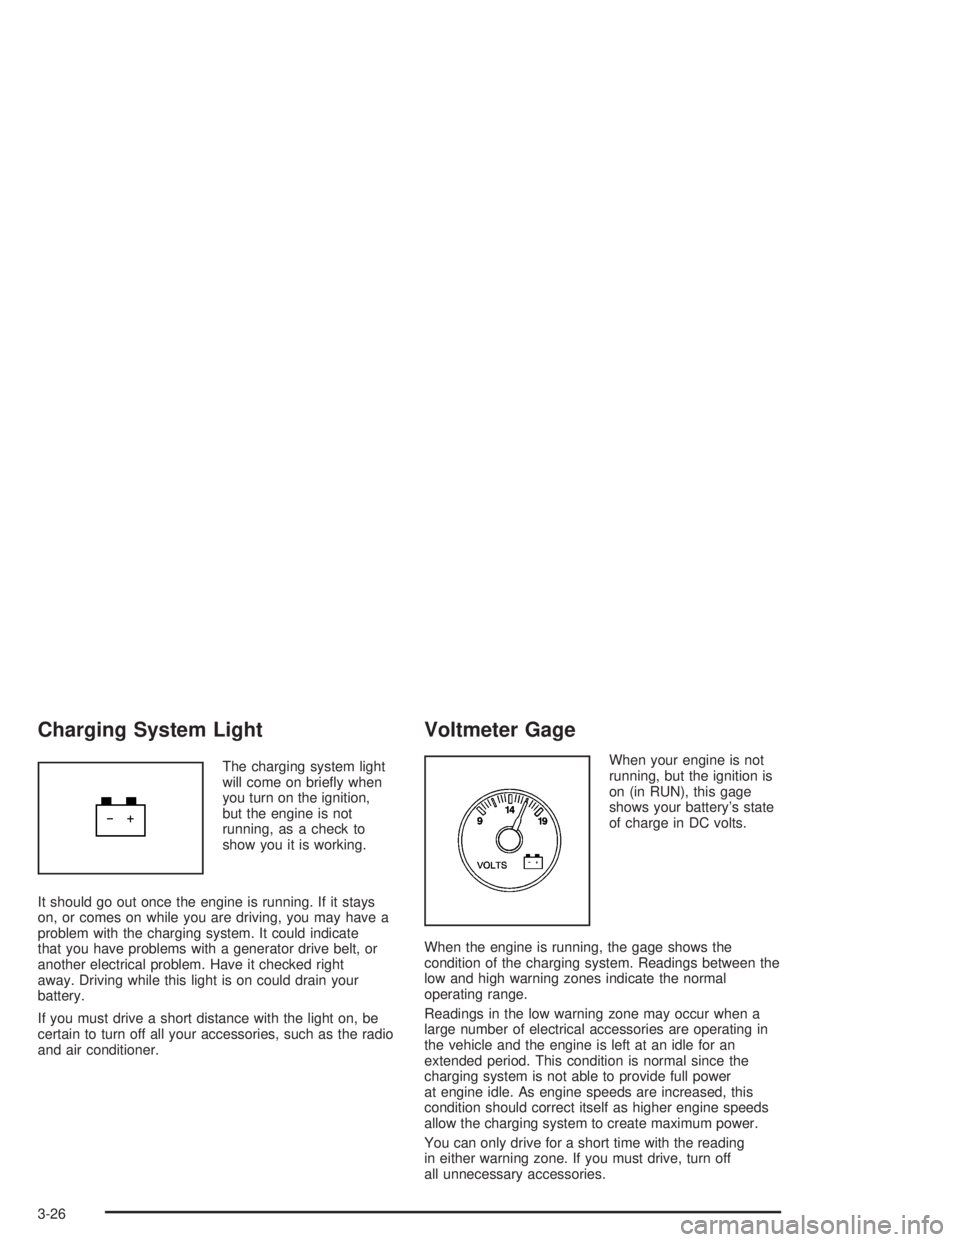
The charging system light
will come on briefly when
you turn on the ignition,
but the engine is not
running, as a check to
show you it is working.
It should go out once the engine is running. If it stays
on, or comes on while you are driving, you may have a
problem with the charging system. It could indicate
that you have problems with a generator drive belt, or
another electrical problem. Have it checked right
away. Driving while this light is on could drain your
battery.
If you must drive a short distance with the light on, be
certain to turn off all your accessories, such as the radio
and air conditioner.
Voltmeter Gage
When your engine is not
running, but the ignition is
on (in RUN), this gage
shows your battery’s state
of charge in DC volts.
When the engine is running, the gage shows the
condition of the charging system. Readings between the
low and high warning zones indicate the normal
operating range.
Readings in the low warning zone may occur when a
large number of electrical accessories are operating in
the vehicle and the engine is left at an idle for an
extended period. This condition is normal since the
charging system is not able to provide full power
at engine idle. As engine speeds are increased, this
condition should correct itself as higher engine speeds
allow the charging system to create maximum power.
You can only drive for a short time with the reading
in either warning zone. If you must drive, turn off
all unnecessary accessories.
3-26
Page 139 of 412
Low Fuel Warning Light
This light comes on briefly
when you start your
engine.
This light comes on when the fuel tank is low on fuel.
To turn if off, add fuel to the fuel tank. SeeFilling Your
Tank on page 5-7.
Audio System(s)
Notice:Before you add any sound equipment to
your vehicle – like a tape player, CB radio, mobile
telephone or two-way radio – be sure you can
add what you want. If you can, it’s very important to
do it properly. Added sound equipment may
interfere with the operation of your vehicle’s engine,
radio or other systems, and even damage them.
Your vehicle’s systems may interfere with the
operation of sound equipment that has been added
improperly.So, before adding sound equipment, check with
your dealer and be sure to check federal rules
covering mobile radio and telephone units.
Your audio system has been designed to operate easily
and to give years of listening pleasure. You will get
the most enjoyment out of it if you acquaint yourself with
it first. Figure out which radio you have in your vehicle,
find out what your audio system can do and how to
operate all of its controls to be sure you’re getting the
most out of the advanced engineering that went into it.
Your vehicle has a feature called Retained Accessory
Power (RAP). With RAP, you can play your audio
system even after the ignition is turned off. See
“Retained Accessory Power (RAP)” underIgnition
Positions on page 2-17.Setting the Time for Radios without
Radio Data Systems (RDS)
Press and hold HR until the correct hour appears on the
display. Press and hold MIN until the correct minute
appears on the display. To display the time with
the ignition off, press RCL, HR, or MIN and the time will
appear on the display for a few seconds. There is an
initial two-second delay before the clock goes into
time-set mode.
3-35
Page 140 of 412
Setting the Time for Radios with
Radio Data Systems (RDS)
Your radio may have a button marked with an H or HR
to represent hours and an M or MIN to represent
minutes.
Press and hold the hour button until the correct hour
appears on the display. AM or PM will appear on
the display for morning or evening hours. Press and
hold the minute button until the correct minute appears
on the display. The time may be set with the ignition
on or off.
To synchronize the time with an FM station broadcasting
Radio Data System (RDS) information, press and
hold the hour and minute buttons at the same time for
two seconds until UPDATED and the clock symbol
appears on the display. If the time is not available from
the station, NO UPDAT will appear on the display.
RDS time is broadcast once a minute. Once you have
tuned to an RDS broadcast station, it may take a
few minutes for your time to update.
AM-FM Radio
Playing the Radio
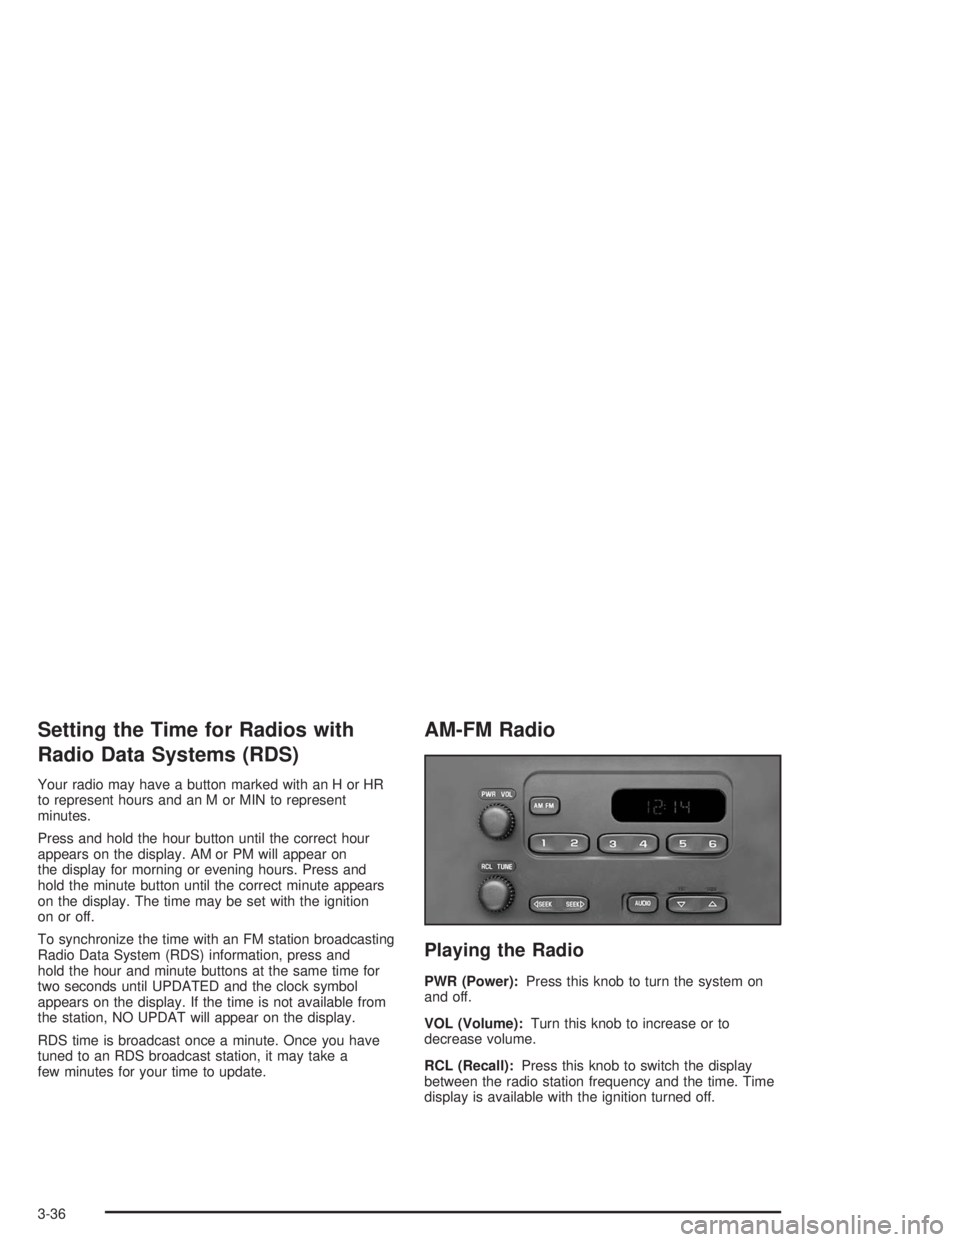
PWR (Power):Press this knob to turn the system on
and off.
VOL (Volume):Turn this knob to increase or to
decrease volume.
RCL (Recall):Press this knob to switch the display
between the radio station frequency and the time. Time
display is available with the ignition turned off.
3-36
Page 141 of 412
Finding a Station
AM FM:Press this button to switch between FM1, FM2,
or AM. The display will show your selection.
TUNE:Turn this knob to select radio stations.
oSEEKp:Press the right or the left arrow to go to
the next or to the previous station and stay there.
To scan stations, press and hold either SEEK arrow for
two seconds until you hear a beep. The radio will go
to a station, play for a few seconds, then go on to
the next station. Press either SEEK arrow again to stop
scanning.
To scan preset stations, press and hold either SEEK
arrow for more than four seconds until you hear
two beeps. The radio will go to the first preset station
stored on the pushbuttons, play for a few seconds, then
go on to the next preset station. Press either SEEK
arrow again to stop scanning presets.
The radio will seek and scan only to stations that are in
the selected band and only to those with a strong
signal.
Setting Preset Stations
The six numbered pushbuttons let you return to your
favorite stations. You can set up to 18 stations
(six FM1, six FM2, and six AM) by performing the
following steps:
1. Turn the radio on.
2. Press AM FM to select FM1, FM2, or AM.
3. Tune in the desired station.
4. Press and hold one of the six numbered
pushbuttons until you hear a beep. Whenever you
press that numbered pushbutton, the station
you set will return.
5. Repeat the steps for each pushbutton.
Setting the Tone (Bass/Treble)
AUDIO:To adjust bass and treble, press and release
AUDIO until BAS or TRE appears on the display.
Then press and hold the up or the down arrow to
increase or to decrease. If a station is weak or noisy,
you may want to decrease the treble.
3-37