spare tire location GMC SONOMA 2004 Owner's Manual
[x] Cancel search | Manufacturer: GMC, Model Year: 2004, Model line: SONOMA, Model: GMC SONOMA 2004Pages: 412, PDF Size: 4.16 MB
Page 311 of 412
Vehicle Capacity Weight:The number of designated
seating positions multiplied by 150 lbs. (68 kg) plus
the rated cargo load. SeeLoading Your Vehicle
on page 4-45.
Vehicle Maximum Load on the Tire:Load on an
individual tire due to curb weight, accessory weight,
occupant weight and cargo weight.
Vehicle Placard:A label permanently attached to a
vehicle showing the original equipment tire size
and recommended inflation pressure. SeeLoading Your
Vehicle on page 4-45.
In�ation - Tire Pressure
The tire and loading information label, shows the correct
inflation pressures for your tires when they’re cold.
“Cold” means your vehicle has been sitting for at least
three hours or driven no more than 1 mile (1.6 km). See
Loading Your Vehicle on page 4-45, for the location
of your vehicle’s tire and loading information label.
Notice:Don’t let anyone tell you that underin�ation
or overin�ation is all right. It’s not. If your tires
don’t have enough air (underin�ation), you can get
the following:
Too much �exing
Too much heat
Tire overloading
Bad wear
Bad handling
Bad fuel economy
If your tires have too much air (overin�ation), you
can get the following:
Unusual wear
Bad handling
Rough ride
Needless damage from road hazards
When to Check
Check your tires once a month or more.
Also, check the tire pressure of the spare tire.
If you have a compact spare tire, it should be at
60 psi (420 kPa).
How to Check
Use a good quality pocket-type gage to check tire
pressure. You can’t tell if your tires are properly inflated
simply by looking at them. Radial tires may look
properly inflated even when they’re underinflated. Check
the tire’s inflation pressure when the tires are cold.
cold means your vehicle has been sitting for at least
three hours or driven no more than 1 mile (1.6 km).
5-67
Page 320 of 412
The following steps will tell you how to use the jack and
change a tire.
Removing the Spare Tire and Tools
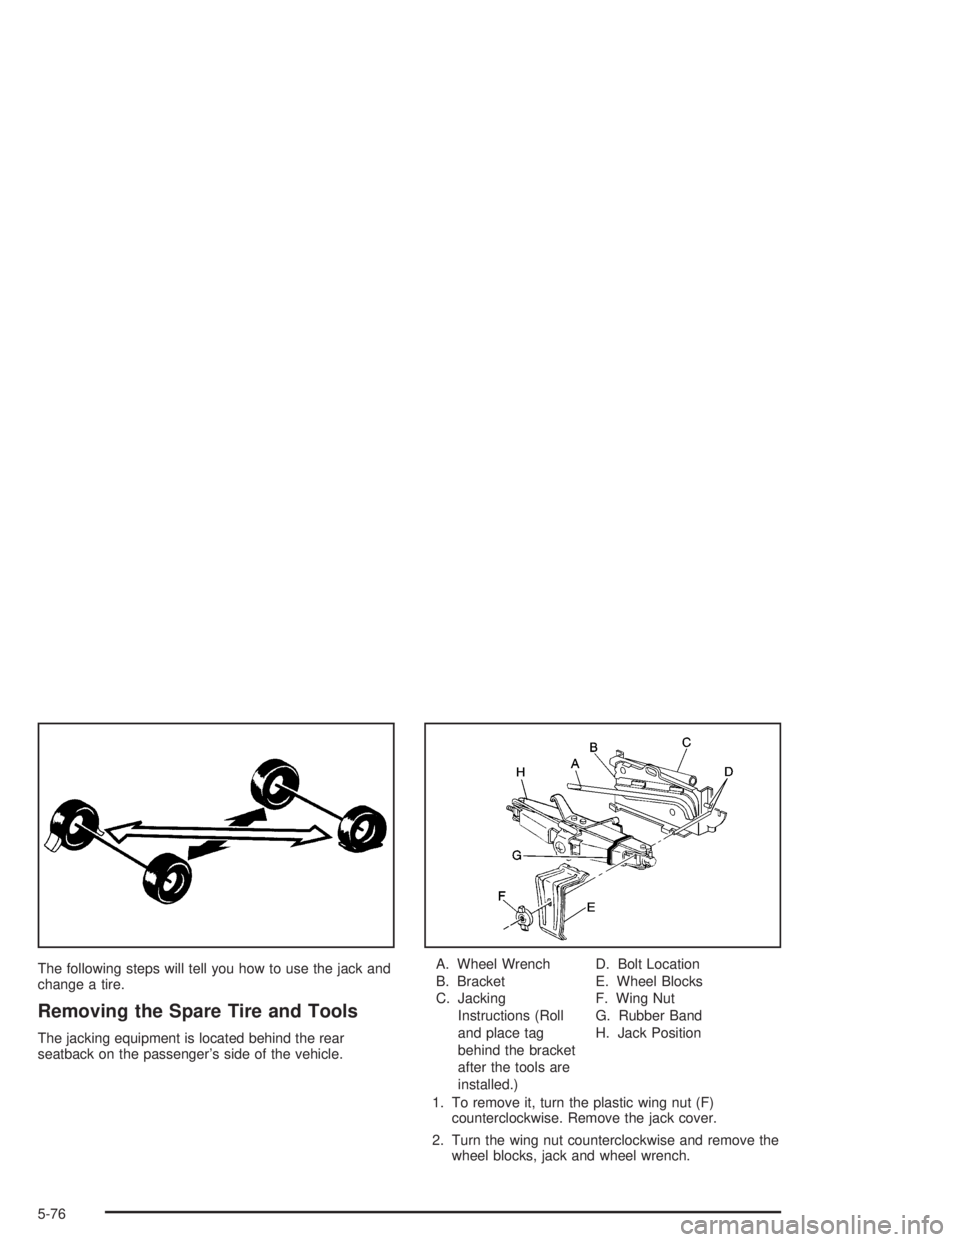
The jacking equipment is located behind the rear
seatback on the passenger’s side of the vehicle.A. Wheel Wrench
B. Bracket
C. Jacking
Instructions (Roll
and place tag
behind the bracket
after the tools are
installed.)D. Bolt Location
E. Wheel Blocks
F. Wing Nut
G. Rubber Band
H. Jack Position
1. To remove it, turn the plastic wing nut (F)
counterclockwise. Remove the jack cover.
2. Turn the wing nut counterclockwise and remove the
wheel blocks, jack and wheel wrench.
5-76
Page 324 of 412
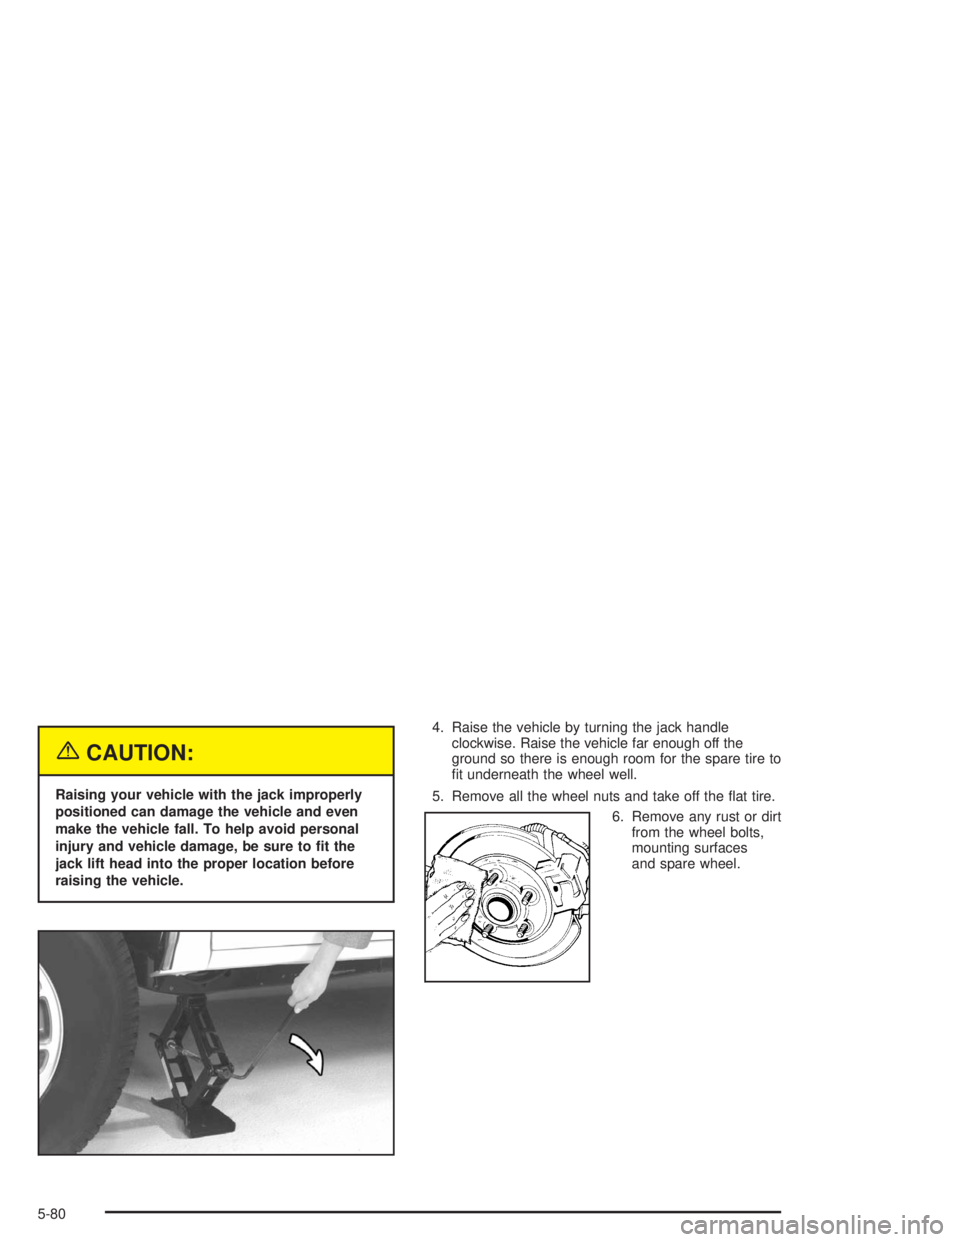
{CAUTION:
Raising your vehicle with the jack improperly
positioned can damage the vehicle and even
make the vehicle fall. To help avoid personal
injury and vehicle damage, be sure to �t the
jack lift head into the proper location before
raising the vehicle.4. Raise the vehicle by turning the jack handle
clockwise. Raise the vehicle far enough off the
ground so there is enough room for the spare tire to
fit underneath the wheel well.
5. Remove all the wheel nuts and take off the flat tire.
6. Remove any rust or dirt
from the wheel bolts,
mounting surfaces
and spare wheel.
5-80
Page 328 of 412
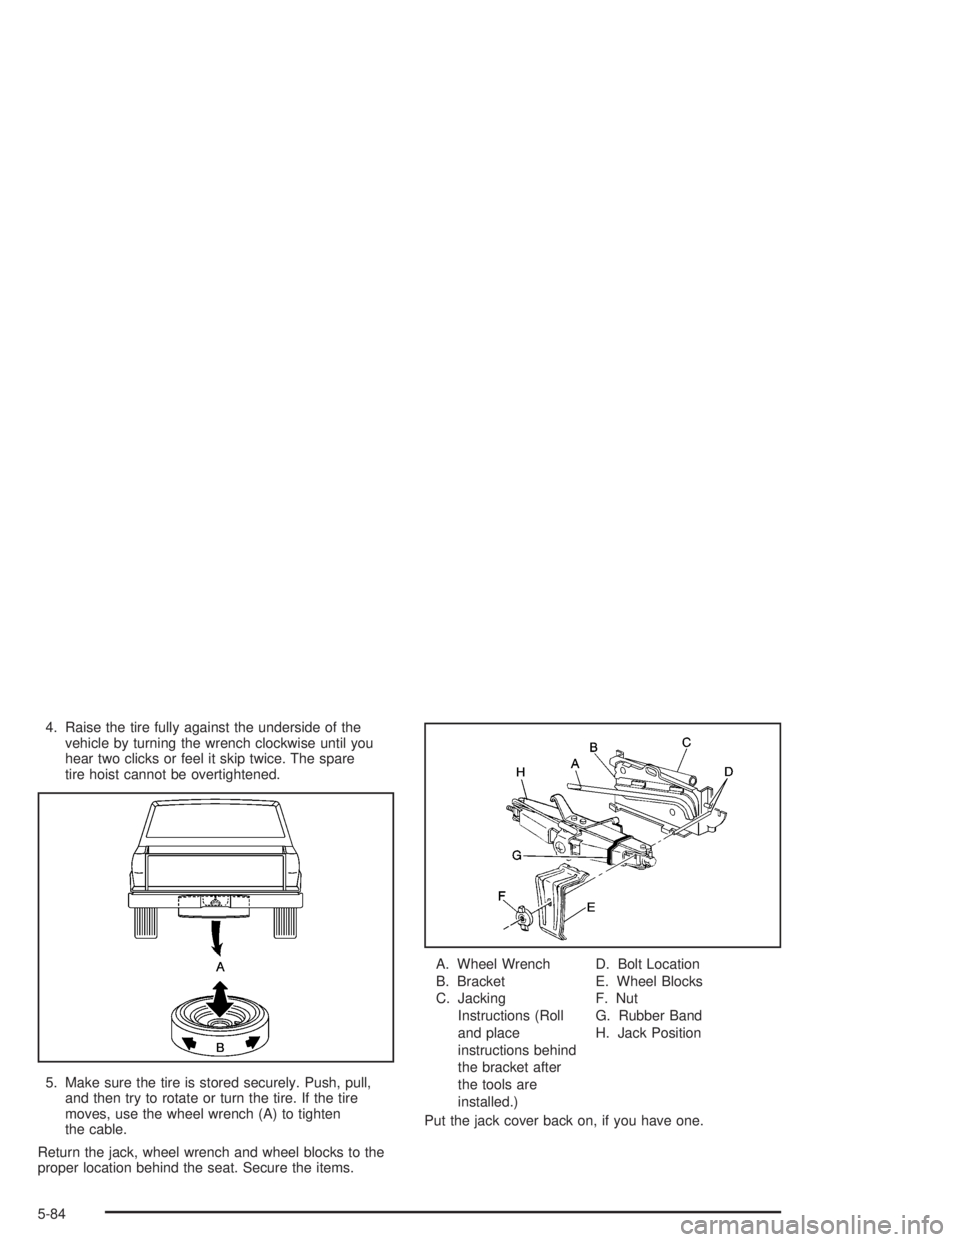
4. Raise the tire fully against the underside of the
vehicle by turning the wrench clockwise until you
hear two clicks or feel it skip twice. The spare
tire hoist cannot be overtightened.
5. Make sure the tire is stored securely. Push, pull,
and then try to rotate or turn the tire. If the tire
moves, use the wheel wrench (A) to tighten
the cable.
Return the jack, wheel wrench and wheel blocks to the
proper location behind the seat. Secure the items.A. Wheel Wrench
B. Bracket
C. Jacking
Instructions (Roll
and place
instructions behind
the bracket after
the tools are
installed.)D. Bolt Location
E. Wheel Blocks
F. Nut
G. Rubber Band
H. Jack Position
Put the jack cover back on, if you have one.
5-84
Page 410 of 412
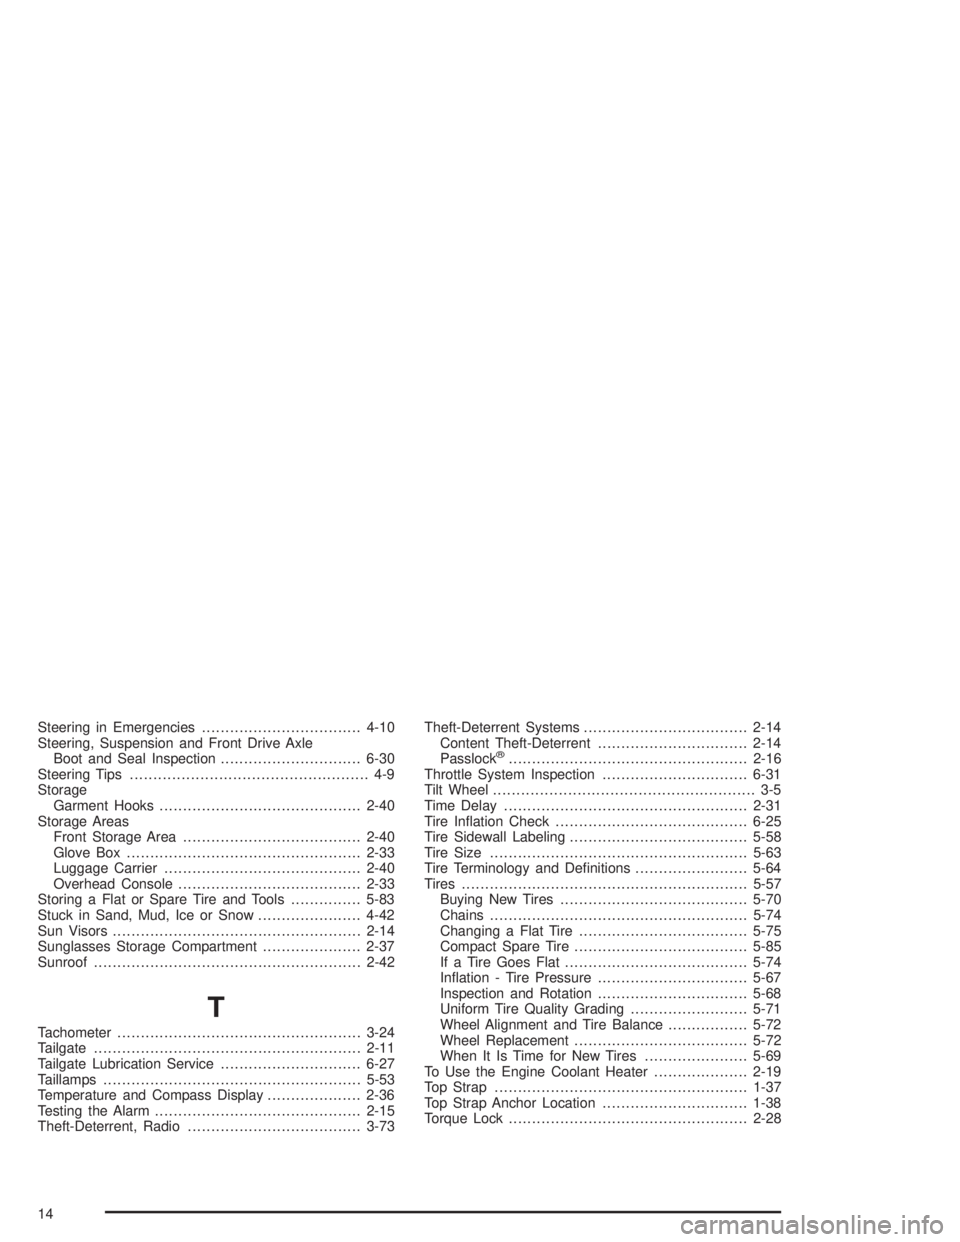
Steering in Emergencies..................................4-10
Steering, Suspension and Front Drive Axle
Boot and Seal Inspection..............................6-30
Steering Tips................................................... 4-9
Storage
Garment Hooks...........................................2-40
Storage Areas
Front Storage Area......................................2-40
Glove Box..................................................2-33
Luggage Carrier..........................................2-40
Overhead Console.......................................2-33
Storing a Flat or Spare Tire and Tools...............5-83
Stuck in Sand, Mud, Ice or Snow......................4-42
Sun Visors.....................................................2-14
Sunglasses Storage Compartment.....................2-37
Sunroof.........................................................2-42
T
Tachometer....................................................3-24
Tailgate.........................................................2-11
Tailgate Lubrication Service..............................6-27
Taillamps.......................................................5-53
Temperature and Compass Display....................2-36
Testing the Alarm............................................2-15
Theft-Deterrent, Radio.....................................3-73Theft-Deterrent Systems...................................2-14
Content Theft-Deterrent................................2-14
Passlock
®...................................................2-16
Throttle System Inspection...............................6-31
Tilt Wheel........................................................ 3-5
Time Delay....................................................2-31
Tire Inflation Check.........................................6-25
Tire Sidewall Labeling......................................5-58
Tire Size.......................................................5-63
Tire Terminology and Definitions........................5-64
Tires.............................................................5-57
Buying New Tires........................................5-70
Chains.......................................................5-74
Changing a Flat Tire....................................5-75
Compact Spare Tire.....................................5-85
If a Tire Goes Flat.......................................5-74
Inflation - Tire Pressure................................5-67
Inspection and Rotation................................5-68
Uniform Tire Quality Grading.........................5-71
Wheel Alignment and Tire Balance.................5-72
Wheel Replacement.....................................5-72
When It Is Time for New Tires......................5-69
To Use the Engine Coolant Heater....................2-19
Top Strap......................................................1-37
Top Strap Anchor Location...............................1-38
Torque Lock...................................................2-28
14