light GMC TERRAIN 2010 Owner's Manual
[x] Cancel search | Manufacturer: GMC, Model Year: 2010, Model line: TERRAIN, Model: GMC TERRAIN 2010Pages: 410, PDF Size: 2.55 MB
Page 1 of 410
2010 GMC Terrain Owner ManualM
Keys, Doors and Windows. . . 1-1
Keys and Locks . . . . . . . . . . . . . . . 1-2
Doors . . . . . . . . . . . . . . . . . . . . . . . . . . 1-8
Vehicle Security . . . . . . . . . . . . . . 1-13
Exterior Mirrors . . . . . . . . . . . . . . . 1-14
Interior Mirrors . . . . . . . . . . . . . . . . 1-16
Windows . . . . . . . . . . . . . . . . . . . . . 1-16
Roof . . . . . . . . . . . . . . . . . . . . . . . . . . 1-19
Seats and Restraints . . . . . . . . . 2-1
Head Restraints . . . . . . . . . . . . . . . 2-2
Front Seats . . . . . . . . . . . . . . . . . . . . 2-3
Rear Seats . . . . . . . . . . . . . . . . . . . . 2-8
Safety Belts . . . . . . . . . . . . . . . . . . . . 2-9
Airbag System . . . . . . . . . . . . . . . . 2-25
Child Restraints . . . . . . . . . . . . . . 2-41
Storage . . . . . . . . . . . . . . . . . . . . . . . 3-1
Storage Compartments . . . . . . . . 3-1
Additional Storage Features . . . 3-2
Roof Rack System . . . . . . . . . . . . . 3-2 Instruments and Controls
. . . . 4-1
Instrument Panel Overview . . . . 4-4
Controls . . . . . . . . . . . . . . . . . . . . . . . 4-6
Warning Lights, Gauges, and
Indicators . . . . . . . . . . . . . . . . . . . 4-11
Information Displays . . . . . . . . . . 4-25
Vehicle Messages . . . . . . . . . . . . 4-29
Vehicle Personalization . . . . . . . 4-36
OnStar
®System . . . . . . . . . . . . . . 4-41
Lighting . . . . . . . . . . . . . . . . . . . . . . . 5-1
Exterior Lighting . . . . . . . . . . . . . . . 5-1
Interior Lighting . . . . . . . . . . . . . . . . 5-4
Lighting Features . . . . . . . . . . . . . . 5-4
Infotainment System . . . . . . . . . 6-1
Introduction . . . . . . . . . . . . . . . . . . . . 6-1
Radio . . . . . . . . . . . . . . . . . . . . . . . . . 6-11
Audio Players . . . . . . . . . . . . . . . . 6-18
Rear Seat Infotainment . . . . . . . 6-33
Phone . . . . . . . . . . . . . . . . . . . . . . . . 6-41 Climate Controls
. . . . . . . . . . . . . 7-1
Climate Control Systems . . . . . . 7-1
Air Vents . . . . . . . . . . . . . . . . . . . . . . . 7-6
Driving and Operating . . . . . . . . 8-1
Driving Information . . . . . . . . . . . . . 8-2
Starting and Operating . . . . . . . 8-27
Engine Exhaust . . . . . . . . . . . . . . 8-34
Automatic Transmission . . . . . . 8-35
Drive Systems . . . . . . . . . . . . . . . . 8-38
Brakes . . . . . . . . . . . . . . . . . . . . . . . 8-39
Ride Control Systems . . . . . . . . 8-41
Cruise Control . . . . . . . . . . . . . . . . 8-44
Object Detection Systems . . . . 8-47
Fuel . . . . . . . . . . . . . . . . . . . . . . . . . . 8-54
Towing . . . . . . . . . . . . . . . . . . . . . . . 8-58
Conversions and Add-Ons . . . 8-66
Page 5 of 410
Introduction v
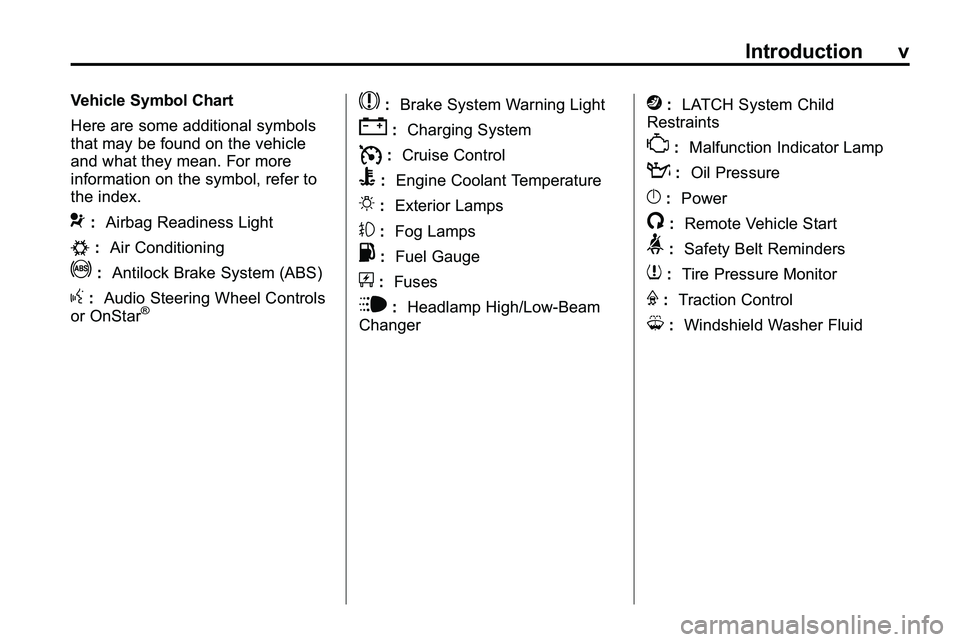
Vehicle Symbol Chart
Here are some additional symbols
that may be found on the vehicle
and what they mean. For more
information on the symbol, refer to
the index.
9:Airbag Readiness Light
#:Air Conditioning
!:Antilock Brake System (ABS)
g:Audio Steering Wheel Controls
or OnStar®
$: Brake System Warning Light
":Charging System
I:Cruise Control
B: Engine Coolant Temperature
O:Exterior Lamps
#:Fog Lamps
.: Fuel Gauge
+:Fuses
i: Headlamp High/Low-Beam
Changer
j: LATCH System Child
Restraints
*: Malfunction Indicator Lamp
::Oil Pressure
}:Power
/:Remote Vehicle Start
>:Safety Belt Reminders
7:Tire Pressure Monitor
F:Traction Control
M:Windshield Washer Fluid
Page 10 of 410
1-4 Keys, Doors and Windows
See“Unlocked Door Anti Lock Out”
under Vehicle Personalizationon
page 4‑36.
Pressing
Qmay also arm the
theft-deterrent system. See
Anti-Theft Alarm System
on
page 1‑13.
K(Unlock): Press to unlock
the driver door or all doors, see
“Remote Door Unlock” under
Vehicle Personalization
on
page 4‑36. The turn signal
indicators flash to indicate unlocking
has occurred. For more information
see “Remote Unlock Light
Feedback” underVehicle
Personalization
on page 4‑36.
Pressing
Kmay also disarm the
theft-deterrent system. See
Anti-Theft Alarm System
on
page 1‑13.
V(Remote Liftgate Release):
First press
K, then press and hold
Vto unlock the liftgate. For
vehicles with the power liftgate,
press and hold
Vuntil the liftgate
begins to move to open the liftgate.
7(Vehicle Locator/Panic
Alarm): Press and release one
time to locate the vehicle. The
exterior lamps flash and the horn
chirps. Press and hold
7for at least
two seconds to sound the panic
alarm. The horn sounds and the
turn signals flash until
7is pressed
again or the key is placed in the
ignition and turned to ON/RUN.
/(Remote Vehicle Start): For
vehicles with this feature, first press
Qthen press and hold/to start
the engine from outside the vehicle
using the RKE transmitter. See
Remote Vehicle Start
on page 1‑5for additional information.
Programming Transmitters
to the Vehicle
Only RKE transmitters programmed
to this vehicle will work. If a
transmitter is lost or stolen, a
replacement can be purchased and
programmed through your dealer/
retailer. When the replacement
transmitter is programmed to this
vehicle, all remaining transmitters
must also be reprogrammed. Any
lost or stolen transmitters will no
longer work once the new
transmitter is programmed.
Battery Replacement
Replace the battery if the “Replace
Battery in Remote Key” message
displays in the DIC. See “Replace
Battery in Remote Key” underKey
and Lock Messages on page 4‑33.
The battery is not rechargeable.
See your dealer/retailer to replace
the battery.
Page 14 of 410
1-8 Keys, Doors and Windows
Safety Locks
Rear door security locks prevent
passengers from opening the rear
doors from the inside.
Press (C) to activate the safety
locks. Once activated, the LED light,
changes to amber.
Pressing the button again
deactivates the safety locks.
SeePower Door Locks
on
page 1‑7.
Doors
Liftgate (Manual)
{WARNING
Exhaust gases can enter the
vehicle if it is driven with the
liftgate, trunk/hatch open, or with
any objects that pass through the
seal between the body and the
trunk/hatch or liftgate. Engine
exhaust contains Carbon
Monoxide (CO) which cannot be
seen or smelled. It can cause
unconsciousness and even death.
If the vehicle must be driven with
the liftgate, or trunk/hatch open:
.Close all of the windows.
.Fully open the air outlets on
or under the instrument
panel.
(Continued)
WARNING (Continued)
.Adjust the Climate Control
system to a setting that
brings in only outside air and
set the fan speed to the
highest setting. See Climate
Control System in the Index.
For more information about
carbon monoxide, see Engine
Exhaust on page 8‑34.
Notice: If you open the liftgate
without checking for overhead
obstructions such as a garage
door, you could damage the
liftgate or the liftgate glass.
Always check to make sure the
area above and behind the liftgate
is clear before opening it.
Press the touchpad located in the
handle of the liftgate, above the
license plate, and lift up to open.
Page 19 of 410
Keys, Doors and Windows 1-13
Vehicle Security
Vehicle theft is big business,
especially in some cities. This
vehicle has theft-deterrent features,
however, they do not make it
impossible to steal.
Anti-Theft Alarm System
This vehicle has an anti-theft alarm
system.
Arming the System
To arm the system, either:
.PressQon the RKE transmitter.
.Or, lock the vehicle using the
key in the driver door.
The alarm automatically arms after
about 30 seconds. The security
light, located on the instrument
panel, flashes.
Press
Von the RKE transmitter to
open the liftgate without setting off
the alarm. The system rearms when
the liftgate is closed.
Disarming the System
To disarm the system, do one of the
following:
.PressKon the RKE transmitter.
.Turn the ignition to ON/RUN.
.Allow the alarm to time out after
about 30 seconds and reset
itself.
The alarm automatically disarms.
If the system is armed and any door
is unlocked without pressing
Kon
the RKE transmitter the alarm
sounds.
How to Detect a Tamper
Condition
IfKis pressed and the horn
sounds, an attempted break-in has
occurred while the system was
armed. If the alarm has been activated, the
“Theft Attempted”
message will
appear on the DIC. See Key and
Lock Messages
on page 4‑33for
additional information.
Immobilizer
See Radio Frequency Statementon
page 12‑16for information
regarding Part 15 of the Federal
Communications Commission (FCC)
Rules and RSS-210/211 of Industry
Canada.
Immobilizer Operation
This vehicle has a passive
theft-deterrent system.
The system does not have to be
manually armed or disarmed.
The vehicle is automatically
immobilized when the key is
removed from the ignition.
Page 20 of 410
1-14 Keys, Doors and Windows
The system is automatically
disarmed when the vehicle is
started with the correct key. The key
uses a transponder that matches
an immobilizer control unit in the
vehicle and automatically disarms
the system. Only the correct key
starts the vehicle. The vehicle may
not start if the key is damaged.
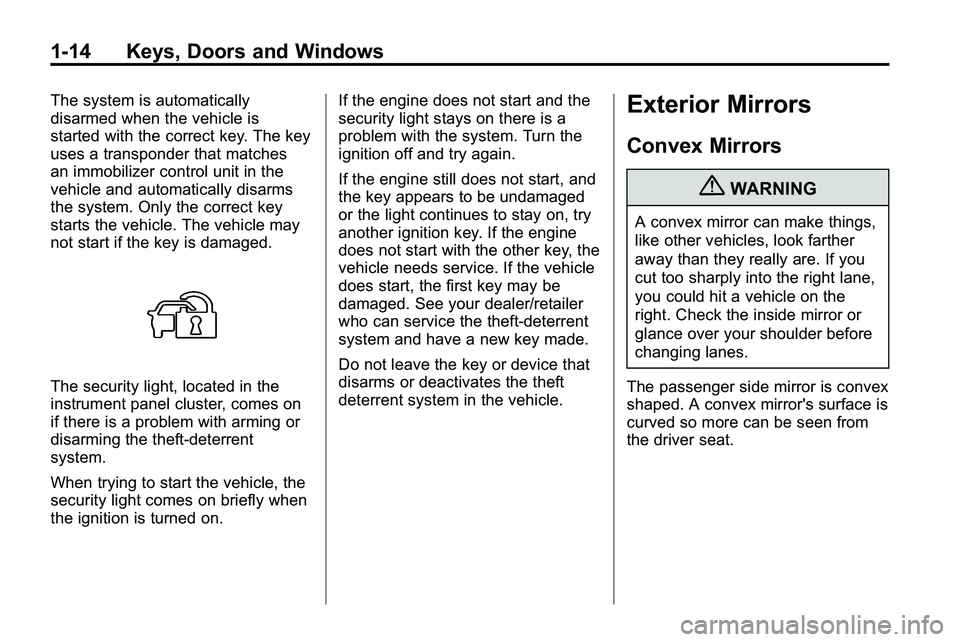
The security light, located in the
instrument panel cluster, comes on
if there is a problem with arming or
disarming the theft-deterrent
system.
When trying to start the vehicle, the
security light comes on briefly when
the ignition is turned on.If the engine does not start and the
security light stays on there is a
problem with the system. Turn the
ignition off and try again.
If the engine still does not start, and
the key appears to be undamaged
or the light continues to stay on, try
another ignition key. If the engine
does not start with the other key, the
vehicle needs service. If the vehicle
does start, the first key may be
damaged. See your dealer/retailer
who can service the theft-deterrent
system and have a new key made.
Do not leave the key or device that
disarms or deactivates the theft
deterrent system in the vehicle.
Exterior Mirrors
Convex Mirrors
{WARNING
A convex mirror can make things,
like other vehicles, look farther
away than they really are. If you
cut too sharply into the right lane,
you could hit a vehicle on the
right. Check the inside mirror or
glance over your shoulder before
changing lanes.
The passenger side mirror is convex
shaped. A convex mirror's surface is
curved so more can be seen from
the driver seat.
Page 22 of 410
1-16 Keys, Doors and Windows
Interior Mirrors
Automatic Dimming
Rearview Mirror
The vehicle may have an automatic
dimming inside rearview mirror.
Vehicles with OnStar
®have three
additional control buttons located at
the bottom of the mirror. See your
dealer/retailer for more information
on the system and how to subscribe
to OnStar. See OnStar
®Systemon
page 4‑41for more information
about the services OnStar provides.
O: Press to turn automatic
dimming on or off.
If the vehicle has a rear vision
camera (RVC) the
Obutton for
turning the automatic dimming
feature on or off will not be
available. See Rear Vision Camera
(RVC)
on page 8‑50for more
information.
Automatic Dimming Mirror
Operation
Automatic dimming reduces the
glare from the headlamps of the
vehicle behind you. The dimming
feature comes on and the indicator
light comes on each time the vehicle
is started.
Cleaning the Mirror
Do not spray glass cleaner directly
on the mirror. Use a soft towel
dampened with water.
Windows
{WARNING
Leaving children, helpless adults,
or pets in a vehicle with the
windows closed is dangerous.
They can be overcome by
the extreme heat and suffer
permanent injuries or even death
from heat stroke. Never leave a
child, a helpless adult, or a pet
alone in a vehicle, especially with
the windows closed in warm or
hot weather.
Page 24 of 410
1-18 Keys, Doors and Windows
Express Down Windows
Windows that have the
express‐down feature allow
the windows to be lowered
without holding the switch. Press
the window switch fully and release
it to activate the express‐down
feature. The express mode can be
canceled at any time by briefly
pressing, or pulling the switch.
Programming the Power
Windows
Programming the power windows
may be necessary if the vehicle's
battery has been disconnected or
discharged.To program the window:
1. Close all doors with the ignition
in the ACC/ACCESSORY,
ON/RUN position, or when
Retained Accessory
Power (RAP) is active. See
Retained Accessory Power
(RAP) on page 8‑29.
2. Press and continue to hold the window switch until the window
is fully open.
3. Pull up and hold the window switch to close the window.
Continue to hold it briefly after
the window is fully closed.
Window Lockout
o(Window Lockout): The window
lockout switch is located on the
driver door. This feature prevents
the rear passenger windows from
operating, except from the driver
position. Press the switch to turn
the lockout feature on or off. An
indicator light shows the feature
is on.
Sun Visors
Pull the sun visor down to block
glare. Detach the sun visor from the
center mount and slide it along the
rod from side-to-side to cover the
driver or passenger side of the front
window. Swing the sun visor to the
side to cover the side window. It can
be moved along the rod from
side-to-side in this position also.
Page 33 of 410
Seats and Restraints 2-7
Heated Front Seats
{WARNING
If you cannot feel temperature
change or pain to the skin, the
seat heater may cause burns
even at low temperatures. To
reduce the risk of burns, people
with such a condition should use
care when using the seat heater,
especially for long periods of
time. Do not place anything on
the seat that insulates against
heat, such as a blanket, cushion,
cover or similar item. This may
cause the seat heater to
overheat. An overheated seat
heater may cause a burn or may
damage the seat.
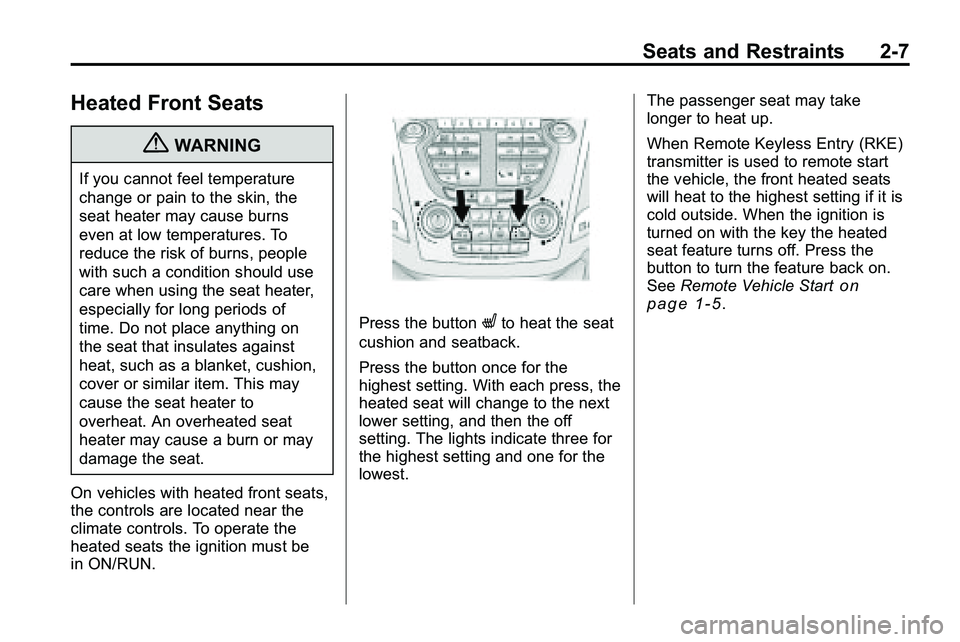
On vehicles with heated front seats,
the controls are located near the
climate controls. To operate the
heated seats the ignition must be
in ON/RUN.
Press the buttonLto heat the seat
cushion and seatback.
Press the button once for the
highest setting. With each press, the
heated seat will change to the next
lower setting, and then the off
setting. The lights indicate three for
the highest setting and one for the
lowest. The passenger seat may take
longer to heat up.
When Remote Keyless Entry (RKE)
transmitter is used to remote start
the vehicle, the front heated seats
will heat to the highest setting if it is
cold outside. When the ignition is
turned on with the key the heated
seat feature turns off. Press the
button to turn the feature back on.
See
Remote Vehicle Start
on
page 1‑5.
Page 44 of 410
2-18 Seats and Restraints
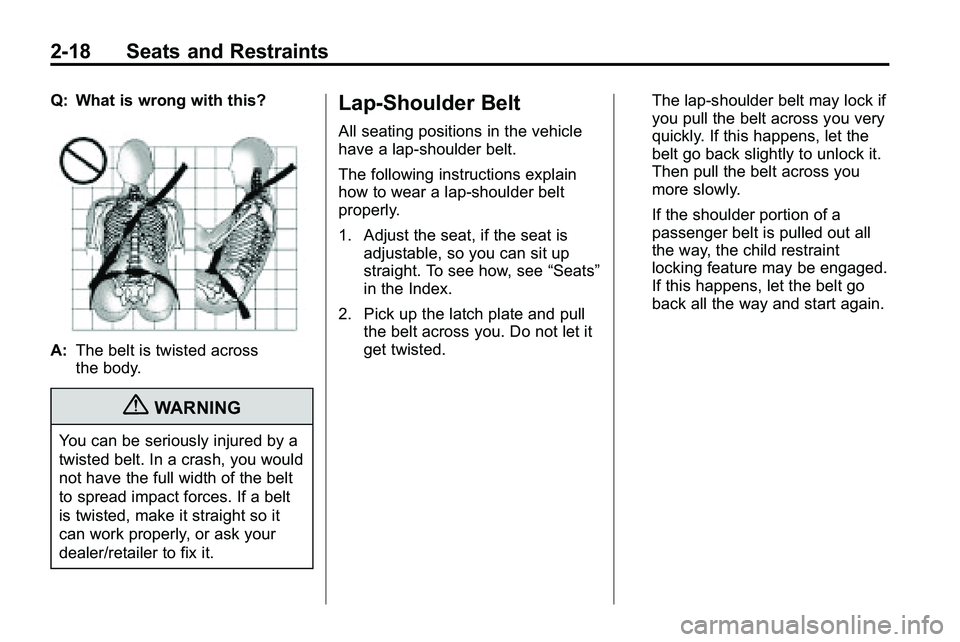
Q: What is wrong with this?
A:The belt is twisted across
the body.
{WARNING
You can be seriously injured by a
twisted belt. In a crash, you would
not have the full width of the belt
to spread impact forces. If a belt
is twisted, make it straight so it
can work properly, or ask your
dealer/retailer to fix it.
Lap-Shoulder Belt
All seating positions in the vehicle
have a lap-shoulder belt.
The following instructions explain
how to wear a lap-shoulder belt
properly.
1. Adjust the seat, if the seat is
adjustable, so you can sit up
straight. To see how, see “Seats”
in the Index.
2. Pick up the latch plate and pull the belt across you. Do not let it
get twisted. The lap-shoulder belt may lock if
you pull the belt across you very
quickly. If this happens, let the
belt go back slightly to unlock it.
Then pull the belt across you
more slowly.
If the shoulder portion of a
passenger belt is pulled out all
the way, the child restraint
locking feature may be engaged.
If this happens, let the belt go
back all the way and start again.