door lock GMC TERRAIN 2011 Owner's Manual
[x] Cancel search | Manufacturer: GMC, Model Year: 2011, Model line: TERRAIN, Model: GMC TERRAIN 2011Pages: 426, PDF Size: 5.58 MB
Page 1 of 426
Black plate (1,1)GMC Terrain Owner Manual - 2011
2011 GMC Terrain Owner ManualM
In Brief. . . . . . . . . . . . . . . . . . . . . . . . 1-1
Instrument Panel . . . . . . . . . . . . . . 1-2
Initial Drive Information . . . . . . . . 1-4
Vehicle Features . . . . . . . . . . . . . 1-18
Performance and Maintenance . . . . . . . . . . . . . . . . 1-23
Keys, Doors and Windows . . . 2-1
Keys and Locks . . . . . . . . . . . . . . . 2-2
Doors . . . . . . . . . . . . . . . . . . . . . . . . . . 2-8
Vehicle Security . . . . . . . . . . . . . . 2-12
Exterior Mirrors . . . . . . . . . . . . . . . 2-14
Interior Mirrors . . . . . . . . . . . . . . . . 2-15
Windows . . . . . . . . . . . . . . . . . . . . . 2-16
Roof . . . . . . . . . . . . . . . . . . . . . . . . . . 2-18
Seats and Restraints . . . . . . . . . 3-1
Head Restraints . . . . . . . . . . . . . . . 3-2
Front Seats . . . . . . . . . . . . . . . . . . . . 3-3
Rear Seats . . . . . . . . . . . . . . . . . . . . 3-9
Safety Belts . . . . . . . . . . . . . . . . . . 3-10
Airbag System . . . . . . . . . . . . . . . . 3-26
Child Restraints . . . . . . . . . . . . . . 3-40 Storage
. . . . . . . . . . . . . . . . . . . . . . . 4-1
Storage Compartments . . . . . . . . 4-1
Additional Storage Features . . . 4-2
Roof Rack System . . . . . . . . . . . . . 4-2
Instruments and Controls . . . . 5-1
Controls . . . . . . . . . . . . . . . . . . . . . . . 5-2
Warning Lights, Gauges, and
Indicators . . . . . . . . . . . . . . . . . . . . 5-7
Information Displays . . . . . . . . . . 5-20
Vehicle Messages . . . . . . . . . . . . 5-24
Vehicle Personalization . . . . . . . 5-30
Lighting . . . . . . . . . . . . . . . . . . . . . . . 6-1
Exterior Lighting . . . . . . . . . . . . . . . 6-1
Interior Lighting . . . . . . . . . . . . . . . . 6-4
Lighting Features . . . . . . . . . . . . . . 6-5
Infotainment System . . . . . . . . . 7-1
Introduction . . . . . . . . . . . . . . . . . . . . 7-1
Radio . . . . . . . . . . . . . . . . . . . . . . . . . 7-11
Audio Players . . . . . . . . . . . . . . . . 7-19
Rear Seat Infotainment . . . . . . . 7-33
Phone . . . . . . . . . . . . . . . . . . . . . . . . 7-45 Climate Controls
. . . . . . . . . . . . . 8-1
Climate Control Systems . . . . . . 8-1
Air Vents . . . . . . . . . . . . . . . . . . . . . . . 8-5
Maintenance . . . . . . . . . . . . . . . . . . . 8-6
Driving and Operating . . . . . . . . 9-1
Driving Information . . . . . . . . . . . . . 9-2
Starting and Operating . . . . . . . 9-26
Engine Exhaust . . . . . . . . . . . . . . 9-32
Automatic Transmission . . . . . . 9-34
Drive Systems . . . . . . . . . . . . . . . . 9-37
Brakes . . . . . . . . . . . . . . . . . . . . . . . 9-37
Ride Control Systems . . . . . . . . 9-39
Cruise Control . . . . . . . . . . . . . . . . 9-42
Object Detection Systems . . . . 9-45
Fuel . . . . . . . . . . . . . . . . . . . . . . . . . . 9-52
Towing . . . . . . . . . . . . . . . . . . . . . . . 9-57
Conversions and
Add-Ons . . . . . . . . . . . . . . . . . . . . 9-64
Page 7 of 426
Black plate (1,1)GMC Terrain Owner Manual - 2011
In Brief 1-1
In Brief
Instrument Panel
Instrument Panel . . . . . . . . . . . . . . 1-2
Initial Drive Information
Initial Drive Information . . . . . . . . 1-4
Remote Keyless Entry (RKE)System . . . . . . . . . . . . . . . . . . . . . . 1-4
Remote Vehicle Start . . . . . . . . . 1-5
Door Locks . . . . . . . . . . . . . . . . . . . 1-5
Liftgate . . . . . . . . . . . . . . . . . . . . . . . . 1-6
Windows . . . . . . . . . . . . . . . . . . . . . . 1-7
Seat Adjustment . . . . . . . . . . . . . . 1-7
Memory Features . . . . . . . . . . . . . 1-9
Heated Seats . . . . . . . . . . . . . . . . 1-10
Head Restraint Adjustment . . . . . . . . . . . . . . . . . 1-11
Safety Belts . . . . . . . . . . . . . . . . . . 1-11 Sensing System for
Passenger Airbag . . . . . . . . . . 1-11
Mirror Adjustment . . . . . . . . . . . . 1-12
Steering Wheel Adjustment . . . . . . . . . . . . . . . . . 1-12
Interior Lighting . . . . . . . . . . . . . . 1-13
Exterior Lighting . . . . . . . . . . . . . 1-13
Windshield Wiper/Washer . . . . 1-14
Climate Controls . . . . . . . . . . . . . 1-15
Parking Brake . . . . . . . . . . . . . . . 1-16
Transmission . . . . . . . . . . . . . . . . 1-17
Vehicle Features
Radio(s) . . . . . . . . . . . . . . . . . . . . . 1-18
Satellite Radio . . . . . . . . . . . . . . . 1-19
Portable Audio Devices . . . . . . 1-19
Bluetooth
®. . . . . . . . . . . . . . . . . . . 1-19
Steering Wheel Controls . . . . . 1-20
Cruise Control . . . . . . . . . . . . . . . 1-20
Navigation System . . . . . . . . . . . 1-21 Driver Information
Center (DIC) . . . . . . . . . . . . . . . 1-21
Vehicle Personalization . . . . . . 1-21
Rear Vision Camera (RVC) . . . . . . . . . . . . . 1-22
Ultrasonic Parking Assist . . . . 1-22
Roof Rack System . . . . . . . . . . . 1-22
Power Outlets . . . . . . . . . . . . . . . 1-23
Performance and Maintenance
Traction Control System (TCS) . . . . . . . . . . . . . . 1-23
StabiliTrak
®System . . . . . . . . . 1-23
Tire Pressure Monitor . . . . . . . . 1-24
Engine Oil Life System . . . . . . 1-24
Fuel E85 (85% Ethanol) . . . . . 1-24
Driving for Better Fuel Economy . . . . . . . . . . . . . . . . . . . 1-25
Roadside Assistance Program . . . . . . . . . . . . . . . . . . . . 1-25
OnStar
®. . . . . . . . . . . . . . . . . . . . . 1-26
Page 9 of 426
Black plate (3,1)GMC Terrain Owner Manual - 2011
In Brief 1-3
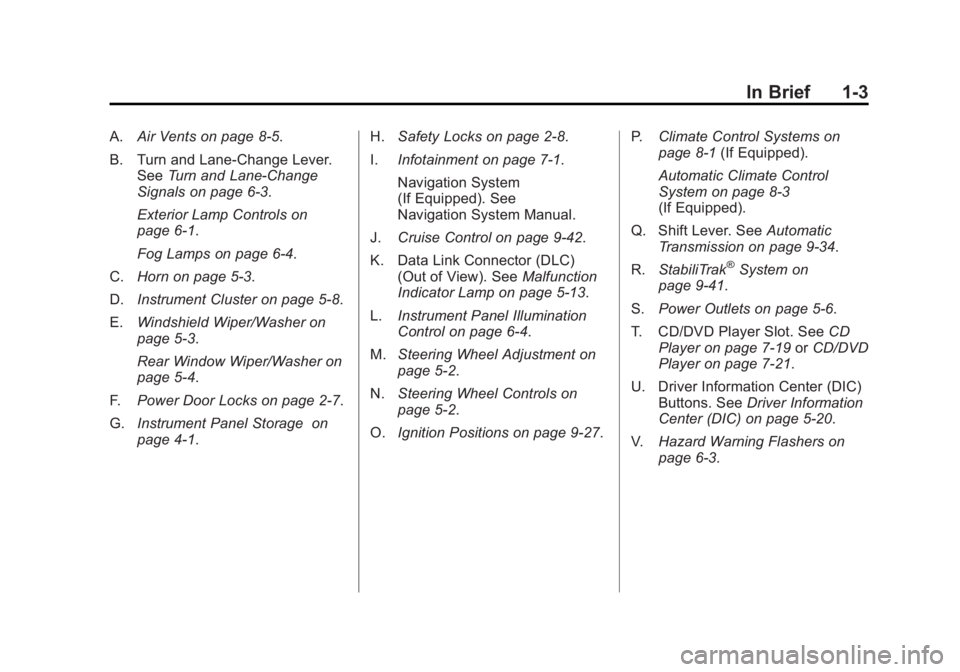
A.Air Vents on page 8‑5.
B. Turn and Lane‐Change Lever. See Turn and Lane-Change
Signals on page 6‑3.
Exterior Lamp Controls on
page 6‑1.
Fog Lamps on page 6‑4.
C. Horn on page 5‑3.
D. Instrument Cluster on page 5‑8.
E. Windshield Wiper/Washer on
page 5‑3.
Rear Window Wiper/Washer on
page 5‑4.
F. Power Door Locks on page 2‑7.
G. Instrument Panel Storage on
page 4‑1. H.
Safety Locks on page 2‑8.
I. Infotainment on page 7‑1.
Navigation System
(If Equipped). See
Navigation System Manual.
J. Cruise Control on page 9‑42.
K. Data Link Connector (DLC) (Out of View). See Malfunction
Indicator Lamp on page 5‑13.
L. Instrument Panel Illumination
Control on page 6‑4.
M. Steering Wheel Adjustment on
page 5‑2.
N. Steering Wheel Controls on
page 5‑2.
O. Ignition Positions on page 9‑27. P.
Climate Control Systems on
page 8‑1 (If Equipped).
Automatic Climate Control
System on page 8‑3
(If Equipped).
Q. Shift Lever. See Automatic
Transmission on page 9‑34.
R. StabiliTrak
®System on
page 9‑41.
S. Power Outlets on page 5‑6.
T. CD/DVD Player Slot. See CD
Player on page 7‑19 orCD/DVD
Player on page 7‑21.
U. Driver Information Center (DIC) Buttons. See Driver Information
Center (DIC) on page 5‑20.
V. Hazard Warning Flashers on
page 6‑3.
Page 10 of 426
Black plate (4,1)GMC Terrain Owner Manual - 2011
1-4 In Brief
Initial Drive
Information
This section provides a brief
overview about some of the
important features that may or may
not be on your specific vehicle.
For more detailed information, refer
to each of the features which can be
found later in this owner manual.
Remote Keyless Entry
(RKE) System
The Remote Keyless Entry (RKE)
transmitter will work up to
60 m (195 ft) away from the vehicle.
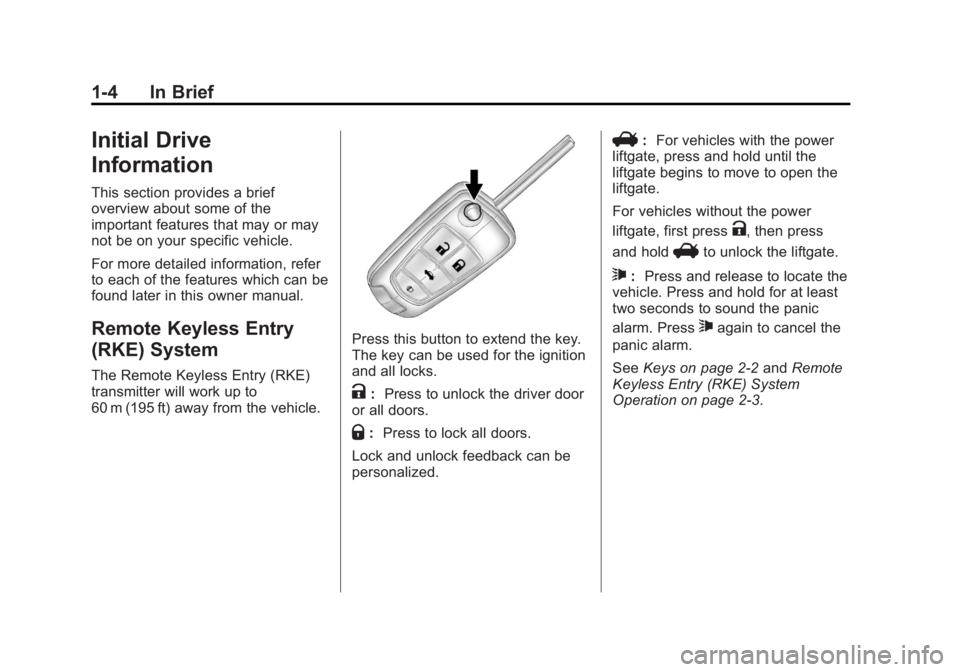
Press this button to extend the key.
The key can be used for the ignition
and all locks.
K:Press to unlock the driver door
or all doors.
Q: Press to lock all doors.
Lock and unlock feedback can be
personalized.
V: For vehicles with the power
liftgate, press and hold until the
liftgate begins to move to open the
liftgate.
For vehicles without the power
liftgate, first press
K, then press
and hold
Vto unlock the liftgate.
7: Press and release to locate the
vehicle. Press and hold for at least
two seconds to sound the panic
alarm. Press
7again to cancel the
panic alarm.
See Keys on page 2‑2 andRemote
Keyless Entry (RKE) System
Operation on page 2‑3.
Page 11 of 426
Black plate (5,1)GMC Terrain Owner Manual - 2011
In Brief 1-5
Remote Vehicle Start
With this feature the engine can be
started from outside of the vehicle.
Starting the Vehicle
1. PressQon the Remote Keyless
Entry transmitter.
2. Press and hold
/for about
two seconds. The turn signal
lamps will briefly flash to confirm
the vehicle has been started.
The parking lamps will turn on
and remain on as long as the
engine is running. The vehicle's
doors will be locked.
3. The key must be inserted and turned to ON/RUN before
driving.
The engine will shut off after
10 minutes unless a time extension
is done or the key is inserted and
turned to ON/RUN.
Canceling a Remote Start
To cancel a remote start, do one of
the following:
.Press/until the parking lamps
turn off.
.Turn on the hazard warning
flashers.
.Insert the key and turn it to
ON/RUN and then back to
LOCK/OFF.
See Remote Vehicle Start on
page 2‑5.
Door Locks
To lock or unlock a door, use the
Remote Keyless Entry (RKE)
transmitter from outside the vehicle.
From inside the vehicle with the
doors locked, pull once on the door
handle to unlock it, and a second
time to open it or use the power
door lock switch.
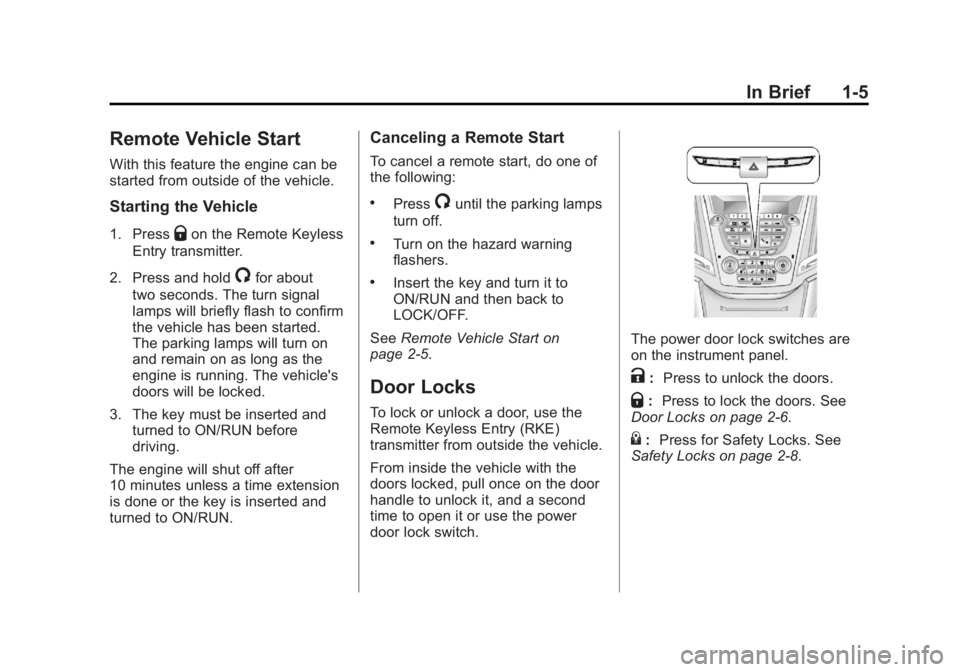
The power door lock switches are
on the instrument panel.
K: Press to unlock the doors.
Q:Press to lock the doors. See
Door Locks on page 2‑6.
{: Press for Safety Locks. See
Safety Locks on page 2‑8.
Page 12 of 426
Black plate (6,1)GMC Terrain Owner Manual - 2011
1-6 In Brief
Liftgate
Manual Liftgate Operation
Unlock the vehicle before opening
the liftgate.
Press the touchpad located in the
handle of the liftgate, above the
license plate, and lift up to open.
Do not press the touchpad while
closing the liftgate. This will cause
the liftgate to be unlatched.
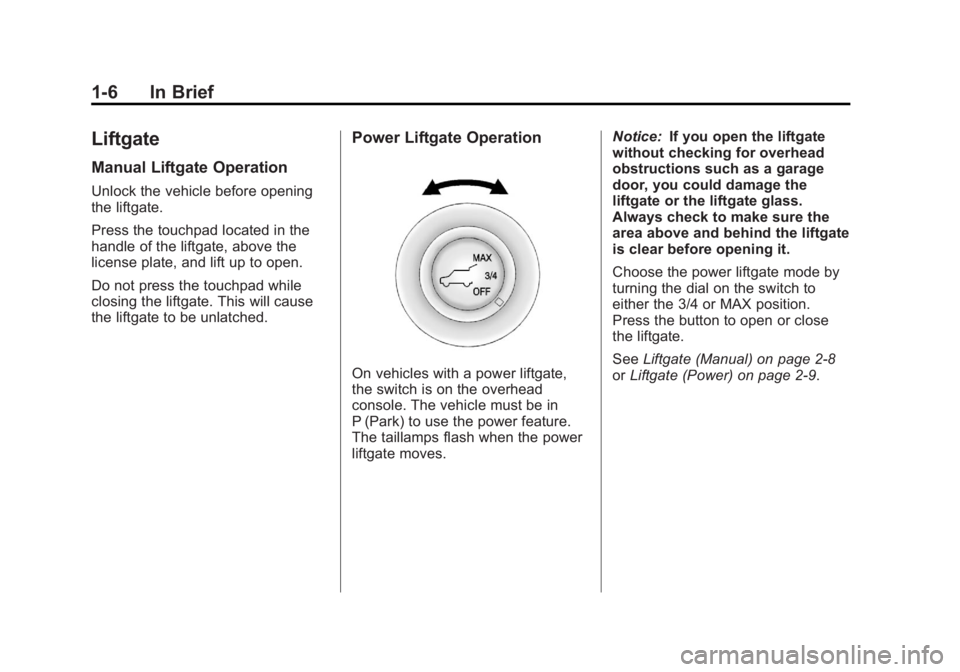
Power Liftgate Operation
On vehicles with a power liftgate,
the switch is on the overhead
console. The vehicle must be in
P (Park) to use the power feature.
The taillamps flash when the power
liftgate moves.Notice:
If you open the liftgate
without checking for overhead
obstructions such as a garage
door, you could damage the
liftgate or the liftgate glass.
Always check to make sure the
area above and behind the liftgate
is clear before opening it.
Choose the power liftgate mode by
turning the dial on the switch to
either the 3/4 or MAX position.
Press the button to open or close
the liftgate.
See Liftgate (Manual) on page 2‑8
or Liftgate (Power) on page 2‑9.
Page 16 of 426
Black plate (10,1)GMC Terrain Owner Manual - 2011
1-10 In Brief
To recall the manually saved
Button Memory positions, press
and hold“1”or“2.” The driver seat
and outside mirrors move to the
positions stored to those buttons
when pressed. Releasing “1”or“2”
before the stored positions are
reached stops the recall.
To automatically recall RKE Memory
positions, unlock the driver door
with the RKE transmitter and open
the driver door. If the driver door is
already open, pressing the RKE
transmitter Kbutton will also
activate the RKE Memory recall.
The driver seat and outside mirrors
will move to the previously saved
RKE Memory positions. See
“Memory Seat and Mirrors”
under Power Seat Adjustment on
page 3‑3 for more information.
Easy Exit Driver Seat
This feature moves the seat
rearward allowing the driver more
room to exit the vehicle.
To activate, turn the ignition off and
open the driver door. If the driver
door is already open, turning the
ignition off will activate the easy exit
driver seat.
This feature can be turned on or off
using the vehicle personalization
menu. See “Easy Exit Driver Seat”
under Vehicle Personalization on
page 5‑30 for more information.Heated Seats
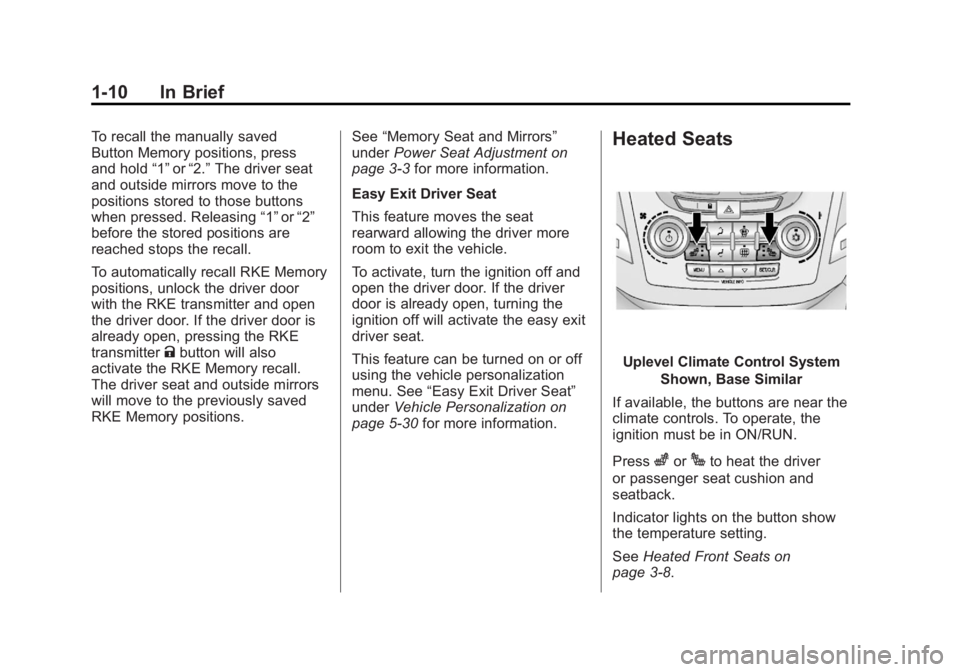
Uplevel Climate Control System
Shown, Base Similar
If available, the buttons are near the
climate controls. To operate, the
ignition must be in ON/RUN.
Press
zorJto heat the driver
or passenger seat cushion and
seatback.
Indicator lights on the button show
the temperature setting.
See Heated Front Seats on
page 3‑8.
Page 19 of 426

Black plate (13,1)GMC Terrain Owner Manual - 2011
In Brief 1-13
3. Pull or push the steering wheelcloser or away from you.
4. Pull the lever (A) up to lock the steering wheel in place.
Do not adjust the steering wheel
while driving.
Interior Lighting
Reading Lamps
These lamps are located on the
overhead console. These lamps
come on automatically when any
door is opened.
For manual operation, press the
button next to each lamp to turn it
on or off. Center Dome Lamps
There are front and rear dome
lamps.
The dome lamp controls are located
in the overhead console. To change
the settings, press the following:
*:
Turns the lamp off, even when
a door is open.
1: The lamps come on
automatically when a door is
opened.
+: Turns the dome lamps on.
The dome lamps can also be turned
on and off by pressing the buttons
next to the lamps.
For more information on interior
lighting, See Instrument Panel
Illumination Control on page 6‑4.
Exterior Lighting
The exterior lamp control is located
on the turn signal/lane change lever.
O: Turn to operate the exterior
lamps.
O: Turns the exterior lamps off.
AUTO: Turns the exterior lamps on
and off automatically depending on
the exterior light.
;: Turns on the parking lamps,
together with the sidemarker lamps,
taillamps, license plate lamps, and
instrument panel lights.
5: Turns on the headlamps,
together with the parking lamps,
sidemarker lamps, taillamps, license
plate lamps, and instrument panel
lights.
Page 28 of 426
Black plate (22,1)GMC Terrain Owner Manual - 2011
1-22 In Brief
.Power Door Locks
.Remote Lock/Unlock/Start
.Return to Factory Settings
See Vehicle Personalization on
page 5‑30.
Rear Vision
Camera (RVC)
If available, the rear vision camera
displays a view of the area behind
the vehicle when the vehicle is
shifted into R (Reverse). The
display will appear on either the
inside rearview mirror or navigation
screen, if equipped.
To clean the camera lens, located
above the license plate, rinse it with
water and wipe it with a soft cloth.
See Rear Vision Camera (RVC) on
page 9‑47.
Ultrasonic Parking Assist
If available, Ultrasonic Rear Parking
Assist (URPA) uses sensors on the
rear bumper to detect objects while
parking the vehicle. URPA comes
on automatically when the shift lever
is moved into R (Reverse) and
operates at speeds less than 8 km/h
(5 mph). URPA uses audio beeps
to provide distance and system
information.
Keep the sensors on the vehicle's
rear bumper clean to ensure proper
operation.
The URPA system can be turned
on and off using the infotainment
system controls. See Vehicle
Personalization on page 5‑30 for
more information.
See Ultrasonic Parking Assist on
page 9‑45 for more information.
Roof Rack System
The roof rack cross rails can be
locked in four positions along the
roof rack side rails. Lift the lever to
release and move the cross rail.
Push the lever down to completely
engage into the side rail holes. Slide
the cross rails back and forth until
the lock pins engage in the holes
and a click is heard.
When the roof rack is not in use,
lock one cross rail at the furthest
forward position and lock the other
cross rail at the furthest rearward
position to reduce wind noise. See
Roof Rack System on page 4‑2.
Page 32 of 426
Black plate (26,1)GMC Terrain Owner Manual - 2011
1-26 In Brief
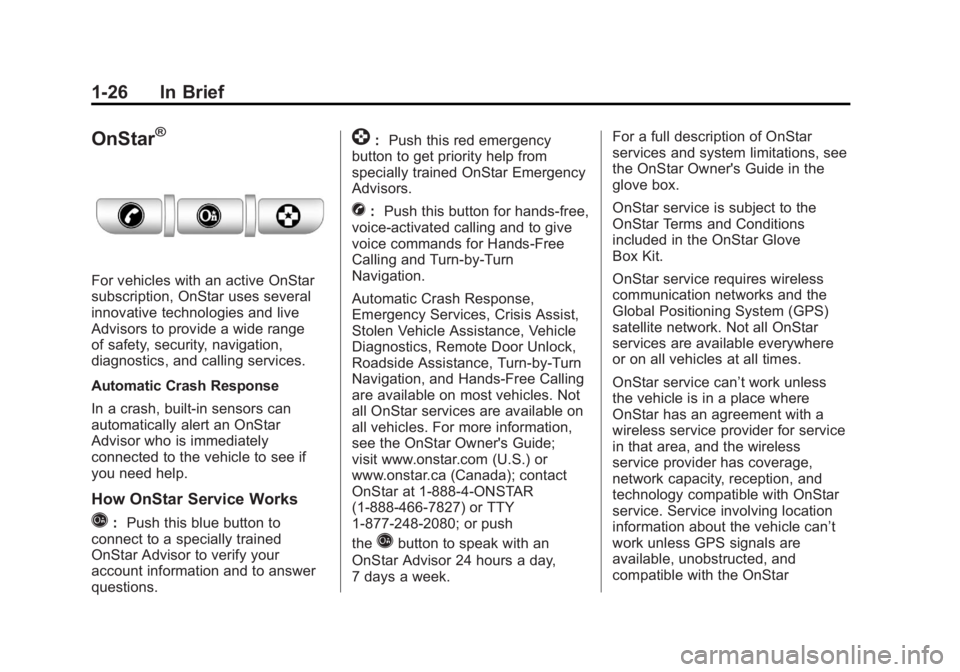
OnStar®
For vehicles with an active OnStar
subscription, OnStar uses several
innovative technologies and live
Advisors to provide a wide range
of safety, security, navigation,
diagnostics, and calling services.
Automatic Crash Response
In a crash, built‐in sensors can
automatically alert an OnStar
Advisor who is immediately
connected to the vehicle to see if
you need help.
How OnStar Service Works
Q:Push this blue button to
connect to a specially trained
OnStar Advisor to verify your
account information and to answer
questions.
]: Push this red emergency
button to get priority help from
specially trained OnStar Emergency
Advisors.
X: Push this button for hands‐free,
voice‐activated calling and to give
voice commands for Hands‐Free
Calling and Turn‐by‐Turn
Navigation.
Automatic Crash Response,
Emergency Services, Crisis Assist,
Stolen Vehicle Assistance, Vehicle
Diagnostics, Remote Door Unlock,
Roadside Assistance, Turn‐by‐Turn
Navigation, and Hands‐Free Calling
are available on most vehicles. Not
all OnStar services are available on
all vehicles. For more information,
see the OnStar Owner's Guide;
visit www.onstar.com (U.S.) or
www.onstar.ca (Canada); contact
OnStar at 1-888-4-ONSTAR
(1‐888‐466‐7827) or TTY
1‐877‐248‐2080; or push
the
Qbutton to speak with an
OnStar Advisor 24 hours a day,
7 days a week. For a full description of OnStar
services and system limitations, see
the OnStar Owner's Guide in the
glove box.
OnStar service is subject to the
OnStar Terms and Conditions
included in the OnStar Glove
Box Kit.
OnStar service requires wireless
communication networks and the
Global Positioning System (GPS)
satellite network. Not all OnStar
services are available everywhere
or on all vehicles at all times.
OnStar service can’t work unless
the vehicle is in a place where
OnStar has an agreement with a
wireless service provider for service
in that area, and the wireless
service provider has coverage,
network capacity, reception, and
technology compatible with OnStar
service. Service involving location
information about the vehicle can’t
work unless GPS signals are
available, unobstructed, and
compatible with the OnStar