key GMC TERRAIN 2012 Service Manual
[x] Cancel search | Manufacturer: GMC, Model Year: 2012, Model line: TERRAIN, Model: GMC TERRAIN 2012Pages: 428, PDF Size: 5.45 MB
Page 235 of 428
Black plate (25,1)GMC Terrain Owner Manual (Include Mex) - 2012
Driving and Operating 9-25
Retained Accessory
Power (RAP)
These vehicle accessories can be
used for up to 10 minutes after the
engine is turned off:
.Audio System
.Power Windows
.Sunroof (if equipped)
Power to the audio system will
continue to operate for up to
10 minutes or until the driver door is
opened.
Power to the power windows and
sunroof will continue to operate for
up to 10 minutes or until any door is
opened.
All these features will work when the
key is in ON/RUN or ACC/
ACCESSORY.
Engine Coolant Heater
The engine coolant heater,
if available, can help in cold weather
conditions at or below −18°C (0°F)
for easier starting and better fuel
economy during engine warm-up.
Plug in the coolant heater at least
four hours before starting the
vehicle. An internal thermostat in
the plug-end of the cord will prevent
engine coolant heater operation at
temperatures above −18°C (0°F).
To Use The Engine Coolant
Heater
1. Turn off the engine.
2. Open the hood and unwrap the
electrical cord.
The electrical cord is located on
the passenger side of the engine
compartment, in front of the air
cleaner.
3. Plug it into a normal, grounded 110-volt AC outlet.
{WARNING
Plugging the cord into an
ungrounded outlet could cause an
electrical shock. Also, the wrong
kind of extension cord could
overheat and cause a fire. You
could be seriously injured. Plug
the cord into a properly grounded
three-prong 110-volt AC outlet.
If the cord will not reach, use a
heavy-duty three-prong extension
cord rated for at least 15 amps.
4. Before starting the engine, be sure to unplug and store the
cord as it was before to keep it
away from moving engine parts.
If you do not it could be
damaged.
The length of time the heater should
remain plugged in depends on
several factors. Ask a dealer in the
area where you will be parking the
vehicle for the best advice on this.
Page 236 of 428
Black plate (26,1)GMC Terrain Owner Manual (Include Mex) - 2012
9-26 Driving and Operating
Shifting Into Park
{WARNING
It can be dangerous to get out of
the vehicle if the shift lever is not
fully in P (Park) with the parking
brake firmly set. The vehicle can
roll. If you have left the engine
running, the vehicle can move
suddenly. You or others could be
injured. To be sure the vehicle will
not move, even when you are on
fairly level ground, use the steps
that follow. If you are pulling a
trailer, seeDriving Characteristics
and Towing Tips on page 9‑57. Use this procedure to shift into
P (Park):
1. Hold the brake pedal down and
set the parking brake.
See Parking Brake on page 9‑33
for more information.
2. Hold the button on the shift lever and push the lever toward the
front of the vehicle into P (Park).
3. Turn the ignition to LOCK/OFF.
4. Remove the key.
Leaving the Vehicle With the
Engine Running
{WARNING
It can be dangerous to leave the
vehicle with the engine running.
The vehicle could move suddenly
if the shift lever is not fully in
P (Park) with the parking brake
firmly set. And, if you leave the
vehicle with the engine running, it
could overheat and even catch
fire. You or others could be
injured. Do not leave the vehicle
with the engine running.
If you have to leave the vehicle with
the engine running, the vehicle must
be in P (Park) and the parking
brake set.
Release the button and check that
the shift lever cannot be moved out
of P (Park).
Page 240 of 428

Black plate (30,1)GMC Terrain Owner Manual (Include Mex) - 2012
9-30 Driving and Operating
from P (Park) when the ignition key
is in ON/RUN. If you cannot shift out
of P (Park), ease pressure on the
shift lever, then push the shift lever
all the way into P (Park) as you
maintain brake application. Then
press the shift lever button and
move the shift lever into another
gear. SeeShifting out of Park on
page 9‑27.
R (Reverse): Use this gear to
back up.
Notice: Shifting to R (Reverse)
while the vehicle is moving
forward could damage the
transmission. The repairs would
not be covered by the vehicle
warranty. Shift to R (Reverse) only
after the vehicle is stopped.
To rock the vehicle back and forth to
get out of snow, ice or sand without
damaging the transmission, see If
the Vehicle Is Stuck on page 9‑15. N (Neutral):
In this position the
engine and transmission do not
connect. Use N (Neutral) to restart a
vehicle that is already moving.
{WARNING
Shifting into a drive gear while the
engine is running at high speed is
dangerous. Unless your foot is
firmly on the brake pedal, the
vehicle could move very rapidly.
You could lose control and hit
people or objects. Do not shift
into a drive gear while the engine
is running at high speed.
Notice: Shifting out of P (Park) or
N (Neutral) with the engine
running at high speed may
damage the transmission. The
repairs would not be covered by
the vehicle warranty. Be sure the
engine is not running at high
speed when shifting the vehicle. D (Drive):
This position is for
normal driving. It provides the best
fuel economy. If you need more
power for passing, and you are:
.Going less than 56 km/h
(35 mph), push the accelerator
pedal about halfway down.
.Going about 56 km/h (35 mph) or
more, push the accelerator all
the way down.
Notice: If the vehicle seems to
accelerate slowly or not shift
gears when you go faster, and
you continue to drive the vehicle
that way, you could damage the
transmission. Have the vehicle
serviced right away.
M (Manual Mode): Allows the
driver to select the range of gear
positions. See Manual Mode on
page 9‑31.
Page 255 of 428
Black plate (45,1)GMC Terrain Owner Manual (Include Mex) - 2012
Driving and Operating 9-45
Rear Vision
Camera (RVC)
The vehicle may have a Rear Vision
Camera (RVC) system. Read this
entire section before using it.
The RVC can assist the driver when
backing up by displaying a view of
the area behind the vehicle.
{WARNING
The RVC system does not display
pedestrians, bicyclists, animals,
or any other object located
outside the camera's field of view,
below the bumper, or under the
vehicle.
Do not back the vehicle using
only the RVC screen or by using
the screen during longer, higher
speed backing maneuvers,
or where there could be(Continued)
WARNING (Continued)
cross-traffic. Perceived distances
may be different from actual
distances.
Failure to use proper care before
backing may result in injury,
death, or vehicle damage. Always
check before backing by checking
behind and around the vehicle.
An image appears on the radio
screen with the message Check
Surroundings for Safety when the
vehicle is shifted into R (Reverse).
The radio screen goes to the
previous screen after approximately
10 seconds once the vehicle is
shifted out of R (Reverse). To cancel the delay, do one of the
following:.Press a hard key on the
navigation system.
.Shift into P (Park).
.Reach a vehicle speed of
8 km/h (5 mph).
Turning the Rear Vision Camera
System On or Off
To turn the rear vision camera
system on or off:
1. Shift into P (Park).
2. Press the CONFIG button.
3. Select Display.
Page 277 of 428
Black plate (3,1)GMC Terrain Owner Manual (Include Mex) - 2012
Vehicle Care 10-3
California Proposition
65 Warning
Most motor vehicles, including this
one, contain and/or emit chemicals
known to the State of California to
cause cancer and birth defects or
other reproductive harm. Engine
exhaust, many parts and systems,
many fluids, and some component
wear by-products contain and/or
emit these chemicals.
California Perchlorate
Materials Requirements
Certain types of automotive
applications, such as airbag
initiators, seat belt pretensioners,
and lithium batteries contained in
Remote Keyless Entry transmitters,
may contain perchlorate materials.
Special handling may be necessary.
For additional information, see
www.dtsc.ca.gov/hazardouswaste/
perchlorate.
Accessories and
Modifications
Adding non‐dealer accessories or
making modifications to the vehicle
can affect vehicle performance and
safety, including such things as
airbags, braking, stability, ride and
handling, emissions systems,
aerodynamics, durability, and
electronic systems like antilock
brakes, traction control, and stability
control. These accessories or
modifications could even cause
malfunction or damage not covered
by the vehicle warranty.
Page 287 of 428
Black plate (13,1)GMC Terrain Owner Manual (Include Mex) - 2012
Vehicle Care 10-13
It is possible that, if driving under
the best conditions, the oil life
system might indicate that an oil
change is not necessary for up to a
year. The engine oil and filter must
be changed at least once a year
and, at this time, the system must
be reset. Your dealer has trained
service people who will perform this
work and reset the system. It is also
important to check the oil regularly
over the course of an oil drain
interval and keep it at the proper
level.
If the system is ever reset
accidentally, the oil must be
changed at 5 000 km (3,000 mi)
since the last oil change.
Remember to reset the oil life
system whenever the oil is changed.How to Reset the Engine Oil
Life System
Reset the system whenever the
engine oil is changed so that the
system can calculate the next
engine oil change. To reset the
system:
1. Turn the ignition to ON/RUN,with the engine off.
2. Press the DIC MENU button to display the Vehicle
Information menu.
3. Press either the up or down arrows to view REMAINING
OIL LIFE.
4. Press the SET/CLR button until 100% is displayed.
5. Turn the key to LOCK/OFF.
Or:
1. Turn the ignition to ON/RUN with the engine off.
2. Fully press and release the accelerator pedal three times
within five seconds. The system is reset when the
CHANGE ENGINE OIL SOON
message goes off.
If the CHANGE ENGINE OIL SOON
message comes back on when the
vehicle is started, the engine oil life
system has not been reset. Repeat
the procedure.
Automatic Transmission
Fluid
How to Check Automatic
Transmission Fluid
It is not necessary to check the
transmission fluid level.
A transmission fluid leak is the only
reason for fluid loss. If a leak
occurs, take the vehicle to your
dealer and have it repaired as soon
as possible.
Page 302 of 428

Black plate (28,1)GMC Terrain Owner Manual (Include Mex) - 2012
10-28 Vehicle Care
3. With the engine off, turn theignition on, but do not start the
engine. Without applying the
regular brake, try to move the
shift lever out of P (Park) with
normal effort. If the shift lever
moves out of P (Park), contact
your dealer for service.
Ignition Transmission
Lock Check
While parked, and with the parking
brake set, try to turn the ignition to
LOCK/OFF in each shift lever
position.
.The ignition should turn to
LOCK/OFF only when the shift
lever is in P (Park).
.The ignition key should come
out only in LOCK/OFF.
Contact your dealer if service is
required.
Park Brake and P (Park)
Mechanism Check
{WARNING
When you are doing this check,
the vehicle could begin to move.
You or others could be injured
and property could be damaged.
Make sure there is room in front
of the vehicle in case it begins to
roll. Be ready to apply the regular
brake at once should the vehicle
begin to move.
Park on a fairly steep hill, with the
vehicle facing downhill. Keeping
your foot on the regular brake, set
the parking brake.
.To check the parking brake's
holding ability: With the engine
running and the transmission in
N (Neutral), slowly remove foot
pressure from the regular brake
pedal. Do this until the vehicle is
held by the parking brake only.
.To check the P (Park)
mechanism's holding ability:
With the engine running, shift to
P (Park). Then release the
parking brake followed by the
regular brake.
Contact your dealer if service is
required.
Wiper Blade Replacement
Windshield wiper blades should be
inspected for wear and cracking.
See Maintenance Schedule on
page 11‑3 for more information.
Replacement blades come in
different types and are removed in
different ways. For proper type and
length, see Maintenance
Replacement Parts on page 11‑14.
Notice: Allowing the wiper arm to
touch the windshield when no
wiper blade is installed could
damage the windshield. Any
damage that occurs would not be
covered by your warranty. Do not
allow the wiper arm to touch the
windshield.
Page 330 of 428

Black plate (56,1)GMC Terrain Owner Manual (Include Mex) - 2012
10-56 Vehicle Care
.Operating electronic devices or
being near facilities using radio
wave frequencies similar to the
TPMS could cause the TPMS
sensors to malfunction.
If the TPMS is not functioning
properly, it cannot detect or signal a
low tire condition. See your dealer
for service if the TPMS malfunction
light and DIC message comes on
and stays on.
TPMS Sensor Matching
Process
Each TPMS sensor has a unique
identification code. The identification
code needs to be matched to a new
tire/wheel position after rotating the
tires or replacing one or more of the
TPMS sensors. The TPMS sensor
matching process should also be
performed after replacing a spare
tire with a road tire containing the
TPMS sensor. The malfunction light
and the DIC message should go off
at the next ignition cycle. The
sensors are matched to the
tire/wheel positions, using a TPMS relearn tool, in the following order:
driver side front tire, passenger side
front tire, passenger side rear tire,
and driver side rear. See your
dealer for service or to purchase a
relearn tool.
There are two minutes to match the
first tire/wheel position, and
five minutes overall to match all four
tire/wheel positions. If it takes
longer, the matching process stops
and must be restarted.
The TPMS sensor matching
process is:
1. Set the parking brake.
2. Turn the ignition to ON/RUN with
the engine off.
3. Use the MENU button to select the Vehicle Information Menu in
the Driver Information Center
(DIC). Use the arrow keys to
scroll to the Tire Pressure
screen. 4. Press the SET/CLR button to
begin the sensor matching
process.
A message requesting
acceptance of the process
should display.
5. Press the SET/CLR button again to confirm the selection.
The horn sounds twice to signal
the receiver is in relearn mode
and the TIRE LEARNING
ACTIVE message displays on
the DIC screen.
6. Start with the driver side front tire.
7. Place the relearn tool against the tire sidewall, near the valve
stem. Then press the button to
activate the TPMS sensor.
A horn chirp confirms that the
sensor identification code has
been matched to this tire and
wheel position.
Page 352 of 428
Black plate (78,1)GMC Terrain Owner Manual (Include Mex) - 2012
10-78 Vehicle Care
The remote negative (−)
terminal (B) is a stud behind the
metal tab stamped with GND (−)
near the driver side strut tower.
6. The jumper cables should be in good working condition with no
loose or missing insulation. The
vehicles could be damaged if
they are not.
7. Connect the red positive (+) cable to the positive (+) terminal
on the vehicle with the dead
battery. Use a remote
positive (+) terminal if the vehicle
has one.
8. Do not let the other end touch metal. Connect it to the
positive (+) terminal of the good
battery. Use a remote
positive (+) terminal if the vehicle
has one. 9. Connect the black negative (−)
cable to the negative (−) terminal
of the good battery. Use a
remote negative (−) terminal if
the vehicle has one.
Do not let the other end touch
anything until the next step. The
other end of the negative (−)
cable does not go to the dead
battery. It goes to a heavy,
unpainted metal engine part or
to a remote negative (−) terminal
on the vehicle with the dead
battery.
10. Connect the other end of the negative (−) cable away from
the dead battery, but not near
engine parts that move.
11. Start the vehicle with the good battery and run the engine. 12. Press the unlock symbol on the
remote keyless entry
transmitter to disarm the
security system, if equipped.
13. Try to start the vehicle that had the dead battery. If it will not
start after a few tries, it needs
service.
Notice: If the jumper cables are
connected or removed in the
wrong order, electrical shorting
may occur and damage the
vehicle. The repairs would not be
covered by the vehicle warranty.
Always connect and remove the
jumper cables in the correct
order, making sure that the
cables do not touch each other or
other metal.
Page 354 of 428
Black plate (80,1)GMC Terrain Owner Manual (Include Mex) - 2012
10-80 Vehicle Care
Recreational Vehicle
Towing
Recreational vehicle towing means
towing the vehicle behind another
vehicle–such as behind a motor
home. The two most common types
of recreational vehicle towing are
known as dinghy towing and dolly
towing. Dinghy towing is towing the
vehicle with all four wheels on the
ground. Dolly towing is towing the
vehicle with two wheels on the
ground and two wheels up on a
device known as a dolly.
Here are some important things to
consider before recreational vehicle
towing:
.What is the towing capacity of
the towing vehicle? Be sure to
read the tow vehicle
manufacturer's
recommendations.
.What is the distance that will be
travelled? Some vehicles have
restrictions on how far and how
long they can tow.
.Is the proper towing equipment
going to be used? See your
dealer or trailering professional
for additional advice and
equipment recommendations.
.Is the vehicle ready to be
towed? Just as preparing the
vehicle for a long trip, make sure
the vehicle is prepared to be
towed.
Dinghy Towing
Front-wheel‐drive and
all-wheel-drive vehicles may be
dinghy towed from the front. These
vehicles can also be towed by
placing them on a platform trailer
with all four wheels off of the
ground. For other towing options,
see “Dolly Towing” following in this
section.
For vehicles being dinghy towed,
the vehicle should be run at the
beginning of each day and at each
RV fuel stop for about five minutes.
This will ensure proper lubrication of
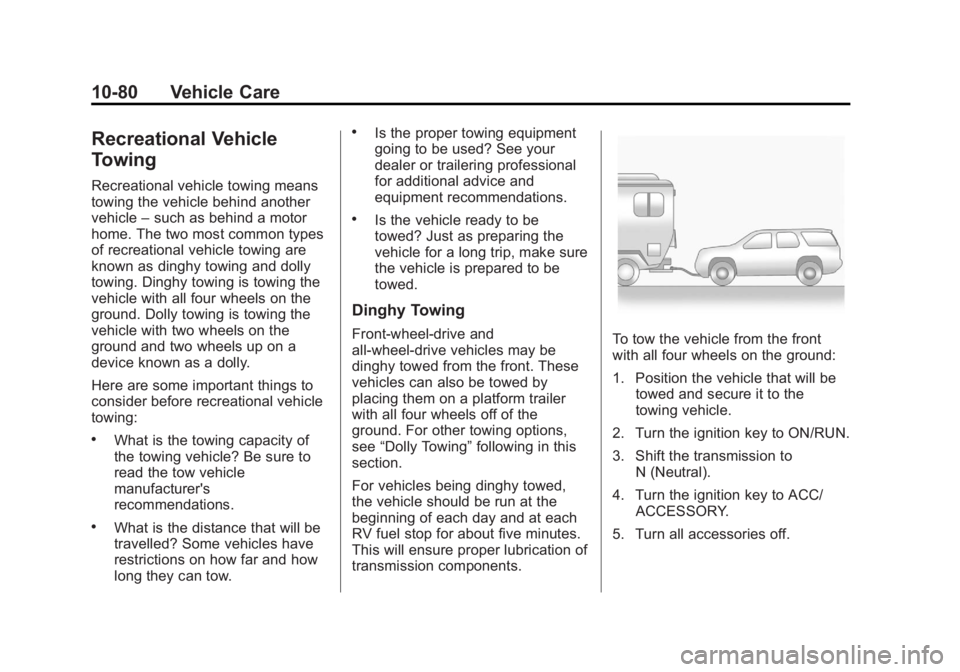
transmission components.To tow the vehicle from the front
with all four wheels on the ground:
1. Position the vehicle that will be towed and secure it to the
towing vehicle.
2. Turn the ignition key to ON/RUN.
3. Shift the transmission to N (Neutral).
4. Turn the ignition key to ACC/ ACCESSORY.
5. Turn all accessories off.