headlamp GMC TERRAIN 2012 Owner's Manual
[x] Cancel search | Manufacturer: GMC, Model Year: 2012, Model line: TERRAIN, Model: GMC TERRAIN 2012Pages: 428, PDF Size: 5.45 MB
Page 1 of 428
Black plate (1,1)GMC Terrain Owner Manual (Include Mex) - 2012
2012 GMC Terrain Owner ManualM
In Brief. . . . . . . . . . . . . . . . . . . . . . . . 1-1
Instrument Panel . . . . . . . . . . . . . . 1-2
Initial Drive Information . . . . . . . . 1-4
Vehicle Features . . . . . . . . . . . . . 1-19
Performance and Maintenance . . . . . . . . . . . . . . . . 1-24
Keys, Doors, and Windows . . . . . . . . . . . . . . . . . . . . 2-1
Keys and Locks . . . . . . . . . . . . . . . 2-2
Doors . . . . . . . . . . . . . . . . . . . . . . . . . . 2-9
Vehicle Security . . . . . . . . . . . . . . 2-13
Exterior Mirrors . . . . . . . . . . . . . . . 2-15
Interior Mirrors . . . . . . . . . . . . . . . . 2-17
Windows . . . . . . . . . . . . . . . . . . . . . 2-18
Roof . . . . . . . . . . . . . . . . . . . . . . . . . . 2-20
Seats and Restraints . . . . . . . . . 3-1
Head Restraints . . . . . . . . . . . . . . . 3-2
Front Seats . . . . . . . . . . . . . . . . . . . . 3-3
Rear Seats . . . . . . . . . . . . . . . . . . . 3-10
Safety Belts . . . . . . . . . . . . . . . . . . 3-12
Airbag System . . . . . . . . . . . . . . . . 3-21
Child Restraints . . . . . . . . . . . . . . 3-35 Storage
. . . . . . . . . . . . . . . . . . . . . . . 4-1
Storage Compartments . . . . . . . . 4-1
Additional Storage Features . . . 4-2
Roof Rack System . . . . . . . . . . . . . 4-2
Instruments and Controls . . . . 5-1
Controls . . . . . . . . . . . . . . . . . . . . . . . 5-2
Warning Lights, Gauges, and
Indicators . . . . . . . . . . . . . . . . . . . . 5-7
Information Displays . . . . . . . . . . 5-23
Vehicle Messages . . . . . . . . . . . . 5-26
Vehicle Personalization . . . . . . . 5-33
Lighting . . . . . . . . . . . . . . . . . . . . . . . 6-1
Exterior Lighting . . . . . . . . . . . . . . . 6-1
Interior Lighting . . . . . . . . . . . . . . . . 6-4
Lighting Features . . . . . . . . . . . . . . 6-5
Infotainment System . . . . . . . . . 7-1
Introduction . . . . . . . . . . . . . . . . . . . . 7-1
Radio . . . . . . . . . . . . . . . . . . . . . . . . . . 7-8
Audio Players . . . . . . . . . . . . . . . . 7-14
Rear Seat Infotainment . . . . . . . 7-22
Phone . . . . . . . . . . . . . . . . . . . . . . . . 7-34
Trademarks and License Agreements . . . . . . . . . . . . . . . . . 7-46 Climate Controls
. . . . . . . . . . . . . 8-1
Climate Control Systems . . . . . . 8-1
Air Vents . . . . . . . . . . . . . . . . . . . . . . . 8-5
Maintenance . . . . . . . . . . . . . . . . . . . 8-6
Driving and Operating . . . . . . . . 9-1
Driving Information . . . . . . . . . . . . . 9-2
Starting and Operating . . . . . . . 9-20
Engine Exhaust . . . . . . . . . . . . . . 9-28
Automatic Transmission . . . . . . 9-29
Drive Systems . . . . . . . . . . . . . . . . 9-32
Brakes . . . . . . . . . . . . . . . . . . . . . . . 9-32
Ride Control Systems . . . . . . . . 9-35
Cruise Control . . . . . . . . . . . . . . . . 9-38
Object Detection Systems . . . . 9-40
Fuel . . . . . . . . . . . . . . . . . . . . . . . . . . 9-51
Towing . . . . . . . . . . . . . . . . . . . . . . . 9-56
Conversions and Add-Ons . . . 9-64
Vehicle Care . . . . . . . . . . . . . . . . . 10-1
General Information . . . . . . . . . . 10-2
Vehicle Checks . . . . . . . . . . . . . . . 10-4
Headlamp Aiming . . . . . . . . . . . 10-30
Bulb Replacement . . . . . . . . . . 10-32
Electrical System . . . . . . . . . . . . 10-38
Wheels and Tires . . . . . . . . . . . 10-44
Page 5 of 428
Black plate (5,1)GMC Terrain Owner Manual (Include Mex) - 2012
Introduction v
Vehicle Symbol Chart
Here are some additional symbols
that may be found on the vehicle
and what they mean. For more
information on the symbol, refer to
the Index.
9:Airbag Readiness Light
#:Air Conditioning
!:Antilock Brake System (ABS)
$:Brake System Warning Light
":Charging System
I:Cruise Control
B: Engine Coolant Temperature
O:Exterior Lamps
#:Fog Lamps
.: Fuel Gauge
+:Fuses
3: Headlamp High/Low-Beam
Changer
j: LATCH System Child
Restraints
*: Malfunction Indicator Lamp
::Oil Pressure
J:OnStar®
}: Power
/:Remote Vehicle Start
>:Safety Belt Reminders
%: Steering Wheel Controls
7:Tire Pressure Monitor
d:Traction Control/StabiliTrak®
M:Windshield Washer Fluid
Page 19 of 428
Black plate (13,1)GMC Terrain Owner Manual (Include Mex) - 2012
In Brief 1-13
Mirror Adjustment
Exterior
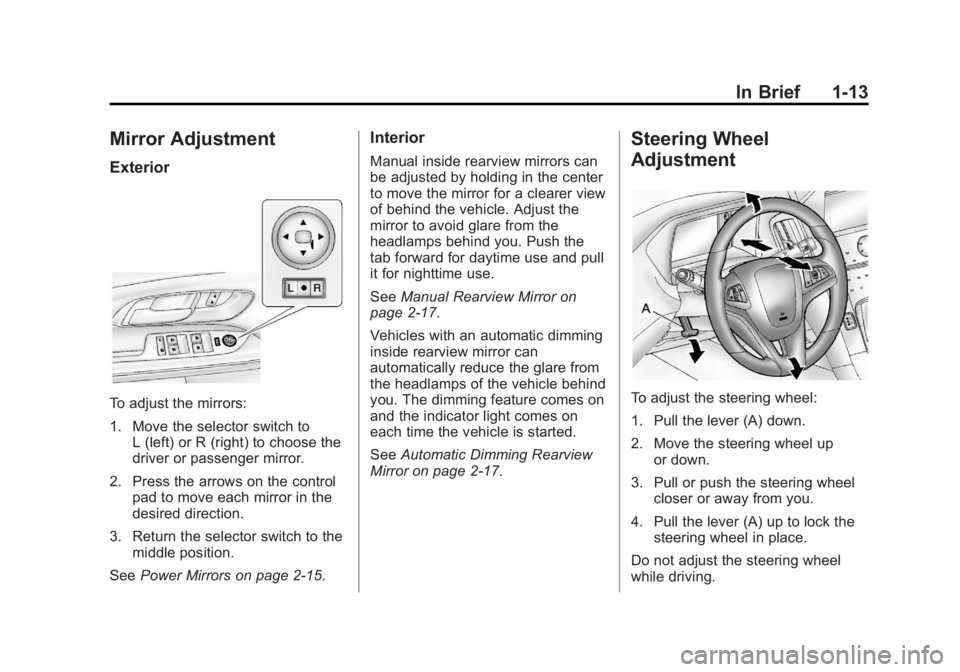
To adjust the mirrors:
1. Move the selector switch toL (left) or R (right) to choose the
driver or passenger mirror.
2. Press the arrows on the control pad to move each mirror in the
desired direction.
3. Return the selector switch to the middle position.
See Power Mirrors on page 2‑15.
Interior
Manual inside rearview mirrors can
be adjusted by holding in the center
to move the mirror for a clearer view
of behind the vehicle. Adjust the
mirror to avoid glare from the
headlamps behind you. Push the
tab forward for daytime use and pull
it for nighttime use.
SeeManual Rearview Mirror on
page 2‑17.
Vehicles with an automatic dimming
inside rearview mirror can
automatically reduce the glare from
the headlamps of the vehicle behind
you. The dimming feature comes on
and the indicator light comes on
each time the vehicle is started.
See Automatic Dimming Rearview
Mirror on page 2‑17.
Steering Wheel
Adjustment
To adjust the steering wheel:
1. Pull the lever (A) down.
2. Move the steering wheel up or down.
3. Pull or push the steering wheel closer or away from you.
4. Pull the lever (A) up to lock the steering wheel in place.
Do not adjust the steering wheel
while driving.
Page 20 of 428
Black plate (14,1)GMC Terrain Owner Manual (Include Mex) - 2012
1-14 In Brief
Interior Lighting
Reading Lamps
These lamps are located on the
overhead console. These lamps
come on automatically when any
door is opened.
For manual operation, press the
button next to each lamp to turn it
on or off.
Center Dome Lamps
There are front and rear dome
lamps.
The dome lamp controls are located
in the overhead console. To change
the settings, press the following:
*:Turns the lamp off, even when
a door is open.
1: The lamps come on
automatically when a door is
opened.
+: Turns the dome lamps on.
The dome lamps can also be turned
on and off by pressing the buttons
next to the lamps.
For more information on interior
lighting, See Instrument Panel
Illumination Control on page 6‑4.
Exterior Lighting
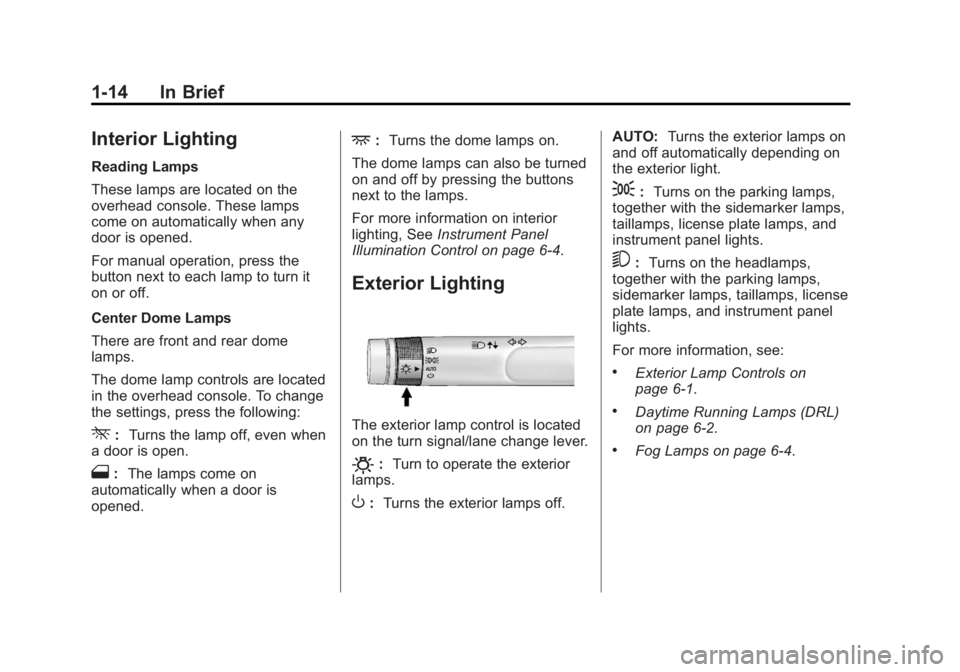
The exterior lamp control is located
on the turn signal/lane change lever.
O: Turn to operate the exterior
lamps.
O: Turns the exterior lamps off. AUTO:
Turns the exterior lamps on
and off automatically depending on
the exterior light.
;: Turns on the parking lamps,
together with the sidemarker lamps,
taillamps, license plate lamps, and
instrument panel lights.
5: Turns on the headlamps,
together with the parking lamps,
sidemarker lamps, taillamps, license
plate lamps, and instrument panel
lights.
For more information, see:
.Exterior Lamp Controls on
page 6‑1.
.Daytime Running Lamps (DRL)
on page 6‑2.
.Fog Lamps on page 6‑4.
Page 49 of 428
Black plate (17,1)GMC Terrain Owner Manual (Include Mex) - 2012
Keys, Doors, and Windows 2-17
Park Tilt Mirrors
If the vehicle is equipped with
memory mirrors, there is an option
to have the mirrors tilt down, when
in R (Reverse), to more easily see
the ground near the vehicle.
When the vehicle is shifted to
R (Reverse), both the driver and
passenger mirrors will tilt downward.
They will return to their previous
position when the vehicle is shifted
out of R (Reverse), the ignition is
turned to OFF, or the vehicle is left
in R (Reverse) for an extended
period of time.
This feature can be turned on or off.
SeeVehicle Personalization on
page 5‑33.
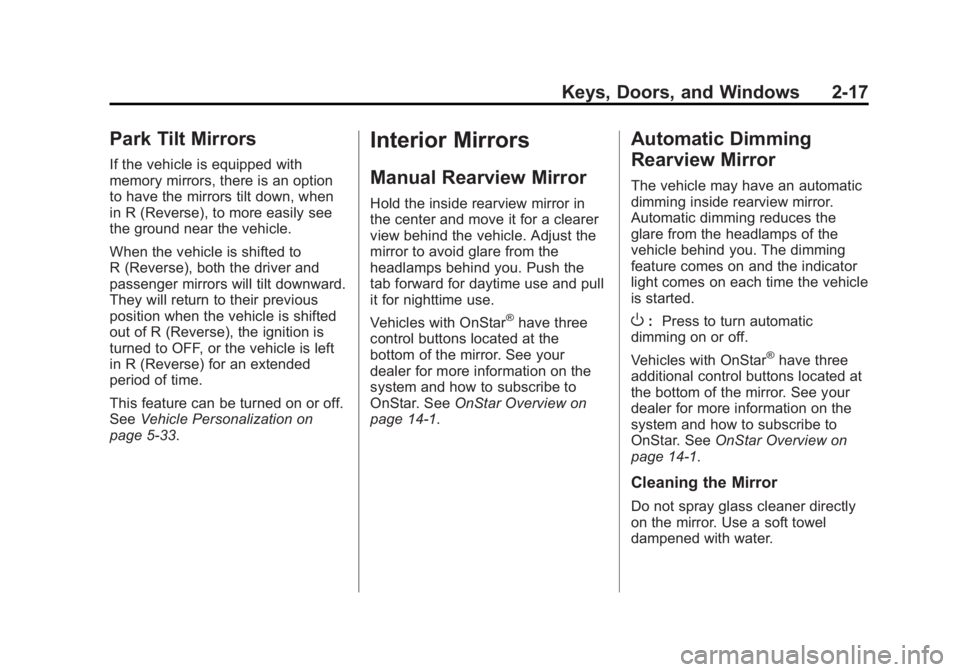
Interior Mirrors
Manual Rearview Mirror
Hold the inside rearview mirror in
the center and move it for a clearer
view behind the vehicle. Adjust the
mirror to avoid glare from the
headlamps behind you. Push the
tab forward for daytime use and pull
it for nighttime use.
Vehicles with OnStar
®have three
control buttons located at the
bottom of the mirror. See your
dealer for more information on the
system and how to subscribe to
OnStar. See OnStar Overview on
page 14‑1.
Automatic Dimming
Rearview Mirror
The vehicle may have an automatic
dimming inside rearview mirror.
Automatic dimming reduces the
glare from the headlamps of the
vehicle behind you. The dimming
feature comes on and the indicator
light comes on each time the vehicle
is started.
O: Press to turn automatic
dimming on or off.
Vehicles with OnStar
®have three
additional control buttons located at
the bottom of the mirror. See your
dealer for more information on the
system and how to subscribe to
OnStar. See OnStar Overview on
page 14‑1.
Cleaning the Mirror
Do not spray glass cleaner directly
on the mirror. Use a soft towel
dampened with water.
Page 136 of 428

Black plate (22,1)GMC Terrain Owner Manual (Include Mex) - 2012
5-22 Instruments and Controls
High-Beam On Light
The high‐beam on light comes on
when the high-beam headlamps are
in use.
SeeHeadlamp High/Low-Beam
Changer on page 6‑2 for more
information.
Front Fog Lamp Light
The front fog lamp light comes on
when the fog lamps are in use.
The light goes out when the fog
lamps are turned off. See Fog
Lamps on page 6‑4 for more
information.
Lamps On Reminder
For vehicles with the lamps on
reminder light, it comes on when the
lights are in use.
Cruise Control Light
The cruise control light is white
whenever the cruise control is set,
and turns green when the cruise
control is active.
The light turns off when the cruise
control is turned off. See Cruise
Control on page 9‑38 for more
information.
Page 153 of 428

Black plate (1,1)GMC Terrain Owner Manual (Include Mex) - 2012
Lighting 6-1
Lighting
Exterior Lighting
Exterior Lamp Controls . . . . . . . . 6-1
Headlamp High/Low-BeamChanger . . . . . . . . . . . . . . . . . . . . . 6-2
Flash-to-Pass . . . . . . . . . . . . . . . . . 6-2
Daytime Running Lamps (DRL) . . . . . . . . . . . . . . . . 6-2
Automatic Headlamp System . . . . . . . . . . . . . . . . . . . . . . 6-3
Hazard Warning Flashers . . . . . 6-3
Turn and Lane-Change Signals . . . . . . . . . . . . . . . . . . . . . . 6-3
Fog Lamps . . . . . . . . . . . . . . . . . . . . 6-4
Interior Lighting
Instrument Panel Illumination Control . . . . . . . . . . . . . . . . . . . . . . 6-4
Dome Lamps . . . . . . . . . . . . . . . . . 6-4
Reading Lamps . . . . . . . . . . . . . . . 6-5
Lighting Features
Entry Lighting . . . . . . . . . . . . . . . . . 6-5
Battery Load Management . . . . 6-5
Exterior Lighting
Exterior Lamp Controls
The exterior lamp control is on the
turn signal/lane change lever.
O(Exterior Lamp Control):
Operates the exterior lamps. Turn to
one of the following positions:
O(Off): Briefly turn to this position
to turn the automatic light control off
or on again. AUTO (Automatic Headlamps):
Turns the exterior lamps on and off
automatically depending on the
exterior light. The vehicle will default
to the AUTO setting when it is first
started.
;(Parking Lamps):
Turns on the
parking lamps together with the
following:
.Sidemarker Lamps
.Taillamps
.License Plate Lamps
.Instrument Panel Lights
5(Headlamps): Turns on the
headlamps, together with the
previously listed lamps and lights.
Page 154 of 428

Black plate (2,1)GMC Terrain Owner Manual (Include Mex) - 2012
6-2 Lighting
Headlamp High/
Low-Beam Changer
2 3
Headlamp High/Low‐Beam
Changer: Push the turn signal/lane
change lever away from you and
release, to turn the high beams on.
To return to low beams, push the
lever again or pull it toward you and
release.
This indicator light turns on in the
instrument panel cluster when the
high‐beam headlamps are on.
Flash-to-Pass
The flash‐to‐pass feature works with
the low beams or Daytime Running
Lamps (DRL) on or off.
To flash the high beams, pull the
turn signal/lane change lever all the
way toward you, then release it.
Daytime Running
Lamps (DRL)
Daytime Running Lamps (DRL)
system makes the low-beam
headlamps come on at a reduced
brightness in daylight when the
following conditions are met:
.The ignition is on.
.The exterior lamp band is in the
automatic position.
.The transmission is not in
P (Park).
.The light sensor determines it is
daytime.
.The parking brake is released. Fully functional Daytime Running
Lamps (DRL) are required on all
vehicles first sold in Canada.
When the DRL are on the taillamps,
sidemarker, instrument panel lights
and other lamps will not be on. The
instrument panel cluster will be lit.
When the exterior lamp band is
turned to the headlamp position, the
low-beam headlamps come on. The
other lamps that come on with the
headlamps will also come on.
To idle your vehicle with the DRL
off, move the shift lever to P (Park).
The DRL will stay off until the shift
lever is moved out of the P (Park)
position.
The regular headlamp system
should be turned on when needed.
Page 155 of 428
Black plate (3,1)GMC Terrain Owner Manual (Include Mex) - 2012
Lighting 6-3
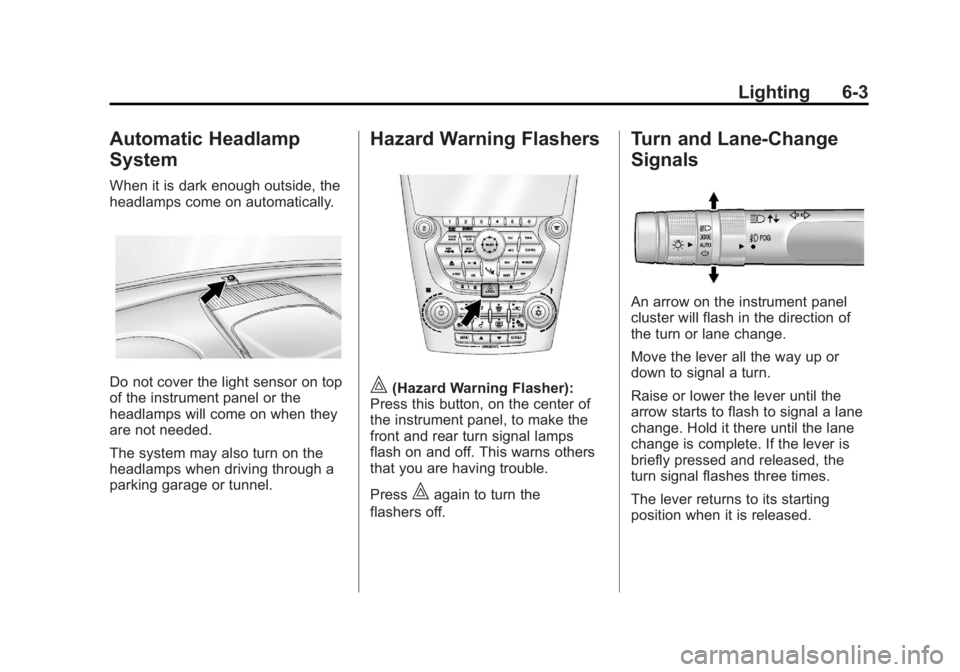
Automatic Headlamp
System
When it is dark enough outside, the
headlamps come on automatically.
Do not cover the light sensor on top
of the instrument panel or the
headlamps will come on when they
are not needed.
The system may also turn on the
headlamps when driving through a
parking garage or tunnel.
Hazard Warning Flashers
|(Hazard Warning Flasher):
Press this button, on the center of
the instrument panel, to make the
front and rear turn signal lamps
flash on and off. This warns others
that you are having trouble.
Press
|again to turn the
flashers off.
Turn and Lane-Change
Signals
An arrow on the instrument panel
cluster will flash in the direction of
the turn or lane change.
Move the lever all the way up or
down to signal a turn.
Raise or lower the lever until the
arrow starts to flash to signal a lane
change. Hold it there until the lane
change is complete. If the lever is
briefly pressed and released, the
turn signal flashes three times.
The lever returns to its starting
position when it is released.
Page 156 of 428

Black plate (4,1)GMC Terrain Owner Manual (Include Mex) - 2012
6-4 Lighting
If after signaling a turn or a lane
change the arrows flash rapidly or
do not come on, a signal bulb may
be burned out.
Have the bulbs replaced. If the bulb
is not burned out, check the fuse;
seeFuses on page 10‑38 for more
information.
Fog Lamps
The fog lamps control is located on
the turn/lane change lever.
Use the fog lamps for better vision
in foggy or misty conditions.
#FOG (Fog Lamps): Turn the fog
lamp band on the lever to
#and
release it, to turn the fog lamps on
or off. The band will return to its
original position.
The parking lamps or low‐beam
headlamps must be on to use the
fog lamps.
The fog lamps will go off whenever
the high-beam headlamps are
turned on. When the high‐beam
headlamps are turned off, the fog
lamps will come on again.
Some localities have laws that
require the headlamps to be on
along with the fog lamps.
Interior Lighting
Instrument Panel
Illumination Control
This control is located on the
instrument panel, to the left of the
steering column.
D(Instrument Panel
Brightness): Turn clockwise or
counterclockwise to brighten or dim
the lights.
Dome Lamps
There are front and rear dome
lamps.
The dome lamp controls are located
in the overhead console. To change
the settings, press the following:
*(Dome Lamp Override): Turns
the lamps off, even when a door
is open.