key GMC TERRAIN 2013 Owner's Guide
[x] Cancel search | Manufacturer: GMC, Model Year: 2013, Model line: TERRAIN, Model: GMC TERRAIN 2013Pages: 364, PDF Size: 5.26 MB
Page 43 of 364

Black plate (15,1)GMC Terrain/Terrain Denali Owner Manual - 2013 - crc 1st edition - 5/8/12
Keys, Doors, and Windows 2-15
Driving with the Blind Spot
Mirror
Actual Mirror View1. When the approaching vehicle is
a long distance away, the image
in the main mirror is small and
near the inboard edge of the
mirror.
2. As the vehicle gets closer, the image in the main mirror gets
larger and moves outboard.
3. As the vehicle enters the blind zone, the image transitions from
the main mirror to the blind spot
mirror.
4. When the vehicle is in the blind zone, the image only appears in
the blind spot mirror.
Using the Outside Mirror with
the Blind Spot Mirror
1. Set the main mirror so that theside of the vehicle can just be
seen and the blind spot mirror
has an unobstructed view.
2. When checking for traffic or before changing a lane, look at
the main driver/passenger side
mirror to observe traffic in the
adjacent lane, behind your vehicle. Check the blind spot
mirror for a vehicle in the blind
zone. Then, glance over your
shoulder to double check before
moving slowly into the
adjacent lane.
Park Tilt Mirrors
If the vehicle is equipped with
memory mirrors, there is an option
to have the mirrors tilt down, when
in R (Reverse), to more easily see
the ground near the vehicle.
When the vehicle is shifted to
R (Reverse), both the driver and
passenger mirrors will tilt downward.
They will return to their previous
position when the vehicle is shifted
out of R (Reverse), the ignition is
turned to OFF, or the vehicle is left
in R (Reverse) for an extended
period of time.
This feature can be turned on or off.
See
Vehicle Personalization on
page 5‑31.
Page 44 of 364
Black plate (16,1)GMC Terrain/Terrain Denali Owner Manual - 2013 - crc 1st edition - 5/8/12
2-16 Keys, Doors, and Windows
Interior Mirrors
Manual Rearview Mirror
Hold the inside rearview mirror in
the center and move it for a clearer
view behind the vehicle. Adjust the
mirror to avoid glare from the
headlamps behind you. Push the
tab forward for daytime use and pull
it for nighttime use.
Vehicles with OnStar
®have three
control buttons located at the
bottom of the mirror. See your
dealer for more information on the
system and how to subscribe to
OnStar. See OnStar Overview on
page 14‑1.
Automatic Dimming
Rearview Mirror
The vehicle may have an automatic
dimming inside rearview mirror.
Automatic dimming reduces the
glare from the headlamps of the
vehicle behind you. The dimming
feature comes on and the indicator
light comes on each time the vehicle
is started.
O(On/Off): Press to turn automatic
dimming on or off.
Vehicles with OnStar® have three
additional control buttons located at
the bottom of the mirror. See your
dealer for more information on the
system and how to subscribe to
OnStar. See OnStar Overview on
page 14‑1.
Cleaning the Mirror
Do not spray glass cleaner directly
on the mirror. Use a soft towel
dampened with water.
Windows
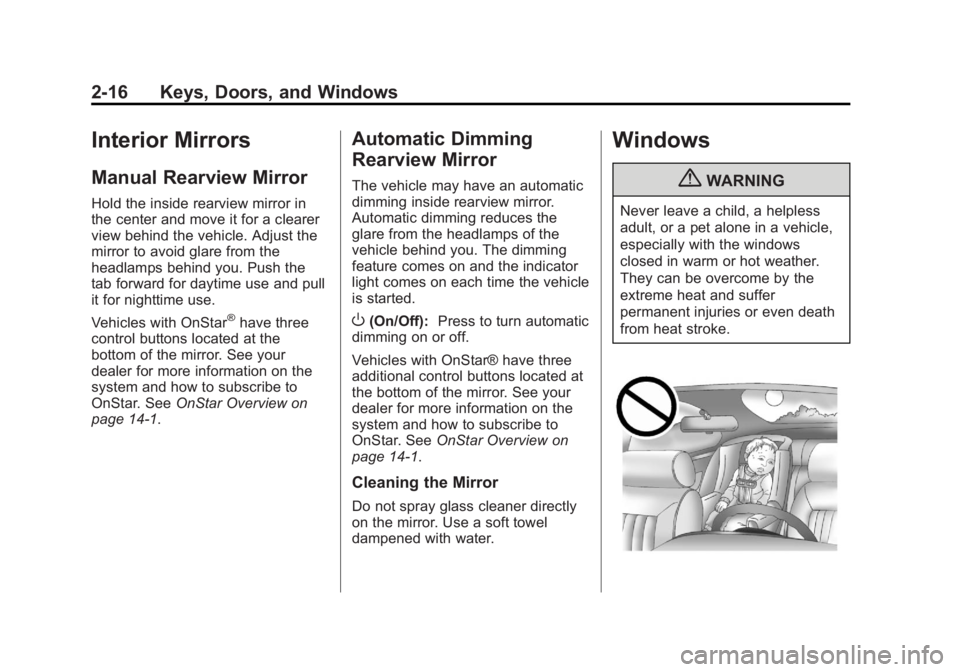
{WARNING
Never leave a child, a helpless
adult, or a pet alone in a vehicle,
especially with the windows
closed in warm or hot weather.
They can be overcome by the
extreme heat and suffer
permanent injuries or even death
from heat stroke.
Page 45 of 364
Black plate (17,1)GMC Terrain/Terrain Denali Owner Manual - 2013 - crc 1st edition - 5/8/12
Keys, Doors, and Windows 2-17
The vehicle aerodynamics are
designed to improve fuel economy
performance. This may result in a
pulsing sound when either rear
window is down and the front
windows are up. To reduce the
sound, open either a front window
or the sunroof (if equipped).
Power Windows
{WARNING
Children could be seriously
injured or killed if caught in the
path of a closing window. Never
leave keys in a vehicle with
children. When there are children
in the rear seat, use the window
lockout button to prevent
operation of the windows. See
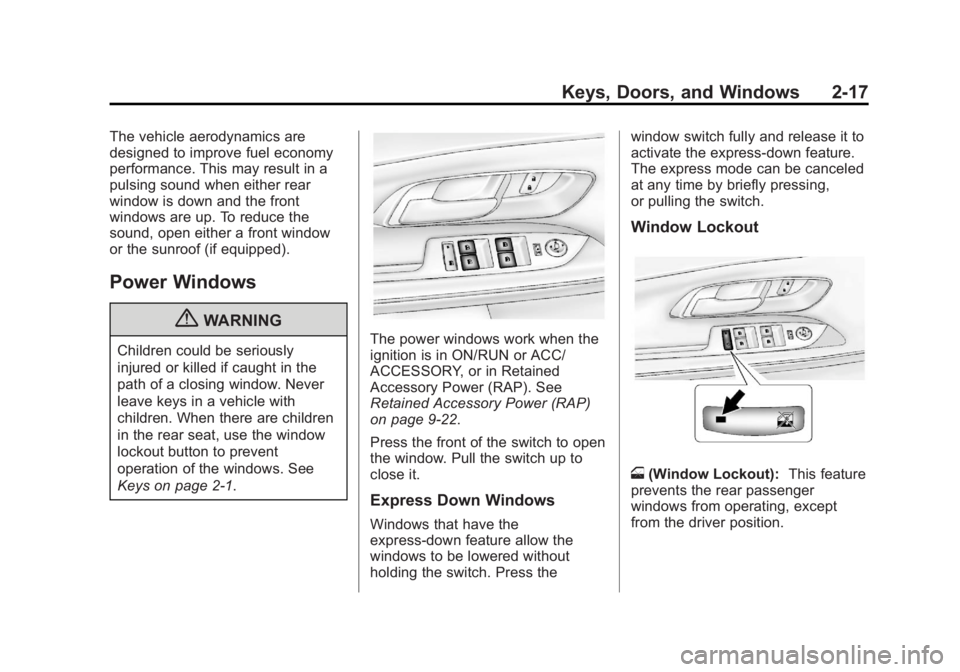
Keys on page 2‑1.The power windows work when the
ignition is in ON/RUN or ACC/
ACCESSORY, or in Retained
Accessory Power (RAP). See
Retained Accessory Power (RAP)
on page 9‑22.
Press the front of the switch to open
the window. Pull the switch up to
close it.
Express Down Windows
Windows that have the
express-down feature allow the
windows to be lowered without
holding the switch. Press thewindow switch fully and release it to
activate the express-down feature.
The express mode can be canceled
at any time by briefly pressing,
or pulling the switch.
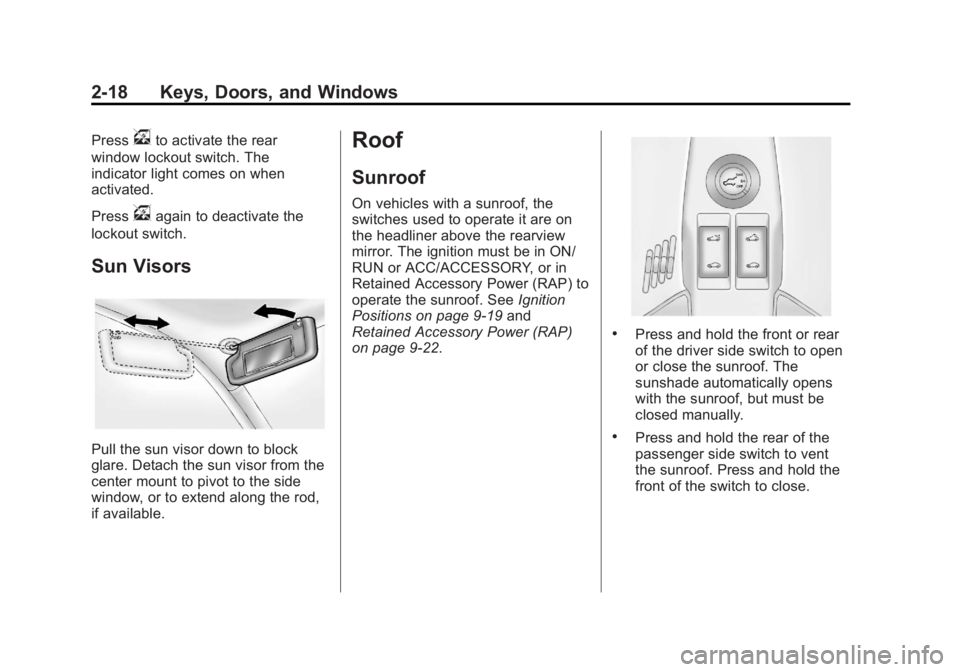
Window Lockout
o
(Window Lockout): This feature
prevents the rear passenger
windows from operating, except
from the driver position.
Page 46 of 364
Black plate (18,1)GMC Terrain/Terrain Denali Owner Manual - 2013 - crc 1st edition - 5/8/12
2-18 Keys, Doors, and Windows
Pressvto activate the rear
window lockout switch. The
indicator light comes on when
activated.
Press
vagain to deactivate the
lockout switch.
Sun Visors
Pull the sun visor down to block
glare. Detach the sun visor from the
center mount to pivot to the side
window, or to extend along the rod,
if available.
Roof
Sunroof
On vehicles with a sunroof, the
switches used to operate it are on
the headliner above the rearview
mirror. The ignition must be in ON/
RUN or ACC/ACCESSORY, or in
Retained Accessory Power (RAP) to
operate the sunroof. See Ignition
Positions on page 9‑19 and
Retained Accessory Power (RAP)
on page 9‑22.
.Press and hold the front or rear
of the driver side switch to open
or close the sunroof. The
sunshade automatically opens
with the sunroof, but must be
closed manually.
.Press and hold the rear of the
passenger side switch to vent
the sunroof. Press and hold the
front of the switch to close.
Page 47 of 364
Black plate (19,1)GMC Terrain/Terrain Denali Owner Manual - 2013 - crc 1st edition - 5/8/12
Keys, Doors, and Windows 2-19
Express-open/Express-close
Press and release the front or rear
of the driver side switch to
express-open or express-close the
sunroof.
Anti-Pinch Feature
If an object is in the path of the
sunroof when it is closing, the
anti-pinch feature detects the object
and stops the sunroof from closing
at the point of the obstruction. The
sunroof then returns to the full-open
position.
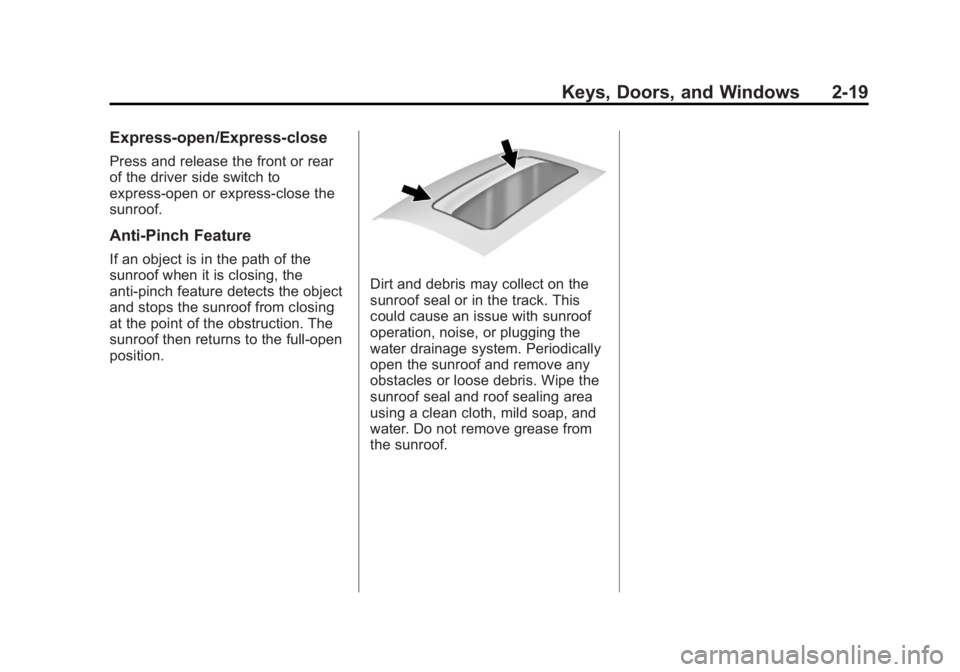
Dirt and debris may collect on the
sunroof seal or in the track. This
could cause an issue with sunroof
operation, noise, or plugging the
water drainage system. Periodically
open the sunroof and remove any
obstacles or loose debris. Wipe the
sunroof seal and roof sealing area
using a clean cloth, mild soap, and
water. Do not remove grease from
the sunroof.
Page 48 of 364

Black plate (20,1)GMC Terrain/Terrain Denali Owner Manual - 2013 - crc 1st edition - 5/8/12
2-20 Keys, Doors, and Windows
2NOTES
Page 55 of 364
Black plate (7,1)GMC Terrain/Terrain Denali Owner Manual - 2013 - crc 1st edition - 5/8/12
Seats and Restraints 3-7
Memory Seats
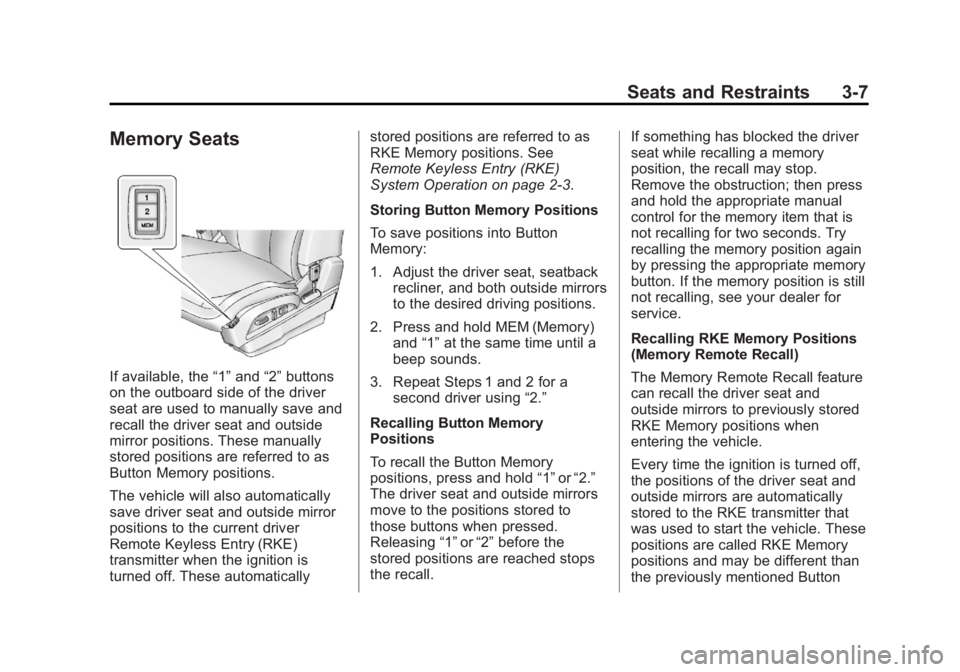
If available, the“1”and “2”buttons
on the outboard side of the driver
seat are used to manually save and
recall the driver seat and outside
mirror positions. These manually
stored positions are referred to as
Button Memory positions.
The vehicle will also automatically
save driver seat and outside mirror
positions to the current driver
Remote Keyless Entry (RKE)
transmitter when the ignition is
turned off. These automatically stored positions are referred to as
RKE Memory positions. See
Remote Keyless Entry (RKE)
System Operation on page 2‑3.
Storing Button Memory Positions
To save positions into Button
Memory:
1. Adjust the driver seat, seatback
recliner, and both outside mirrors
to the desired driving positions.
2. Press and hold MEM (Memory) and “1”at the same time until a
beep sounds.
3. Repeat Steps 1 and 2 for a second driver using “2.”
Recalling Button Memory
Positions
To recall the Button Memory
positions, press and hold “1”or“2.”
The driver seat and outside mirrors
move to the positions stored to
those buttons when pressed.
Releasing “1”or“2” before the
stored positions are reached stops
the recall. If something has blocked the driver
seat while recalling a memory
position, the recall may stop.
Remove the obstruction; then press
and hold the appropriate manual
control for the memory item that is
not recalling for two seconds. Try
recalling the memory position again
by pressing the appropriate memory
button. If the memory position is still
not recalling, see your dealer for
service.
Recalling RKE Memory Positions
(Memory Remote Recall)
The Memory Remote Recall feature
can recall the driver seat and
outside mirrors to previously stored
RKE Memory positions when
entering the vehicle.
Every time the ignition is turned off,
the positions of the driver seat and
outside mirrors are automatically
stored to the RKE transmitter that
was used to start the vehicle. These
positions are called RKE Memory
positions and may be different than
the previously mentioned Button
Page 65 of 364
Black plate (17,1)GMC Terrain/Terrain Denali Owner Manual - 2013 - crc 1st edition - 5/8/12
Seats and Restraints 3-17
To remove and store the comfort
guide, squeeze the belt edges
together so that the safety belt can
be removed from the guide. Slide
the guide back into its storage
pocket located on the side of the
seatback.
Safety Belt Use During
Pregnancy
Safety belts work for everyone,
including pregnant women. Like all
occupants, they are more likely to
be seriously injured if they do not
wear safety belts.
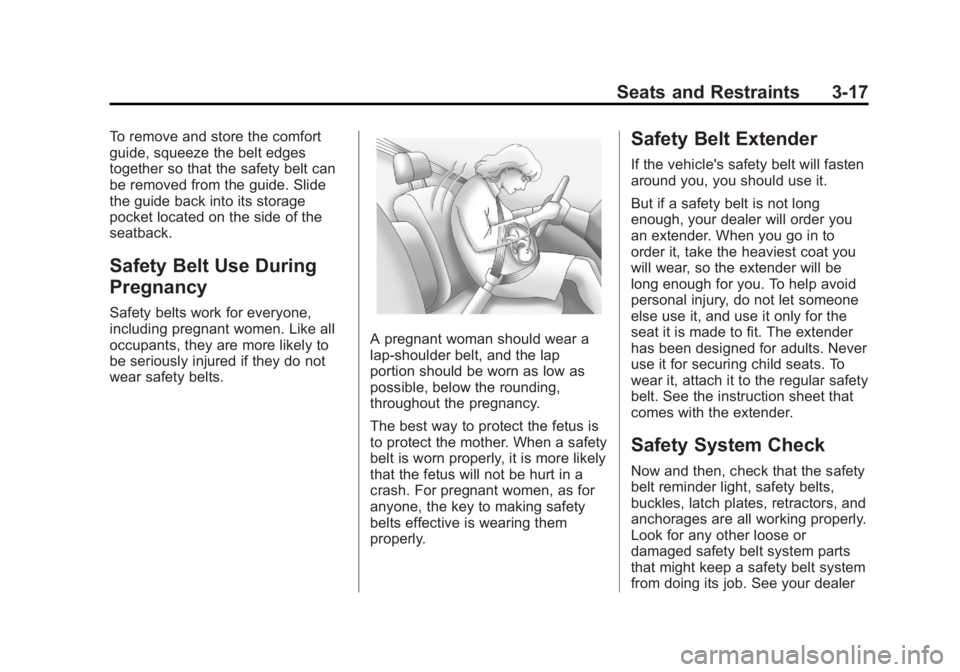
A pregnant woman should wear a
lap-shoulder belt, and the lap
portion should be worn as low as
possible, below the rounding,
throughout the pregnancy.
The best way to protect the fetus is
to protect the mother. When a safety
belt is worn properly, it is more likely
that the fetus will not be hurt in a
crash. For pregnant women, as for
anyone, the key to making safety
belts effective is wearing them
properly.
Safety Belt Extender
If the vehicle's safety belt will fasten
around you, you should use it.
But if a safety belt is not long
enough, your dealer will order you
an extender. When you go in to
order it, take the heaviest coat you
will wear, so the extender will be
long enough for you. To help avoid
personal injury, do not let someone
else use it, and use it only for the
seat it is made to fit. The extender
has been designed for adults. Never
use it for securing child seats. To
wear it, attach it to the regular safety
belt. See the instruction sheet that
comes with the extender.
Safety System Check
Now and then, check that the safety
belt reminder light, safety belts,
buckles, latch plates, retractors, and
anchorages are all working properly.
Look for any other loose or
damaged safety belt system parts
that might keep a safety belt system
from doing its job. See your dealer
Page 105 of 364
Black plate (1,1)GMC Terrain/Terrain Denali Owner Manual - 2013 - crc 1st edition - 5/8/12
Instruments and Controls 5-1
Instruments and
Controls
Controls
Steering Wheel Adjustment . . . 5-2
Steering Wheel Controls . . . . . . 5-2
Horn . . . . . . . . . . . . . . . . . . . . . . . . . . 5-3
Windshield Wiper/Washer . . . . . 5-3
Rear Window Wiper/Washer . . . . . . . . . . . . . . . . . . . . . . 5-4
Compass . . . . . . . . . . . . . . . . . . . . . 5-5
Power Outlets . . . . . . . . . . . . . . . . . 5-5
Warning Lights, Gauges, and
Indicators
Warning Lights, Gauges, and Indicators . . . . . . . . . . . . . . . . . . . . 5-6
Instrument Cluster . . . . . . . . . . . . 5-7
Speedometer . . . . . . . . . . . . . . . . . 5-8
Odometer . . . . . . . . . . . . . . . . . . . . . 5-8
Tachometer . . . . . . . . . . . . . . . . . . . 5-8
Fuel Gauge . . . . . . . . . . . . . . . . . . . 5-8
Engine Coolant Temperature Gauge . . . . . . . . . . . . . . . . . . . . . . . 5-9
Safety Belt Reminders . . . . . . . 5-10
Airbag Readiness Light . . . . . . 5-10 Passenger Airbag Status
Indicator . . . . . . . . . . . . . . . . . . . . 5-11
Charging System Light . . . . . . 5-12
Malfunction Indicator Lamp . . . . . . . . . . . . . 5-12
Brake System Warning Light . . . . . . . . . . . . . . . . . . . . . . . 5-14
Antilock Brake System (ABS) Warning Light . . . . . . . . . . . . . . 5-15
Lane Departure Warning (LDW) Light . . . . . . . . . . . . . . . . 5-16
Forward Collision Alert (FCA) Warning Light . . . . . . . . . . . . . . 5-16
Traction Off Light . . . . . . . . . . . . 5-16
StabiliTrak
®OFF Light . . . . . . . 5-17
Traction Control System (TCS)/StabiliTrak
®Light . . . . 5-17
Tire Pressure Light . . . . . . . . . . 5-18
Engine Oil Pressure Light . . . . 5-18
Fuel Economy Light . . . . . . . . . 5-19
Low Fuel Warning Light . . . . . . 5-19
Security Light . . . . . . . . . . . . . . . . 5-19
High-Beam On Light . . . . . . . . . 5-20
Front Fog Lamp Light . . . . . . . . 5-20
Lamps On Reminder . . . . . . . . . 5-20
Cruise Control Light . . . . . . . . . 5-20
Information Displays
Driver Information Center (DIC) . . . . . . . . . . . . . . . 5-21
Vehicle Messages
Vehicle Messages . . . . . . . . . . . 5-24
Battery Voltage and ChargingMessages . . . . . . . . . . . . . . . . . . 5-24
Brake System Messages . . . . 5-25
Compass Messages . . . . . . . . . 5-25
Cruise Control Messages . . . . 5-25
Door Ajar Messages . . . . . . . . . 5-25
Engine Cooling System Messages . . . . . . . . . . . . . . . . . . 5-25
Engine Oil Messages . . . . . . . . 5-26
Engine Power Messages . . . . 5-27
Fuel System Messages . . . . . . 5-27
Key and Lock Messages . . . . . 5-27
Object Detection System Messages . . . . . . . . . . . . . . . . . . 5-27
Ride Control System Messages . . . . . . . . . . . . . . . . . . 5-28
Airbag System Messages . . . . 5-29
Security Messages . . . . . . . . . . 5-29
Service Vehicle Messages . . . 5-29
Tire Messages . . . . . . . . . . . . . . . 5-30
Transmission Messages . . . . . 5-30
Vehicle Reminder Messages . . . . . . . . . . . . . . . . . . 5-31
Page 131 of 364
Black plate (27,1)GMC Terrain/Terrain Denali Owner Manual - 2013 - crc 1st edition - 5/8/12
Instruments and Controls 5-27
Engine Power Messages
ENGINE POWER IS REDUCED
This message displays when the
vehicle's engine power is reduced.
Reduced engine power can affect
the vehicle's ability to accelerate.
If this message is on, but there is no
reduction in performance, proceed
to your destination. The
performance may be reduced the
next time the vehicle is driven. The
vehicle may be driven at a reduced
speed while this message is on, but
maximum acceleration and speed
may be reduced. Anytime this
message stays on, the vehicle
should be taken to your dealer for
service as soon as possible.
Fuel System Messages
ECO MODE ON
On some models, this message
displays when the fuel economy
mode has been turned on bypressing the eco button near the
shift lever. See
Fuel Economy Mode
on page 9‑29 for more information.
FUEL LEVEL LOW
This message displays when the
vehicle is low on fuel. Refuel as
soon as possible.
TIGHTEN GAS CAP
This message displays when the
fuel cap is not on tight. Tighten the
fuel cap.
Key and Lock Messages
REPLACE BATTERY IN
REMOTE KEY
This message displays when the
battery in the Remote Keyless Entry
(RKE) transmitter needs to be
replaced.
Object Detection System
Messages
FORWARD COLLISION
ALERT OFF
If your vehicle has the Forward
Collision Alert (FCA) system, this
message may display if the FCA
system cannot activate due to a
temporary condition. See Forward
Collision Alert (FCA) System on
page 9‑37.
FRONT CAMERA BLOCKED,
CLEAN WINDSHIELD
This message displays when the
Lane Departure Warning (LDW) and
Forward Collision Alert (FCA)
systems are disabled because the
camera view is blocked and cannot
operate properly. It may also
activate during heavy rain or due to
road spray. To clean the system,
clean the outside of the windshield
area in front of the LDW/FCA
camera sensor.