driver seat adjustment GMC TERRAIN 2013 Owner's Manual
[x] Cancel search | Manufacturer: GMC, Model Year: 2013, Model line: TERRAIN, Model: GMC TERRAIN 2013Pages: 364, PDF Size: 5.26 MB
Page 7 of 364
Black plate (1,1)GMC Terrain/Terrain Denali Owner Manual - 2013 - crc 1st edition - 5/8/12
In Brief 1-1
In Brief
Instrument Panel
Instrument Panel . . . . . . . . . . . . . . 1-2
Initial Drive Information
Initial Drive Information . . . . . . . . 1-4
Remote Keyless Entry (RKE)System . . . . . . . . . . . . . . . . . . . . . . 1-4
Remote Vehicle Start . . . . . . . . . 1-4
Door Locks . . . . . . . . . . . . . . . . . . . 1-5
Liftgate . . . . . . . . . . . . . . . . . . . . . . . . 1-6
Windows . . . . . . . . . . . . . . . . . . . . . . 1-6
Seat Adjustment . . . . . . . . . . . . . . 1-7
Memory Features . . . . . . . . . . . . . 1-8
Heated Seats . . . . . . . . . . . . . . . . . 1-9
Head Restraint Adjustment . . . . 1-9
Safety Belts . . . . . . . . . . . . . . . . . . 1-10
Passenger Sensing System . . . . . . . . . . . . . . . . . . . . . 1-10 Mirror Adjustment . . . . . . . . . . . . 1-10
Steering Wheel
Adjustment . . . . . . . . . . . . . . . . . 1-11
Interior Lighting . . . . . . . . . . . . . . 1-11
Exterior Lighting . . . . . . . . . . . . . 1-12
Windshield Wiper/Washer . . . . 1-12
Climate Controls . . . . . . . . . . . . . 1-13
Parking Brake . . . . . . . . . . . . . . . 1-14
Transmission . . . . . . . . . . . . . . . . 1-15
Vehicle Features
Steering Wheel Controls . . . . . 1-15
Cruise Control . . . . . . . . . . . . . . . 1-16
Infotainment System . . . . . . . . . 1-16
Driver Information Center (DIC) . . . . . . . . . . . . . . . 1-16
Forward Collision Alert (FCA)
System . . . . . . . . . . . . . . . . . . . . . 1-17
Lane Departure Warning (LDW) . . . . . . . . . . . . . 1-17 Side Blind Zone
Alert (SBZA) . . . . . . . . . . . . . . . 1-18
Rear Vision Camera (RVC) . . . . . . . . . . . . . 1-18
Ultrasonic Parking Assist . . . . 1-18
Roof Rack System . . . . . . . . . . . 1-18
Power Outlets . . . . . . . . . . . . . . . 1-19
Universal Remote System . . . 1-19
Performance and Maintenance
Traction Control
System (TCS) . . . . . . . . . . . . . . 1-19
StabiliTrak
®System . . . . . . . . . 1-20
Tire Pressure Monitor . . . . . . . . 1-20
Engine Oil Life System . . . . . . 1-20
Fuel E85 (85% Ethanol) . . . . . 1-21
Driving for Better Fuel Economy . . . . . . . . . . . . . . . . . . . 1-21
Roadside Assistance Program . . . . . . . . . . . . . . . . . . . . 1-21
OnStar
®. . . . . . . . . . . . . . . . . . . . . 1-22
Page 14 of 364
Black plate (8,1)GMC Terrain/Terrain Denali Owner Manual - 2013 - crc 1st edition - 5/8/12
1-8 In Brief
SeeLumbar Adjustment on
page 3‑5.
Reclining Seatbacks
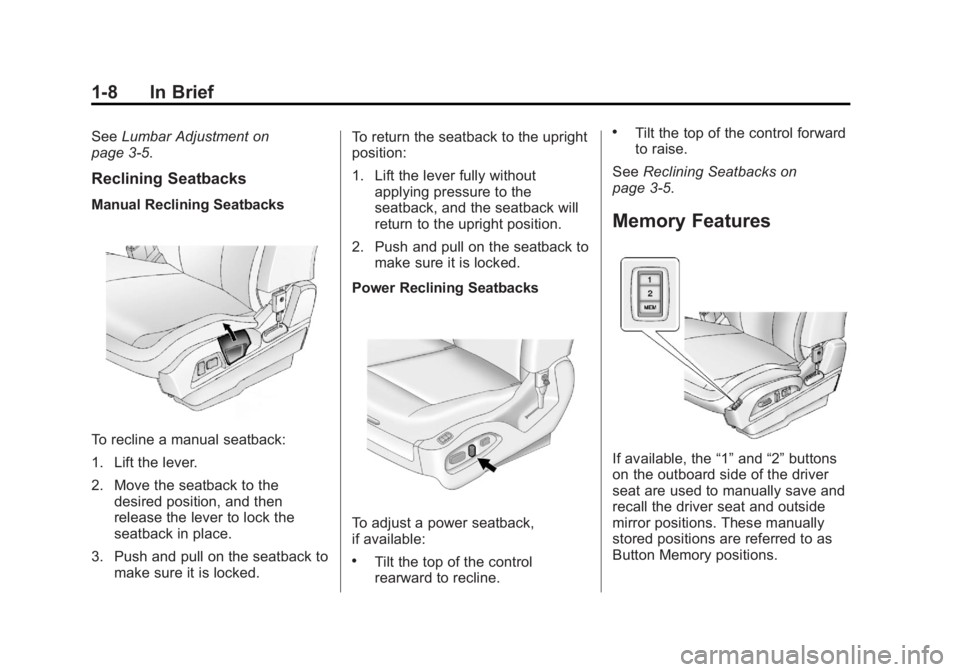
Manual Reclining Seatbacks
To recline a manual seatback:
1. Lift the lever.
2. Move the seatback to the
desired position, and then
release the lever to lock the
seatback in place.
3. Push and pull on the seatback to make sure it is locked. To return the seatback to the upright
position:
1. Lift the lever fully without
applying pressure to the
seatback, and the seatback will
return to the upright position.
2. Push and pull on the seatback to make sure it is locked.
Power Reclining Seatbacks
To adjust a power seatback,
if available:
.Tilt the top of the control
rearward to recline.
.Tilt the top of the control forward
to raise.
See Reclining Seatbacks on
page 3‑5.
Memory Features
If available, the “1”and “2”buttons
on the outboard side of the driver
seat are used to manually save and
recall the driver seat and outside
mirror positions. These manually
stored positions are referred to as
Button Memory positions.
Page 15 of 364
Black plate (9,1)GMC Terrain/Terrain Denali Owner Manual - 2013 - crc 1st edition - 5/8/12
In Brief 1-9
The vehicle will also automatically
save driver seat and outside mirror
positions to the current driver
Remote Keyless Entry (RKE)
transmitter when the ignition is
turned off. These automatically
stored positions are referred to as
RKE Memory positions.
SeeMemory Seats on page 3‑7 and
Vehicle Personalization on
page 5‑31.Heated Seats
Uplevel Climate Control System
Shown, Base Similar
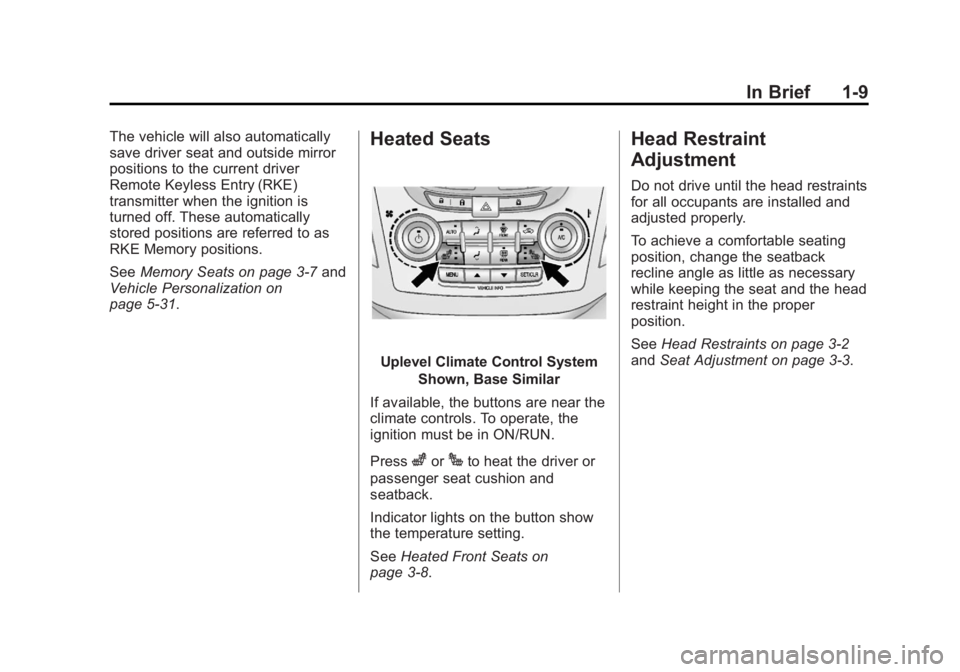
If available, the buttons are near the
climate controls. To operate, the
ignition must be in ON/RUN.
Press
zorJto heat the driver or
passenger seat cushion and
seatback.
Indicator lights on the button show
the temperature setting.
See Heated Front Seats on
page 3‑8.
Head Restraint
Adjustment
Do not drive until the head restraints
for all occupants are installed and
adjusted properly.
To achieve a comfortable seating
position, change the seatback
recline angle as little as necessary
while keeping the seat and the head
restraint height in the proper
position.
See Head Restraints on page 3‑2
and Seat Adjustment on page 3‑3.
Page 16 of 364
Black plate (10,1)GMC Terrain/Terrain Denali Owner Manual - 2013 - crc 1st edition - 5/8/12
1-10 In Brief
Safety Belts
Refer to the following sections for
important information on how to use
safety belts properly:
.Safety Belts on page 3‑11.
.How to Wear Safety Belts
Properly on page 3‑12.
.Lap-Shoulder Belt on page 3‑13.
.Lower Anchors and Tethers for
Children (LATCH System) on
page 3‑40.
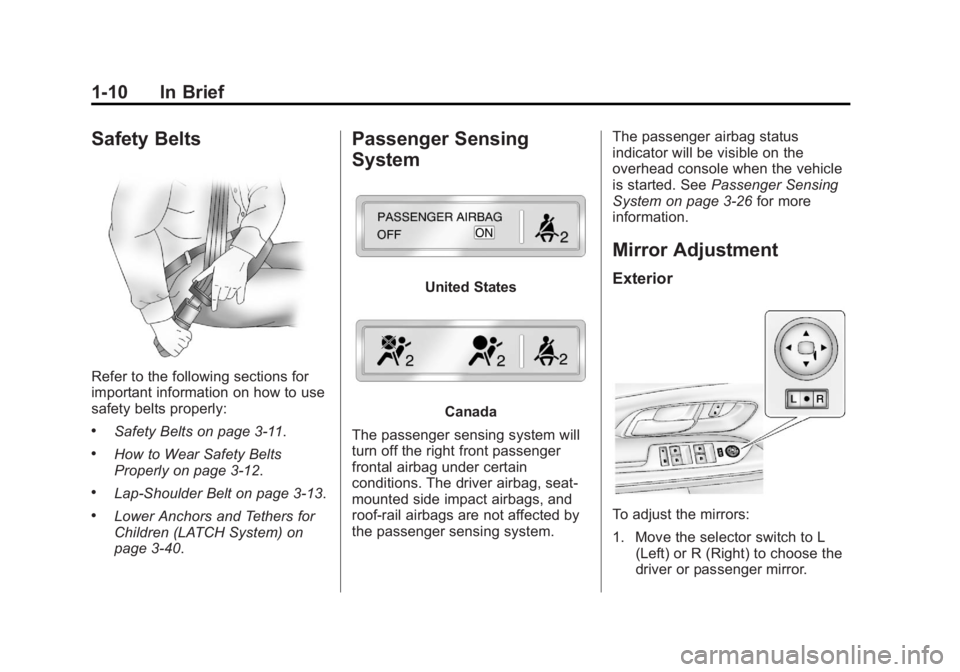
Passenger Sensing
System
United States
Canada
The passenger sensing system will
turn off the right front passenger
frontal airbag under certain
conditions. The driver airbag, seat‐
mounted side impact airbags, and
roof‐rail airbags are not affected by
the passenger sensing system. The passenger airbag status
indicator will be visible on the
overhead console when the vehicle
is started. See
Passenger Sensing
System on page 3‑26 for more
information.
Mirror Adjustment
Exterior
To adjust the mirrors:
1. Move the selector switch to L
(Left) or R (Right) to choose the
driver or passenger mirror.
Page 51 of 364
Black plate (3,1)GMC Terrain/Terrain Denali Owner Manual - 2013 - crc 1st edition - 5/8/12
Seats and Restraints 3-3
To lower the head restraint, press
the button, located on the top of the
seatback, and push the head
restraint down. Try to move the
head restraint after the button is
released to make sure that it is
locked in place.
The front seat outboard head
restraints are not designed to be
removed.
Rear Seats
The vehicle's rear seat has head
restraints in the outboard seating
positions that cannot be adjusted.
Rear outboard head restraints are
not designed to be removed.
Front Seats
Seat Adjustment
{WARNING
You can lose control of the
vehicle if you try to adjust a driver
seat while the vehicle is moving.
Adjust the driver seat only when
the vehicle is not moving.
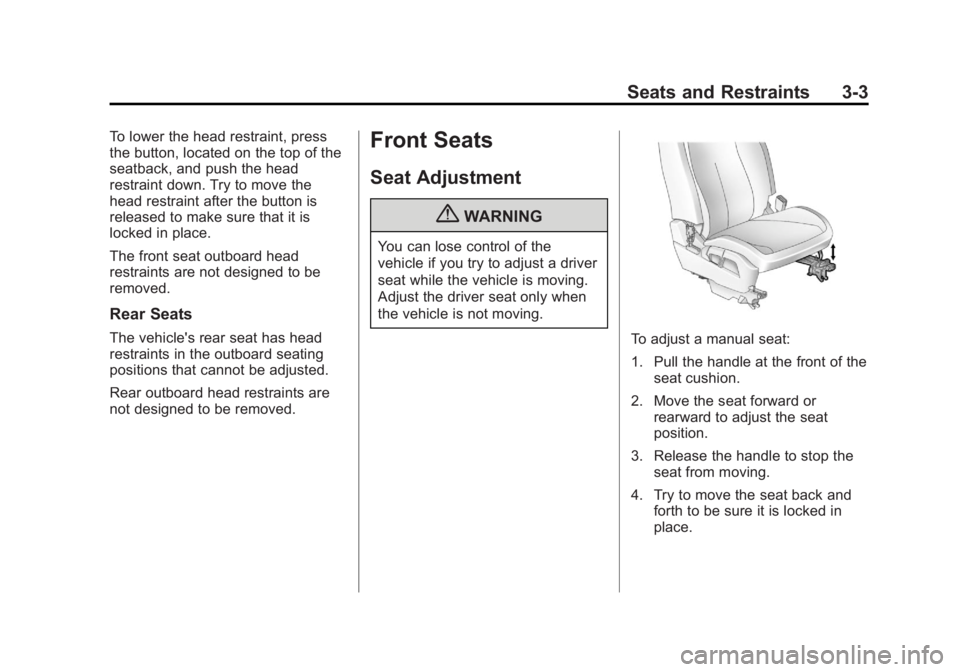
To adjust a manual seat:
1. Pull the handle at the front of theseat cushion.
2. Move the seat forward or rearward to adjust the seat
position.
3. Release the handle to stop the seat from moving.
4. Try to move the seat back and forth to be sure it is locked in
place.
Page 62 of 364
Black plate (14,1)GMC Terrain/Terrain Denali Owner Manual - 2013 - crc 1st edition - 5/8/12
3-14 Seats and Restraints
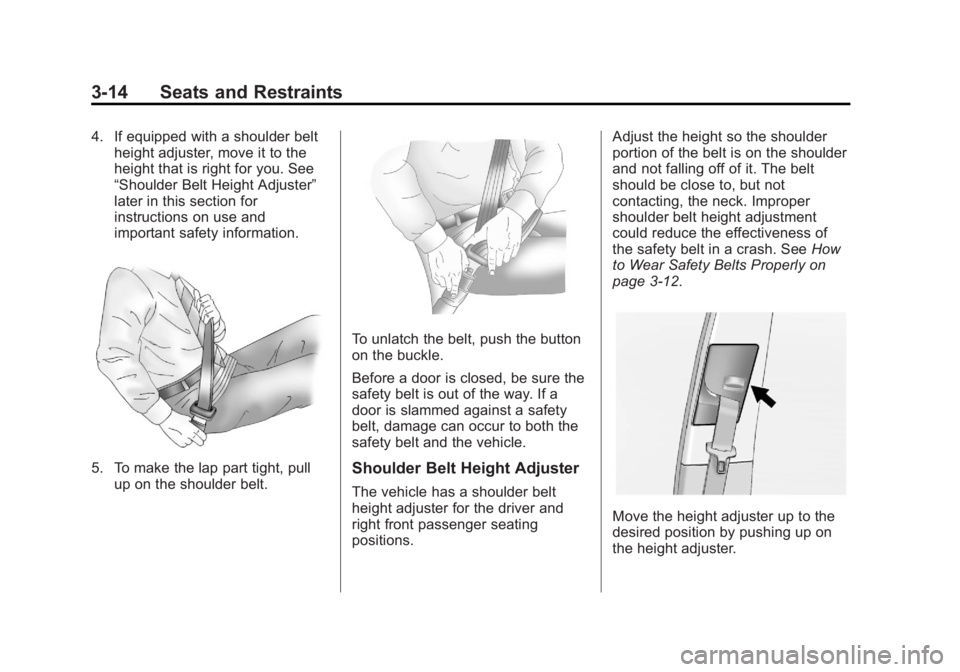
4. If equipped with a shoulder beltheight adjuster, move it to the
height that is right for you. See
“Shoulder Belt Height Adjuster”
later in this section for
instructions on use and
important safety information.
5. To make the lap part tight, pull
up on the shoulder belt.
To unlatch the belt, push the button
on the buckle.
Before a door is closed, be sure the
safety belt is out of the way. If a
door is slammed against a safety
belt, damage can occur to both the
safety belt and the vehicle.
Shoulder Belt Height Adjuster
The vehicle has a shoulder belt
height adjuster for the driver and
right front passenger seating
positions. Adjust the height so the shoulder
portion of the belt is on the shoulder
and not falling off of it. The belt
should be close to, but not
contacting, the neck. Improper
shoulder belt height adjustment
could reduce the effectiveness of
the safety belt in a crash. See
How
to Wear Safety Belts Properly on
page 3‑12.
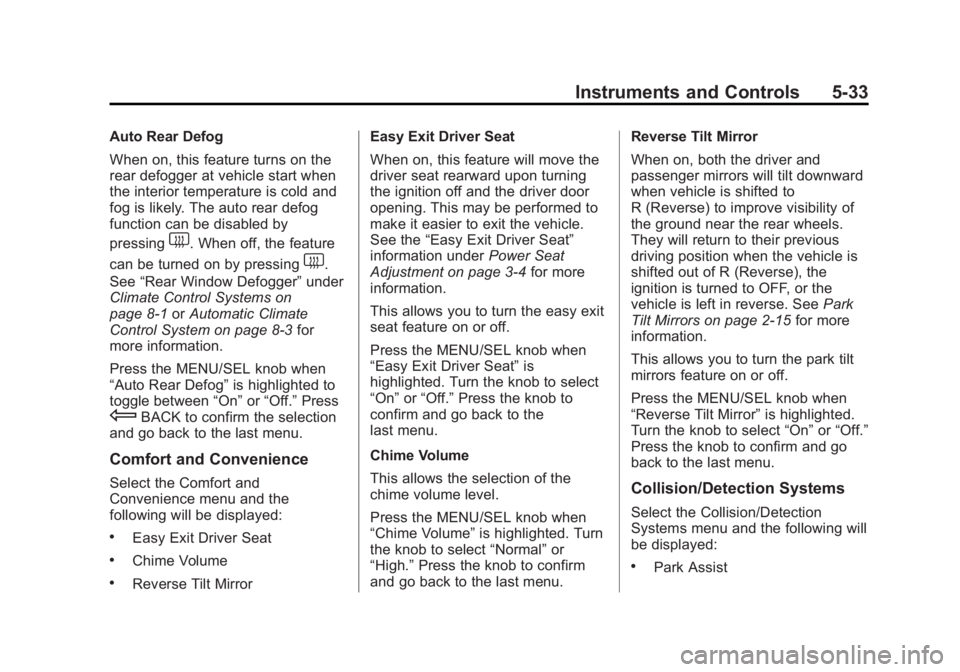
Move the height adjuster up to the
desired position by pushing up on
the height adjuster.
Page 137 of 364
Black plate (33,1)GMC Terrain/Terrain Denali Owner Manual - 2013 - crc 1st edition - 5/8/12
Instruments and Controls 5-33
Auto Rear Defog
When on, this feature turns on the
rear defogger at vehicle start when
the interior temperature is cold and
fog is likely. The auto rear defog
function can be disabled by
pressing
1. When off, the feature
can be turned on by pressing
1.
See “Rear Window Defogger” under
Climate Control Systems on
page 8‑1 orAutomatic Climate
Control System on page 8‑3 for
more information.
Press the MENU/SEL knob when
“Auto Rear Defog” is highlighted to
toggle between “On”or“Off.” Press
EBACK to confirm the selection
and go back to the last menu.
Comfort and Convenience
Select the Comfort and
Convenience menu and the
following will be displayed:
.Easy Exit Driver Seat
.Chime Volume
.Reverse Tilt Mirror Easy Exit Driver Seat
When on, this feature will move the
driver seat rearward upon turning
the ignition off and the driver door
opening. This may be performed to
make it easier to exit the vehicle.
See the
“Easy Exit Driver Seat”
information under Power Seat
Adjustment on page 3‑4 for more
information.
This allows you to turn the easy exit
seat feature on or off.
Press the MENU/SEL knob when
“Easy Exit Driver Seat” is
highlighted. Turn the knob to select
“On” or“Off.” Press the knob to
confirm and go back to the
last menu.
Chime Volume
This allows the selection of the
chime volume level.
Press the MENU/SEL knob when
“Chime Volume” is highlighted. Turn
the knob to select “Normal”or
“High.” Press the knob to confirm
and go back to the last menu. Reverse Tilt Mirror
When on, both the driver and
passenger mirrors will tilt downward
when vehicle is shifted to
R (Reverse) to improve visibility of
the ground near the rear wheels.
They will return to their previous
driving position when the vehicle is
shifted out of R (Reverse), the
ignition is turned to OFF, or the
vehicle is left in reverse. See
Park
Tilt Mirrors on page 2‑15 for more
information.
This allows you to turn the park tilt
mirrors feature on or off.
Press the MENU/SEL knob when
“Reverse Tilt Mirror” is highlighted.
Turn the knob to select “On”or“Off.”
Press the knob to confirm and go
back to the last menu.
Collision/Detection Systems
Select the Collision/Detection
Systems menu and the following will
be displayed:
.Park Assist