height GMC TERRAIN 2013 Owner's Manual
[x] Cancel search | Manufacturer: GMC, Model Year: 2013, Model line: TERRAIN, Model: GMC TERRAIN 2013Pages: 364, PDF Size: 5.26 MB
Page 13 of 364
Black plate (7,1)GMC Terrain/Terrain Denali Owner Manual - 2013 - crc 1st edition - 5/8/12
In Brief 1-7
Seat Adjustment
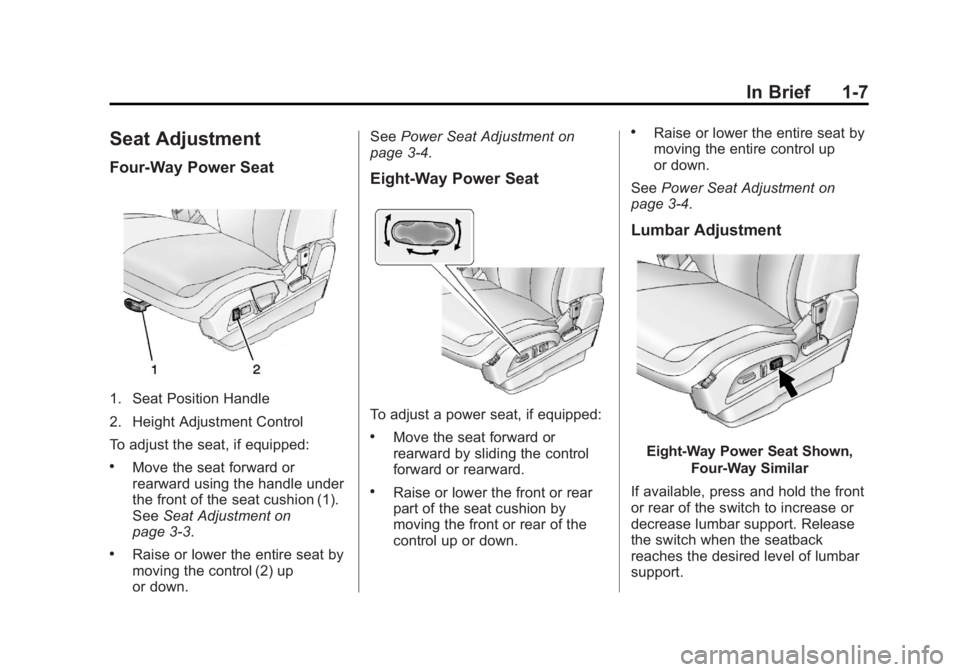
Four-Way Power Seat
1. Seat Position Handle
2. Height Adjustment Control
To adjust the seat, if equipped:
.Move the seat forward or
rearward using the handle under
the front of the seat cushion (1).
SeeSeat Adjustment on
page 3‑3.
.Raise or lower the entire seat by
moving the control (2) up
or down. See
Power Seat Adjustment on
page 3‑4.
Eight-Way Power Seat
To adjust a power seat, if equipped:
.Move the seat forward or
rearward by sliding the control
forward or rearward.
.Raise or lower the front or rear
part of the seat cushion by
moving the front or rear of the
control up or down.
.Raise or lower the entire seat by
moving the entire control up
or down.
See Power Seat Adjustment on
page 3‑4.
Lumbar Adjustment
Eight-Way Power Seat Shown,
Four-Way Similar
If available, press and hold the front
or rear of the switch to increase or
decrease lumbar support. Release
the switch when the seatback
reaches the desired level of lumbar
support.
Page 15 of 364
Black plate (9,1)GMC Terrain/Terrain Denali Owner Manual - 2013 - crc 1st edition - 5/8/12
In Brief 1-9
The vehicle will also automatically
save driver seat and outside mirror
positions to the current driver
Remote Keyless Entry (RKE)
transmitter when the ignition is
turned off. These automatically
stored positions are referred to as
RKE Memory positions.
SeeMemory Seats on page 3‑7 and
Vehicle Personalization on
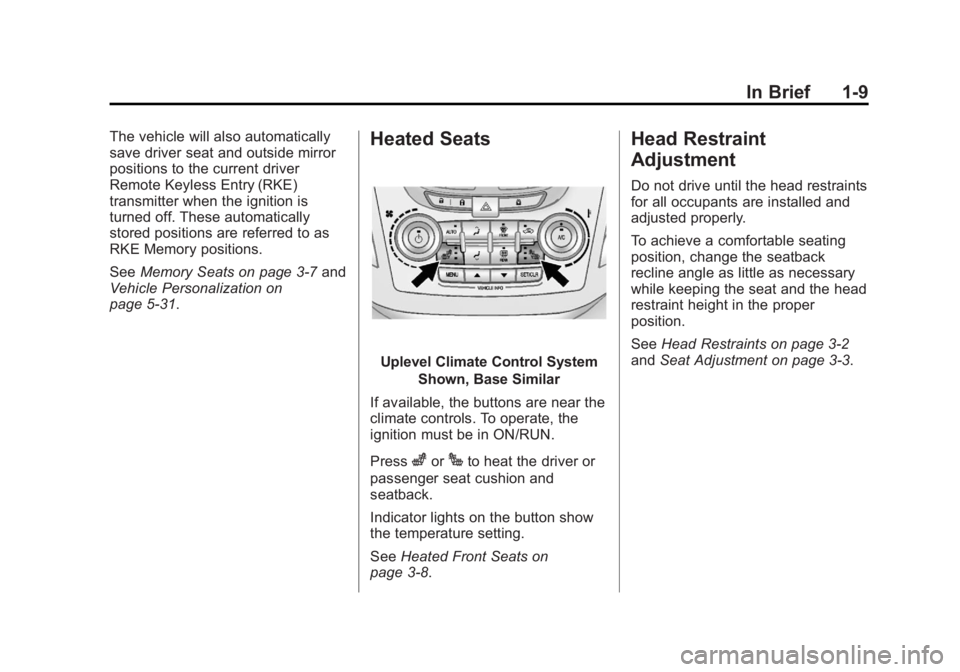
page 5‑31.Heated Seats
Uplevel Climate Control System
Shown, Base Similar
If available, the buttons are near the
climate controls. To operate, the
ignition must be in ON/RUN.
Press
zorJto heat the driver or
passenger seat cushion and
seatback.
Indicator lights on the button show
the temperature setting.
See Heated Front Seats on
page 3‑8.
Head Restraint
Adjustment
Do not drive until the head restraints
for all occupants are installed and
adjusted properly.
To achieve a comfortable seating
position, change the seatback
recline angle as little as necessary
while keeping the seat and the head
restraint height in the proper
position.
See Head Restraints on page 3‑2
and Seat Adjustment on page 3‑3.
Page 37 of 364
Black plate (9,1)GMC Terrain/Terrain Denali Owner Manual - 2013 - crc 1st edition - 5/9/12
Keys, Doors, and Windows 2-9
Manual Liftgate
To unlock the liftgate, press the
power door lock switch or press
K
on the Remote Keyless Entry
(RKE) transmitter twice. See
Remote Keyless Entry (RKE)
System Operation on page 2‑3.
To open the liftgate, press the touch
pad under the liftgate handle and
lift up.
Use the pull cup to lower and close
the liftgate. Do not press the touch
pad while closing the liftgate. This
may cause the liftgate to be
unlatched.
Always close the liftgate before
driving.
Power Liftgate
On vehicles with a power liftgate,
the vehicle must be in P (Park) to
operate. The taillamps flash when
the power liftgate moves.
{WARNING
You or others could be injured if
caught in the path of the power
liftgate. Make sure there is no one
in the way of the liftgate as it is
opening and closing.
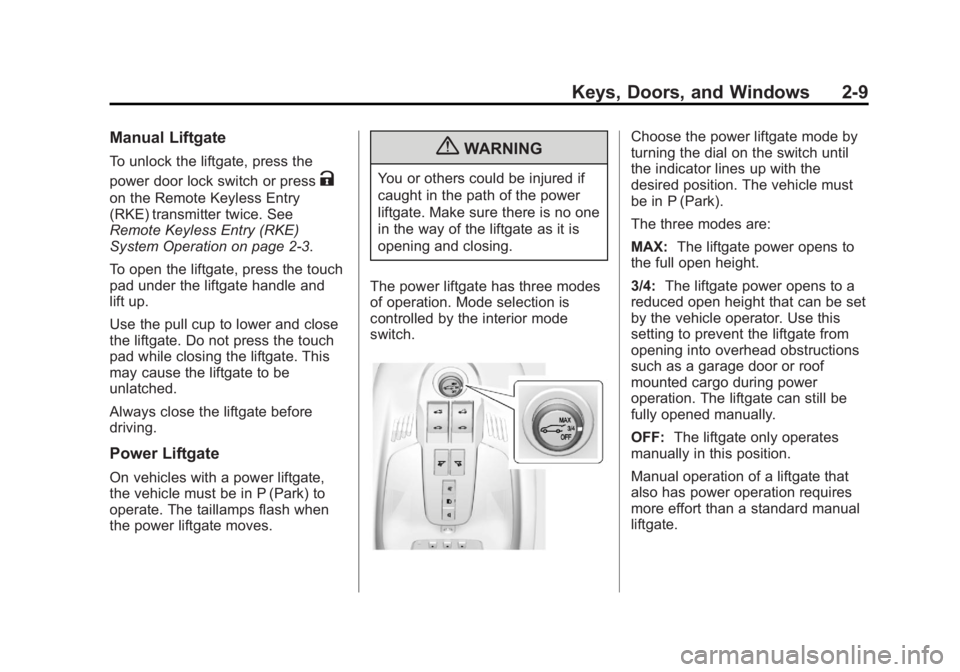
The power liftgate has three modes
of operation. Mode selection is
controlled by the interior mode
switch.
Choose the power liftgate mode by
turning the dial on the switch until
the indicator lines up with the
desired position. The vehicle must
be in P (Park).
The three modes are:
MAX: The liftgate power opens to
the full open height.
3/4: The liftgate power opens to a
reduced open height that can be set
by the vehicle operator. Use this
setting to prevent the liftgate from
opening into overhead obstructions
such as a garage door or roof
mounted cargo during power
operation. The liftgate can still be
fully opened manually.
OFF: The liftgate only operates
manually in this position.
Manual operation of a liftgate that
also has power operation requires
more effort than a standard manual
liftgate.
Page 39 of 364
Black plate (11,1)GMC Terrain/Terrain Denali Owner Manual - 2013 - crc 1st edition - 5/8/12
Keys, Doors, and Windows 2-11
Obstacle Detection Features
If the liftgate encounters an obstacle
during a power open or close cycle,
a warning chime will sound and the
liftgate will automatically reverse
direction to the full closed or open
position. After removing the
obstruction, the power liftgate
operation can be used again. If the
liftgate encounters multiple
obstacles on the same power cycle,
the power function will deactivate
and a message will display in the
Driver Information Center (DIC), see
Object Detection System Messages
on page 5‑27. After removing the
obstructions, the liftgate will resume
normal power operation.
Pinch sensors are located on the
side edges of the liftgate. If an
object is caught between the liftgate
and the vehicle and presses against
this sensor, the liftgate will reverse
direction and open fully. The liftgate
will remain open until it is activated
again or closed manually.
Power Liftgate 3/4 Mode
To program the liftgate opening
height:
1. Turn the liftgate switch to eitherthe MAX, or the 3/4 mode
position and power open the
liftgate.
2. Stop the liftgate movement at the desired height by pressing
any liftgate switch. Manually
adjust the liftgate position if
required.
3. Press and hold the button on the liftgate adjacent to the latch until
the turn signals flash and a beep
sounds to indicate that the new
setting is recorded.
When power opened with the 3/4
mode selected, the liftgate stops at
the new set position. If there is no audible and visual
feedback when setting the
intermediate stop position, the
liftgate height is being set below the
3/4 open height minimum
(approximately 1.5 m or 5 ft). The
liftgate cannot be set below that
minimum and the new setting will
not be recorded.
Manual Operation of Power
Liftgate
To change the liftgate to manual
operation, turn the mode switch to
the OFF position.
With the power liftgate disabled and
all of the doors unlocked, the liftgate
can be manually opened and
closed. Manual operation of a
liftgate that also has power
operation requires more effort than
a standard manual liftgate.
Page 50 of 364

Black plate (2,1)GMC Terrain/Terrain Denali Owner Manual - 2013 - crc 1st edition - 5/8/12
3-2 Seats and Restraints
Head Restraints
Front Seats
The vehicle's front seats have head
restraints in the outboard seating
positions.
{WARNING
With head restraints that are not
installed and adjusted properly,
there is a greater chance that
occupants will suffer a neck/
spinal injury in a crash. Do not
drive until the head restraints for
all occupants are installed and
adjusted properly.
Adjust the head restraint so that the
top of the restraint is at the same
height as the top of the occupant's
head. This position reduces the
chance of a neck injury in a crash.The height of the head restraint can
be adjusted. Pull the head restraint
up to raise it. Try to move the head
restraint to make sure that it is
locked in place.
Page 52 of 364
Black plate (4,1)GMC Terrain/Terrain Denali Owner Manual - 2013 - crc 1st edition - 5/8/12
3-4 Seats and Restraints
Power Seat Adjustment
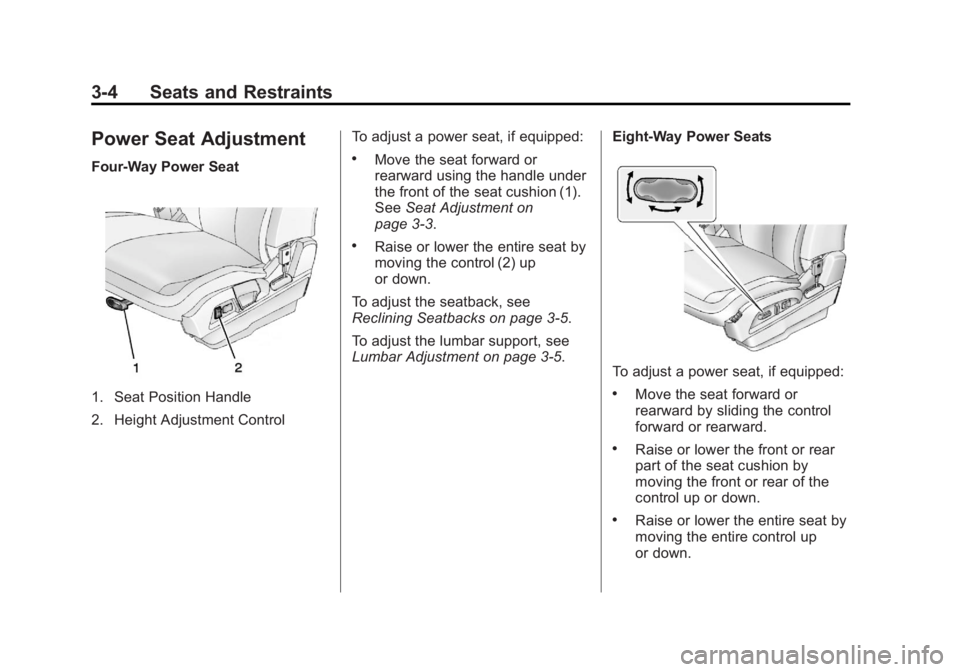
Four-Way Power Seat
1. Seat Position Handle
2. Height Adjustment ControlTo adjust a power seat, if equipped:
.Move the seat forward or
rearward using the handle under
the front of the seat cushion (1).
See
Seat Adjustment on
page 3‑3.
.Raise or lower the entire seat by
moving the control (2) up
or down.
To adjust the seatback, see
Reclining Seatbacks on page 3‑5.
To adjust the lumbar support, see
Lumbar Adjustment on page 3‑5. Eight-Way Power Seats
To adjust a power seat, if equipped:
.Move the seat forward or
rearward by sliding the control
forward or rearward.
.Raise or lower the front or rear
part of the seat cushion by
moving the front or rear of the
control up or down.
.Raise or lower the entire seat by
moving the entire control up
or down.
Page 62 of 364
Black plate (14,1)GMC Terrain/Terrain Denali Owner Manual - 2013 - crc 1st edition - 5/8/12
3-14 Seats and Restraints
4. If equipped with a shoulder beltheight adjuster, move it to the
height that is right for you. See
“Shoulder Belt Height Adjuster”
later in this section for
instructions on use and
important safety information.
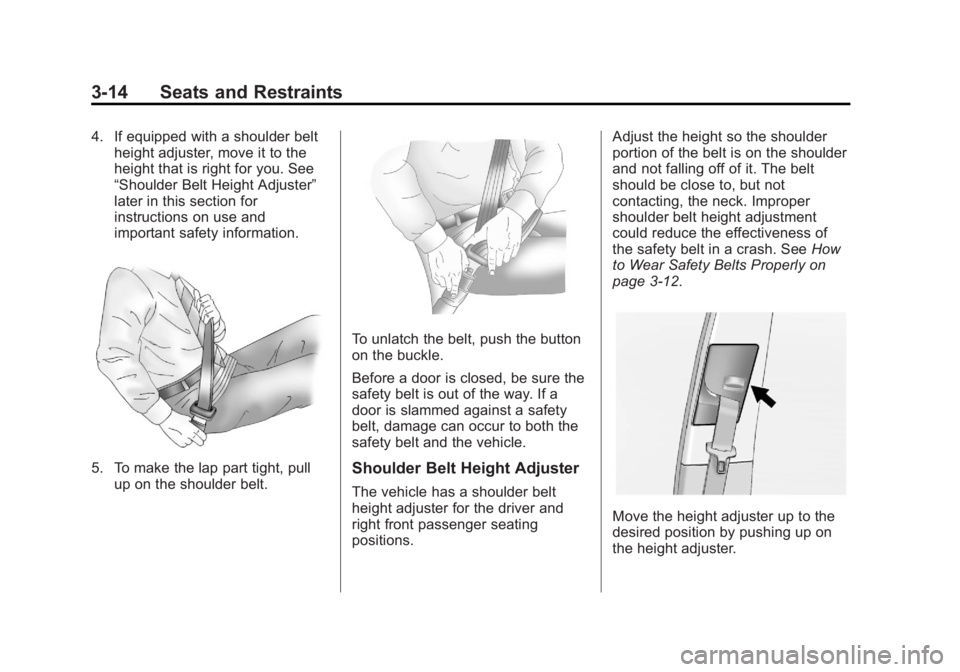
5. To make the lap part tight, pull
up on the shoulder belt.
To unlatch the belt, push the button
on the buckle.
Before a door is closed, be sure the
safety belt is out of the way. If a
door is slammed against a safety
belt, damage can occur to both the
safety belt and the vehicle.
Shoulder Belt Height Adjuster
The vehicle has a shoulder belt
height adjuster for the driver and
right front passenger seating
positions. Adjust the height so the shoulder
portion of the belt is on the shoulder
and not falling off of it. The belt
should be close to, but not
contacting, the neck. Improper
shoulder belt height adjustment
could reduce the effectiveness of
the safety belt in a crash. See
How
to Wear Safety Belts Properly on
page 3‑12.
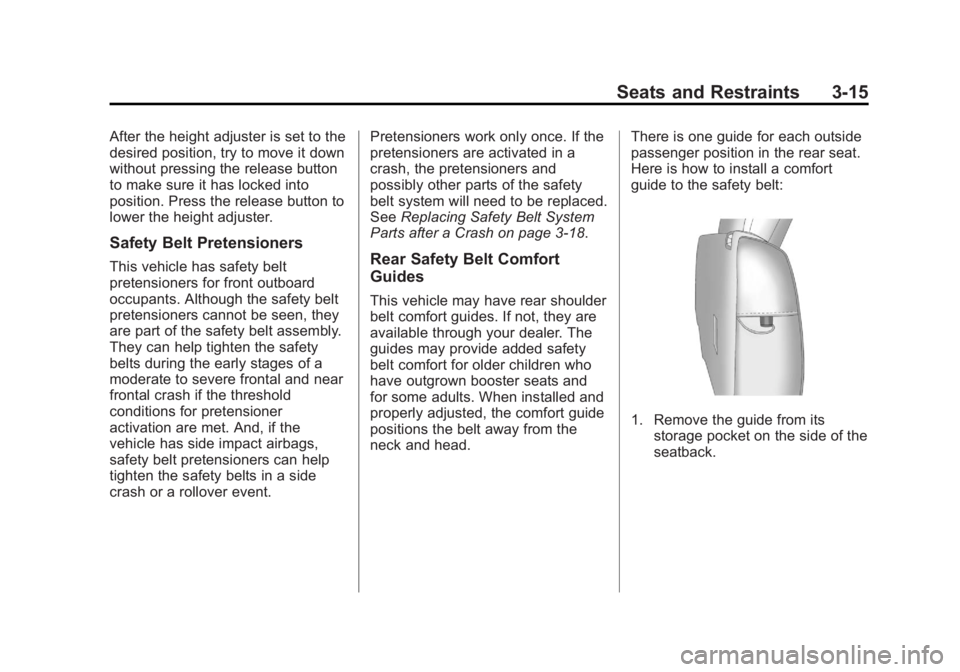
Move the height adjuster up to the
desired position by pushing up on
the height adjuster.
Page 63 of 364
Black plate (15,1)GMC Terrain/Terrain Denali Owner Manual - 2013 - crc 1st edition - 5/8/12
Seats and Restraints 3-15
After the height adjuster is set to the
desired position, try to move it down
without pressing the release button
to make sure it has locked into
position. Press the release button to
lower the height adjuster.
Safety Belt Pretensioners
This vehicle has safety belt
pretensioners for front outboard
occupants. Although the safety belt
pretensioners cannot be seen, they
are part of the safety belt assembly.
They can help tighten the safety
belts during the early stages of a
moderate to severe frontal and near
frontal crash if the threshold
conditions for pretensioner
activation are met. And, if the
vehicle has side impact airbags,
safety belt pretensioners can help
tighten the safety belts in a side
crash or a rollover event.Pretensioners work only once. If the
pretensioners are activated in a
crash, the pretensioners and
possibly other parts of the safety
belt system will need to be replaced.
See
Replacing Safety Belt System
Parts after a Crash on page 3‑18.Rear Safety Belt Comfort
Guides
This vehicle may have rear shoulder
belt comfort guides. If not, they are
available through your dealer. The
guides may provide added safety
belt comfort for older children who
have outgrown booster seats and
for some adults. When installed and
properly adjusted, the comfort guide
positions the belt away from the
neck and head. There is one guide for each outside
passenger position in the rear seat.
Here is how to install a comfort
guide to the safety belt:
1. Remove the guide from its
storage pocket on the side of the
seatback.
Page 78 of 364
Black plate (30,1)GMC Terrain/Terrain Denali Owner Manual - 2013 - crc 1st edition - 5/8/12
3-30 Seats and Restraints
indicator will be lit, and the
airbag readiness light on the
instrument panel will also be lit.
.Liquid pooled on the seat that
has not soaked in may make it
more likely that the passenger
sensing system will enable (turn
on) the passenger airbag while a
child restraint or child occupant
is on the seat. If the passenger
airbag is turned on, the on
indicator will be lit.
If the passenger seat gets wet, dry
the seat immediately. If the airbag
readiness light is lit, do not install a
child restraint or allow anyone to
occupy the seat. See Airbag
Readiness Light on page 5‑10 for
important safety information.
The on indicator may be lit if an
object, such as a briefcase,
handbag, grocery bag, laptop or
other electronic device, is put on an
unoccupied seat. If this is not
desired remove the object from
the seat.
{WARNING
Stowing of articles under the
passenger seat or between the
passenger seat cushion and
seatback may interfere with the
proper operation of the passenger
sensing system.
Servicing the
Airbag-Equipped Vehicle
Airbags affect how the vehicle
should be serviced. There are parts
of the airbag system in several
places around the vehicle. Your
dealer and the service manual have
information about servicing the
vehicle and the airbag system. To
purchase a service manual, see
Service Publications Ordering
Information on page 13‑17.
{WARNING
For up to 10 seconds after the
vehicle is turned off and the
battery is disconnected, an airbag
can still inflate during improper
service. You can be injured if you
are close to an airbag when it
inflates. Avoid yellow connectors.
They are probably part of the
airbag system. Be sure to follow
proper service procedures, and
make sure the person performing
work for you is qualified to do so.
Adding Equipment to the
Airbag-Equipped Vehicle
Q: Is there anything I might add to or change about the vehicle
that could keep the airbags
from working properly?
A: Yes. If you add things that
change the vehicle's frame,
bumper system, height, front end
or side sheet metal, they may
Page 81 of 364
Black plate (33,1)GMC Terrain/Terrain Denali Owner Manual - 2013 - crc 1st edition - 5/8/12
Seats and Restraints 3-33
Child Restraints
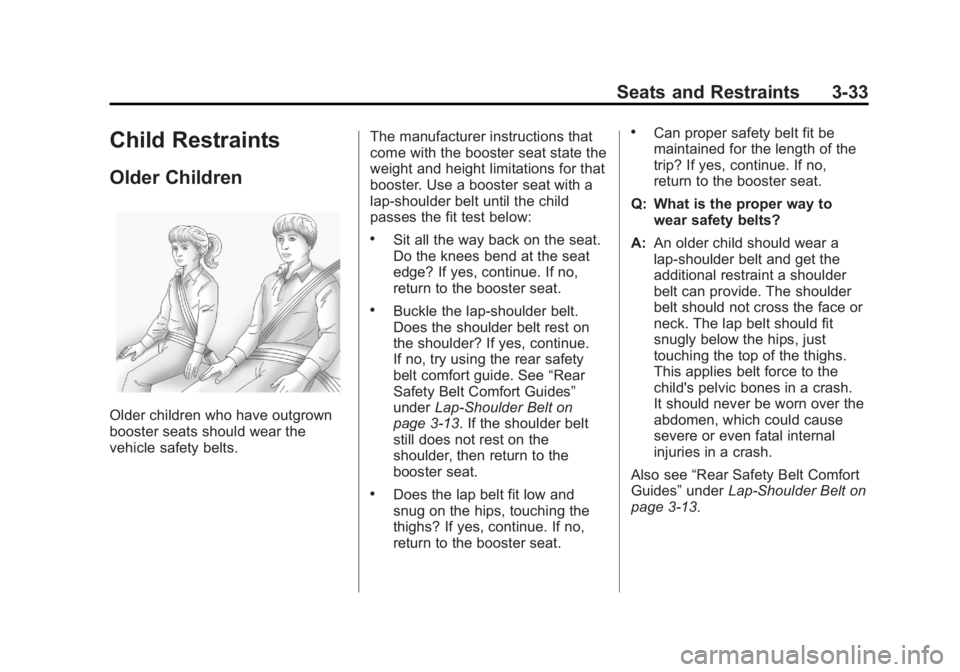
Older Children
Older children who have outgrown
booster seats should wear the
vehicle safety belts.The manufacturer instructions that
come with the booster seat state the
weight and height limitations for that
booster. Use a booster seat with a
lap-shoulder belt until the child
passes the fit test below:
.Sit all the way back on the seat.
Do the knees bend at the seat
edge? If yes, continue. If no,
return to the booster seat.
.Buckle the lap-shoulder belt.
Does the shoulder belt rest on
the shoulder? If yes, continue.
If no, try using the rear safety
belt comfort guide. See
“Rear
Safety Belt Comfort Guides”
under Lap-Shoulder Belt on
page 3‑13. If the shoulder belt
still does not rest on the
shoulder, then return to the
booster seat.
.Does the lap belt fit low and
snug on the hips, touching the
thighs? If yes, continue. If no,
return to the booster seat.
.Can proper safety belt fit be
maintained for the length of the
trip? If yes, continue. If no,
return to the booster seat.
Q: What is the proper way to wear safety belts?
A: An older child should wear a
lap-shoulder belt and get the
additional restraint a shoulder
belt can provide. The shoulder
belt should not cross the face or
neck. The lap belt should fit
snugly below the hips, just
touching the top of the thighs.
This applies belt force to the
child's pelvic bones in a crash.
It should never be worn over the
abdomen, which could cause
severe or even fatal internal
injuries in a crash.
Also see “Rear Safety Belt Comfort
Guides” underLap-Shoulder Belt on
page 3‑13.