navigation GMC TERRAIN 2014 Get To Know Guide
[x] Cancel search | Manufacturer: GMC, Model Year: 2014, Model line: TERRAIN, Model: GMC TERRAIN 2014Pages: 20, PDF Size: 2.81 MB
Page 1 of 20

Review this Quick Reference Guide for an overview of some important features in your GMC Terrain. More detailed information can be found in your Owner Manual. Some option\
al equipment described in this guide may not be included in your vehicle. For easy reference, keep this guide\
with your Owner Manual in your glove box.
www.gmc.com
Instrument Panel .............2Remote Keyless Entry Transmitter .................4Rear Door Safety Locks .......4Tilt/Telescopic Steering Wheel ..4Driver’s Seat Adjustments ......5Rear Seat Adjustments ........6Exterior/Interior Lighting .......6Wipers and Washers ..........7Power Programmable Liftgate ...7Audio System ...............8Bluetooth System ...........10Audio Steering Wheel Controls .10
GMC IntelliLink .............11Navigation System ..........13Rear Seat Entertainment System ....................13Cruise Control ..............14Forward Collision Alert/ Lane Departure Warning ......14Accessory Power Outlets .....15Passenger Presence System ..15Parking Brake ..............15Wind Noise ................15Driver Information Center .....16Vehicle Personalization .......16
Climate Controls ............17Automatic Transmission Features ..................18StabiliTrak/Traction Control Systems ............18Roof Rack Cross Rails .......19Tire Pressure Monitor ........19Engine Oil Life System .......19Refueling the Vehicle ........19Roadside Assistance .........20myGMC and OnStar Mobile Apps ................20GMC Owner Center ..........20
This Important Information To Be REMOVED AND READ BY THE CUSTOMER
Page 3 of 20

3
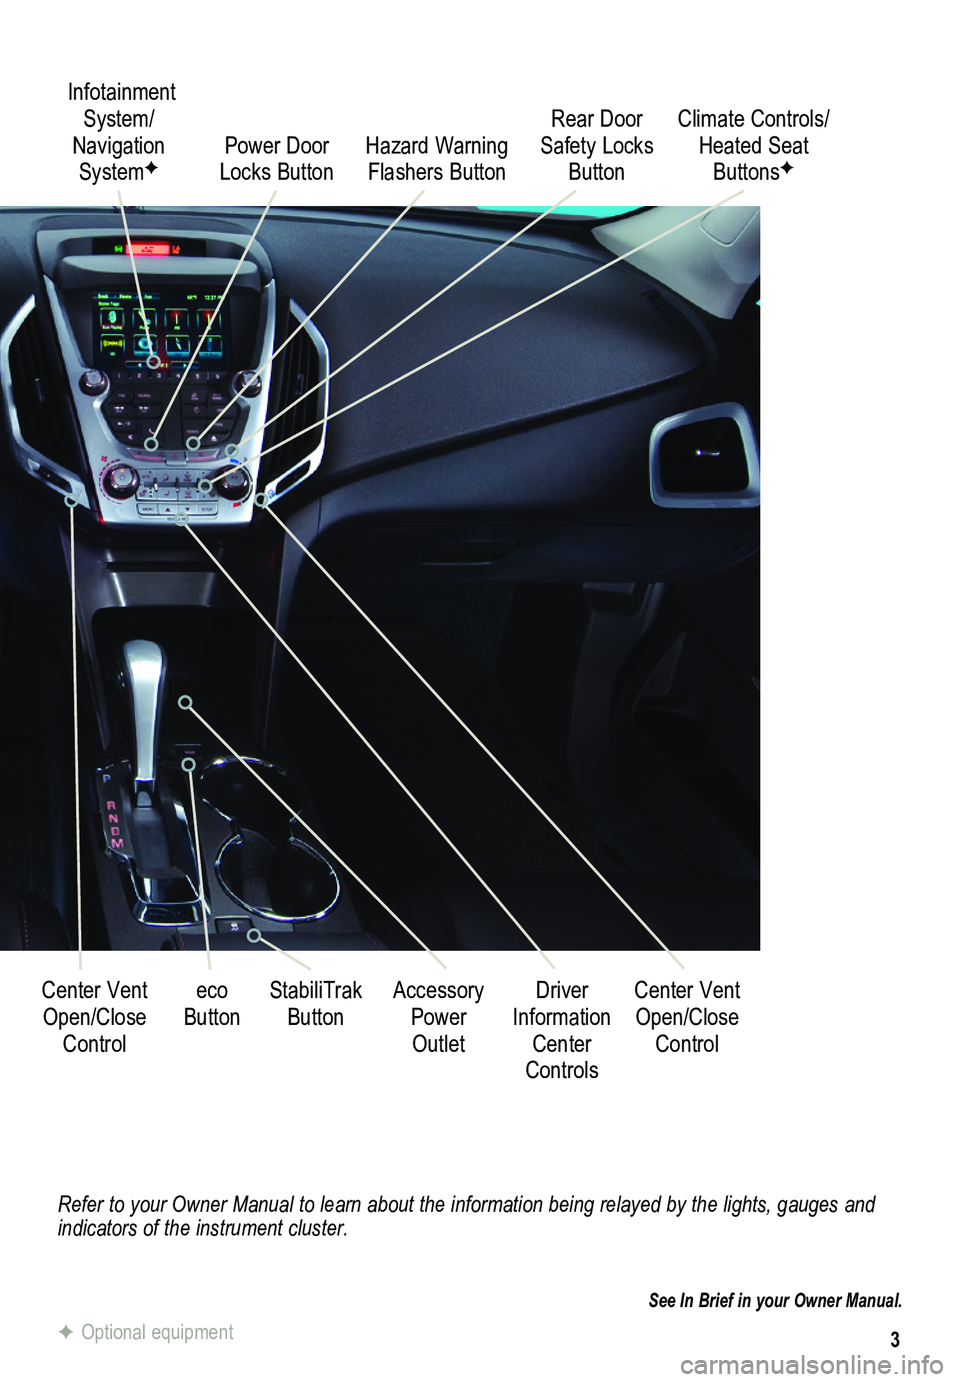
Refer to your Owner Manual to learn about the information being relayed \
by the lights, gauges and indicators of the instrument cluster.
See In Brief in your Owner Manual.
Infotainment System/ Navigation SystemFPower Door Locks Button
StabiliTrak ButtonCenter Vent Open/Close
Control
Accessory Power Outlet
Rear Door Safety Locks ButtonHazard Warning Flashers Button
Driver Information Center Controls
Climate Controls/ Heated Seat ButtonsF
Center Vent Open/Close
Control
eco Button
F Optional equipment
Page 10 of 20

10F Optional equipment
Bluetooth® System
Before using a Bluetooth-enabled device in the vehicle, it must be paired with the in-vehicle Bluetooth system. Not all devices will support all functions. The pairing process is disabled when the vehicle is moving. For more information about Bluetooth pairing\
, device compat-ibility and text messaging, visit www.gmtotalconnect.com.
Pair a Phone
1. To use voice recognition, press the Push to Talk button on the steering wheel; after the beep, say “Pair.”
To use the screen buttons, press the CONFIG button and then touch Phone Settings > Pair Device.
2. Start the pairing process on the phone. Locate your vehicle name or Inte\
lliLink on the phone.
3. Enter the four-digit code that appears on the touch screen into the phone or confirm the six-digit code on the phone.
4. If your phone prompts you to accept the connection or phone book download, click “yes” and always allow.
Text MessagingF
Text messages can be displayed, played back over the audio system, or a predefined message can be sent. Only SMS text messages are supported.
1. Touch the Messages screen button on the home page.
2. Once all messages are retrieved, the Text Message Inbox displays.
3. Select a text message to view (available only if the vehicle is not in motion) or listen to.
A pop-up screen will display when there is an incoming text message.
See your Infotainment System Owner Manual.
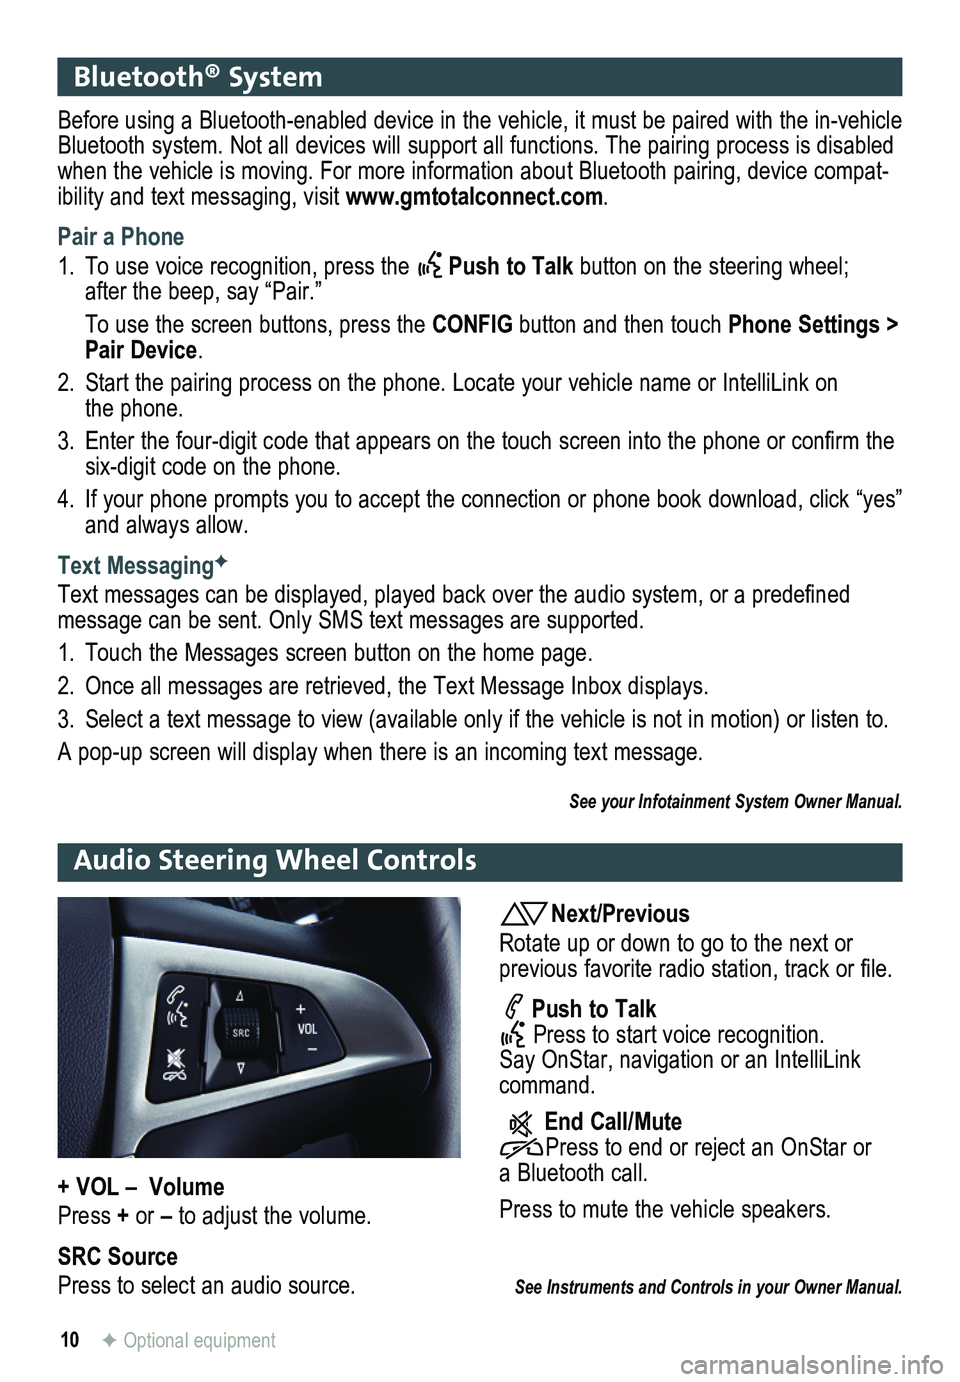
Audio Steering Wheel Controls
Next/Previous
Rotate up or down to go to the next or
previous favorite radio station, track or file.
Push to Talk Press to start voice recognition. Say OnStar, navigation or an IntelliLink command.
End Call/Mute Press to end or reject an OnStar or a Bluetooth call.
Press to mute the vehicle
speakers.
See Instruments and Controls in your Owner Manual.
+ VOL – Volume
Press + or – to adjust the volume.
SRC Source
Press to select an audio source.
Page 13 of 20

13
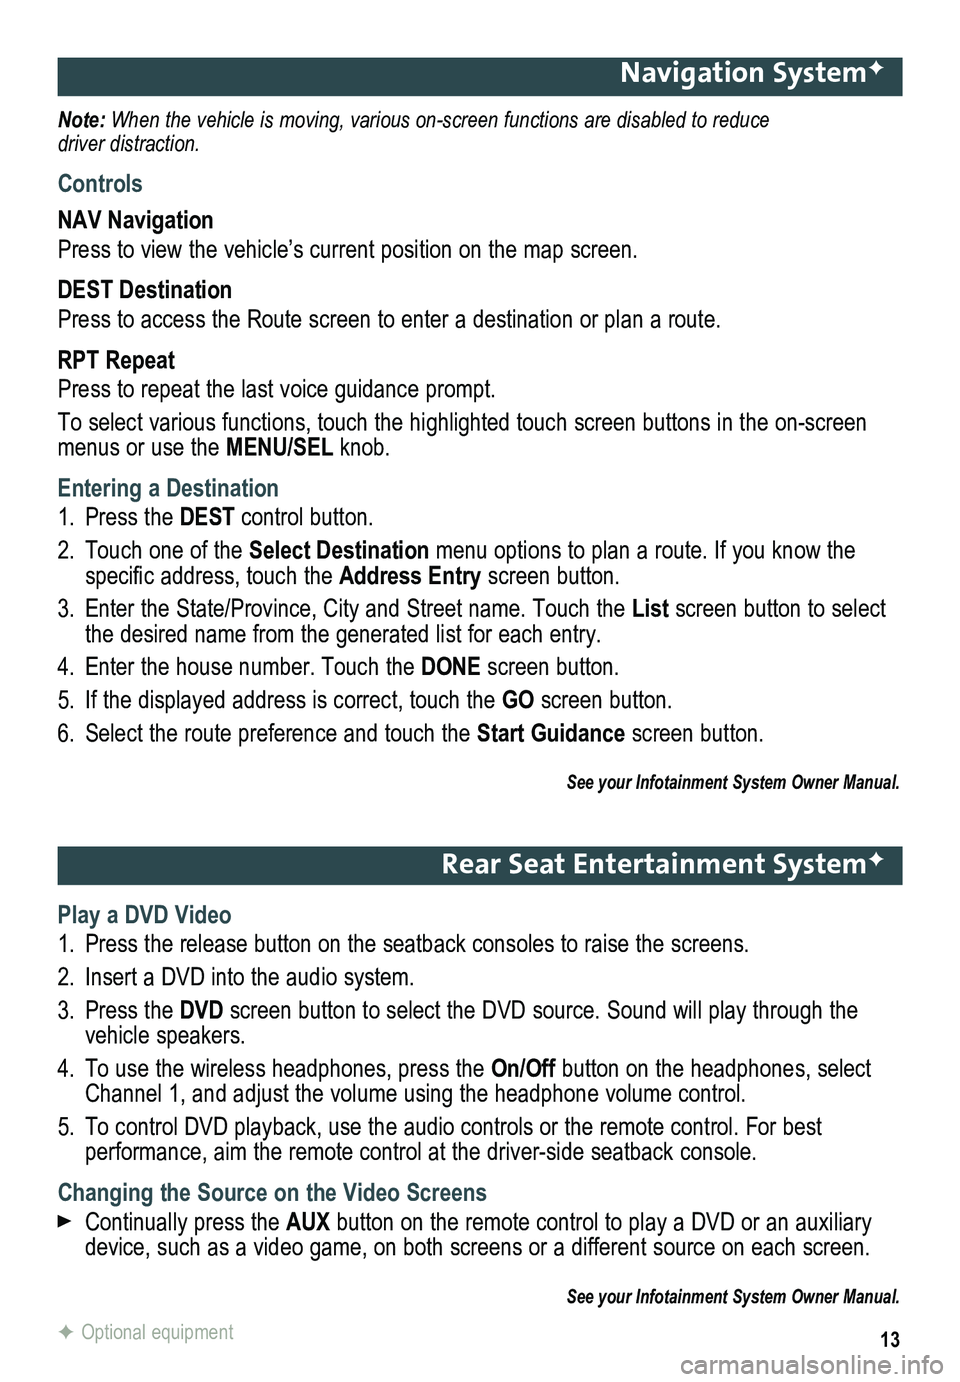
Navigation SystemF
Note: When the vehicle is moving, various on-screen functions are disabled to reduce driver distraction.
Controls
NAV Navigation
Press to view the vehicle’s current position on the map screen.
DEST Destination
Press to access the Route screen to enter a destination or plan a route.
RPT Repeat
Press to repeat the last voice guidance prompt.
To select various functions, touch the highlighted touch screen buttons in the on-screen menus or use the MENU/SEL knob.
Entering a Destination
1. Press the DEST control button.
2. Touch one of the Select Destination menu options to plan a route. If you know the
specific address, touch the Address Entry screen button.
3. Enter the State/Province, City and Street name. Touch the List screen button to select the desired name from the generated list for each entry.
4. Enter the house number. Touch the DONE screen button.
5. If the displayed address is correct, touch the GO screen button.
6. Select the route preference and touch the Start Guidance screen button.
See your Infotainment System Owner Manual.
Rear Seat Entertainment SystemF
Play a DVD Video
1. Press the release button on the seatback consoles to raise the screens.
2. Insert a DVD into the audio system.
3. Press the DVD screen button to select the DVD source. Sound will play through the vehicle speakers.
4. To use the wireless headphones, press the On/Off button on the headphones, select Channel 1, and adjust the volume using the headphone volume control.
5. To control DVD playback, use the audio controls or the remote control. For best
performance, aim the remote control at the driver-side seatback console.\
Changing the Source on the Video Screens
Continually press the AUX button on the remote control to play a DVD or an auxiliary device, such as a video game, on both screens or a different source on e\
ach screen.
See your Infotainment System Owner Manual.
F Optional equipment