manual radio set GMC TERRAIN 2016 Owner's Manual
[x] Cancel search | Manufacturer: GMC, Model Year: 2016, Model line: TERRAIN, Model: GMC TERRAIN 2016Pages: 326, PDF Size: 4.66 MB
Page 19 of 326
GMC Terrain/Terrain Denali Owner Manual (GMNA-Localizing-U.S./Canada/
Mexico-9234776) - 2016 - crc - 10/12/15
18 In Brief
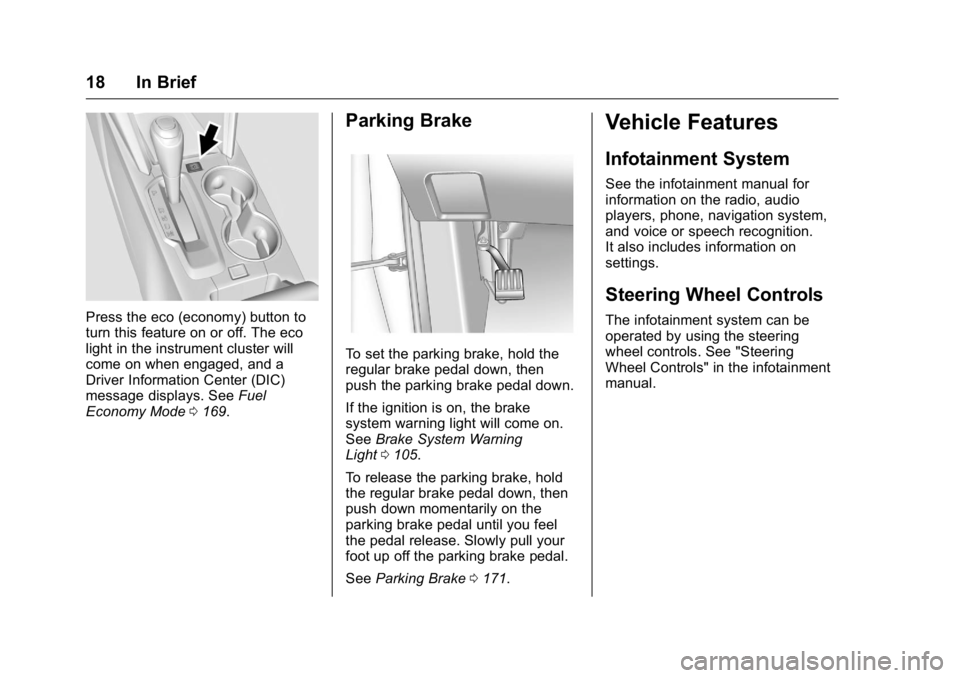
Press the eco (economy) button to
turn this feature on or off. The eco
light in the instrument cluster will
come on when engaged, and a
Driver Information Center (DIC)
message displays. SeeFuel
Economy Mode 0169.
Parking Brake
To set the parking brake, hold the
regular brake pedal down, then
push the parking brake pedal down.
If the ignition is on, the brake
system warning light will come on.
See Brake System Warning
Light 0105.
To release the parking brake, hold
the regular brake pedal down, then
push down momentarily on the
parking brake pedal until you feel
the pedal release. Slowly pull your
foot up off the parking brake pedal.
See Parking Brake 0171.
Vehicle Features
Infotainment System
See the infotainment manual for
information on the radio, audio
players, phone, navigation system,
and voice or speech recognition.
It also includes information on
settings.
Steering Wheel Controls
The infotainment system can be
operated by using the steering
wheel controls. See "Steering
Wheel Controls" in the infotainment
manual.
Page 38 of 326
GMC Terrain/Terrain Denali Owner Manual (GMNA-Localizing-U.S./Canada/
Mexico-9234776) - 2016 - crc - 10/12/15
Keys, Doors, and Windows 37
To avoid setting off the alarm by
accident:
.Lock the vehicle after all
occupants have left the vehicle
and all doors are closed.
. Always unlock a door with the
RKE transmitter.
Unlocking the driver door with the
key will not disarm the system or
turn off the alarm.
How to Detect a Tamper
Condition
IfKis pressed on the RKE
transmitter and the horn chirps and
the lights flash three times, an alarm
occurred previously while the alarm
system was armed.
If the alarm has been activated, a
message will appear on the DIC.
See Security Messages 0118.
Immobilizer
See Radio Frequency
Statement 0301.
Immobilizer Operation
This vehicle has a passive
theft-deterrent system.
The system does not have to be
manually armed or disarmed.
The vehicle is automatically
immobilized when the key is
removed from the ignition.
The system is automatically
disarmed when the vehicle is
started with the correct key. The key
uses a transponder that matches an
immobilizer control unit in the
vehicle and automatically disarms
the system. Only an authorized key
starts the vehicle. The vehicle may
not start if the key is damaged.
The security light in the instrument
cluster comes on if there is a
problem with arming or disarming
the theft-deterrent system. When trying to start the vehicle, the
security light comes on briefly when
the ignition is turned on.
If the engine does not start and the
security light stays on, there is a
problem with the system. Turn the
ignition off and try again.
If the engine still does not start, and
the key appears to be undamaged
or the light continues to stay on, try
another ignition key. If the engine
does not start with the other key, the
vehicle needs service. If the vehicle
does start, the first key may be
damaged. See your dealer who can
service the theft-deterrent system
and have a new key made.
Do not leave the key or device that
disarms or deactivates the
theft-deterrent system in the vehicle.
Page 111 of 326
GMC Terrain/Terrain Denali Owner Manual (GMNA-Localizing-U.S./Canada/
Mexico-9234776) - 2016 - crc - 10/12/15
110 Instruments and Controls
High-Beam On Light
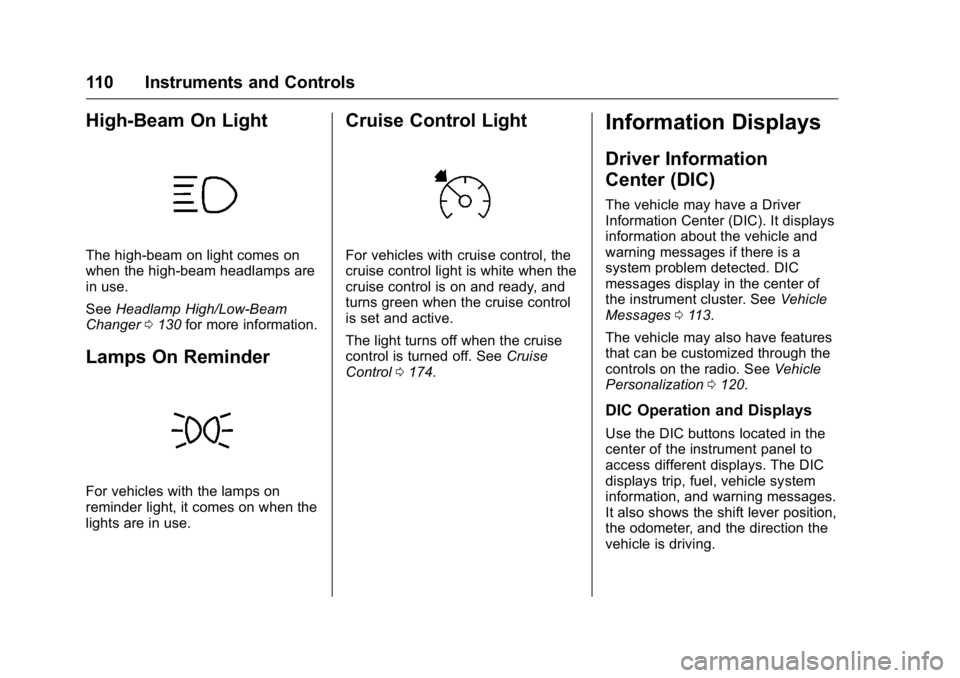
The high‐beam on light comes on
when the high-beam headlamps are
in use.
SeeHeadlamp High/Low-Beam
Changer 0130 for more information.
Lamps On Reminder
For vehicles with the lamps on
reminder light, it comes on when the
lights are in use.
Cruise Control Light
For vehicles with cruise control, the
cruise control light is white when the
cruise control is on and ready, and
turns green when the cruise control
is set and active.
The light turns off when the cruise
control is turned off. See Cruise
Control 0174.
Information Displays
Driver Information
Center (DIC)
The vehicle may have a Driver
Information Center (DIC). It displays
information about the vehicle and
warning messages if there is a
system problem detected. DIC
messages display in the center of
the instrument cluster. See Vehicle
Messages 0113.
The vehicle may also have features
that can be customized through the
controls on the radio. See Vehicle
Personalization 0120.
DIC Operation and Displays
Use the DIC buttons located in the
center of the instrument panel to
access different displays. The DIC
displays trip, fuel, vehicle system
information, and warning messages.
It also shows the shift lever position,
the odometer, and the direction the
vehicle is driving.
Page 122 of 326
GMC Terrain/Terrain Denali Owner Manual (GMNA-Localizing-U.S./Canada/
Mexico-9234776) - 2016 - crc - 10/12/15
Instruments and Controls 121
.Radio Settings
. Phone Settings
. Navigation Settings
. Display Settings
. Vehicle Settings
Each menu is detailed in the
following information.
Languages
Select Languages, then select from
the available language(s).
Time and Date
Manually set the time and date. See
Clock 095.
Radio Settings
Select and the following may
display:
.
Auto Volume
. Gracenote Options
. XM Channel Art
. Max Startup Volume
. Number of Favorites Pages
. XM Categories .
Software Versions Menu
Auto Volume
This feature adjusts the volume to
minimize the effects of unwanted
background noise that can result
from changing road surfaces, driving
speeds, or open windows. This
feature works best at lower volume
settings where background noise is
typically louder than the sound
system volume.
Select Off, Low, Medium, or High.
Gracenote Options
Select and the following may
display:
. Normalization
Normalization
This feature improves voice
recognition and media groupings.
See “USB,” “Auxiliary Devices,” and
“Bluetooth Audio” in the infotainment
manual.
Select to enable or disable. XM Channel Art
This feature turns the XM Audio
page background on the XM
Channel display on and off.
Select to enable or disable.
Max Startup Volume
This feature sets the maximum
startup volume. If the vehicle is
started and the volume is greater
than this level, the volume is
adjusted to this level.
Select + or
−to increase or
decrease the volume.
Number of Favorites Pages
Select to set the number of favorites
to display.
Select the desired number.
XM Categories
This allows which available XM
Categories are used and displayed.
Press to enable or disable available
categories.
Page 124 of 326
GMC Terrain/Terrain Denali Owner Manual (GMNA-Localizing-U.S./Canada/
Mexico-9234776) - 2016 - crc - 10/12/15
Instruments and Controls 123
Symbols
When enabled, symbols will show
on the camera screen. SeeRear
Vision Camera (RVC) 0177.
Select to enable or disable.
Guide Lines
When enabled, guide lines will show
on the camera screen. See Rear
Vision Camera (RVC) 0177.
Select to enable or disable.
Rear Cross Traffic Alert (RCTA)
When enabled, a symbol will show
on the camera screen to warn of
traffic coming from either direction.
See Rear Vision Camera
(RVC) 0177.
Select to enable or disable.
Display Off
Select to turn the display off. The
display will return when any radio
buttons are pressed or the screen is
touched.Map Settings
Select and the following may
display:
. Map Display
. Speed Limits
Map Display
This feature changes the map
screen display. See “Map Settings”
under “Configure Menu” in the
infotainment manual.
Select Automatic, Day, or Night.
Speed Limits
When enabled, the current road
speed limit will display on the map.
See “Map Settings” under
“Configure Menu” in the
infotainment manual.
Select to enable or disable.
Vehicle Settings
Select and the following may
display:
. Climate and Air Quality
. Comfort and Convenience
. Collision Detection Systems .
Lighting
. Power Door Locks
. Remote Lock/Unlock/Start
. Return to Factory Settings?
Each of the menus is detailed in the
following information.
Climate and Air Quality
Select and the following may
display:
. Auto Fan Speed
. Air Conditioning Mode
. Remote Start Auto Heat Seats
. Auto Defog
. Auto Rear Defog
Auto Fan Speed
This selection is available on
vehicles with the Automatic Climate
Control System. Choose the blower
speed setting.
Select High, Medium, or Low
Page 127 of 326
GMC Terrain/Terrain Denali Owner Manual (GMNA-Localizing-U.S./Canada/
Mexico-9234776) - 2016 - crc - 10/12/15
126 Instruments and Controls
Auto Door Unlock
This allows selection of which of the
doors will automatically unlock when
the vehicle is shifted into P (Park).
Select All Doors, Driver Door, or Off.
Delayed Door Lock
When on, this feature will delay the
locking of the doors. To override the
delay, press
Kon the door.
Select to enable or disable.
Remote Lock/Unlock/Start
Select and the following may
display:
. Remote Unlock Light Feedback
. Remote Lock Feedback
. Remote Door Unlock
Remote Unlock Light Feedback
When on, the exterior lamps will
flash when unlocking the vehicle
with the RKE transmitter.
Select Flash Lights or Off. Remote Lock Feedback
This allows selection of what type of
feedback is given when unlocking
the vehicle with the RKE transmitter.
Select Lights and Horn, Lights Only,
Horn Only, or Off.
Remote Door Unlock
This allows selection of which doors
will unlock when pressing
Kon the
RKE transmitter.
Select All Doors or Driver Door.
Return to Factory Settings?
Select Return to Factory Settings to
return all of the vehicle
personalization to the default
settings.
Select Yes or No.
Universal Remote
System
See Radio Frequency
Statement 0301.
Universal Remote System
Programming
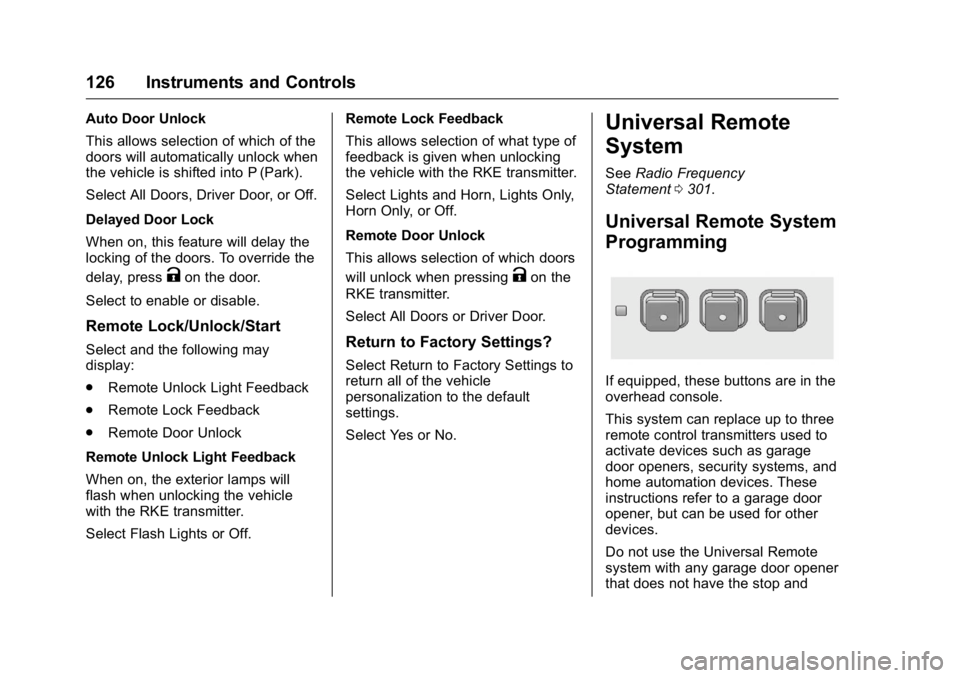
If equipped, these buttons are in the
overhead console.
This system can replace up to three
remote control transmitters used to
activate devices such as garage
door openers, security systems, and
home automation devices. These
instructions refer to a garage door
opener, but can be used for other
devices.
Do not use the Universal Remote
system with any garage door opener
that does not have the stop and
Page 137 of 326

GMC Terrain/Terrain Denali Owner Manual (GMNA-Localizing-U.S./Canada/
Mexico-9234776) - 2016 - crc - 10/12/15
136 Infotainment System
Infotainment
System
Introduction
Infotainment . . . . . . . . . . . . . . . . . . 136
Introduction
Infotainment
See the infotainment manual for
information on the radio, audio
players, phone, navigation system,
and voice or speech recognition.
It also includes information on
settings.
Page 146 of 326

GMC Terrain/Terrain Denali Owner Manual (GMNA-Localizing-U.S./Canada/
Mexico-9234776) - 2016 - crc - 10/12/15
Driving and Operating 145
Driving Information
Distracted Driving
Distraction comes in many forms
and can take your focus from the
task of driving. Exercise good
judgment and do not let other
activities divert your attention away
from the road. Many local
governments have enacted laws
regarding driver distraction. Become
familiar with the local laws in
your area.
To avoid distracted driving, always
keep your eyes on the road, hands
on the wheel, and mind on the drive.
.Do not use a phone in
demanding driving situations.
Use a hands-free method to
place or receive necessary
phone calls.
. Watch the road. Do not read,
take notes, or look up
information on phones or other
electronic devices.
. Designate a front seat
passenger to handle potential
distractions. .
Become familiar with vehicle
features before driving, such as
programming favorite radio
stations and adjusting climate
control and seat settings.
Program all trip information into
any navigation device prior to
driving.
. Wait until the vehicle is parked
to retrieve items that have fallen
to the floor.
. Stop or park the vehicle to tend
to children.
. Keep pets in an appropriate
carrier or restraint.
. Avoid stressful conversations
while driving, whether with a
passenger or on a cell phone.
{Warning
Taking your eyes off the road too
long or too often could cause a
crash resulting in injury or death.
Focus your attention on driving. Refer to the infotainment section for
more information on using that
system and the navigation system,
if equipped, including pairing and
using a cell phone.
Defensive Driving
Defensive driving means
“always
expect the unexpected.” The first
step in driving defensively is to wear
the safety belt. See Safety
Belts 052.
. Assume that other road users
(pedestrians, bicyclists, and
other drivers) are going to be
careless and make mistakes.
Anticipate what they might do
and be ready.
. Allow enough following distance
between you and the driver in
front of you.
. Focus on the task of driving.
Drunk Driving
Death and injury associated with
drinking and driving is a global
tragedy.
Page 243 of 326
GMC Terrain/Terrain Denali Owner Manual (GMNA-Localizing-U.S./Canada/
Mexico-9234776) - 2016 - crc - 10/12/15
242 Vehicle Care
installed and the sensor
matching process is performed
successfully. See your dealer for
service.
. Replacement tires or wheels do
not match the original equipment
tires or wheels. Tires and wheels
other than those recommended
could prevent the TPMS from
functioning properly. See Buying
New Tires 0245.
. Operating electronic devices or
being near facilities using radio
wave frequencies similar to the
TPMS could cause the TPMS
sensors to malfunction.
If the TPMS is not functioning
properly, it cannot detect or signal a
low tire condition. See your dealer
for service if the TPMS malfunction
light and DIC message comes on
and stays on.
TPMS Sensor Matching
Process
Each TPMS sensor has a unique
identification code. The identification
code needs to be matched to a new
tire/wheel position after rotating the tires or replacing one or more of the
TPMS sensors. The TPMS sensor
matching process should also be
performed after replacing a spare
tire with a road tire containing the
TPMS sensor. The malfunction light
and the DIC message should go off
at the next ignition cycle. The
sensors are matched to the tire/
wheel positions, using a TPMS
relearn tool, in the following order:
driver side front tire, passenger side
front tire, passenger side rear tire,
and driver side rear. See your
dealer for service or to purchase a
relearn tool. A TPMS relearn tool
can also be purchased. See
Tire Pressure Monitor
Sensor Activation Tool at
www.gmtoolsandequipment.com or
call 1-800-GM TOOLS
(1-800-468-6657).
There are two minutes to match the
first tire/wheel position, and
five minutes overall to match all four
tire/wheel positions. If it takes
longer, the matching process stops
and must be restarted.
The TPMS sensor matching
process is:
1. Set the parking brake.
2. Turn the ignition to ON/RUN with the engine off.
3. Use the MENU button to select the Vehicle Information Menu
in the Driver Information Center
(DIC). Use the arrow keys to
scroll to the Tire Pressure
screen.
4. Press the SET/CLR button to begin the sensor matching
process.
A message requesting
acceptance of the process
should display.
5. Press the SET/CLR button again to confirm the selection.
The horn sounds twice to
signal the receiver is in relearn
mode and the TIRE
LEARNING ACTIVE message
displays on the DIC screen.
6. Start with the driver side front tire.
Page 261 of 326

GMC Terrain/Terrain Denali Owner Manual (GMNA-Localizing-U.S./Canada/
Mexico-9234776) - 2016 - crc - 10/12/15
260 Vehicle Care
2. The vehicles should be closeenough for the jumper cables
to reach, but the vehicles
should not be touching.
Touching could cause
grounding and possible
electrical system damage.
Put both vehicles in P (Park)
and set the parking brake
firmly.
3. Unplug accessories plugged into the cigarette lighter or the
accessory power outlet. Turn
off the radio and all lamps that
are not needed. Turn off the
ignition on both vehicles.
4. Locate the positive (+) and negative (−) terminals on both
vehicles. Some vehicles have
remote jump starting terminals.
{Warning
An electric fan can start up even
when the engine is not running
and can injure you. Keep hands,
clothing, and tools away from any
underhood electric fan. 5. The remote positive (+)
terminal (1) is located on the
underhood fuse block, on the
driver side. Lift the red cap to
uncover the terminal.
The remote negative (−)
terminal (2) is a stud behind
the metal tab stamped with
GND (−) near the driver side
strut tower.
6. The jumper cables should be in good working condition with no
loose or missing insulation.
The vehicles could be
damaged if they are not.
7. Connect the red positive (+) cable to the positive (+)
terminal on the vehicle with the
dead battery. Use a remote
positive (+) terminal if the
vehicle has one.
8. Do not let the other end touch metal. Connect it to the
positive (+) terminal of the
good battery. Use a remote
positive (+) terminal if the
vehicle has one. 9. Connect the black negative (−)
cable to the negative (−)
terminal of the good battery.
Use a remote negative (−)
terminal if the vehicle has one.
Do not let the other end touch
anything until the next step.
The other end of the negative
(−) cable does not go to the
dead battery. It goes to a
heavy, unpainted metal engine
part or to a remote negative (−)
terminal on the vehicle with the
dead battery.
10. Connect the other end of the negative (−) cable away from
the dead battery, but not near
engine parts that move.
11. Start the vehicle with the good battery and run the engine.
12. Press the unlock symbol on the Remote Keyless Entry (RKE)
transmitter to disarm the
security system, if equipped.
13. Try to start the vehicle that had the dead battery. If it will not
start after a few tries, it needs
service.