start stop button GMC TERRAIN 2016 Owner's Manual
[x] Cancel search | Manufacturer: GMC, Model Year: 2016, Model line: TERRAIN, Model: GMC TERRAIN 2016Pages: 326, PDF Size: 4.66 MB
Page 24 of 326
GMC Terrain/Terrain Denali Owner Manual (GMNA-Localizing-U.S./Canada/
Mexico-9234776) - 2016 - crc - 10/12/15
In Brief 23
Resetting the Oil Life System1. Turn the ignition to ON/RUN, with the engine off.
2. Press the DIC MENU button to display the Vehicle
Information menu.
3. Press either the up or down arrows to view REMAINING
OIL LIFE.
4. Press the SET/CLR button until 100% is displayed.
5. Turn the key to LOCK/OFF.
Or: 1. Turn the ignition to ON/RUN with the engine off.
2. Fully press and release the accelerator pedal three times
within five seconds.
See Engine Oil Life System 0207.
E85 or FlexFuel
Vehicles with a yellow fuel cap can
use either unleaded gasoline or
ethanol fuel containing up to 85%
ethanol (E85). See E85 or FlexFuel 0
187. For all other vehicles, use
only the unleaded gasoline
described under Fuel0186.
Driving for Better Fuel
Economy
Driving habits can affect fuel
mileage. Here are some driving tips
to get the best fuel economy
possible.
.
Avoid fast starts and accelerate
smoothly.
. Brake gradually and avoid
abrupt stops.
. Avoid idling the engine for long
periods of time.
. When road and weather
conditions are appropriate, use
cruise control.
. Always follow posted speed
limits or drive more slowly when
conditions require.
. Keep vehicle tires properly
inflated.
. Combine several trips into a
single trip. .
Replace the vehicle's tires with
the same TPC Spec number
molded into the tire's sidewall
near the size.
. Follow recommended scheduled
maintenance.Roadside Assistance
Program
U.S.: 1-888-881-3302
TTY Users (U.S. Only):
1-888-889-2438
Canada: 1-800-268-6800
New GMC owners are automatically
enrolled in the Roadside Assistance
Program.
See Roadside Assistance
Program 0295.
Page 28 of 326
GMC Terrain/Terrain Denali Owner Manual (GMNA-Localizing-U.S./Canada/
Mexico-9234776) - 2016 - crc - 10/12/15
Keys, Doors, and Windows 27
SeeVehicle Personalization 0120.
If a passenger door is open when
Q
is pressed, all doors lock.
Pressing
Qmay also arm the
theft-deterrent system. See Vehicle
Alarm System 036.
K(Unlock) : Press to unlock the
driver door or all doors. See Vehicle
Personalization 0120. The turn
signal indicators may flash to
indicate unlocking has occurred.
See Vehicle Personalization 0120.
Pressing
Kmay also disarm the
theft-deterrent system. See Vehicle
Alarm System 036.
For vehicles with the manual
liftgate, press
Ktwice within
five seconds to unlock the liftgate.
Y(Remote Liftgate Release) :
If equipped with the power liftgate,
press and hold until the liftgate
begins to move. Press again to stop
the power liftgate.
7(Vehicle Locator/Panic
Alarm) : Press and release one
time to initiate vehicle locator. The
exterior lamps flash and the horn chirps three times. Press and hold
7for at least three seconds to
sound the panic alarm. The horn
sounds and the turn signals flash
until
7is pressed again or the key
is placed in the ignition and turned
to ON/RUN.
/(Remote Vehicle Start) :
If equipped, first press and release
Qthen immediately press and hold/for at least four seconds to start
the engine from outside the vehicle
using the RKE transmitter. See
Remote Vehicle Start 028.
The buttons on the keys are
disabled when there is a key in the
ignition.
Programming Transmitters to
the Vehicle
Only RKE transmitters programmed
to this vehicle will work. If a
transmitter is lost or stolen, a
replacement can be purchased and
programmed through your dealer.
When the replacement transmitter is
programmed to this vehicle, all
remaining transmitters must also be
reprogrammed. Any lost or stolen transmitters will no longer work
once the new transmitter is
programmed. See your dealer to
have new transmitters programmed.
Programming with a Recognized
Transmitter
To program a new key:
1. Insert the original, already programmed key in the ignition
and turn to the key to the ON/
RUN position.
2. Turn the key to LOCK/OFF, and remove the key.
3. Insert the new key to be programmed and turn it to the
ON/RUN position within
five seconds.
The security light will turn off
once the key has been
programmed.
4. Repeat Steps 1–3 if additional keys are to be programmed.
If a key is lost or damaged, see your
dealer to have a new key made.
Page 50 of 326
GMC Terrain/Terrain Denali Owner Manual (GMNA-Localizing-U.S./Canada/
Mexico-9234776) - 2016 - crc - 10/12/15
Seats and Restraints 49
If something has blocked the driver
seat while recalling a memory
position, the recall may stop.
Remove the obstruction; then press
and hold the appropriate manual
control for the memory item that is
not recalling for two seconds. Try
recalling the memory position again
by pressing the appropriate memory
button. If the memory position is still
not recalling, see your dealer for
service.
Recalling RKE Memory Positions
(Memory Remote Recall)
The Memory Remote Recall feature
can recall the driver seat and
outside mirrors to previously stored
RKE Memory positions when
entering the vehicle.
Every time the ignition is turned off,
the positions of the driver seat and
outside mirrors are automatically
stored to the RKE transmitter that
was used to start the vehicle. These
positions are called RKE Memory
positions and may be different than
the previously mentioned Button
Memory positions saved to the
1 or 2 buttons. To recall RKEMemory positions, unlock the driver
door with the RKE transmitter and
open the driver door. If the driver
door is already open, pressing the
RKE transmitter
Kbutton will also
activate the RKE Memory recall.
The driver seat and outside mirrors
will move to the previously saved
RKE Memory positions.
This feature is turned on or off using
the vehicle personalization menu.
See Vehicle Personalization 0120.
To stop recall movement, press any
of the memory, power mirror,
or power seat controls.
If something has blocked the driver
seat while recalling a memory
position, the recall may stop.
Remove the obstruction; then press
and hold the appropriate manual
control for the memory item that is
not recalling for two seconds. Try
recalling the memory position again
by opening the driver door and
pressing
Kon the RKE transmitter.
RKE transmitters are not labeled
with a number. If your memory seat
position is stored to 1 or 2 but this position is not automatically
recalling, then store your positions
to the other button or switch RKE
transmitters with the other driver.
If the memory position is still not
recalling, see your dealer for
service.
Easy Exit Driver Seat
This feature moves the seat
rearward allowing the driver more
room to exit the vehicle.
To activate, turn the ignition off and
open the driver door. If the driver
door is already open, turning the
ignition off will activate the recall.
This feature can be turned on or off
using the vehicle personalization
menu. See
Vehicle
Personalization 0120.
To stop recall movement, press one
of the memory or power seat
controls.
If something has blocked the driver
seat while recalling the exit position,
the recall may stop. Remove the
obstruction; then press and hold the
power seat control rearward for
Page 95 of 326
GMC Terrain/Terrain Denali Owner Manual (GMNA-Localizing-U.S./Canada/
Mexico-9234776) - 2016 - crc - 10/12/15
94 Instruments and Controls
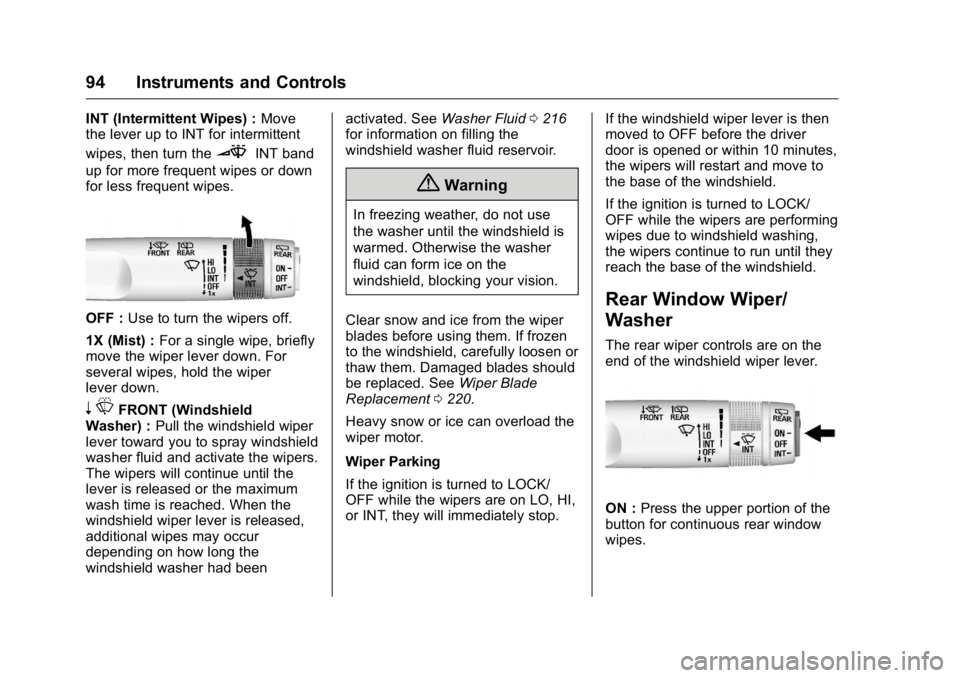
INT (Intermittent Wipes) :Move
the lever up to INT for intermittent
wipes, then turn the
3INT band
up for more frequent wipes or down
for less frequent wipes.
OFF : Use to turn the wipers off.
1X (Mist) : For a single wipe, briefly
move the wiper lever down. For
several wipes, hold the wiper
lever down.
n LFRONT (Windshield
Washer) : Pull the windshield wiper
lever toward you to spray windshield
washer fluid and activate the wipers.
The wipers will continue until the
lever is released or the maximum
wash time is reached. When the
windshield wiper lever is released,
additional wipes may occur
depending on how long the
windshield washer had been activated. See
Washer Fluid0216
for information on filling the
windshield washer fluid reservoir.
{Warning
In freezing weather, do not use
the washer until the windshield is
warmed. Otherwise the washer
fluid can form ice on the
windshield, blocking your vision.
Clear snow and ice from the wiper
blades before using them. If frozen
to the windshield, carefully loosen or
thaw them. Damaged blades should
be replaced. See Wiper Blade
Replacement 0220.
Heavy snow or ice can overload the
wiper motor.
Wiper Parking
If the ignition is turned to LOCK/
OFF while the wipers are on LO, HI,
or INT, they will immediately stop. If the windshield wiper lever is then
moved to OFF before the driver
door is opened or within 10 minutes,
the wipers will restart and move to
the base of the windshield.
If the ignition is turned to LOCK/
OFF while the wipers are performing
wipes due to windshield washing,
the wipers continue to run until they
reach the base of the windshield.
Rear Window Wiper/
Washer
The rear wiper controls are on the
end of the windshield wiper lever.
ON :
Press the upper portion of the
button for continuous rear window
wipes.
Page 96 of 326
GMC Terrain/Terrain Denali Owner Manual (GMNA-Localizing-U.S./Canada/
Mexico-9234776) - 2016 - crc - 10/12/15
Instruments and Controls 95
OFF :The rear wiper turns off when
the button is returned to the middle
position.
INT (Intermittent Rear Wipes) :
Press the lower portion of the button
to set a delay between wipes.
a(Rear Washer) : Push the
windshield wiper lever forward to
spray washer fluid on the rear
window. The lever returns to its
starting position when released.
Rear Wiper Arm Assembly
Protection
When using an automatic car wash,
move the rear wiper control to OFF.
This disables the rear wiper.
If the transmission is in N (Neutral)
and the vehicle speed is very slow,
the rear wiper will automatically stop
at the base of the rear window.
The wiper operations return to
normal when the transmission is no
longer in N (Neutral) or the vehicle
speed has increased. The windshield washer reservoir is
used for the windshield and the rear
window. Check the fluid level in the
reservoir if either washer is not
working. See
Washer Fluid 0216.Compass
The vehicle may have a compass
display in the Driver Information
Center (DIC). The compass receives
its heading and other information
from the Global Positioning
System (GPS) antenna, StabiliTrak,
and vehicle speed information.
Avoid covering the GPS antenna,
located on the roof, for long periods
of time with objects that may
interfere with the antenna's ability to
receive a satellite signal. The
compass system is designed to
operate for a certain number of
miles or degrees of turn before
needing a signal from the GPS
satellites. When the compass
display shows CAL, drive the
vehicle for a short distance in an
open area where it can receive a
GPS signal. The compass system will automatically determine when
the GPS signal is restored and
provide a heading again.
Clock
The infotainment system controls
are used to access the time and
date settings through the menu
system. See
“Using the System” in
the infotainment manual.
Setting the Clock Using the
Faceplate
To set the time and date:
1. Turn the infotainment system on.
2. Press the CONFIG button and select Time and Date, or press
the
Hbutton.
3. Select Set Time or Set Date.
4. Turn the MENU/SEL knob to adjust the highlighted value.
5. Press the MENU/SEL knob to select the next value.
6. To save the settings and return to the Time and Date menu,
press
EBACK.
Page 113 of 326
GMC Terrain/Terrain Denali Owner Manual (GMNA-Localizing-U.S./Canada/
Mexico-9234776) - 2016 - crc - 10/12/15
112 Instruments and Controls
Best Average Fuel Economy
The right hand side displays the
best average fuel economy (AFE)
that is achieved for a selected
distance. The left hand side displays
a running average of fuel economy
for the most recently traveled
selected distance. The center of the
Best AFE menu includes a digital
readout and bar graph to show the
instantaneous fuel economy.
Quickly press the SET/CLR button
to display a page for selecting one
of the distance options. Move the
up/down arrow to choose the
selection, and SET/CLR to change
the setting.
When viewing best AFE, a several
second press and hold of SET/CLR
will reset the best value. The best
value will show“- - -”until the
selected distance has been
traveled.
The display provides feedback on
how current driving behavior in the
bar graph affects the running
average in the left display and how
well recent driving compares to the
best that has been achieved. Average Vehicle Speed
This display shows the average
speed of the vehicle in kilometers
per hour (km/h) or miles per
hour (mph). This average is
calculated based on the various
vehicle speeds recorded since the
last reset of this value. The average
speed can be reset by pressing
SET/CLR while the Average Vehicle
Speed display is showing.
Timer
This display can be used as a timer.
To start the timer, press SET/CLR
while Timer is displayed. The
display will show the amount of time
that has passed since the timer was
last reset, not including time the
ignition is off. Time will continue to
be counted as long as the ignition is
on, even if another display is being
shown on the DIC. The timer will
record up to 99 hours, 59 minutes
and 59 seconds (99:59:59) after
which the display will return to zero.
To stop the timer, press SET/CLR
briefly while Timer is displayed. To
reset the timer to zero, press and
hold SET/CLR.Navigation
This display is used for the OnStar
or Navigation System Turn-by-Turn
guidance, if equipped. See
OnStar
Overview 0305 or the infotainment
manual, if equipped.
Blank Display
This display shows no information.
Vehicle Information Menu
Items
Press the MENU button until Vehicle
Information Menu is displayed. Then
press
Rto scroll through the
following menu items:
. Unit
. Tire Pressure
. Remaining Oil Life
. Blank Display
Unit
Press SET/CLR to enter the unit
menu. Then press
QorRto switch
between METRIC or US when the
Unit display is active. Press SET/
CLR to confirm the setting. This will
Page 127 of 326
GMC Terrain/Terrain Denali Owner Manual (GMNA-Localizing-U.S./Canada/
Mexico-9234776) - 2016 - crc - 10/12/15
126 Instruments and Controls
Auto Door Unlock
This allows selection of which of the
doors will automatically unlock when
the vehicle is shifted into P (Park).
Select All Doors, Driver Door, or Off.
Delayed Door Lock
When on, this feature will delay the
locking of the doors. To override the
delay, press
Kon the door.
Select to enable or disable.
Remote Lock/Unlock/Start
Select and the following may
display:
. Remote Unlock Light Feedback
. Remote Lock Feedback
. Remote Door Unlock
Remote Unlock Light Feedback
When on, the exterior lamps will
flash when unlocking the vehicle
with the RKE transmitter.
Select Flash Lights or Off. Remote Lock Feedback
This allows selection of what type of
feedback is given when unlocking
the vehicle with the RKE transmitter.
Select Lights and Horn, Lights Only,
Horn Only, or Off.
Remote Door Unlock
This allows selection of which doors
will unlock when pressing
Kon the
RKE transmitter.
Select All Doors or Driver Door.
Return to Factory Settings?
Select Return to Factory Settings to
return all of the vehicle
personalization to the default
settings.
Select Yes or No.
Universal Remote
System
See Radio Frequency
Statement 0301.
Universal Remote System
Programming
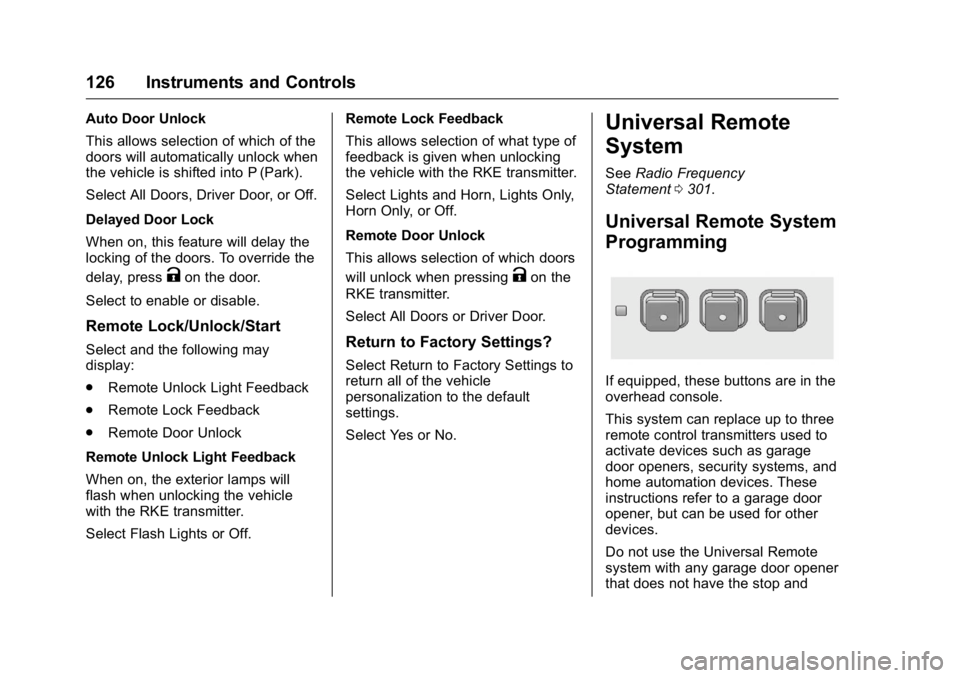
If equipped, these buttons are in the
overhead console.
This system can replace up to three
remote control transmitters used to
activate devices such as garage
door openers, security systems, and
home automation devices. These
instructions refer to a garage door
opener, but can be used for other
devices.
Do not use the Universal Remote
system with any garage door opener
that does not have the stop and
Page 174 of 326
GMC Terrain/Terrain Denali Owner Manual (GMNA-Localizing-U.S./Canada/
Mexico-9234776) - 2016 - crc - 10/12/15
Driving and Operating 173
vehicle wheel brakes to assist the
driver in keeping the vehicle on the
intended path.
If cruise control is being used and
traction control or StabiliTrak begins
to limit wheel spin, cruise control will
disengage. Cruise control may be
turned back on when road
conditions allow.
Both systems come on
automatically when the vehicle is
started and begins to move. The
systems may be heard or felt while
they are operating or while
performing diagnostic checks. This
is normal and does not mean there
is a problem with the vehicle.
It is recommended to leave both
systems on for normal driving
conditions, but it may be necessary
to turn TCS off if the vehicle gets
stuck in sand, mud, ice, or snow.
SeeIf the Vehicle Is Stuck 0155
and “Turning the Systems Off and
On” later in this section.
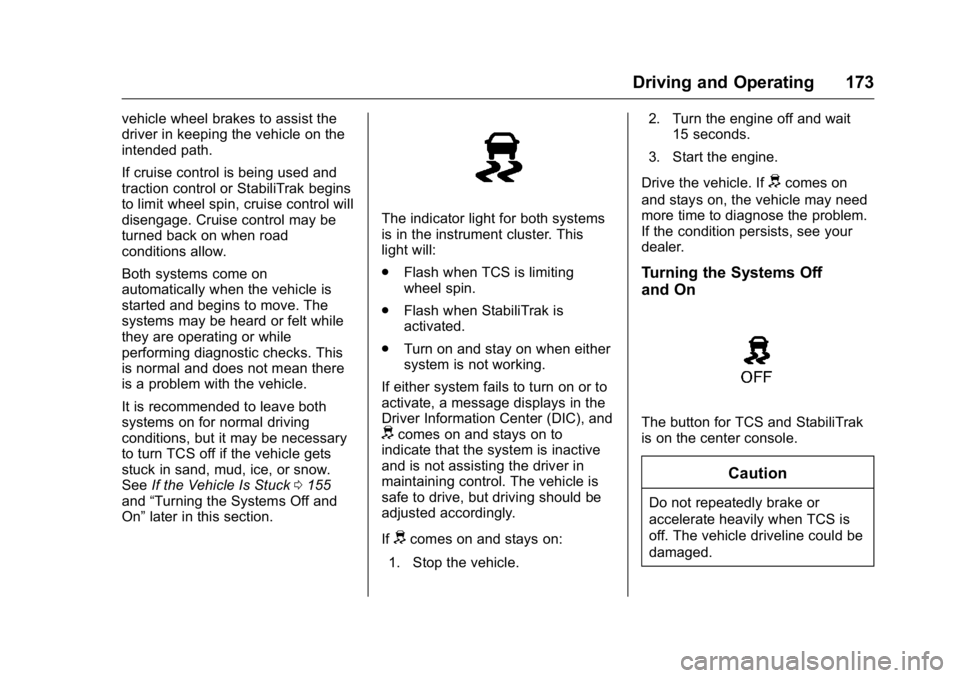
The indicator light for both systems
is in the instrument cluster. This
light will:
.
Flash when TCS is limiting
wheel spin.
. Flash when StabiliTrak is
activated.
. Turn on and stay on when either
system is not working.
If either system fails to turn on or to
activate, a message displays in the
Driver Information Center (DIC), and
dcomes on and stays on to
indicate that the system is inactive
and is not assisting the driver in
maintaining control. The vehicle is
safe to drive, but driving should be
adjusted accordingly.
If
dcomes on and stays on:
1. Stop the vehicle. 2. Turn the engine off and wait
15 seconds.
3. Start the engine.
Drive the vehicle. If
dcomes on
and stays on, the vehicle may need
more time to diagnose the problem.
If the condition persists, see your
dealer.
Turning the Systems Off
and On
The button for TCS and StabiliTrak
is on the center console.
Caution
Do not repeatedly brake or
accelerate heavily when TCS is
off. The vehicle driveline could be
damaged.
Page 243 of 326
GMC Terrain/Terrain Denali Owner Manual (GMNA-Localizing-U.S./Canada/
Mexico-9234776) - 2016 - crc - 10/12/15
242 Vehicle Care
installed and the sensor
matching process is performed
successfully. See your dealer for
service.
. Replacement tires or wheels do
not match the original equipment
tires or wheels. Tires and wheels
other than those recommended
could prevent the TPMS from
functioning properly. See Buying
New Tires 0245.
. Operating electronic devices or
being near facilities using radio
wave frequencies similar to the
TPMS could cause the TPMS
sensors to malfunction.
If the TPMS is not functioning
properly, it cannot detect or signal a
low tire condition. See your dealer
for service if the TPMS malfunction
light and DIC message comes on
and stays on.
TPMS Sensor Matching
Process
Each TPMS sensor has a unique
identification code. The identification
code needs to be matched to a new
tire/wheel position after rotating the tires or replacing one or more of the
TPMS sensors. The TPMS sensor
matching process should also be
performed after replacing a spare
tire with a road tire containing the
TPMS sensor. The malfunction light
and the DIC message should go off
at the next ignition cycle. The
sensors are matched to the tire/
wheel positions, using a TPMS
relearn tool, in the following order:
driver side front tire, passenger side
front tire, passenger side rear tire,
and driver side rear. See your
dealer for service or to purchase a
relearn tool. A TPMS relearn tool
can also be purchased. See
Tire Pressure Monitor
Sensor Activation Tool at
www.gmtoolsandequipment.com or
call 1-800-GM TOOLS
(1-800-468-6657).
There are two minutes to match the
first tire/wheel position, and
five minutes overall to match all four
tire/wheel positions. If it takes
longer, the matching process stops
and must be restarted.
The TPMS sensor matching
process is:
1. Set the parking brake.
2. Turn the ignition to ON/RUN with the engine off.
3. Use the MENU button to select the Vehicle Information Menu
in the Driver Information Center
(DIC). Use the arrow keys to
scroll to the Tire Pressure
screen.
4. Press the SET/CLR button to begin the sensor matching
process.
A message requesting
acceptance of the process
should display.
5. Press the SET/CLR button again to confirm the selection.
The horn sounds twice to
signal the receiver is in relearn
mode and the TIRE
LEARNING ACTIVE message
displays on the DIC screen.
6. Start with the driver side front tire.