wheel GMC TERRAIN 2017 Get To Know Guide
[x] Cancel search | Manufacturer: GMC, Model Year: 2017, Model line: TERRAIN, Model: GMC TERRAIN 2017Pages: 20, PDF Size: 2.79 MB
Page 1 of 20
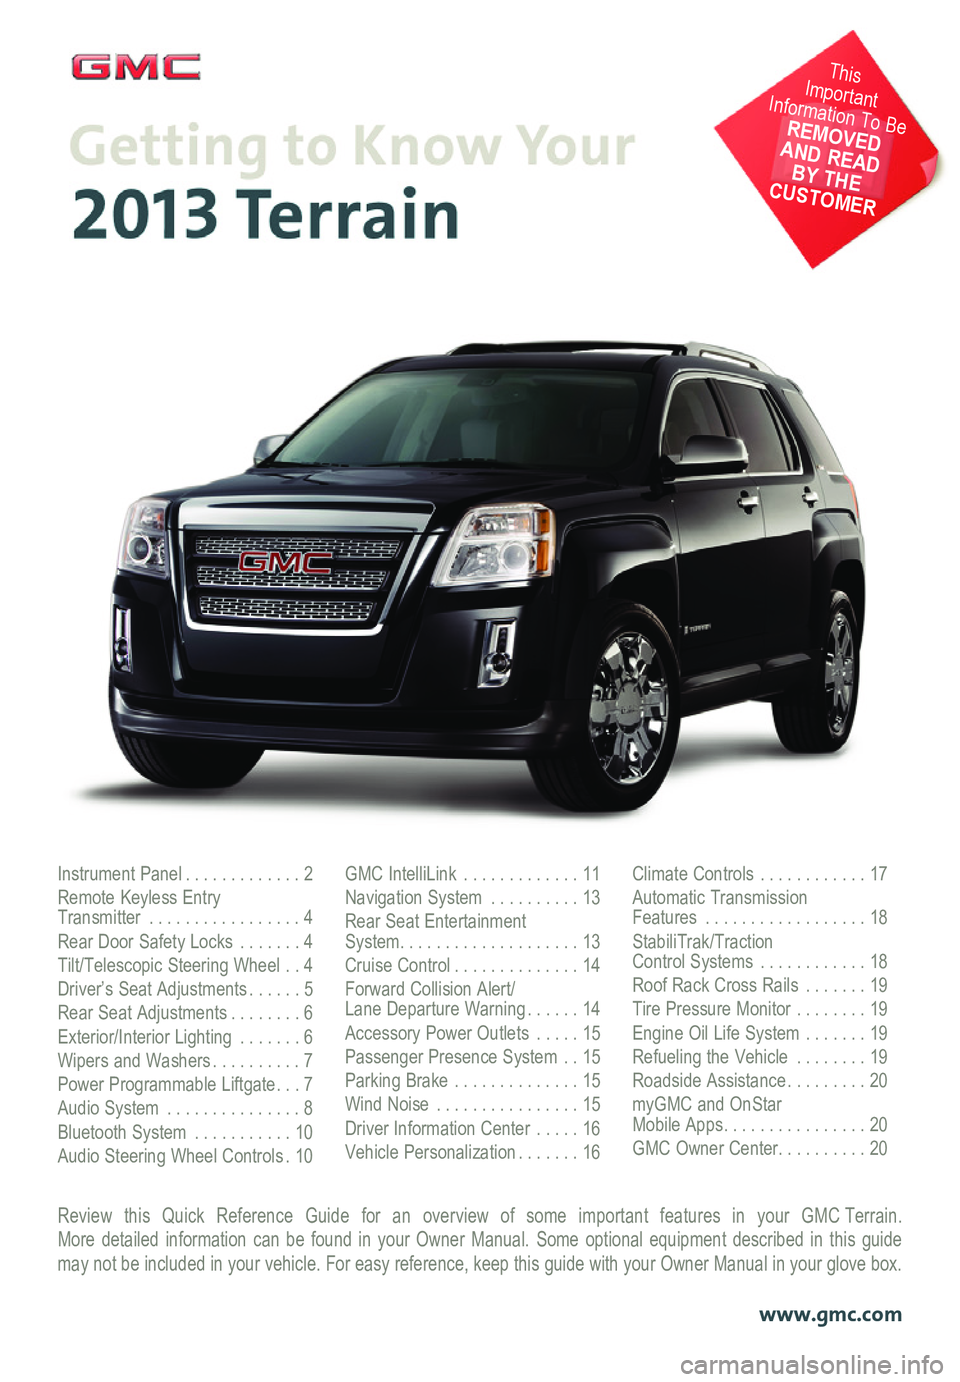
Review this Quick Reference Guide for an overview of some important features in your GMC Terrain. More detailed information can be found in your Owner Manual. Some option\
al equipment described in this guide may not be included in your vehicle. For easy reference, keep this guide\
with your Owner Manual in your glove box.
www.gmc.com
Instrument Panel .............2Remote Keyless Entry Transmitter .................4Rear Door Safety Locks .......4Tilt/Telescopic Steering Wheel ..4Driver’s Seat Adjustments ......5Rear Seat Adjustments ........6Exterior/Interior Lighting .......6Wipers and Washers ..........7Power Programmable Liftgate ...7Audio System ...............8Bluetooth System ...........10Audio Steering Wheel Controls .10
GMC IntelliLink .............11Navigation System ..........13Rear Seat Entertainment System ....................13Cruise Control ..............14Forward Collision Alert/ Lane Departure Warning ......14Accessory Power Outlets .....15Passenger Presence System ..15Parking Brake ..............15Wind Noise ................15Driver Information Center .....16Vehicle Personalization .......16
Climate Controls ............17Automatic Transmission Features ..................18StabiliTrak/Traction Control Systems ............18Roof Rack Cross Rails .......19Tire Pressure Monitor ........19Engine Oil Life System .......19Refueling the Vehicle ........19Roadside Assistance .........20myGMC and OnStar Mobile Apps ................20GMC Owner Center ..........20
This Important Information To Be REMOVED AND READ BY THE CUSTOMER
Page 2 of 20
2
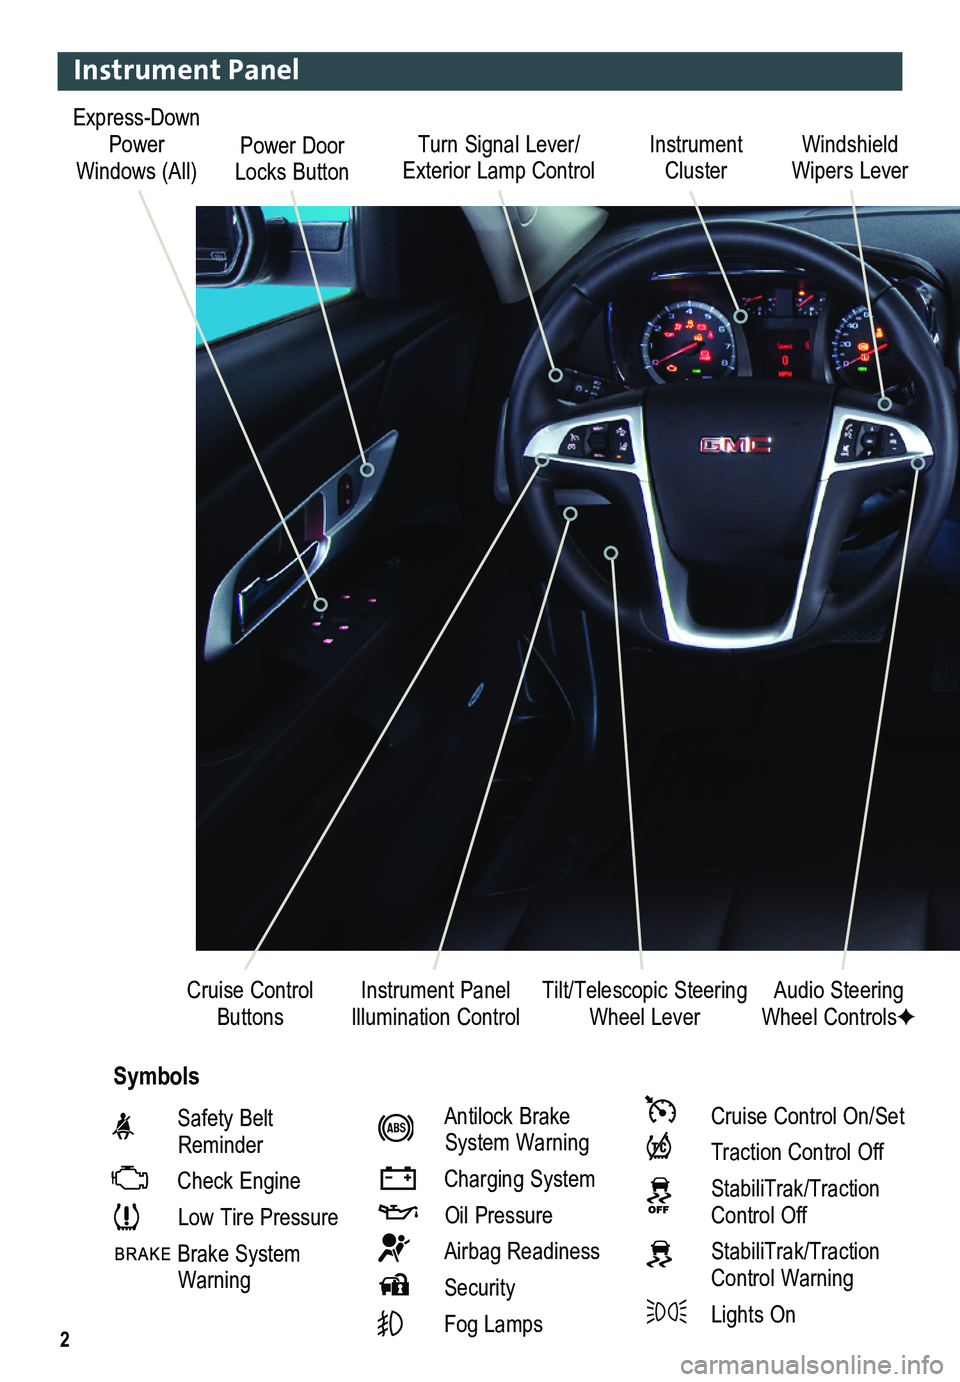
Turn Signal Lever/ Exterior Lamp ControlInstrument Cluster
Tilt/Telescopic Steering Wheel Lever
Windshield Wipers Lever
Instrument Panel Illumination ControlCruise Control Buttons
Instrument Panel
Safety Belt Reminder
Check Engine
Low Tire Pressure
Brake System Warning
Antilock Brake System Warning
Charging System
Oil Pressure
Airbag Readiness
Security
Fog Lamps
Cruise Control On/Set
Traction Control Off
StabiliTrak/Traction Control Off
StabiliTrak/Traction Control Warning
Lights On
Audio Steering Wheel ControlsF
Symbols
Express-Down Power Windows (All)Power Door Locks Button
Page 4 of 20
4
Remote Keyless Entry Transmitter
Unlock
Press to unlock the driver’s door. Press again to unlock all doors and the liftgate.
Lock
Press to lock all doors and the liftgate. The driver’s door will not lock if open.
TIP: The unlock and lock settings can be changed in the Vehicle Settings menu by using the audio system controls.
Liftgate
Press to open/stop/close the power liftgate (optional).
Vehicle Locator/Panic Alarm
Press and release to locate your vehicle. The turn signal lamps will flash and the horn will sound.
Press and hold to activate the alarm. The turn signal lamps will flash and the horn will sound until the button is pressed again or the ignition is turned on.
Remote Vehicle StartF
Press and release the Lock button and then press and hold the button to start the engine from outside the vehicle. After entering the vehicle, turn the ignition to the On position.
– The engine will run for 10 minutes. Repeat these steps for a 10-minute time extension.
– Only two remote starts are allowed between ignition cycles.
– Press and hold the button to cancel a remote start.
Note: Open the Vehicle Settings in the Configuration menu to have the heated seatsF turn on during a remote start.
See Keys, Doors and Windows in your Owner Manual.
Tilt/Telescopic Steering Wheel
With the vehicle in Park, push down the lever on the left side of the steering column to\
adjust the steering wheel. The steering wheel can then be moved up or do\
wn and in or out. After adjustment, pull up the lever to lock the steering wheel in place.
See Instruments and Controls in your Owner Manual.
Rear Door Safety Locks
F Optional equipment
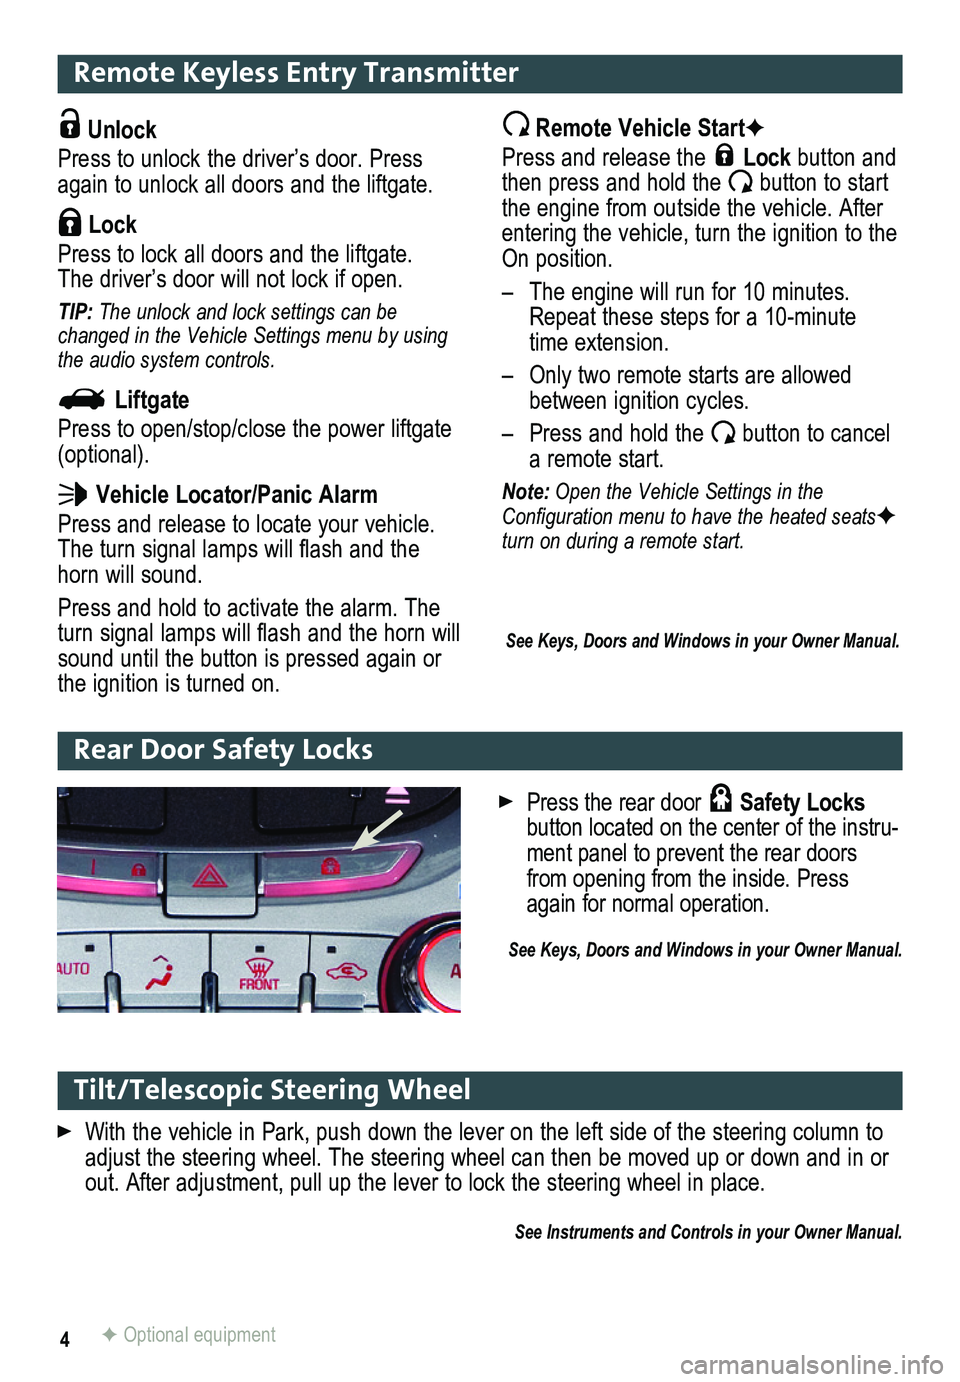
Press the rear door Safety Locks button located on the center of the instru-ment panel to prevent the rear doors from opening from the inside. Press again for normal operation.
See Keys, Doors and Windows in your Owner Manual.
Page 10 of 20
10F Optional equipment
Bluetooth® System
Before using a Bluetooth-enabled device in the vehicle, it must be paired with the in-vehicle Bluetooth system. Not all devices will support all functions. Bluetooth streaming audio is available with the IntelliLink system.F For more information, visit www.gm.com/bluetooth.
Pair a Phone
1. To use voice recognition, press the Voice Recognition button on the steering wheel; after the beep, say “Pair.”
To use the screen buttons, press the CONFIG button and then touch Phone Settings > Pair Device.
2. Start the pairing process on the phone. Locate your vehicle name on the \
phone.
3. Enter the four-digit code that appears on the touch screen into the phone or confirm the six-digit code on the phone.
4. If your phone prompts you to accept the connection or phone book download, click “yes” and always allow.
See your Infotainment System Owner Manual.
Audio Steering Wheel Controls
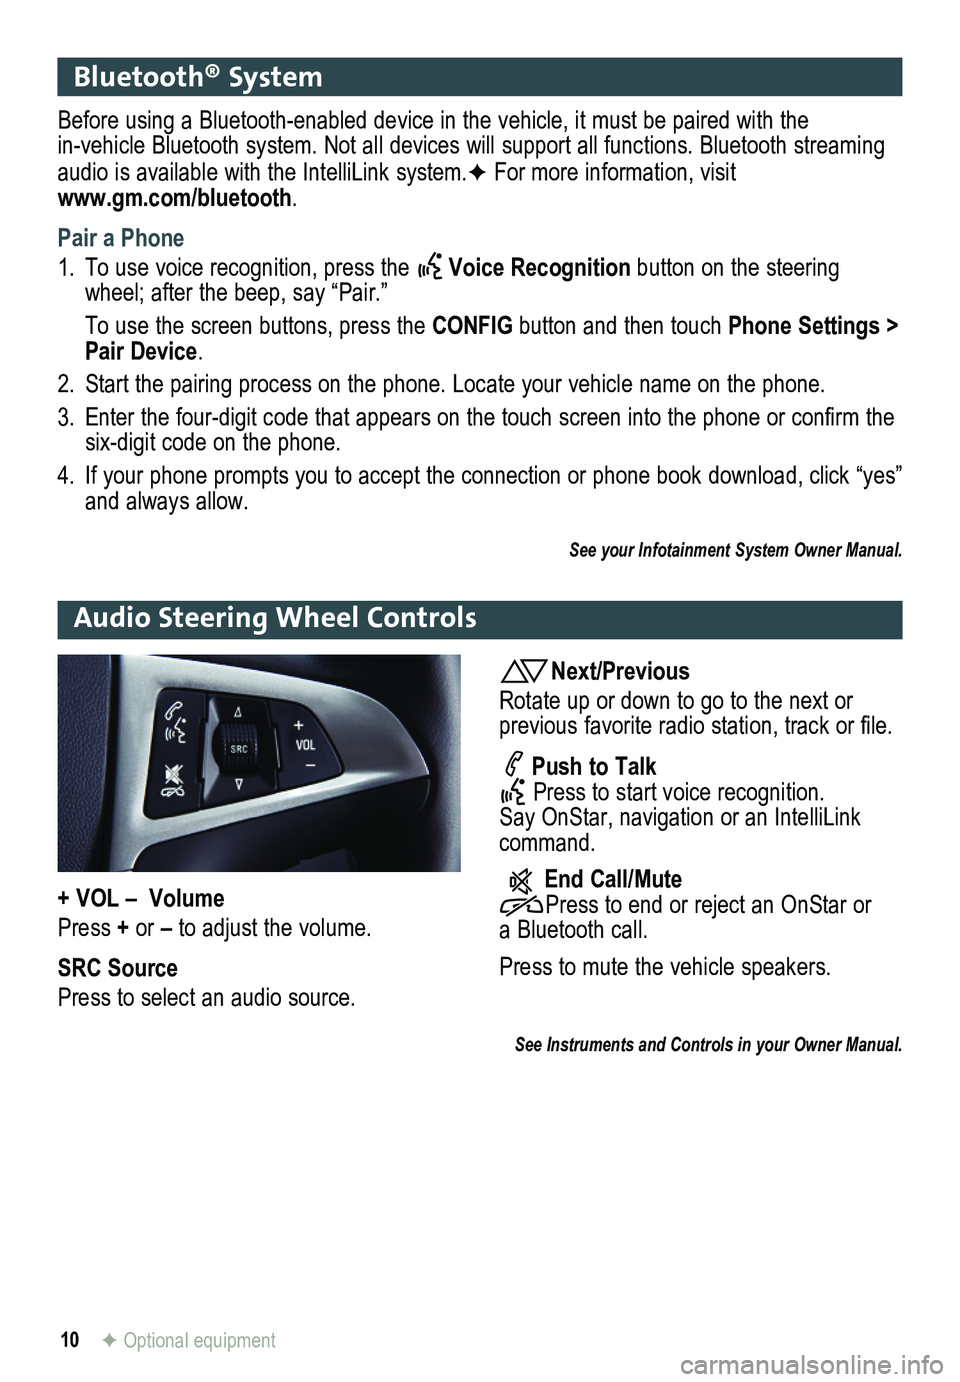
Next/Previous
Rotate up or down to go to the next or
previous favorite radio station, track or file.
Push to Talk Press to start voice recognition. Say OnStar, navigation or an IntelliLink command.
End Call/Mute Press to end or reject an OnStar or a Bluetooth call.
Press to mute the vehicle
speakers.
See Instruments and Controls in your Owner Manual.
+ VOL – Volume
Press + or – to adjust the volume.
SRC Source
Press to select an audio source.
Page 12 of 20
12
GMC IntelliLinkF
Voice Recognition
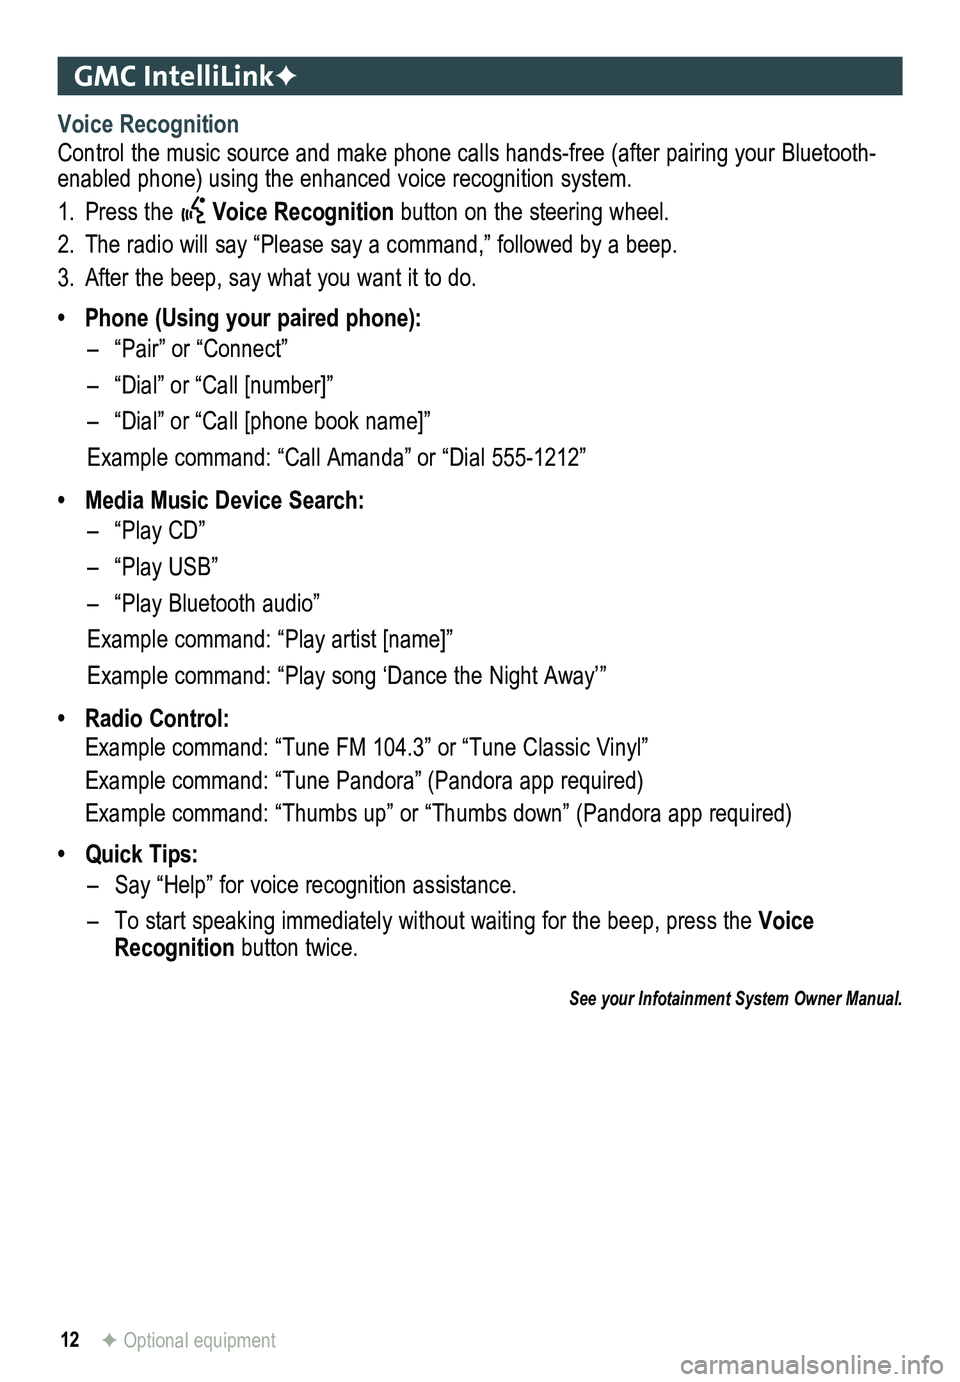
Control the music source and make phone calls hands-free (after pairing\
your Bluetooth-enabled phone) using the enhanced voice recognition system.
1. Press the Voice Recognition button on the steering wheel.
2. The radio will say “Please say a command,” followed by a beep.
3. After the beep, say what you want it to do.
• Phone (Using your paired phone):
– “Pair” or “Connect”
– “Dial” or “Call [number]”
– “Dial” or “Call [phone book name]”
Example command: “Call Amanda” or “Dial 555-1212”
• Media Music Device Search:
– “Play CD”
– “Play USB”
– “Play Bluetooth audio”
Example command: “Play artist [name]”
Example command: “Play song ‘Dance the Night Away’”
• Radio Control:
Example command: “Tune FM 104.3” or “Tune Classic Vinyl”
Example command: “Tune Pandora” (Pandora app required)
Example command: “Thumbs up” or “Thumbs down” (Pandora app \
required)
• Quick Tips:
– Say “Help” for voice recognition assistance.
– To start speaking immediately without waiting for the beep, press the Voice Recognition button twice.
See your Infotainment System Owner Manual.
F Optional equipment
Page 14 of 20
14
Cruise Control
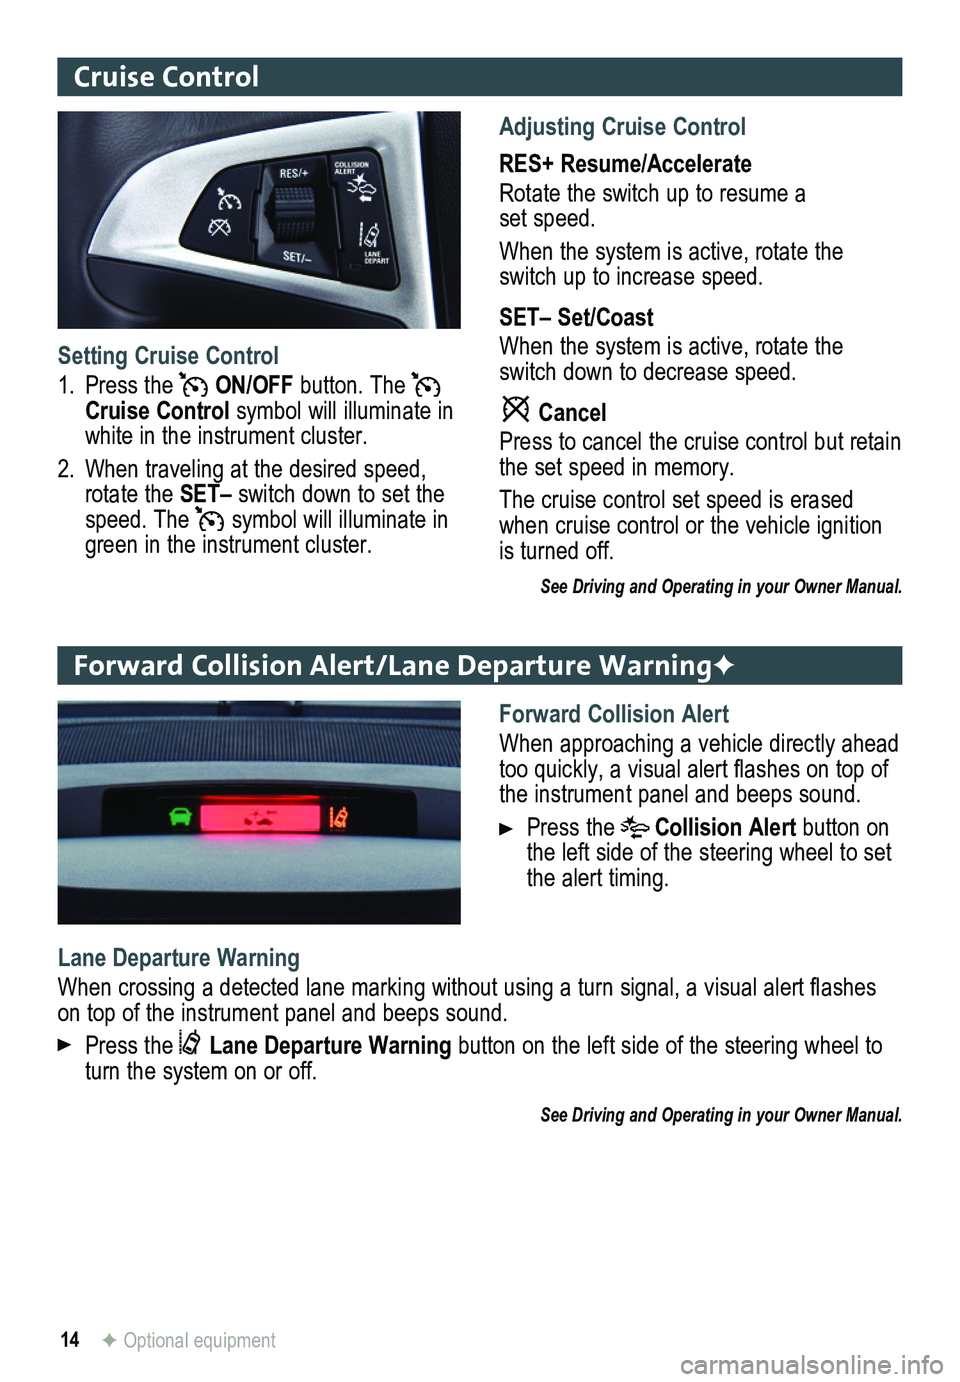
Adjusting Cruise Control
RES+ Resume/Accelerate
Rotate the switch up to resume a set speed.
When the system is active, rotate the switch up to increase speed.
SET– Set/Coast
When the system is active, rotate the switch down to decrease speed.
Cancel
Press to cancel the cruise control but retain the set speed in memory.
The cruise control set speed is erased when cruise control or the vehicle ignition is turned off.
See Driving and Operating in your Owner Manual.
Setting Cruise Control
1. Press the ON/OFF button. The Cruise Control symbol will illuminate in white in the instrument cluster.
2. When traveling at the desired speed, rotate the SET– switch down to set the speed. The symbol will illuminate in green in the instrument cluster.
Forward Collision Alert/Lane Departure WarningF
Forward Collision Alert
When approaching a vehicle directly ahead too quickly, a visual alert flashes on top of the instrument panel and beeps sound.
Press the Collision Alert button on the left side of the steering wheel to set the alert timing.
Lane Departure Warning
When crossing a detected lane marking without using a turn signal, a visual alert flashes on top of the instrument panel and beeps sound.
Press the Lane Departure Warning button on the left side of the steering wheel to turn the system on or off.
See Driving and Operating in your Owner Manual.
F Optional equipment
Page 17 of 20
17
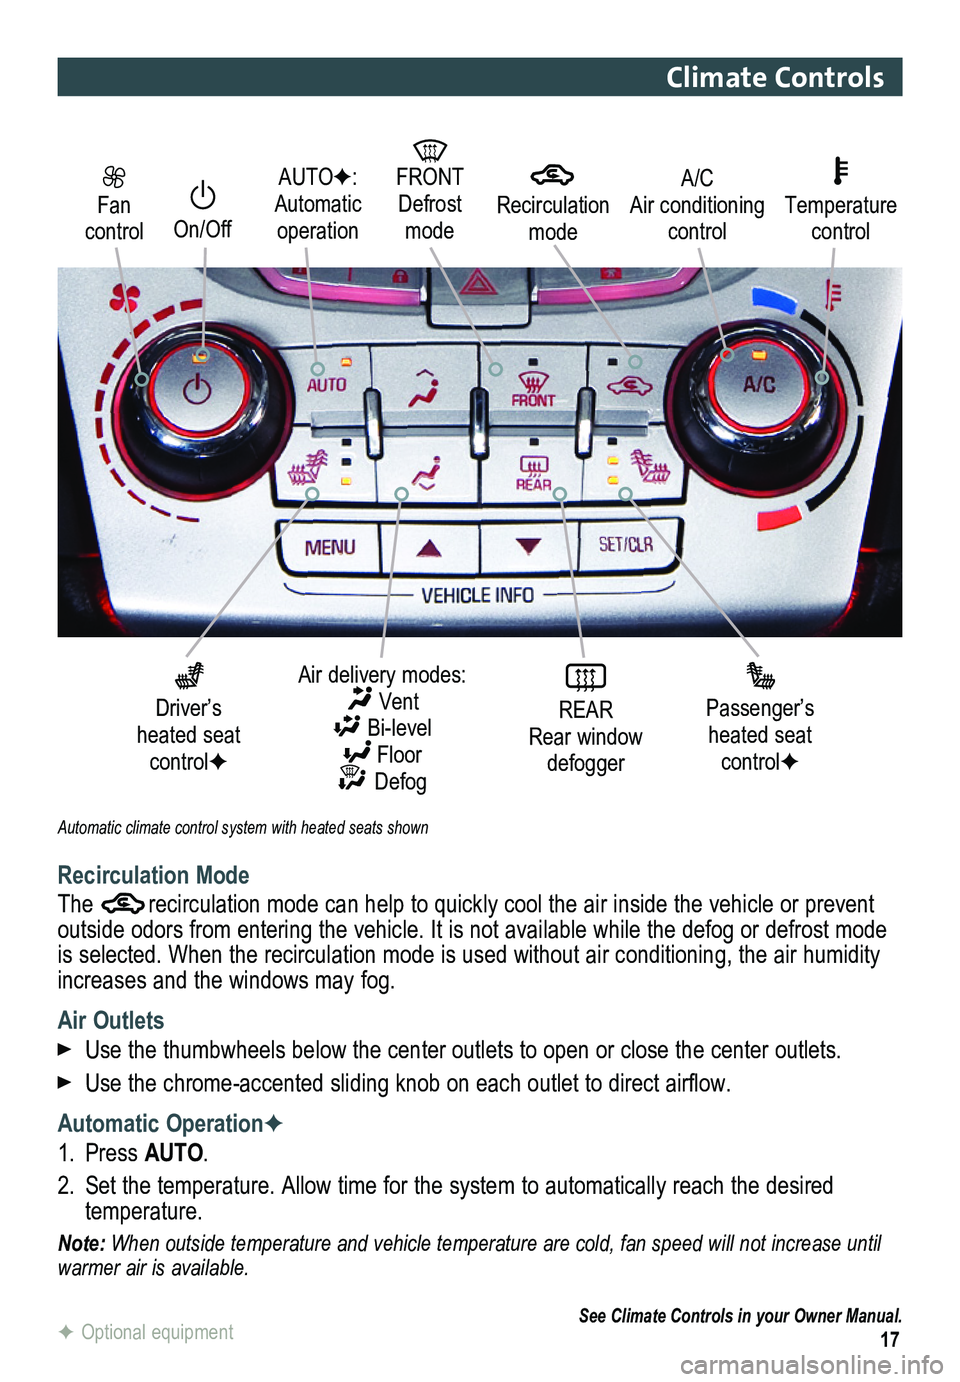
Fan control
On/Off
AUTOF: Automatic operation
FRONT Defrost mode
Driver’s heated seat controlF
Air delivery modes: Vent Bi-level Floor Defog
REAR Rear window defogger
Passenger’s heated seat controlF
Automatic climate control system with heated seats shown
A/C Air conditioning control
Temperature control
Climate Controls
Recirculation Mode
The recirculation mode can help to quickly cool the air inside the vehicle or prevent outside odors from entering the vehicle. It is not available while the defog or defrost mode is selected. When the recirculation mode is used without air conditioning, the air humidity increases and the windows may fog.
Air Outlets
Use the thumbwheels below the center outlets to open or close the center\
outlets.
Use the chrome-accented sliding knob on each outlet to direct airflow.
Automatic OperationF
1. Press AUTO.
2. Set the temperature. Allow time for the system to automatically reach the desired temperature.
Note: When outside temperature and vehicle temperature are cold, fan speed will not increase until warmer air is available.
See Climate Controls in your Owner Manual.
Recirculation mode
F Optional equipment
Page 18 of 20
18
Automatic Transmission Features
Electronic Range Select (ERS) Mode
The Electronic Range Select mode allows the driver to manually select the range of gear positions. This feature can be used to limit the top gear while towing or to downshift when driving on a downhill grade to provide engine braking. ERS is not designed to provide sportier
performance or to be used to shift gears similar to a manual transmission.
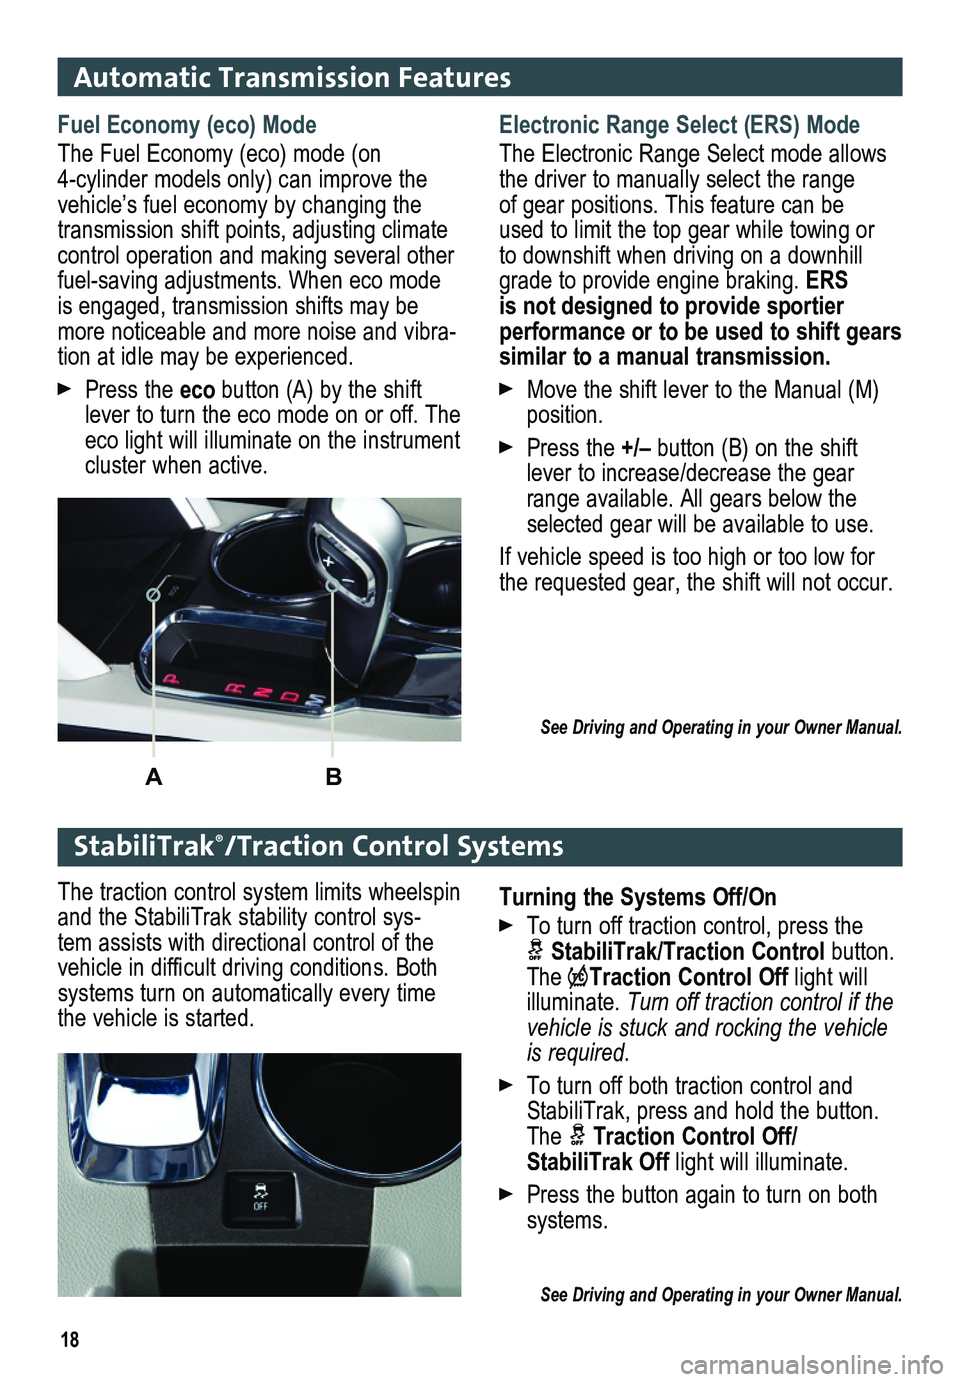
Move the shift lever to the Manual (M) position.
Press the +/– button (B) on the shift lever to increase/decrease the gear range available. All gears below the selected gear will be available to use.
If vehicle speed is too high or too low for the requested gear, the shift will not occur.
See Driving and Operating in your Owner Manual.
StabiliTrak®/Traction Control Systems
Fuel Economy (eco) Mode
The Fuel Economy (eco) mode (on 4-cylinder models only) can improve the vehicle’s fuel economy by changing the transmission shift points, adjusting climate control operation and making sev eral other fuel-saving adjustments. When eco mode is engaged, transmission shifts may be more noticeable and more noise and vibra-tion at idle may be experienced.
Press the eco button (A) by the shift lever to turn the eco mode on or off. The eco light will illuminate on the instrument cluster when active.
AB
Turning the Systems Off/On
To turn off traction control, press the
StabiliTrak/Traction Control button. The Traction Control Off light will illuminate. Turn off traction control if the vehicle is stuck and rocking the vehicle is required.
To turn off both traction control and StabiliTrak, press and hold the button. The Traction Control Off/ StabiliTrak Off light will illuminate.
Press the button again to turn on both systems.
See Driving and Operating in your Owner Manual.
The traction control system limits wheelspin and the StabiliTrak stability control sys-tem assists with directional control of the vehicle in difficult driving conditions. Both systems turn on automatically every time the vehicle is started.