display GMC TERRAIN 2018 Workshop Manual
[x] Cancel search | Manufacturer: GMC, Model Year: 2018, Model line: TERRAIN, Model: GMC TERRAIN 2018Pages: 408, PDF Size: 5.95 MB
Page 208 of 408
GMC Terrain/Terrain Denali Owner Manual (GMNA-Localizing-U.S./Canada/
Mexico-10664916) - 2018 - crc - 9/15/17
Driving and Operating 207
Car Wash Mode (Engine Off–
Driver out of Vehicle) –Diesel
Engine Only
To place the vehicle in N (Neutral)
with the engine off and the vehicle
unoccupied:
1. Drive to the entrance of the car wash.
2. Shift to P (Park) and turn off the vehicle.
3. Place the ignition in Service Mode. See Ignition Positions
0 186.
4. Open the door.
5. Apply the brake pedal and shift to N (Neutral).
6. Release the brake pedal. The indicator should continue to
show N. If it does not, repeat
steps 2–5.
7. Exit the vehicle and close the door. The vehicle is now ready
for the car wash.
8. Ensure the vehicle is in P (Park) upon returning to the
vehicle. Car Wash Mode (Engine On
–
Driver in Vehicle) –Gasoline and
Diesel Engines
To place the vehicle in N (Neutral)
with the engine on and the vehicle
occupied:
1. Drive to the entrance of the car wash.
2. Apply the brake pedal.
3. Shift to N (Neutral).
4. Release the brake pedal. The vehicle is now ready for the
car wash.
Car Wash Mode (Engine On –
Driver out of Vehicle) –Gasoline
and Diesel Engines
To place the vehicle in N (Neutral)
with the engine on and the vehicle
unoccupied:
1. Drive to the entrance of the car wash.
2. Apply the brake pedal.
3. Open the door.
4. Shift to N (Neutral), then release the brake pedal. 5. The indicator should continue
to show N. If it does not, repeat
Steps 2–4.
6. Exit the vehicle and close the door. The vehicle is now ready
for the car wash.
7. Ensure the vehicle is in P (Park) upon returning to the
vehicle.
Caution
A transmission hot message may
display if the automatic
transmission fluid is too hot.
Driving under this condition can
damage the vehicle. Stop and idle
the engine to cool the automatic
transmission fluid. This message
clears when the transmission fluid
has cooled sufficiently.
D : This position is for normal
driving. If more power is needed for
passing, press the accelerator
pedal down.
Page 209 of 408
GMC Terrain/Terrain Denali Owner Manual (GMNA-Localizing-U.S./Canada/
Mexico-10664916) - 2018 - crc - 9/15/17
208 Driving and Operating
To shift into D (Drive):1. Bring the vehicle to a complete stop.
2. Pull the D (Drive) switch on the front shift console.
To shift out of D (Drive):
1. Bring the vehicle to a complete stop.
2. Shift to the desired gear.
Downshifting the transmission in
slippery road conditions could result
in skidding. See “Skidding”under
Loss of Control 0173.
Caution
Spinning the tires or holding the
vehicle in one place on a hill
using only the accelerator pedal
may damage the transmission.
The repair will not be covered by
the vehicle warranty. If the vehicle
is stuck, do not spin the tires.
When stopping on a hill, use the
brakes to hold the vehicle in
place.
Manual Mode
Electronic Range Select
(ERS) Mode
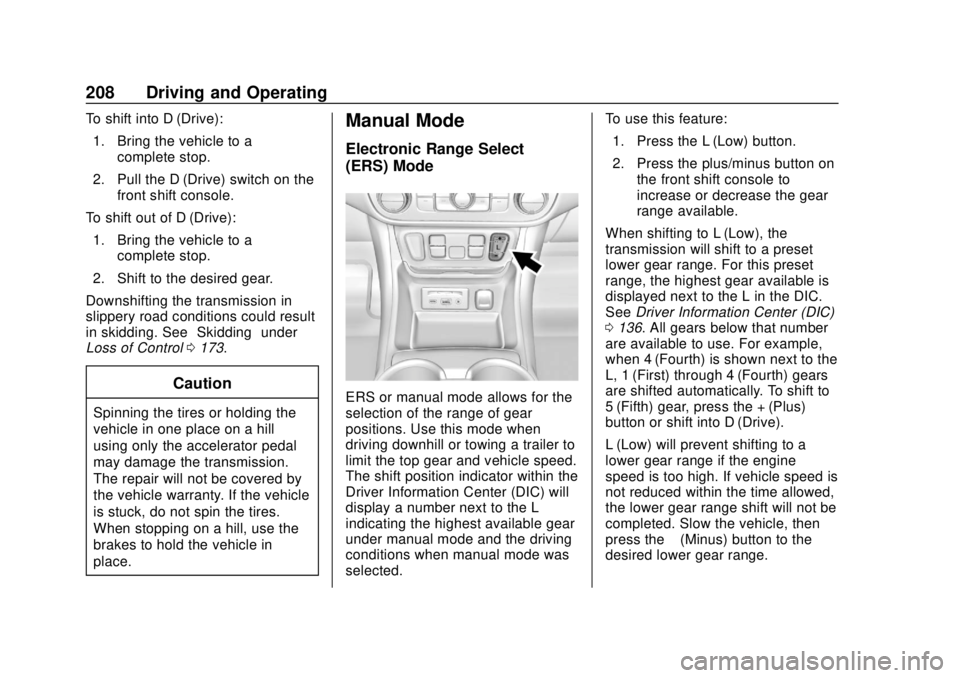
ERS or manual mode allows for the
selection of the range of gear
positions. Use this mode when
driving downhill or towing a trailer to
limit the top gear and vehicle speed.
The shift position indicator within the
Driver Information Center (DIC) will
display a number next to the L
indicating the highest available gear
under manual mode and the driving
conditions when manual mode was
selected. To use this feature:
1. Press the L (Low) button.
2. Press the plus/minus button on the front shift console to
increase or decrease the gear
range available.
When shifting to L (Low), the
transmission will shift to a preset
lower gear range. For this preset
range, the highest gear available is
displayed next to the L in the DIC.
See Driver Information Center (DIC)
0 136. All gears below that number
are available to use. For example,
when 4 (Fourth) is shown next to the
L, 1 (First) through 4 (Fourth) gears
are shifted automatically. To shift to
5 (Fifth) gear, press the + (Plus)
button or shift into D (Drive).
L (Low) will prevent shifting to a
lower gear range if the engine
speed is too high. If vehicle speed is
not reduced within the time allowed,
the lower gear range shift will not be
completed. Slow the vehicle, then
press the −(Minus) button to the
desired lower gear range.
Page 212 of 408
GMC Terrain/Terrain Denali Owner Manual (GMNA-Localizing-U.S./Canada/
Mexico-10664916) - 2018 - crc - 9/15/17
Driving and Operating 211
The vehicle has an Electric Parking
Brake (EPB). The EPB can always
be activated, even if the ignition is
off. To prevent draining the battery,
avoid repeated cycles of the EPB
system when the engine is not
running.
The system has a
Yor PARK
Electric Parking Brake light, and a
8
Service Parking Brake light or
Service Parking Brake message.
See Electric Parking Brake Light
0 130 andService Electric Parking
Brake Light (Uplevel Only) 0130.
Before leaving the vehicle, check for
the
Yor PARK light to ensure that
the parking brake is applied.
EPB Apply
To apply the EPB:
1. Be sure the vehicle is at a complete stop.
2. Press the EPB switch momentarily. The
Yor PARK light will flash and
then stay on once the EPB is fully
applied. If the
Yor PARK light
flashes continuously, then the EPB
is only partially applied or there is a
problem with the EPB. A Driver
Information Center (DIC) message
will display. Release the EPB and
try to apply it again. If the light does
not come on, or keeps flashing,
have the vehicle serviced. Do not
drive the vehicle if the
Yor PARK
light is flashing. See your dealer.
See Electric Parking Brake Light
0 130.
If the
8light or Service Parking
Brake message is on, press the
EPB switch and hold it. Continue to
hold the switch until the
Yor
PARK light remains on. If the
8light
or Service Parking Brake message
remains on, see your dealer.
If the EPB is applied while the
vehicle is moving, the vehicle will
decelerate as long as the switch is pressed. If the switch is pressed
until the vehicle comes to a stop,
the EPB will remain applied.
The vehicle may automatically apply
the EPB in some situations when
the vehicle is not moving. This is
normal, and is done to periodically
check the correct operation of the
EPB system.
If the EPB fails to apply, block the
rear wheels to prevent vehicle
movement.
EPB Release
To release the EPB:
1. Turn the ignition on or to ACC/ ACCESSORY.
2. Apply and hold the brake pedal.
3. Press the EPB switch momentarily.
The EPB is released when the
Y
or PARK light is off.
If the
8light or Service Parking
Brake message is on, release the
EPB by pressing and holding the
Page 214 of 408

GMC Terrain/Terrain Denali Owner Manual (GMNA-Localizing-U.S./Canada/
Mexico-10664916) - 2018 - crc - 9/15/17
Driving and Operating 213
Ride Control Systems
Traction Control/
Electronic Stability
Control
System Operation
The vehicle has a Traction Control
System (TCS) and StabiliTrak, an
electronic stability control system.
These systems help limit wheel slip
and assist the driver in maintaining
control, especially on slippery road
conditions.
TCS activates if it senses that any
of the drive wheels are spinning or
beginning to lose traction. When this
happens, TCS applies the brakes to
the spinning wheels and reduces
engine power to limit wheel spin.
StabiliTrak activates when the
vehicle senses a difference between
the intended path and the direction
the vehicle is actually traveling.
StabiliTrak selectively applies
braking pressure to any one of thevehicle wheel brakes to assist the
driver in keeping the vehicle on the
intended path.
If cruise control is being used and
TCS or StabiliTrak begins to limit
wheel spin, cruise control will
disengage. Cruise control may be
turned back on when road
conditions allow.
Both systems come on
automatically when the vehicle is
started and begins to move. The
systems may be heard or felt while
they are operating or while
performing diagnostic checks. This
is normal and does not mean there
is a problem with the vehicle.
It is recommended to leave both
systems on for normal driving
conditions, but it may be necessary
to turn TCS off if the vehicle gets
stuck in sand, mud, ice, or snow.
See
If the Vehicle Is Stuck 0180
and “Turning the Systems Off and
On” later in this section.
The indicator light for both systems
is in the instrument cluster. This
light will:
.
Flash when TCS is limiting
wheel spin
. Flash when StabiliTrak is
activated
. Turn on and stay on when either
system is not working
If either system fails to turn on or to
activate, a message displays in the
Driver Information Center (DIC), and
dcomes on and stays on to
indicate that the system is inactive
and is not assisting the driver in
maintaining control. The vehicle is
safe to drive, but driving should be
adjusted accordingly.
If
dcomes on and stays on:
1. Stop the vehicle.
Page 217 of 408
GMC Terrain/Terrain Denali Owner Manual (GMNA-Localizing-U.S./Canada/
Mexico-10664916) - 2018 - crc - 9/15/17
216 Driving and Operating
Hill Descent
Control (HDC)
HDC can be used when driving
downhill. It sets and maintains
vehicle speed while descending a
very steep incline in a forward or
reverse gear.
The HDC switch is on the center
console.
Press
5to enable or disable HDC.
Vehicle speed must be below
50 km/h (31 mph).
The HDC light displays on the
instrument cluster when enabled.
HDC can maintain vehicle speeds
between 3 and 22 km/h (2 and
14 mph) on an incline greater than
or equal to a 10% grade. A blinking HDC light indicates the system is
actively applying the brakes to
maintain vehicle speed.
When HDC is activated, the initial
HDC speed is set to the current
driving speed. It can be increased or
decreased by pressing +RES or
–
SET on the steering wheel or by
applying the accelerator or brake
pedal. This adjusted speed
becomes the new set speed.
HDC will remain enabled between
22 and 60 km/h (14 and 37 mph);
however vehicle speed cannot be
set or maintained in this range.
It will automatically disable if the
vehicle speed is above 80 km/h
(50 mph) or above 60 km/h
(37 mph) for at least 30 seconds.
Press
5again to re-enable HDC.
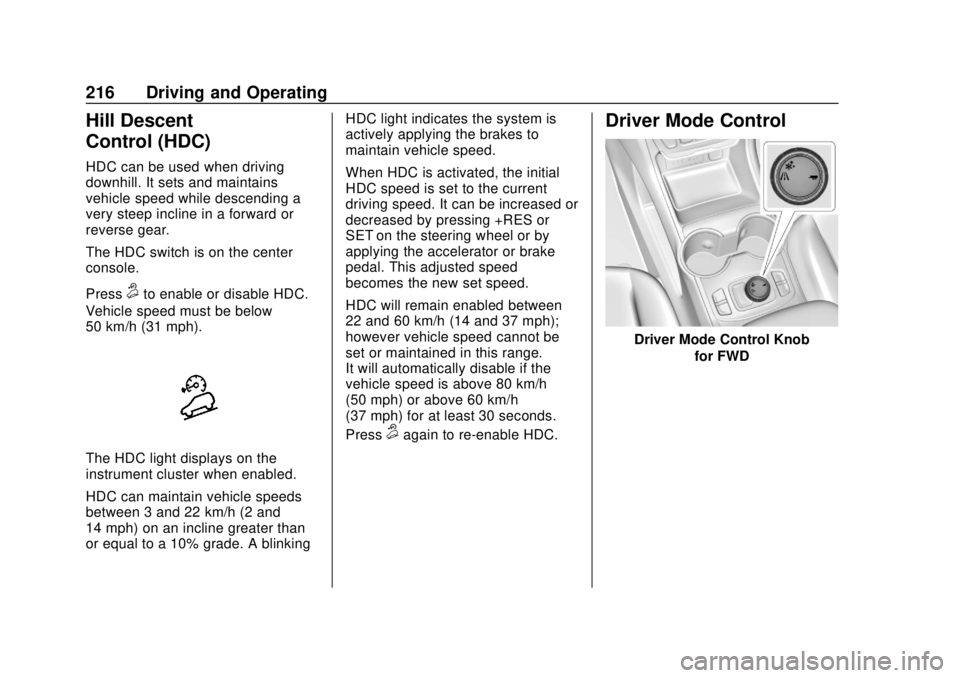
Driver Mode Control
Driver Mode Control Knob
for FWD
Page 222 of 408
GMC Terrain/Terrain Denali Owner Manual (GMNA-Localizing-U.S./Canada/
Mexico-10664916) - 2018 - crc - 9/15/17
Driving and Operating 221
–SET :Press briefly to set the
speed and activate cruise control.
If cruise control is already active,
use to decrease vehicle speed.
Setting Cruise Control
If
5is on when not in use, –SET or
+RES could get bumped and go into
cruise when not desired. Keep
5
off when cruise is not being used.
To set a speed:
1. Press
5to turn the cruise
system on.
2. Get up to the desired speed.
3. Press and release –SET. The
desired set speed briefly
appears in the instrument
cluster.
4. Remove your foot from the accelerator pedal.
The cruise control indicator on the
instrument cluster turns green after
cruise control has been set to the
desired speed. See Instrument
Cluster 0119. Resuming a Set Speed
If the cruise control is set at a
desired speed and then the brakes
are applied or
*is pressed, the
cruise control is disengaged without
erasing the set speed from memory.
Once the vehicle speed reaches
about 40 km/h (25 mph) or more,
briefly press +RES. The vehicle
returns to the previous set speed.
Increasing Speed While Using
Cruise Control
If the cruise control system is
already activated:
. Press and hold +RES on the
steering wheel until the vehicle
accelerates to the desired
speed, then release it.
. To increase the speed in small
increments, briefly press +RES.
For each press, the vehicle goes
about 1 km/h (1 mph) faster.
The speedometer reading can be
displayed in either English or metric
units. See Instrument Cluster 0119.
The increment value used depends
on the units displayed. Reducing Speed While Using
Cruise Control
If the cruise control system is
already activated:
.
Press and hold –SET until the
desired lower speed is reached,
then release it.
. To slow down in small
increments, briefly press –SET.
For each press, the vehicle goes
about 1 km/h (1 mph) slower.
The speedometer reading can be
displayed in either English or metric
units. See Instrument Cluster 0119.
The increment value used depends
on the units displayed.
Passing Another Vehicle While
Using Cruise Control
Use the accelerator pedal to
increase the vehicle speed. When
you take your foot off the pedal, the
vehicle will slow down to the
previous set cruise speed. While
pressing the accelerator pedal or
shortly following the release to
override cruise control, briefly
Page 224 of 408

GMC Terrain/Terrain Denali Owner Manual (GMNA-Localizing-U.S./Canada/
Mexico-10664916) - 2018 - crc - 9/15/17
Driving and Operating 223
Warning (Continued)
Under many conditions, these
systems will not:. Detect children,
pedestrians, bicyclists,
or animals.
. Detect vehicles or objects
outside the area monitored
by the system.
. Work at all driving speeds.
. Warn you or provide you
with enough time to avoid a
crash.
. Work under poor visibility or
bad weather conditions.
. Work if the detection sensor
is not cleaned or is covered
by ice, snow, mud, or dirt.
(Continued)
Warning (Continued)
.Work if the detection sensor
is covered up, such as with
a sticker, magnet, or metal
plate.
. Work if the area surrounding
the detection sensor is
damaged or not properly
repaired.
Complete attention is always
required while driving, and you
should be ready to take action
and apply the brakes and/or steer
the vehicle to avoid crashes.
Audible or Safety Alert Seat
Some driver assistance features
alert the driver of obstacles by
beeping. To change the volume of
the warning chime, see “Comfort
and Convenience” underVehicle
Personalization 0142.
If equipped with the Safety Alert
Seat, the driver seat cushion may
provide a vibrating pulse alert instead of beeping. To change this,
see
“Collision/Detection Systems”
under Vehicle Personalization
0 142.
Assistance Systems for
Parking or Backing
If equipped, the Rear Vision Camera
(RVC), Rear Parking Assist (RPA),
Front Parking Assist (FPA),
Surround Vision, Front Vision
Camera, Rear Cross Traffic Alert
(RCTA), and Automatic Parking
Assist (APA) may help the driver
park or avoid objects. Always check
around the vehicle when parking or
backing.
Rear Vision Camera (RVC)
When the vehicle is shifted into
R (Reverse), the RVC displays an
image of the area behind the vehicle
in the infotainment display. The
previous screen displays when the
vehicle is shifted out of R (Reverse)
after a short delay. To return to the
previous screen sooner, press any
button on the infotainment display,
shift into P (Park), or reach a vehicle
Page 225 of 408
GMC Terrain/Terrain Denali Owner Manual (GMNA-Localizing-U.S./Canada/
Mexico-10664916) - 2018 - crc - 9/15/17
224 Driving and Operating
speed of 12 km/h (8 mph). Select
Guidance Lines on the infotainment
display to enable or disable the
guidance lines.
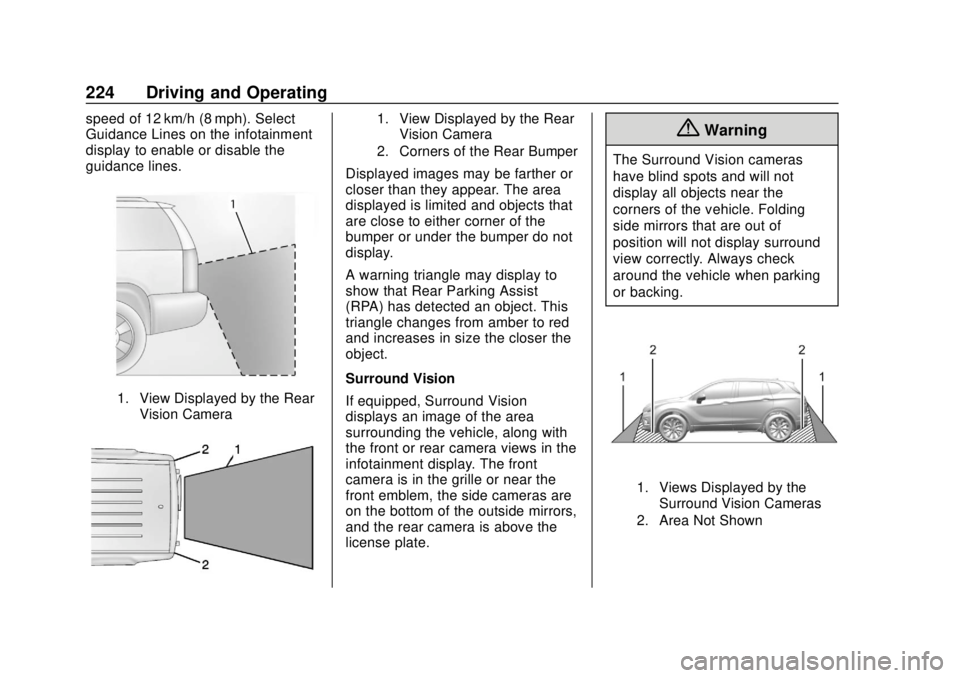
1. View Displayed by the RearVision Camera
1. View Displayed by the RearVision Camera
2. Corners of the Rear Bumper
Displayed images may be farther or
closer than they appear. The area
displayed is limited and objects that
are close to either corner of the
bumper or under the bumper do not
display.
A warning triangle may display to
show that Rear Parking Assist
(RPA) has detected an object. This
triangle changes from amber to red
and increases in size the closer the
object.
Surround Vision
If equipped, Surround Vision
displays an image of the area
surrounding the vehicle, along with
the front or rear camera views in the
infotainment display. The front
camera is in the grille or near the
front emblem, the side cameras are
on the bottom of the outside mirrors,
and the rear camera is above the
license plate.
{Warning
The Surround Vision cameras
have blind spots and will not
display all objects near the
corners of the vehicle. Folding
side mirrors that are out of
position will not display surround
view correctly. Always check
around the vehicle when parking
or backing.
1. Views Displayed by the Surround Vision Cameras
2. Area Not Shown
Page 226 of 408

GMC Terrain/Terrain Denali Owner Manual (GMNA-Localizing-U.S./Canada/
Mexico-10664916) - 2018 - crc - 9/15/17
Driving and Operating 225
1. Views Displayed by theSurround Vision Cameras
2. Area Not Shown
Front Vision Camera
If equipped, a view of the area in
front of the vehicle displays. The
view displays after shifting from R (Reverse) to a forward gear, or by
touching CAMERA in the
infotainment display, and when the
vehicle is moving forward slower
than 8 km/h (5 mph). If equipped,
the Front Vision Camera also
displays when the Parking Assist
system detects an object within
30 cm (12 in).
{Warning
The camera(s) do not display
children, pedestrians, bicyclists,
crossing traffic, animals, or any
other object outside of the
cameras’
field of view, below the
bumper, or under the vehicle.
Shown distances may be different
from actual distances. Do not
drive or park the vehicle using
only these camera(s). Always
check behind and around the
vehicle before driving. Failure to
use proper care may result in
injury, death, or vehicle damage. Parking Assist
With RPA, and if equipped with FPA,
as the vehicle moves at speeds of
less than 8 km/h (5 mph), the
sensors on the bumpers may detect
objects up to 2.5 m (8 ft) behind the
vehicle and 1.2 m (4 ft) in front of the
vehicle within a zone 25 cm (10 in)
high off the ground and below
bumper level. These detection
distances may be shorter during
warmer or humid weather. Blocked
sensors will not detect objects and
can also cause false detections.
Keep the sensors clean of mud, dirt,
snow, ice, and slush; and clean
sensors after a car wash in freezing
temperatures.
{Warning
The Parking Assist system does
not detect children, pedestrians,
bicyclists, animals, or objects
located below the bumper or that
are too close or too far from the
vehicle. It is not available at
(Continued)
Page 227 of 408
GMC Terrain/Terrain Denali Owner Manual (GMNA-Localizing-U.S./Canada/
Mexico-10664916) - 2018 - crc - 9/15/17
226 Driving and Operating
Warning (Continued)
speeds greater than 8 km/h
(5 mph). To prevent injury, death,
or vehicle damage, even with
Parking Assist, always check the
area around the vehicle and
check all mirrors before moving
forward or backing.
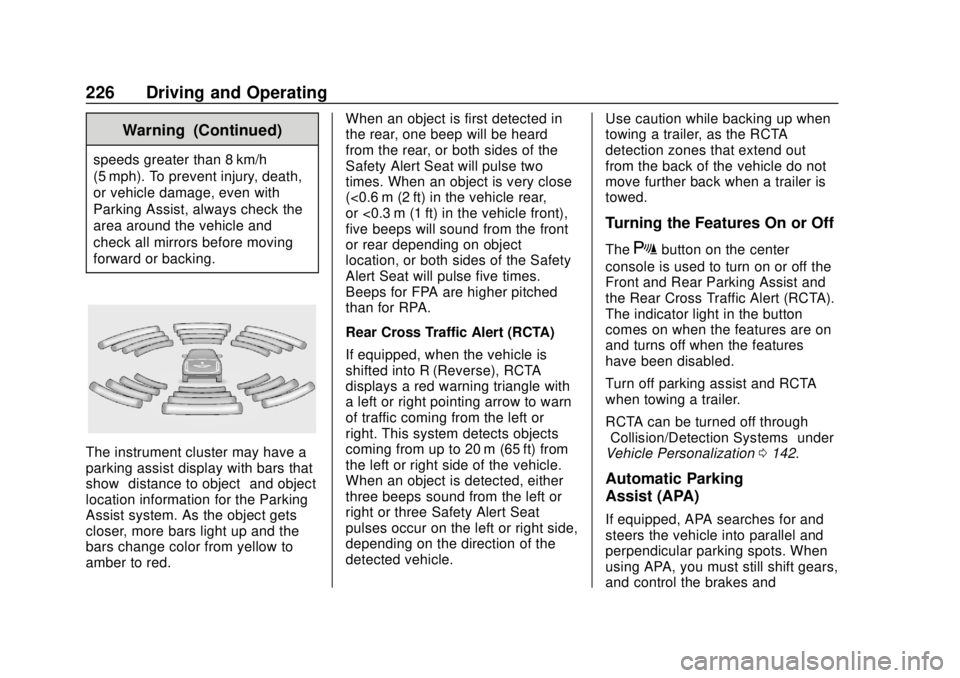
The instrument cluster may have a
parking assist display with bars that
show“distance to object” and object
location information for the Parking
Assist system. As the object gets
closer, more bars light up and the
bars change color from yellow to
amber to red. When an object is first detected in
the rear, one beep will be heard
from the rear, or both sides of the
Safety Alert Seat will pulse two
times. When an object is very close
(<0.6 m (2 ft) in the vehicle rear,
or <0.3 m (1 ft) in the vehicle front),
five beeps will sound from the front
or rear depending on object
location, or both sides of the Safety
Alert Seat will pulse five times.
Beeps for FPA are higher pitched
than for RPA.
Rear Cross Traffic Alert (RCTA)
If equipped, when the vehicle is
shifted into R (Reverse), RCTA
displays a red warning triangle with
a left or right pointing arrow to warn
of traffic coming from the left or
right. This system detects objects
coming from up to 20 m (65 ft) from
the left or right side of the vehicle.
When an object is detected, either
three beeps sound from the left or
right or three Safety Alert Seat
pulses occur on the left or right side,
depending on the direction of the
detected vehicle.
Use caution while backing up when
towing a trailer, as the RCTA
detection zones that extend out
from the back of the vehicle do not
move further back when a trailer is
towed.
Turning the Features On or Off
TheXbutton on the center
console is used to turn on or off the
Front and Rear Parking Assist and
the Rear Cross Traffic Alert (RCTA).
The indicator light in the button
comes on when the features are on
and turns off when the features
have been disabled.
Turn off parking assist and RCTA
when towing a trailer.
RCTA can be turned off through
“Collision/Detection Systems” under
Vehicle Personalization 0142.
Automatic Parking
Assist (APA)
If equipped, APA searches for and
steers the vehicle into parallel and
perpendicular parking spots. When
using APA, you must still shift gears,
and control the brakes and