Auto stop GMC TERRAIN 2018 Owner's Manual
[x] Cancel search | Manufacturer: GMC, Model Year: 2018, Model line: TERRAIN, Model: GMC TERRAIN 2018Pages: 408, PDF Size: 5.95 MB
Page 6 of 408
GMC Terrain/Terrain Denali Owner Manual (GMNA-Localizing-U.S./Canada/
Mexico-10664916) - 2018 - crc - 9/15/17
In Brief 5
In Brief
Instrument Panel
Instrument Panel . . . . . . . . . . . . . . . . 6
Initial Drive Information
Initial Drive Information . . . . . . . . . . 8
Stop/Start System . . . . . . . . . . . . . . . 8
Remote Keyless Entry (RKE)System . . . . . . . . . . . . . . . . . . . . . . . . 8
Remote Vehicle Start . . . . . . . . . . . 8
Door Locks . . . . . . . . . . . . . . . . . . . . . 9
Liftgate . . . . . . . . . . . . . . . . . . . . . . . . . . 9
Windows . . . . . . . . . . . . . . . . . . . . . . . 10
Seat Adjustment . . . . . . . . . . . . . . . 11
Memory Features . . . . . . . . . . . . . . 13
Heated and Ventilated Seats . . . 13
Head Restraint Adjustment . . . . 14
Seat Belts . . . . . . . . . . . . . . . . . . . . . 14
Passenger Sensing System . . . 14
Mirror Adjustment . . . . . . . . . . . . . . 15
Steering Wheel Adjustment . . . . 15
Interior Lighting . . . . . . . . . . . . . . . . 16
Exterior Lighting . . . . . . . . . . . . . . . 16
Windshield Wiper/Washer . . . . . . 17
Climate Controls . . . . . . . . . . . . . . . 18
Transmission . . . . . . . . . . . . . . . . . . 19
Vehicle Features
Infotainment System . . . . . . . . . . . 20
Steering Wheel Controls . . . . . . . 20
Cruise Control . . . . . . . . . . . . . . . . . 20
Driver Information Center (DIC) . . . . . . . . . . . . . . . . . 20
Forward Collision Alert (FCA) System . . . . . . . . . . . . . . . . . . . . . . . 21
Forward Automatic Braking (FAB) . . . . . . . . . . . . . . . . 21
Lane Keep Assist (LKA) . . . . . . . 21
Lane Change Alert (LCA) . . . . . . 21
Surround Vision . . . . . . . . . . . . . . . 22
Rear Vision Camera (RVC) . . . . 22
Rear Cross Traffic Alert (RCTA) System . . . . . . . . . . . . . . . . . . . . . . . 22
Parking Assist . . . . . . . . . . . . . . . . . 22
Automatic Parking Assist (APA) . . . . . . . . . . . . . . . . . . 22
Power Outlets . . . . . . . . . . . . . . . . . 22
Universal Remote System . . . . . 23
Sunroof . . . . . . . . . . . . . . . . . . . . . . . . 23
Performance and Maintenance
Traction Control/Electronic Stability Control . . . . . . . . . . . . . . 24
Tire Pressure Monitor . . . . . . . . . . 24
Fuel (LYX - 1.5L L4 Turbo Engine) . . . . . . . . . . . . . . . . . . . . . . . 25 Fuel (LTG - 2.0L L4 Turbo
Engine) . . . . . . . . . . . . . . . . . . . . . . . 25
Fuel (Diesel) . . . . . . . . . . . . . . . . . . . 25
E85 or FlexFuel . . . . . . . . . . . . . . . . 25
Engine Oil Life System . . . . . . . . 25
Driving for Better Fuel Economy . . . . . . . . . . . . . . . . . . . . . 26
Diesel Particulate Filter . . . . . . . . 26
Diesel Exhaust Fluid . . . . . . . . . . . 27
Roadside Assistance Program . . . . . . . . . . . . . . . . . . . . . . 27
Page 8 of 408

GMC Terrain/Terrain Denali Owner Manual (GMNA-Localizing-U.S./Canada/
Mexico-10664916) - 2018 - crc - 9/15/17
In Brief 7
1.Air Vents 0165.
2. Turn Signal Lever. See Turn
and Lane-Change Signals
0 155.
IntelliBeam System Button (If
Equipped). See Exterior Lamp
Controls 0151.
3. Instrument Cluster 0119.
Driver Information Center (DIC)
Display. See Driver Information
Center (DIC) 0136.
4. Windshield Wiper/Washer
0111.
5. Infotainment 0159.
6. Light Sensor. See Automatic
Headlamp System 0154.
7. Hazard Warning Flashers
0154.
8. Climate Control Systems 0160
(If Equipped).
Dual Automatic Climate Control
System 0162 (If Equipped).
9. Front Shift Console. See Automatic Transmission 0204.
10. Power Outlets 0114. 11.
Assistance Systems for
Parking or Backing 0223 (If
Equipped).
12. Heated and Ventilated Front
Seats 063 (If Equipped).
13. Wireless Charging 0115 (If
Equipped).
14. Driver Mode Control 0216 (If
Equipped).
15. Lane Keep Assist (LKA) 0234
(If Equipped).
Hill Descent Control (HDC)
0 216 (If Equipped).
16. USB Port. See the infotainment manual.
Auxiliary Jack. See the
infotainment manual.
17. ENGINE START/STOP Button. SeeIgnition Positions 0186.
18. Steering Wheel Controls. See the infotainment manual.
19. Horn 0111.
20. Steering Wheel Adjustment
0111 (Out of View). 21. Hood Release. See
Hood
0 262.
22. Cruise Control 0220.
Heated Steering Wheel 0111
(If Equipped).
Forward Collision Alert (FCA)
System 0228 (If Equipped).
23. Data Link Connector (DLC) (Out of View). See Malfunction
Indicator Lamp (Check Engine
Light) 0127.
24. Electric Parking Brake 0210.
25. Exterior Lamp Controls 0151.
Instrument Panel Illumination
Control 0156.
Fog Lamps 0155 (If
Equipped).
Page 24 of 408
GMC Terrain/Terrain Denali Owner Manual (GMNA-Localizing-U.S./Canada/
Mexico-10664916) - 2018 - crc - 9/15/17
In Brief 23
There are power outlets:
.On the center stack below the
climate control system.
. In the rear cargo area.
To use the outlet, remove the cover.
See Power Outlets 0114.
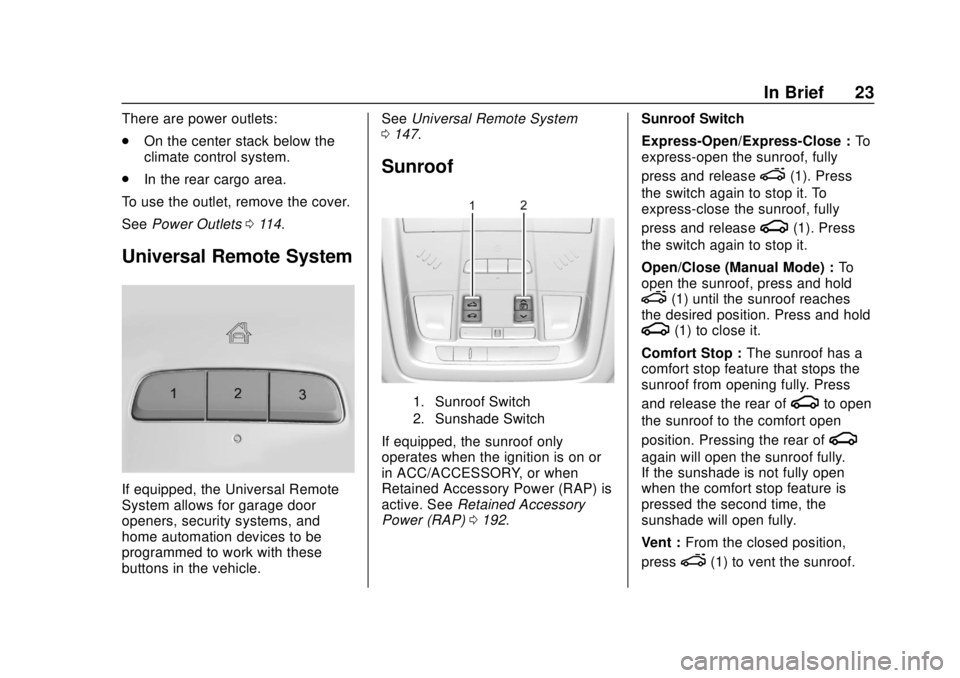
Universal Remote System
If equipped, the Universal Remote
System allows for garage door
openers, security systems, and
home automation devices to be
programmed to work with these
buttons in the vehicle. See
Universal Remote System
0 147.
Sunroof
1. Sunroof Switch
2. Sunshade Switch
If equipped, the sunroof only
operates when the ignition is on or
in ACC/ACCESSORY, or when
Retained Accessory Power (RAP) is
active. See Retained Accessory
Power (RAP) 0192. Sunroof Switch
Express-Open/Express-Close :
To
express-open the sunroof, fully
press and release
e(1). Press
the switch again to stop it. To
express-close the sunroof, fully
press and release
g(1). Press
the switch again to stop it.
Open/Close (Manual Mode) : To
open the sunroof, press and hold
e(1) until the sunroof reaches
the desired position. Press and hold
g(1) to close it.
Comfort Stop : The sunroof has a
comfort stop feature that stops the
sunroof from opening fully. Press
and release the rear of
gto open
the sunroof to the comfort open
position. Pressing the rear of
g
again will open the sunroof fully.
If the sunshade is not fully open
when the comfort stop feature is
pressed the second time, the
sunshade will open fully.
Vent : From the closed position,
press
e(1) to vent the sunroof.
Page 25 of 408
GMC Terrain/Terrain Denali Owner Manual (GMNA-Localizing-U.S./Canada/
Mexico-10664916) - 2018 - crc - 9/15/17
24 In Brief
Sunshade Switch
Express-open/Express-close :To
express-open the sunshade, fully
press and release
r(2). To
express-close the sunshade, fully
press and release
s(2) . Press
the switch again to stop it.
Open/Close : To open the
sunshade, press and hold
r(2)
until the sunshade reaches the
desired position.
When the sunroof is opened, an air
deflector will automatically raise.
The air deflector will retract when
the sunroof is closed.
Performance and
Maintenance
Traction Control/
Electronic Stability
Control
The Traction Control System (TCS)
limits wheel slip. The system is on
when the vehicle is started.
The StabiliTrak system assists with
directional control of the vehicle in
difficult driving conditions. The
system is on when the vehicle is
started.
TCS and StabiliTrak can be turned
off or on using the Driver
Information Center (DIC) controls.
See Traction Control/Electronic
Stability Control 0213.
Tire Pressure Monitor
This vehicle may have a Tire
Pressure Monitor System (TPMS).
The low tire pressure warning light
alerts to a significant loss in
pressure of one of the vehicle's
tires. If the warning light comes on,
stop as soon as possible and inflate
the tires to the recommended
pressure shown on the Tire and
Loading Information label. See
Vehicle Load Limits 0181. The
warning light will remain on until the
tire pressure is corrected.
The low tire pressure warning light
may come on in cool weather when
the vehicle is first started, and then
turn off as the vehicle is driven. This
may be an early indicator that the
tire pressures are getting low and
the tires need to be inflated to the
proper pressure.
The TPMS does not replace normal
monthly tire maintenance. Maintain
the correct tire pressures.
Page 27 of 408
GMC Terrain/Terrain Denali Owner Manual (GMNA-Localizing-U.S./Canada/
Mexico-10664916) - 2018 - crc - 9/15/17
26 In Brief
2. Press and holdVfor several
seconds while the Oil Life
display is active to reset the Oil
Life system.
3. REMAINING OIL LIFE 100% will be displayed when the oil
life system is successfully
reset.
The oil life system can also be reset
as follows: 1. Place the ignition in Service Mode. See Ignition Positions
0 186.
2. Display REMAINING OIL LIFE on the DIC menu. See Driver
Information Center (DIC) 0136.
3. Fully press and release the accelerator pedal three times
within five seconds.
4. If the display changes to 100%, the system is reset.
See Engine Oil Life System 0273.Driving for Better Fuel
Economy
Driving habits can affect fuel
mileage. Here are some driving tips
to get the best fuel economy
possible.
.
Avoid fast starts and accelerate
smoothly.
. Brake gradually and avoid
abrupt stops.
. Avoid idling the engine for long
periods of time.
. When road and weather
conditions are appropriate, use
cruise control.
. Always follow posted speed
limits or drive more slowly when
conditions require.
. Keep vehicle tires properly
inflated.
. Combine several trips into a
single trip.
. Replace the vehicle's tires with
the same TPC Spec number
molded into the tire's sidewall
near the size. .
Follow recommended scheduled
maintenance.Diesel Particulate Filter
The engine is equipped with a
Diesel Particulate Filter (DPF) that
will filter or trap particulates. The
DPF is under the vehicle in the
exhaust system.
Depending on a number of factors
monitored by the engine computer,
the DPF will need to be cleaned of
accumulated solids. When a
cleaning is needed, the engine
computer will initiate a cleaning
action by warming the exhaust gas
temperature. This feature has been
designed to operate automatically,
with limited operator involvement or
awareness.
Cleaning the DPF (Exhaust
Filter)
While the DPF cleaning is
automatically controlled by the
engine computer, the vehicle will
need to operate continuously for
approximately 25 minutes and at
Page 44 of 408
GMC Terrain/Terrain Denali Owner Manual (GMNA-Localizing-U.S./Canada/
Mexico-10664916) - 2018 - crc - 9/15/17
Keys, Doors, and Windows 43
.OFF: Opens manually only.
To power open or close the liftgate,
select MAX or 3/4 mode.
. Press
btwice quickly on the
RKE transmitter until the liftgate
moves.
. Press
8on the driver door.
The driver door must either be
unlocked or locked without the
security armed.
. Press the touch pad on the
bottom of the liftgate after
unlocking all doors. If equipped
with Keyless Access, the RKE
transmitter must be within
1 m (3 ft).
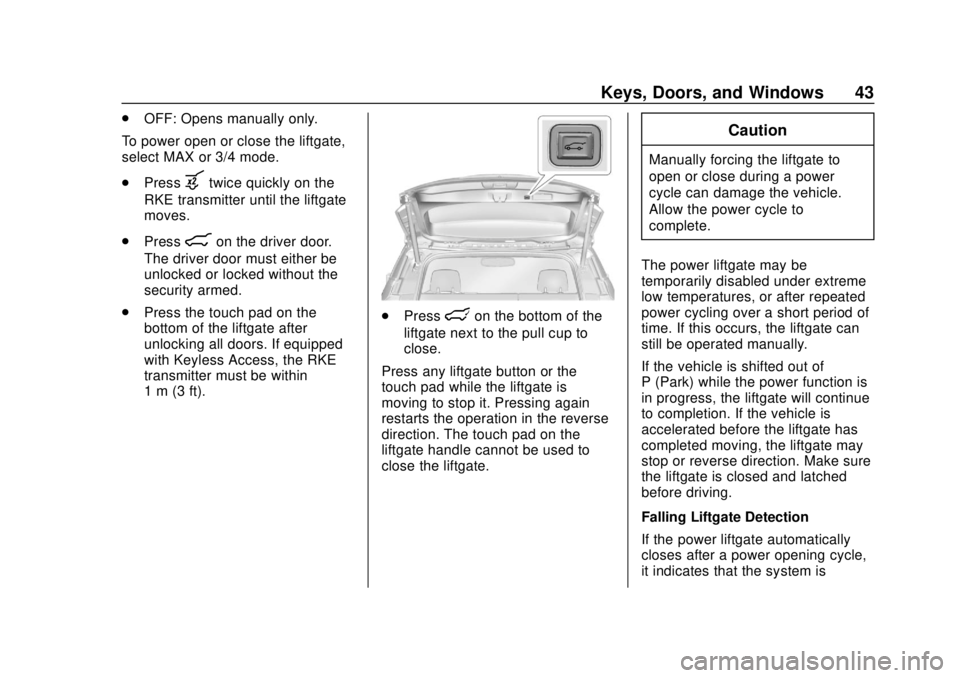
.Presslon the bottom of the
liftgate next to the pull cup to
close.
Press any liftgate button or the
touch pad while the liftgate is
moving to stop it. Pressing again
restarts the operation in the reverse
direction. The touch pad on the
liftgate handle cannot be used to
close the liftgate.
Caution
Manually forcing the liftgate to
open or close during a power
cycle can damage the vehicle.
Allow the power cycle to
complete.
The power liftgate may be
temporarily disabled under extreme
low temperatures, or after repeated
power cycling over a short period of
time. If this occurs, the liftgate can
still be operated manually.
If the vehicle is shifted out of
P (Park) while the power function is
in progress, the liftgate will continue
to completion. If the vehicle is
accelerated before the liftgate has
completed moving, the liftgate may
stop or reverse direction. Make sure
the liftgate is closed and latched
before driving.
Falling Liftgate Detection
If the power liftgate automatically
closes after a power opening cycle,
it indicates that the system is
Page 45 of 408
GMC Terrain/Terrain Denali Owner Manual (GMNA-Localizing-U.S./Canada/
Mexico-10664916) - 2018 - crc - 9/15/17
44 Keys, Doors, and Windows
reacting to excess weight on the
liftgate or a possible support strut
failure. A repetitive chime will sound
while the falling liftgate detection
feature is operating. Remove any
excess weight. If the liftgate
continues to automatically close
after opening, see your dealer for
service before using the power
liftgate.
Interfering with the power liftgate
motion or manually closing the
liftgate too quickly after power
opening may resemble a support
strut failure. This could also activate
the falling liftgate detection feature.
Allow the liftgate to complete its
operation and wait a few seconds
before manually closing the liftgate.
Obstacle Detection Features
If the liftgate encounters an obstacle
during a power open or close cycle,
the liftgate will automatically reverse
direction and move a short distance
away from the obstacle. After
removing the obstruction, the power
liftgate operation can be used again.
If the liftgate encounters multipleobstacles on the same power cycle,
the power function will deactivate.
After removing the obstructions,
manually close the liftgate which will
allow normal power operation
functions to resume.
If the vehicle is locked while the
liftgate is closing, and an obstacle is
encountered that prevents the
liftgate from completely closing, the
horn will sound as an alert that the
liftgate did not close.
Pinch sensors are on the side
edges of the liftgate. If an object is
caught between the liftgate and the
vehicle and presses against this
sensor, the liftgate will reverse
direction and open fully. The liftgate
will remain open until it is activated
again or closed manually.Setting the 3/4 Mode
To change the position the liftgate
stops at when opening:
1. Select MAX or 3/4 mode and power open the liftgate. 2. Stop the liftgate movement at
the desired height by pressing
any liftgate switch. Manually
adjust the liftgate position if
needed.
3. Press and hold
lnext to the
pull cup on the bottom of the
liftgate until the turn signals
flash and a beep sounds. This
indicates the setting has been
recorded.
The liftgate cannot be set below a
minimum programmable height.
If there is no light flash or sound,
then the height adjustment may be
too low.
Manual Operation of Power
Liftgate
Select OFF to manually operate the
liftgate. See “Manual Liftgate” at the
beginning of this section.
Hands-Free Operation
The liftgate may be operated with a
kicking motion under the rear
bumper between the left exhaust
pipe and the license plate.
Page 53 of 408
GMC Terrain/Terrain Denali Owner Manual (GMNA-Localizing-U.S./Canada/
Mexico-10664916) - 2018 - crc - 9/15/17
52 Keys, Doors, and Windows
If equipped, pull the window switch
up fully and quickly release to
express close the window.
Briefly press or pull the window
switch in the same direction to stop
that window’s express movement.
Window Automatic Reversal
System
The express-close feature will
reverse window movement if it
comes in contact with an object.
Extreme cold or ice could cause the
window to auto-reverse. The
window will operate normally after
the object or condition is removed.
Automatic Reversal System
Override
{Warning
If automatic reversal system
override is active, the window will
not reverse automatically. You or
others could be injured and the
window could be damaged.
Before using automatic reversal(Continued)
Warning (Continued)
system override, make sure that
all people and obstructions are
clear of the window path.
When the engine is on, override the
automatic reversal system by pulling
and holding the window switch if
conditions prevent it from closing.
Programming the Power
Windows
Programming may be necessary if
the vehicle’ s battery has been
disconnected or discharged. If the
window will not express close,
program each express-close
window:
1. Close all doors.
2. Turn the ignition on or to ACC/ ACCESSORY.
3. Partially open the window to be programmed. Then close it and
continue to pull the switch
briefly after the window has
fully closed. 4. Open the window and continue
to press the switch briefly after
the window has fully opened.
Remote Window Operation
If equipped, this feature allows all
the windows to be opened remotely.
If enabled in vehicle personalization,
press and hold
Kon the RKE
transmitter. See Vehicle
Personalization 0142.
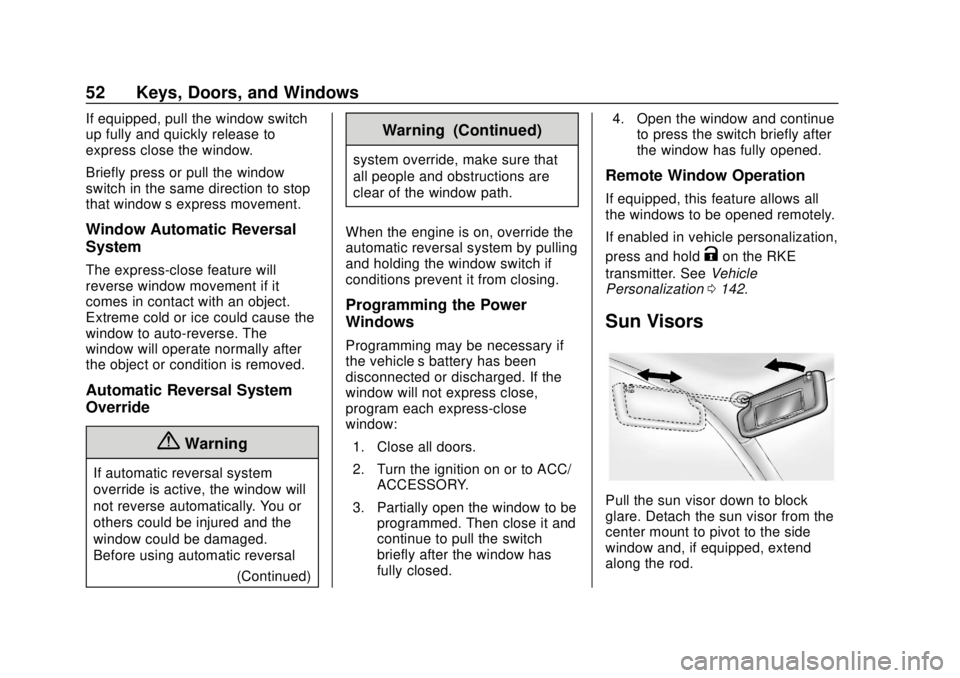
Sun Visors
Pull the sun visor down to block
glare. Detach the sun visor from the
center mount to pivot to the side
window and, if equipped, extend
along the rod.
Page 54 of 408
GMC Terrain/Terrain Denali Owner Manual (GMNA-Localizing-U.S./Canada/
Mexico-10664916) - 2018 - crc - 9/15/17
Keys, Doors, and Windows 53
Roof
Sunroof
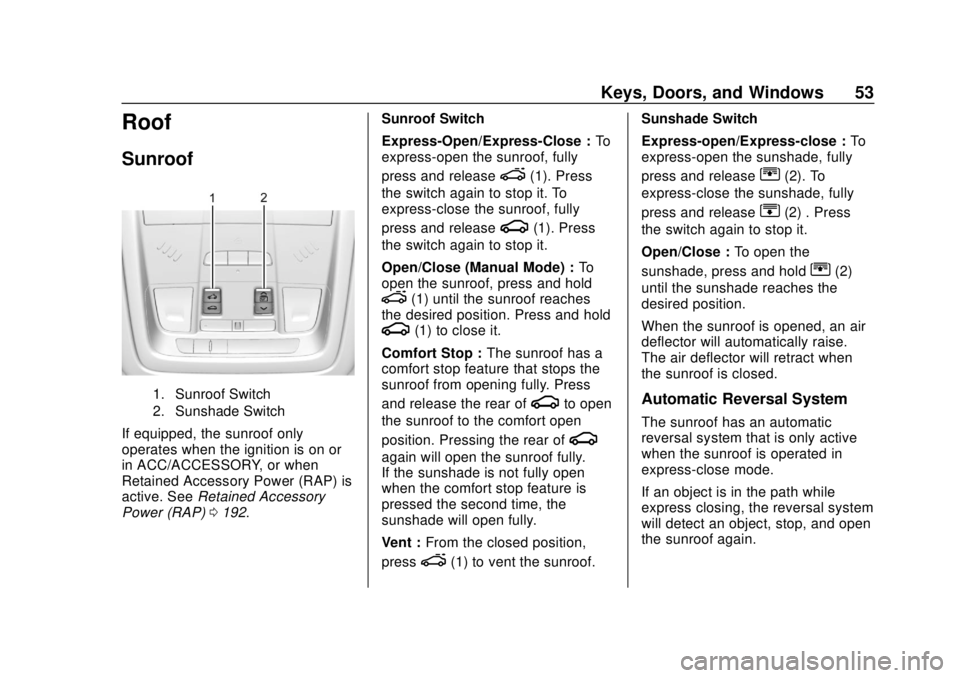
1. Sunroof Switch
2. Sunshade Switch
If equipped, the sunroof only
operates when the ignition is on or
in ACC/ACCESSORY, or when
Retained Accessory Power (RAP) is
active. SeeRetained Accessory
Power (RAP) 0192. Sunroof Switch
Express-Open/Express-Close :
To
express-open the sunroof, fully
press and release
e(1). Press
the switch again to stop it. To
express-close the sunroof, fully
press and release
g(1). Press
the switch again to stop it.
Open/Close (Manual Mode) : To
open the sunroof, press and hold
e(1) until the sunroof reaches
the desired position. Press and hold
g(1) to close it.
Comfort Stop : The sunroof has a
comfort stop feature that stops the
sunroof from opening fully. Press
and release the rear of
gto open
the sunroof to the comfort open
position. Pressing the rear of
g
again will open the sunroof fully.
If the sunshade is not fully open
when the comfort stop feature is
pressed the second time, the
sunshade will open fully.
Vent : From the closed position,
press
e(1) to vent the sunroof. Sunshade Switch
Express-open/Express-close :
To
express-open the sunshade, fully
press and release
r(2). To
express-close the sunshade, fully
press and release
s(2) . Press
the switch again to stop it.
Open/Close : To open the
sunshade, press and hold
r(2)
until the sunshade reaches the
desired position.
When the sunroof is opened, an air
deflector will automatically raise.
The air deflector will retract when
the sunroof is closed.
Automatic Reversal System
The sunroof has an automatic
reversal system that is only active
when the sunroof is operated in
express-close mode.
If an object is in the path while
express closing, the reversal system
will detect an object, stop, and open
the sunroof again.
Page 63 of 408
GMC Terrain/Terrain Denali Owner Manual (GMNA-Localizing-U.S./Canada/
Mexico-10664916) - 2018 - crc - 9/15/17
62 Seats and Restraints
If too much time passes
between releasing SET and
pressing 1, the memory
position will not be saved and
two beeps will not sound.
Repeat Steps 3 and 4.
1 or 2 corresponds to the driver
number. See“Identifying Driver
Number” in this section.
5. Repeat Steps 1–4 for a second driver using 1 or 2.
To save the position for
Band
easy exit features, repeat Steps 1–4
using
B. This stores the position
for getting out of the vehicle.
Save preferred memory feature
positions to both 1 and 2 if you are
the only driver.
Manually Recalling Memory
Positions
Press and hold 1, 2, or
Bto recall
the previously stored memory
positions.
To stop manual recall movement,
release 1, 2, or
B. Recall can also
be stopped by pressing a power seat, SET, or power mirror control,
if memory equipped. The driver or
passenger side mirror must be
selected.
Auto Memory Recall
The vehicle identifies the number of
the current driver
’s RKE transmitter
(1–8). See Remote Keyless Entry
(RKE) System Operation 029. If the
RKE transmitter is 1 or 2, and Auto
Memory Recall is programmed on in
vehicle personalization, the
positions saved to the same
memory button number 1 or 2 are
automatically recalled when the
ignition is turned on, or turned from
off to ACC/ACCESSORY. RKE
transmitters 3–8 will not provide
automatic memory recalls.
To turn Auto Memory Recall on or
off, see "Vehicle Personalization
Settings" previously in this section
and Vehicle Personalization 0142.
The transmission must be in
P (Park) to initiate Auto Memory
Recall. Auto Memory Recall will complete if the vehicle is shifted out
of P (Park) prior to reaching the
stored memory position.
To stop Auto Memory Recall
movement, turn the ignition off or
press any of the following memory
controls:
.
Power seat
. Memory SET, 1, 2, or
B
.Power mirror, with the driver or
passenger side mirror selected
If the stored memory seat position
does not automatically recall or
recalls to the wrong positions, the
driver ’s RKE transmitter number (1
or 2) may not match the memory
button number that positions were
saved to. Try storing the position to
the other memory button or try the
other RKE transmitter.
Easy Exit Recall
Easy Exit Recall is not linked to an
RKE transmitter. The position stored
to
Bis used for all drivers. To turn
Easy Exit Recall on or off, see