remote control GMC TERRAIN 2020 Get To Know Guide
[x] Cancel search | Manufacturer: GMC, Model Year: 2020, Model line: TERRAIN, Model: GMC TERRAIN 2020Pages: 20, PDF Size: 3.69 MB
Page 5 of 20

5
KEYLESS (PUSHBUTTON) START
AUTO ENGINE STOP/START OPERATION
F Optional equipment
The Remote Keyless Entry transmitter must be in the vehicle to turn on the ignition.
STARTING THE ENGINE
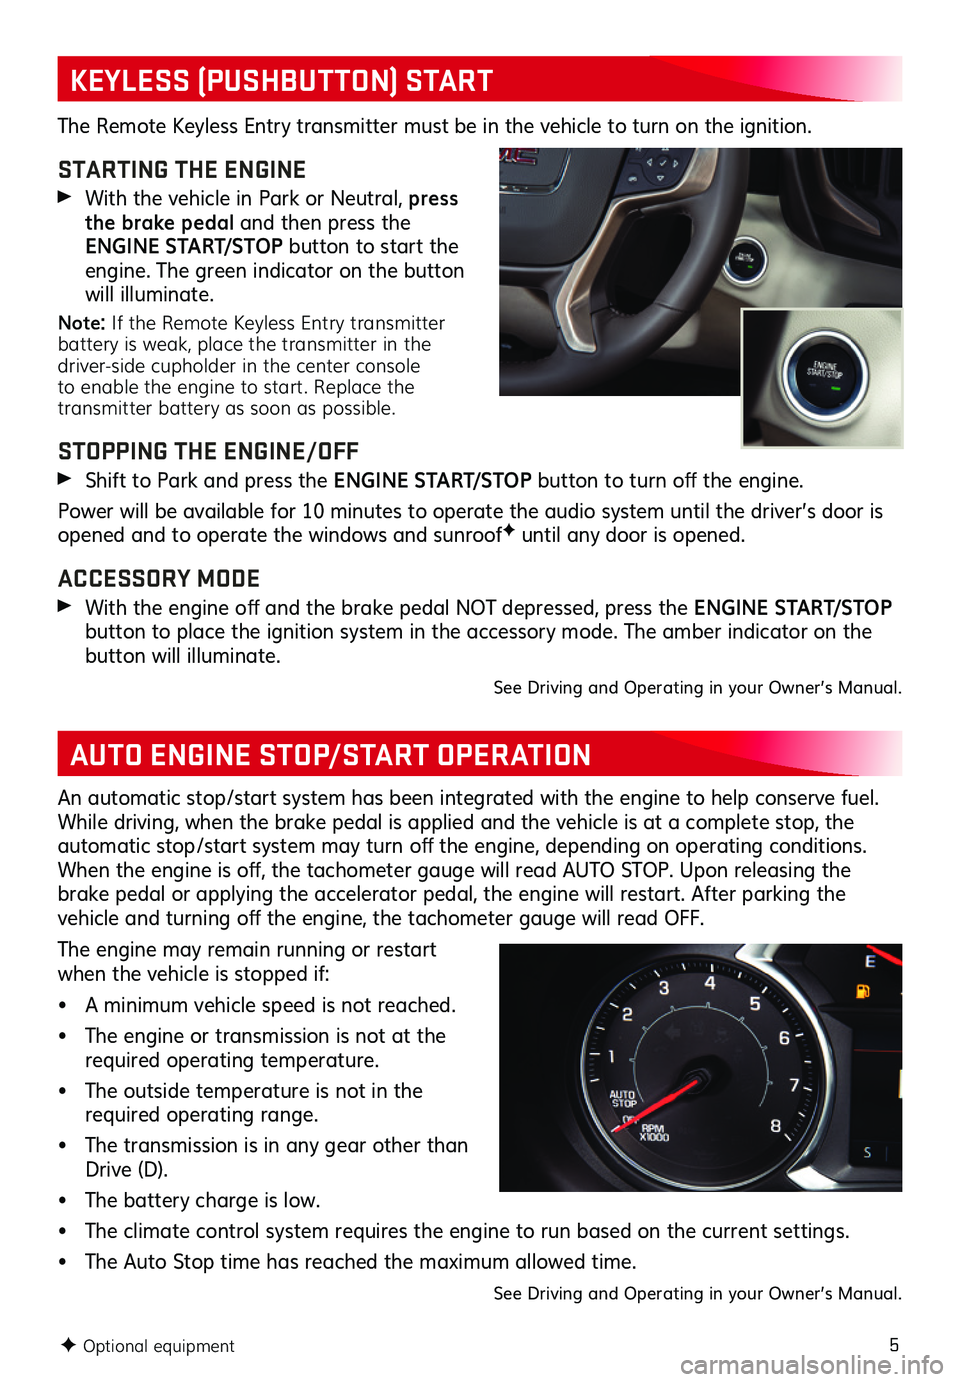
With the vehicle in Park or Neutral, press the brake pedal and then press the E N G I N E S TA R T/ S T O P button to start the engine. The green indicator on the button will illuminate.
Note: If the Remote Keyless Entry transmitter battery is weak, place the transmitter in the driver-side cupholder in the center console to enable the engine to start. Replace the transmitter battery as soon as possible.
STOPPING THE ENGINE/OFF
Shift to Park and press the E N G I N E S TA R T/ S T O P button to turn off the engine.
Power will be available for 10 minutes to operate the audio system until the driver’s door is opened and to operate the windows and sunroofF until any door is opened.
ACCESSORY MODE
With the engine off and the brake pedal NOT depressed, press the E N G I N E S TA R T/ S T O P
button to place the ignition system in the accessory mode. The amber indicator on the button will illuminate.
See Driving and Operating in your Owner’s Manual.
An automatic stop/start system has been integrated with the engine to help conserve fuel. While driving, when the brake pedal is applied and the vehicle is at a complete stop, the automatic stop/start system may turn off the engine, depending on operating conditions. When the engine is off, the tachometer gauge will read AUTO STOP. Upon releasing the brake pedal or applying the accelerator pedal, the engine will restart. After parking the vehicle and turning off the engine, the tachometer gauge will read OFF.
The engine may remain running or restart when the vehicle is stopped if:
• A minimum vehicle speed is not reached.
• The engine or transmission is not at the required operating temperature.
• The outside temperature is not in the required operating range.
• The transmission is in any gear other than Drive (D).
• The battery charge is low.
• The climate control system requires the engine to run based on the current settings.
• The Auto Stop time has reached the maximum allowed time.
See Driving and Operating in your Owner’s Manual.
Page 9 of 20

9
LIGHTING
UNIVERSAL REMOTE SYSTEMF
EXTERIOR LAMP CONTROL
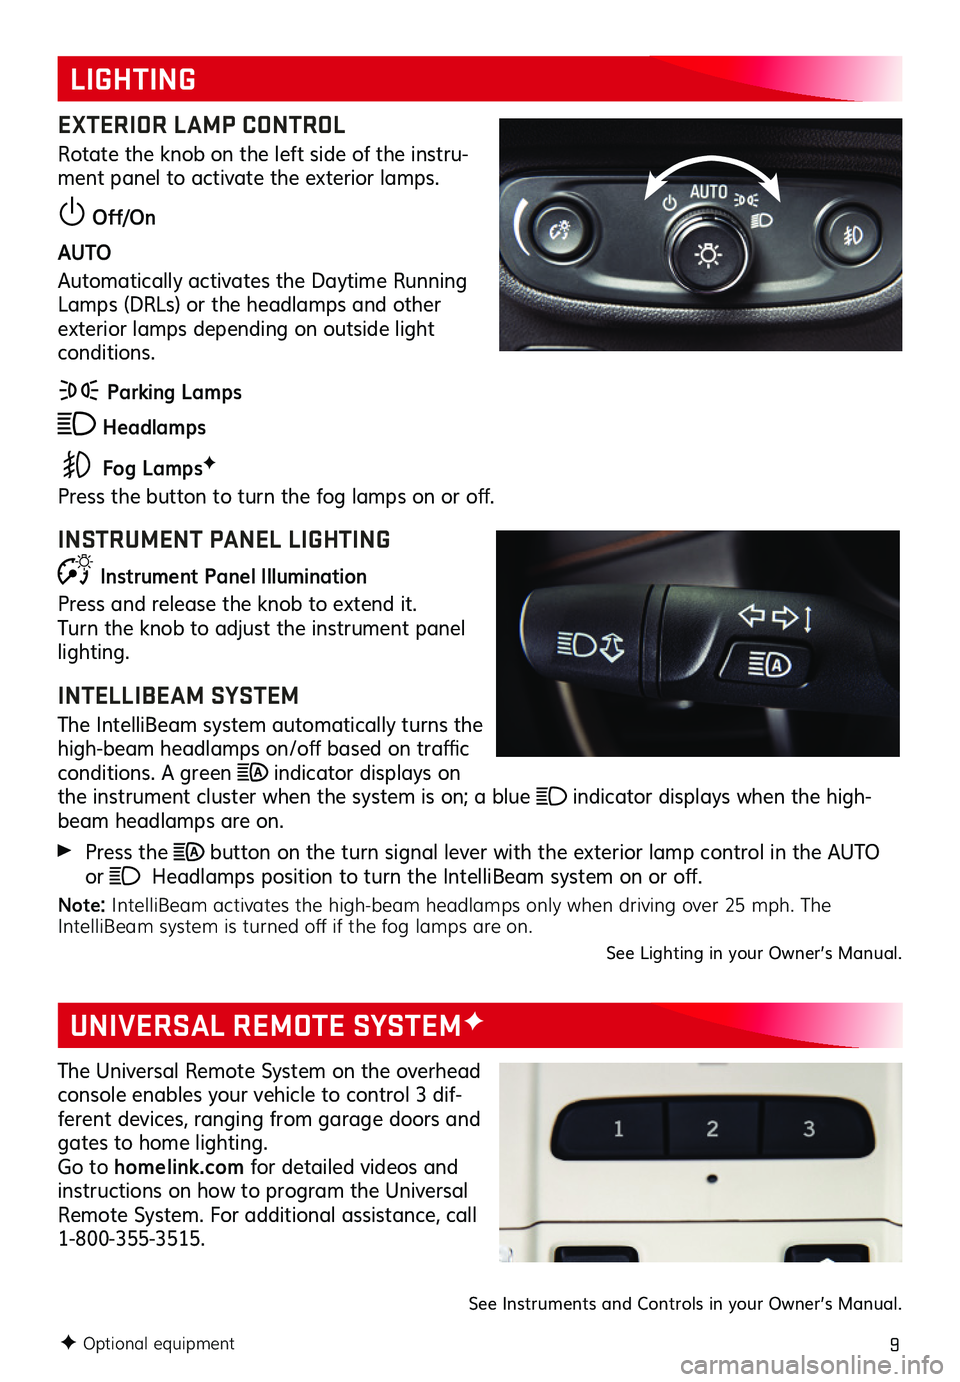
Rotate the knob on the left side of the instru-ment panel to activate the exterior lamps.
Off/On
AUTO
Automatically activates the Daytime Running Lamps (DRLs) or the headlamps and other exterior lamps depending on outside light conditions.
Parking Lamps
Headlamps
Fog LampsF
Press the button to turn the fog lamps on or off.
INSTRUMENT PANEL LIGHTING
Instrument Panel Illumination
Press and release the knob to extend it. Turn the knob to adjust the instrument panel lighting.
INTELLIBEAM SYSTEM
The IntelliBeam system automatically turns the high-beam headlamps on/off based on traffic conditions. A green indicator displays on the instrument cluster when the system is on; a blue indicator displays when the high-beam headlamps are on.
Press the button on the turn signal lever with the exterior lamp control in the AUTO or Headlamps position to turn the IntelliBeam system on or off.
Note: IntelliBeam activates the high-beam headlamps only when driving over 25 mph. The IntelliBeam system is turned off if the fog lamps are on.See Lighting in your Owner’s Manual.
F Optional equipment
The Universal Remote System on the overhead console enables your vehicle to control 3 dif-ferent devices, ranging from garage doors and gates to home lighting. Go to homelink.com for detailed videos and instructions on how to program the Universal Remote System. For additional
assistance, call 1-800-355-3515.
See Instruments and Controls in your Owner’s Manual.
Page 19 of 20

19
OPEN/CLOSE THE POWER LIFTGATE
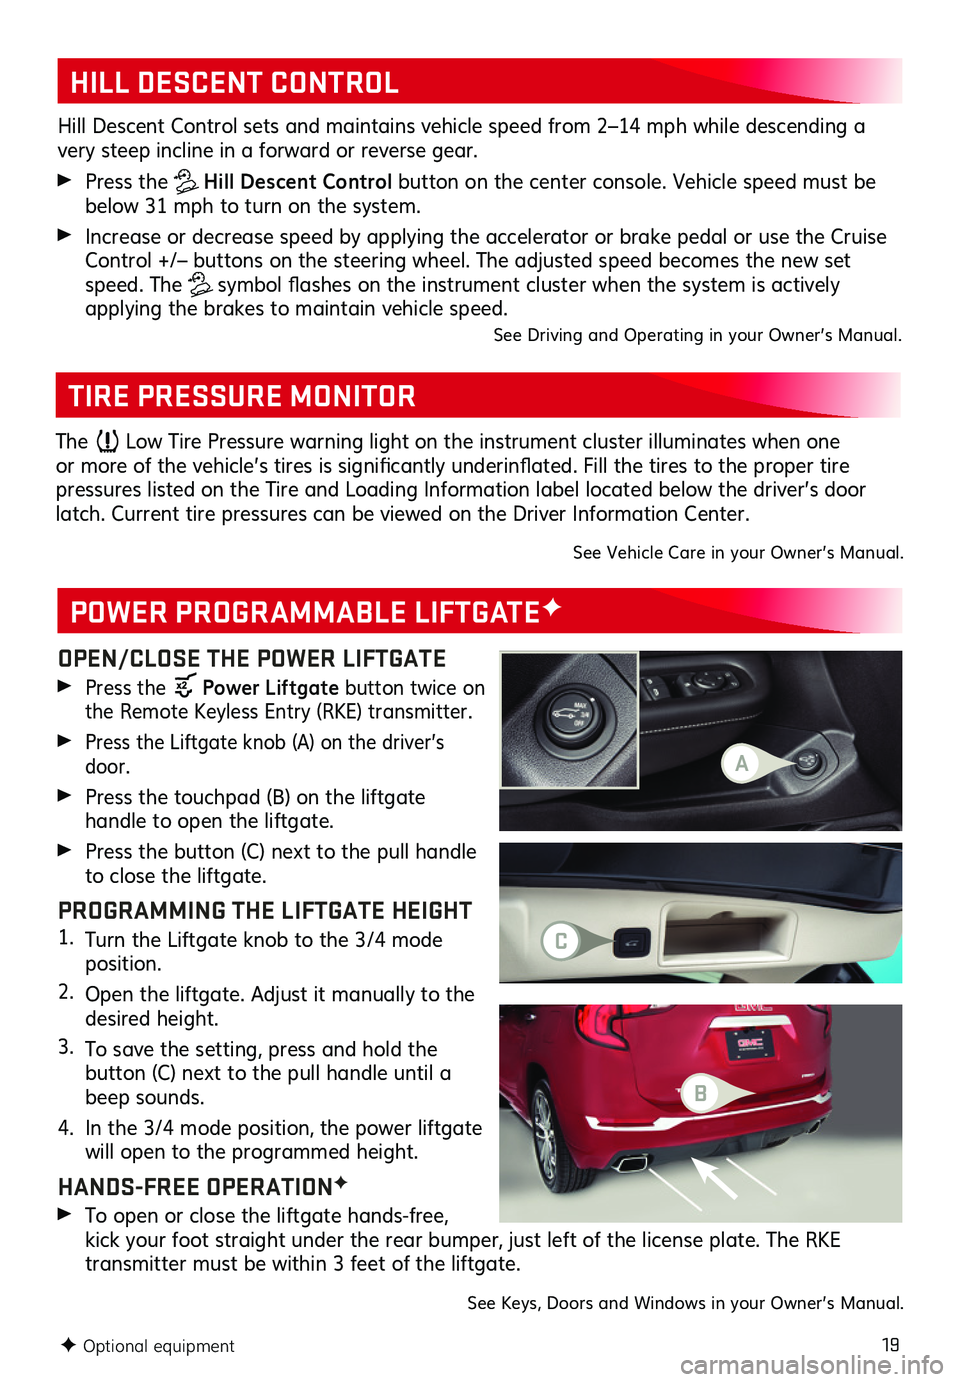
Press the Power Liftgate button twice on the Remote Keyless Entry (RKE) transmitter.
Press the Liftgate knob (A) on the driver’s door.
Press the touchpad (B) on the liftgate
handle to open the liftgate.
Press the button (C) next to the pull handle to close the liftgate.
PROGRAMMING THE LIFTGATE HEIGHT1. Turn the Liftgate knob to the 3/4 mode position.
2. Open the liftgate. Adjust it manually to the desired height.
3. To save the setting, press and hold the
button (C) next to the pull handle until a beep sounds.
4. In the 3/4 mode position, the power liftgate will open to the programmed height.
HANDS-FREE OPERATIONF
To open or close the liftgate hands-free, kick your foot straight under the rear bumper, just left of the license plate. The RKE
transmitter must be within 3 feet of the liftgate.
POWER PROGRAMMABLE LIFTGATEF
TIRE PRESSURE MONITOR
HILL DESCENT CONTROL
Hill Descent Control sets and maintains vehicle speed from 2–14 mph while descending a very steep incline in a forward or reverse gear.
Press the Hill Descent Control button on the center console. Vehicle speed must be below 31 mph to turn on the system.
Increase or decrease speed by applying the accelerator or brake pedal or use the Cruise Control +/– buttons on the steering wheel. The adjusted speed becomes the new set speed. The symbol flashes on the instrument cluster when the system is actively
applying the brakes to maintain vehicle speed.See Driving and Operating in your Owner’s Manual.
F Optional equipment
The Low Tire Pressure warning light on the instrument cluster illuminates when one or more of the vehicle’s tires is significantly underinflated. Fill the tires to the proper tire
pressures listed on the Tire and Loading Information label located below the driver’s door latch. Current tire pressures can be viewed on the Driver Information Center.
See Vehicle Care in your Owner’s Manual.
See Keys, Doors and Windows in your Owner’s Manual.
A
C
B