tow GMC TERRAIN 2020 Repair Manual
[x] Cancel search | Manufacturer: GMC, Model Year: 2020, Model line: TERRAIN, Model: GMC TERRAIN 2020Pages: 425, PDF Size: 6.59 MB
Page 279 of 425
GMC Terrain/Terrain Denali Owner Manual (GMNA-Localizing-U.S./Canada/
Mexico-13556230) - 2020 - CRC - 9/5/19
276 Vehicle Care
If equipped with remote vehicle
start, open the hood before
performing any service work to
prevent remote starting the vehicle
accidentally. SeeRemote Vehicle
Start 015.
Keep a record with all parts receipts
and list the mileage and the date of
any service work performed. See
Maintenance Records 0380.
Caution
Even small amounts of
contamination can cause damage
to vehicle systems. Do not allow
contaminants to contact the fluids,
reservoir caps, or dipsticks.
Hood
{Warning
For vehicles with auto engine
stop/start, turn the vehicle off
before opening the hood. If the
vehicle is on, the engine will start
when the hood is opened. You or
others could be injured.
{Warning
Components under the hood can
get hot from running the engine.
To help avoid the risk of burning
unprotected skin, never touch
these components until they have
cooled, and always use a glove or
towel to avoid direct skin contact.
Clear any snow from the hood
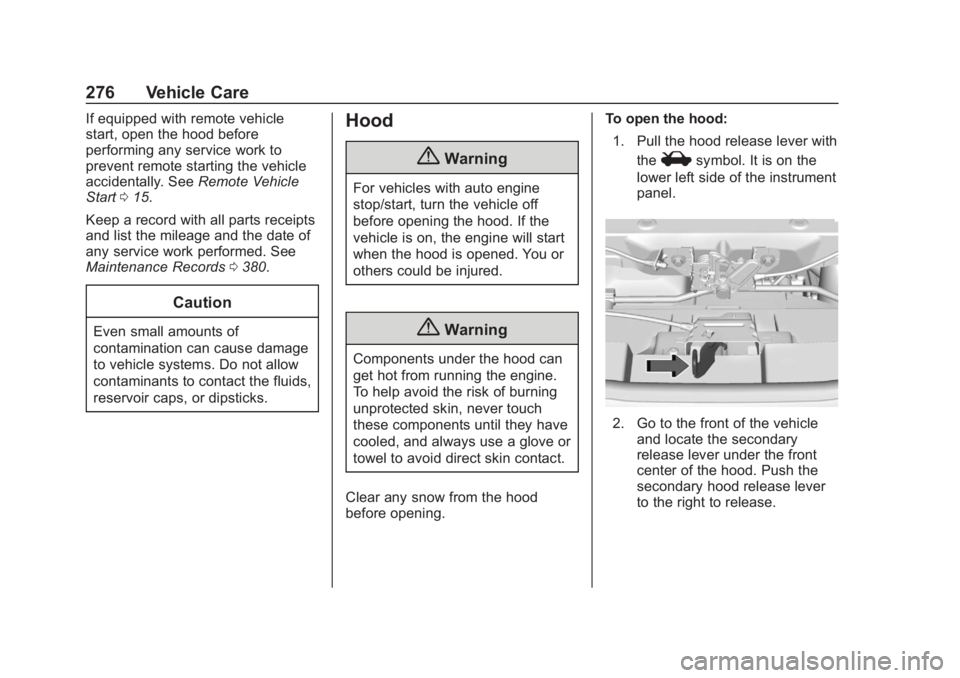
before opening. To open the hood:
1. Pull the hood release lever with the
isymbol. It is on the
lower left side of the instrument
panel.
2. Go to the front of the vehicle and locate the secondary
release lever under the front
center of the hood. Push the
secondary hood release lever
to the right to release.
Page 286 of 425
GMC Terrain/Terrain Denali Owner Manual (GMNA-Localizing-U.S./Canada/
Mexico-13556230) - 2020 - CRC - 9/5/19
Vehicle Care 283
1.Engine Air Cleaner/Filter 0288.
2. Engine Oil Fill Cap. See Engine Oil 0283.
3. Engine Oil Dipstick. See Engine Oil 0283.
4. Engine Cooling Fan. See Cooling System 0290.
5. Brake Fluid Reservoir. See Brake Fluid 0297.
6. Engine Compartment Fuse
Block 0307.
7. Remote Positive (+) Terminal (Under Cover). See Jump
Starting - North America 0349.
8. Engine Coolant Surge Tank and Pressure Cap. See
Cooling System 0290.
9. Battery - North America 0298.
10. Remote Negative (−) Terminal. SeeJump Starting - North
America 0349.
11. Windshield Washer Fluid Reservoir. See Washer Fluid
0 296.Engine Oil
To ensure proper engine
performance and long life, careful
attention must be paid to engine oil.
Following these simple, but
important steps will help protect
your investment:
.
Use engine oil approved to the
proper specification and of the
proper viscosity grade. See
“Selecting the Right Engine Oil”
in this section.
. Check the engine oil level
regularly and maintain the
proper oil level. See “Checking
Engine Oil” and“When to Add
Engine Oil” in this section.
. Change the engine oil at the
appropriate time. See Engine Oil
Life System 0287.
. Always dispose of engine oil
properly. See “What to Do with
Used Oil” in this section.
Checking Engine Oil
Check the engine oil level regularly,
every 650 km (400 mi), especially
prior to a long trip. The engine oil
dipstick handle is a loop. See
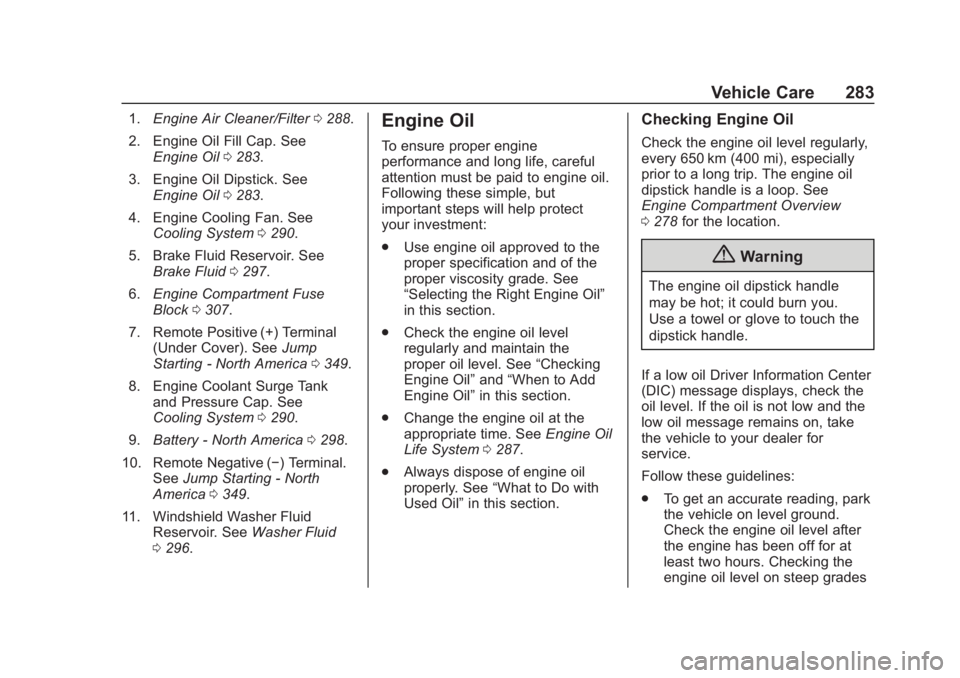
Engine Compartment Overview
0278 for the location.
{Warning
The engine oil dipstick handle
may be hot; it could burn you.
Use a towel or glove to touch the
dipstick handle.
If a low oil Driver Information Center
(DIC) message displays, check the
oil level. If the oil is not low and the
low oil message remains on, take
the vehicle to your dealer for
service.
Follow these guidelines:
. To get an accurate reading, park
the vehicle on level ground.
Check the engine oil level after
the engine has been off for at
least two hours. Checking the
engine oil level on steep grades
Page 287 of 425
GMC Terrain/Terrain Denali Owner Manual (GMNA-Localizing-U.S./Canada/
Mexico-13556230) - 2020 - CRC - 9/5/19
284 Vehicle Care
or too soon after engine shutoff
can result in incorrect readings.
Accuracy improves when
checking a cold engine prior to
starting. Remove the dipstick
and check the level.
. If unable to wait two hours, the
engine must be off for at least
15 minutes if the engine is
warm, or at least 30 minutes if
the engine is not warm. Pull out
the dipstick, wipe it with a clean
paper towel or cloth, then push it
back in all the way. Remove it
again, keeping the tip down, and
check the level.
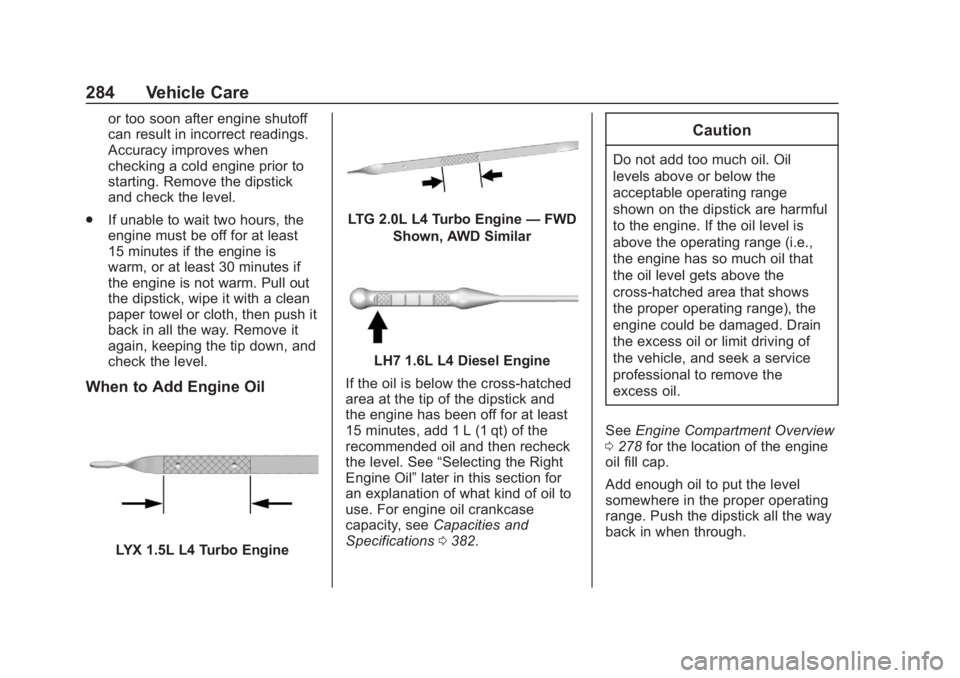
When to Add Engine Oil
LYX 1.5L L4 Turbo Engine
LTG 2.0L L4 Turbo Engine —FWD
Shown, AWD Similar
LH7 1.6L L4 Diesel Engine
If the oil is below the cross-hatched
area at the tip of the dipstick and
the engine has been off for at least
15 minutes, add 1 L (1 qt) of the
recommended oil and then recheck
the level. See “Selecting the Right
Engine Oil” later in this section for
an explanation of what kind of oil to
use. For engine oil crankcase
capacity, see Capacities and
Specifications 0382.
Caution
Do not add too much oil. Oil
levels above or below the
acceptable operating range
shown on the dipstick are harmful
to the engine. If the oil level is
above the operating range (i.e.,
the engine has so much oil that
the oil level gets above the
cross-hatched area that shows
the proper operating range), the
engine could be damaged. Drain
the excess oil or limit driving of
the vehicle, and seek a service
professional to remove the
excess oil.
See Engine Compartment Overview
0 278 for the location of the engine
oil fill cap.
Add enough oil to put the level
somewhere in the proper operating
range. Push the dipstick all the way
back in when through.
Page 298 of 425

GMC Terrain/Terrain Denali Owner Manual (GMNA-Localizing-U.S./Canada/
Mexico-13556230) - 2020 - CRC - 9/5/19
Vehicle Care 295
Caution
Do not run the engine if there is a
leak in the engine cooling system.
This can cause a loss of all
coolant and can damage the
system and vehicle. Have any
leaks fixed right away.
If Steam Is Coming from the
Engine Compartment
{Warning
Steam and scalding liquids from a
hot cooling system are under
pressure. Turning the pressure
cap, even a little, can cause them
to come out at high speed and
you could be burned. Never turn
the cap when the cooling system,
including the pressure cap, is hot.
Wait for the cooling system and
pressure cap to cool.
If No Steam Is Coming from
the Engine Compartment
If the engine coolant temperature
gauge is in the overheat zone or an
engine overheat DIC message is
displayed but no steam can be seen
or heard, the problem may not be
too serious. Sometimes the engine
can get a little too hot when the
vehicle:
.Climbs a long hill on a hot day
. Stops after high-speed driving
. Idles for long periods in traffic
. Tows a trailer
If the engine coolant temperature
gauge is in the overheat zone and
an overheat DIC message is
displayed with no sign of steam: 1. Turn the air conditioning off.
2. Turn the heater on to the highest temperature and to the
highest fan speed. Open the
windows as necessary. 3. When it is safe to do so, pull off
the road, shift to P (Park) or
N (Neutral), and let the
engine idle.
If the engine coolant temperature
gauge is no longer in the overheat
zone or an overheat DIC message
no longer displays, the vehicle can
be driven. Continue to drive the
vehicle slowly for about 10 minutes.
Keep a safe distance from the
vehicle in front. If the engine coolant
temperature gauge does not go
back to the overheat zone or an
overheat DIC message does not
display, continue to drive normally
and have the cooling system
checked for proper fill and function.
If the engine coolant temperature
gauge is still in the overheat zone or
an overheat DIC message still
displays, pull over, stop, and park
the vehicle right away. If overheat
messages appear repeatedly, see
your dealer.
If there is no sign of steam, idle the
engine for three minutes while
parked. If the engine coolant
temperature gauge is still in the
Page 304 of 425

GMC Terrain/Terrain Denali Owner Manual (GMNA-Localizing-U.S./Canada/
Mexico-13556230) - 2020 - CRC - 9/5/19
Vehicle Care 301
2. Lift up on the latch in themiddle of the wiper blade
where the wiper arm attaches.
3. With the latch open, pull the wiper blade down toward the
windshield far enough to
release it from the J-hooked
end of the wiper arm.
4. Remove the wiper blade.
5. Reverse Steps 1–3 for wiper blade replacement.
Rear Wiper Blade Replacement
The rear wiper blade and wiper arm
have a cover for protection.
To remove the cover:
1. Slide a plastic tool under thecover and push upward to
unsnap.
2. Slide the cover toward the wiper blade tip to unhook it
from the blade assembly.
3. Remove the cover.
4. After wiper blade replacement, ensure that the cover hook
slides into the slot in the blade
assembly.
5. Snap the cover down to secure. To replace the wiper blade:
1. Lift the wiper arm away from the windshield.
2. Push the release lever (2) todisengage the hook and push
the wiper arm (1) out of the
blade assembly (3).
3. Push the new blade assembly securely on the wiper arm until
the release lever clicks into
place.
Windshield Replacement
Driver Assistance Systems
If the windshield needs to be
replaced and the vehicle is
equipped with a front camera sensor
for the Driver Assistance Systems, a
Page 332 of 425
GMC Terrain/Terrain Denali Owner Manual (GMNA-Localizing-U.S./Canada/
Mexico-13556230) - 2020 - CRC - 9/5/19
Vehicle Care 329
the tires have been rotated. See
Tire Pressure0321 and
Vehicle Load Limits 0175.
Reset the Tire Pressure Monitor
System. See Tire Pressure
Monitor Operation 0324.
Check that all wheel nuts are
properly tightened. See “Wheel
Nut Torque” underCapacities
and Specifications 0382, and
“Removing the Flat Tire and
Installing the Spare Tire” under
Tire Changing 0343.
{Warning
Rust or dirt on a wheel, or on
the parts to which it is
fastened, can make wheel
nuts become loose after time.
The wheel could come off and
cause a crash. When
changing a wheel, remove any
rust or dirt from places where
the wheel attaches to the
(Continued)
Warning (Continued)
vehicle. In an emergency, a
cloth or a paper towel can be
used; however, use a scraper
or wire brush later to remove
all rust or dirt.
Lightly coat the inner diameter of
the wheel hub opening with
wheel bearing grease after a
wheel change or tire rotation to
prevent corrosion or rust
buildup. Do not get grease on
the wheel mounting surface or
on the wheel nuts or bolts.
When It Is Time for New
Tires
Factors such as maintenance,
temperatures, driving speeds,
vehicle loading, and road conditions
affect the wear rate of the tires.
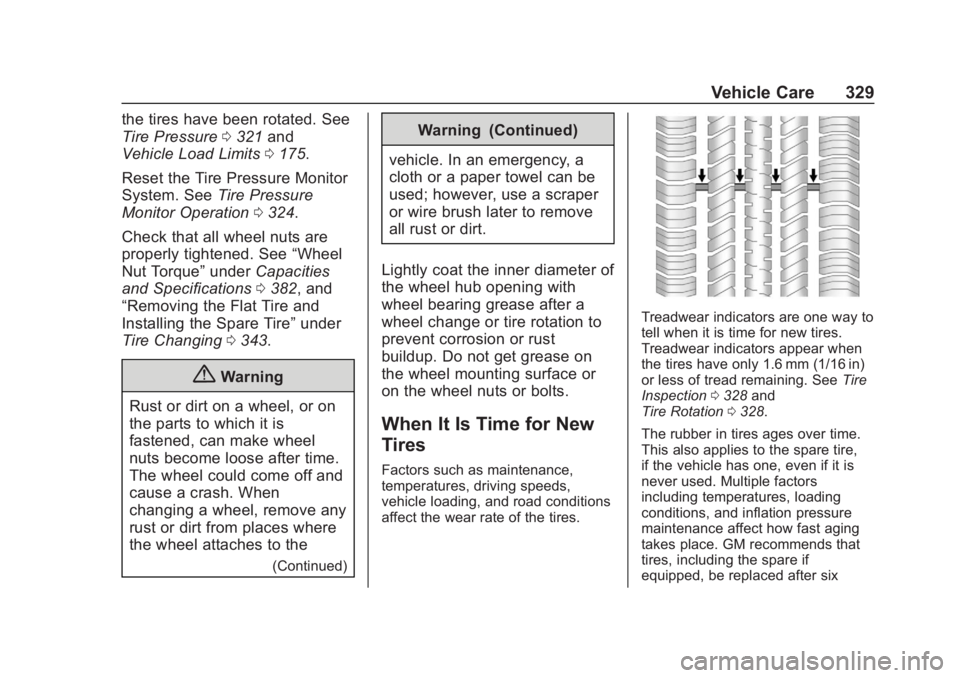
Treadwear indicators are one way to
tell when it is time for new tires.
Treadwear indicators appear when
the tires have only 1.6 mm (1/16 in)
or less of tread remaining. See Tire
Inspection 0328 and
Tire Rotation 0328.
The rubber in tires ages over time.
This also applies to the spare tire,
if the vehicle has one, even if it is
never used. Multiple factors
including temperatures, loading
conditions, and inflation pressure
maintenance affect how fast aging
takes place. GM recommends that
tires, including the spare if
equipped, be replaced after six
Page 338 of 425
GMC Terrain/Terrain Denali Owner Manual (GMNA-Localizing-U.S./Canada/
Mexico-13556230) - 2020 - CRC - 9/5/19
Vehicle Care 335
If a Tire Goes Flat
It is unusual for a tire to blow out
while driving, especially if the tires
are maintained properly. SeeTires
0 314. If air goes out of a tire, it is
much more likely to leak out slowly.
But if there is ever a blowout, here
are a few tips about what to expect
and what to do:
If a front tire fails, the flat tire
creates a drag that pulls the vehicle
toward that side. Take your foot off
the accelerator pedal and grip the
steering wheel firmly. Steer to
maintain lane position, and then
gently brake to a stop, well off the
road, if possible.
A rear blowout, particularly on a
curve, acts much like a skid and
may require the same correction as
used in a skid. Stop pressing the
accelerator pedal and steer to
straighten the vehicle. It may be
very bumpy and noisy. Gently brake
to a stop, well off the road,
if possible.{Warning
Driving on a flat tire will cause
permanent damage to the tire.
Re-inflating a tire after it has been
driven on while severely
underinflated or flat may cause a
blowout and a serious crash.
Never attempt to re-inflate a tire
that has been driven on while
severely underinflated or flat.
Have your dealer or an authorized
tire service center repair or
replace the flat tire as soon as
possible.
{Warning
Lifting a vehicle and getting under
it to do maintenance or repairs is
dangerous without the
appropriate safety equipment and
training. If a jack is provided with
the vehicle, it is designed only for
changing a flat tire. If it is used for
(Continued)
Warning (Continued)
anything else, you or others could
be badly injured or killed if the
vehicle slips off the jack. If a jack
is provided with the vehicle, only
use it for changing a flat tire.
If a tire goes flat, avoid further tire
and wheel damage by driving slowly
to a level place, well off the road,
if possible. Turn on the hazard
warning flashers. See Hazard
Warning Flashers 0147.
{Warning
Changing a tire can be
dangerous. The vehicle can slip
off the jack and roll over or fall
causing injury or death. Find a
level place to change the tire. To
help prevent the vehicle from
moving:
1. Set the parking brake firmly. (Continued)
Page 346 of 425

GMC Terrain/Terrain Denali Owner Manual (GMNA-Localizing-U.S./Canada/
Mexico-13556230) - 2020 - CRC - 9/5/19
Vehicle Care 343
3. Turn the retainer nutcounterclockwise to remove the
tire sealant and compressor
kit bag.
4. Remove the tire sealant and compressor kit from the bag.
To store the tire sealant and
compressor kit, reverse the steps.
Tire Changing
Removing the Spare Tire and
Tools
1. Tow Eye (If Equipped)
2. Capless Funnel Adapter (If Equipped)
3. Wheel Wrench
4. Strap
5. Jack
6. Screwdriver (If Equipped)
To access the spare tire and tools:
1. Open the liftgate. See Liftgate
0 21. 2. Fold the rear part of the load
floor to the front, pull it
rearward to disengage the
clips, then pull upward to
remove it.
3. Pull the spare tire cover forward and upward to
remove it.
4. Turn the retainer nut counterclockwise to remove the
spare tire. Place the spare tire
next to the tire being changed.
5. The jack and tools are stored below the spare tire. Remove
them from their container and
place them near the tire being
changed.
Removing the Flat Tire and
Installing the Spare Tire
1. Do a safety check beforeproceeding. See If a Tire Goes
Flat 0335 for more information.
2. For vehicles with a wheel cover or center cap, pull the cover or
center cap away from the
wheel to remove it. Store the
Page 349 of 425
GMC Terrain/Terrain Denali Owner Manual (GMNA-Localizing-U.S./Canada/
Mexico-13556230) - 2020 - CRC - 9/5/19
346 Vehicle Care
Warning (Continued)
vehicle. In an emergency, a
cloth or a paper towel can be
used; however, use a scraper
or wire brush later to remove
all rust or dirt.
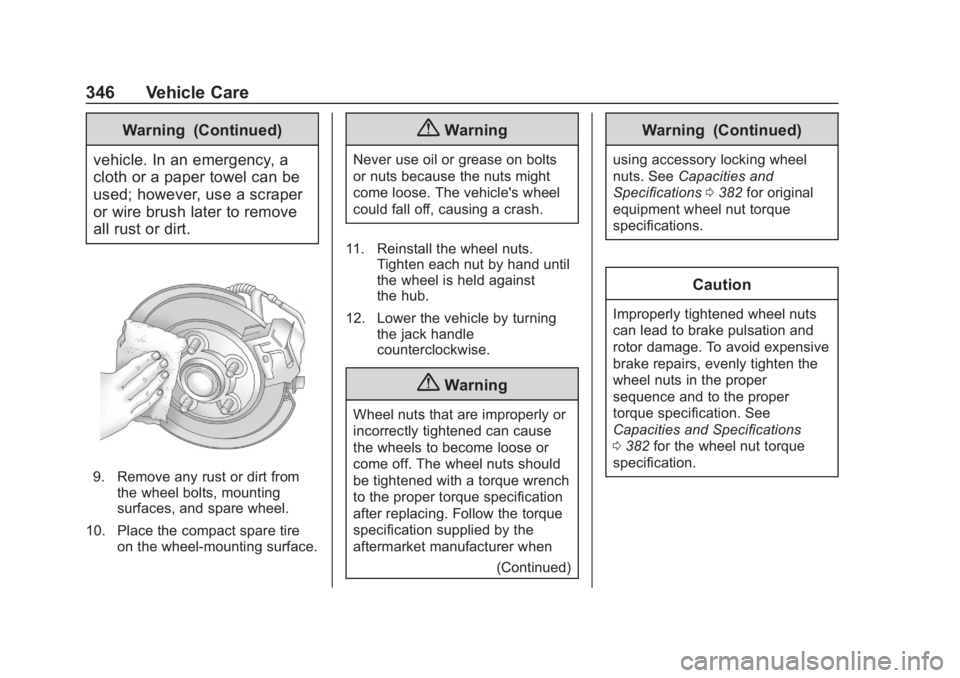
9. Remove any rust or dirt from the wheel bolts, mounting
surfaces, and spare wheel.
10. Place the compact spare tire on the wheel-mounting surface.
{Warning
Never use oil or grease on bolts
or nuts because the nuts might
come loose. The vehicle's wheel
could fall off, causing a crash.
11. Reinstall the wheel nuts. Tighten each nut by hand until
the wheel is held against
the hub.
12. Lower the vehicle by turning the jack handle
counterclockwise.
{Warning
Wheel nuts that are improperly or
incorrectly tightened can cause
the wheels to become loose or
come off. The wheel nuts should
be tightened with a torque wrench
to the proper torque specification
after replacing. Follow the torque
specification supplied by the
aftermarket manufacturer when
(Continued)
Warning (Continued)
using accessory locking wheel
nuts. SeeCapacities and
Specifications 0382 for original
equipment wheel nut torque
specifications.
Caution
Improperly tightened wheel nuts
can lead to brake pulsation and
rotor damage. To avoid expensive
brake repairs, evenly tighten the
wheel nuts in the proper
sequence and to the proper
torque specification. See
Capacities and Specifications
0 382 for the wheel nut torque
specification.
Page 355 of 425

GMC Terrain/Terrain Denali Owner Manual (GMNA-Localizing-U.S./Canada/
Mexico-13556230) - 2020 - CRC - 9/5/19
352 Vehicle Care
Towing the Vehicle
Caution
Incorrectly towing a disabled
vehicle may cause damage. The
damage would not be covered by
the vehicle warranty. Do not lash
or hook to suspension
components. Use the proper
straps around the tires to secure
the vehicle. Do not drag a locked
wheel/tire. Use tire skates or
dollies under any locked wheel/
tire while loading the vehicle. Do
not use a sling type lift to tow the
vehicle. This could damage the
vehicle.
Caution
If the vehicle cannot be shifted
into Neutral (N), do not use the
tow eye to tow the vehicle.
Vehicle damage may occur.GM recommends a flatbed tow truck
to transport a disabled vehicle. Use
ramps to help reduce approach
angles, if necessary. A towed
vehicle should have its drive wheels
off the ground. Contact Roadside
Assistance or a professional towing
service if the disabled vehicle must
be towed.
Caution
Improper use of the tow eye can
cause vehicle damage. Use
caution and low speeds to
prevent damage to the vehicle.
The vehicle is equipped with a tow
eye. Only use the tow eye to pull
the vehicle onto a flatbed car carrier
from a flat road surface. Do not use
the tow eye to pull the vehicle from
snow, mud, or sand.
The tow eye is stored underneath
the load floor, near the spare tire or
the compressor kit, if equipped.
Front Tow Eye
Carefully open the cover by using
the small notch that conceals the
front tow eye socket.