warning GMC TERRAIN 2022 Owners Manual
[x] Cancel search | Manufacturer: GMC, Model Year: 2022, Model line: TERRAIN, Model: GMC TERRAIN 2022Pages: 371, PDF Size: 17.71 MB
Page 2 of 371
GMC Terrain/Terrain Denali Owner Manual (GMNA-Localizing-U.S./Canada/
Mexico-16540740) - 2023 - CRC - 6/16/22
Contents
Introduction . . . . . . . . . . . . . . . . . . . . . . . . . . . . . . 1
Keys, Doors, and Windows . . . . . . . . . . . . . . . 7
Seats and Restraints . . . . . . . . . . . . . . . . . . . . . 31
Storage . . . . . . . . . . . . . . . . . . . . . . . . . . . . . . . . . . 76
Instruments and Controls . . . . . . . . . . . . . . . 80
Lighting . . . . . . . . . . . . . . . . . . . . . . . . . . . . . . . . . 123
Infotainment System . . . . . . . . . . . . . . . . . . . 130
Climate Controls . . . . . . . . . . . . . . . . . . . . . . . . 178
Driving and Operating . . . . . . . . . . . . . . . . . . 185
Vehicle Care . . . . . . . . . . . . . . . . . . . . . . . . . . . 260
Service and Maintenance . . . . . . . . . . . . . . . 327
Technical Data . . . . . . . . . . . . . . . . . . . . . . . . . . 335
Customer Information . . . . . . . . . . . . . . . . . . 339
Reporting Safety Defects . . . . . . . . . . . . . . . 347
OnStar . . . . . . . . . . . . . . . . . . . . . . . . . . . . . . . . . 350
Connected Services . . . . . . . . . . . . . . . . . . . . . 355
Index . . . . . . . . . . . . . . . . . . . . . . . . . . 358
Introduction
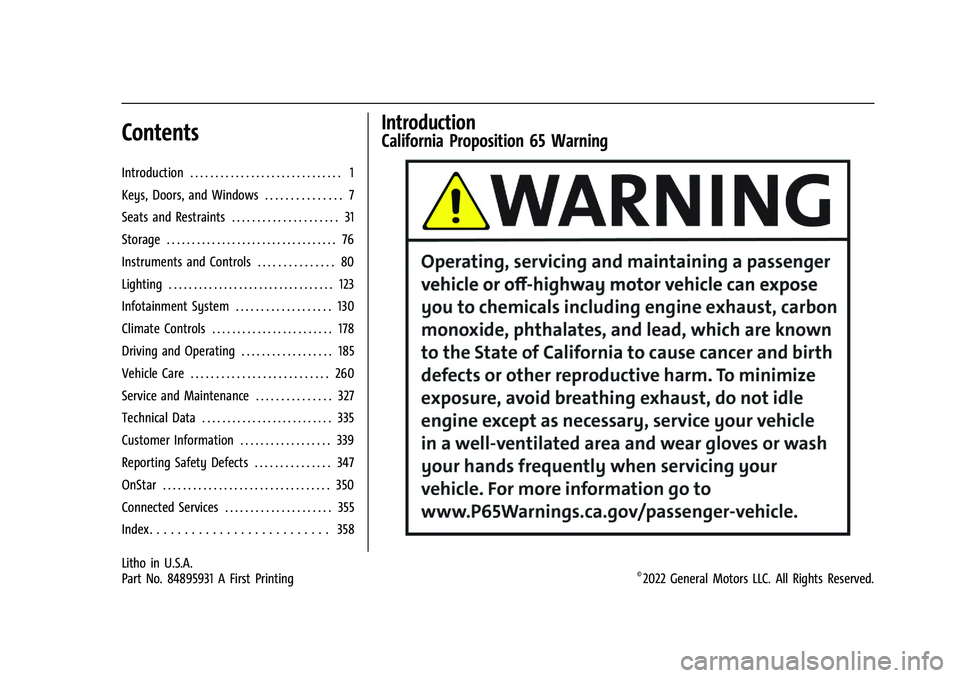
California Proposition 65 Warning
Litho in U.S.A.
Part No. 84895931 A First Printing©2022 General Motors LLC. All Rights Reserved.
Page 3 of 371
GMC Terrain/Terrain Denali Owner Manual (GMNA-Localizing-U.S./Canada/
Mexico-16540740) - 2023 - CRC - 6/16/22
2 Introduction
Introduction
The names, logos, emblems, slogans, vehicle
model names, and vehicle body designs
appearing in this manual including, but not
limited to, GM, the GM logo, GMC, the GMC
Truck Emblem, TERRAIN, and DENALI are
trademarks and/or service marks of General
Motors LLC, its subsidiaries, affiliates,
or licensors.
For vehicles first sold in Canada, substitute
the name“General Motors of Canada
Company” for GMC Motor Division wherever
it appears in this manual.
This manual describes features that may or
may not be on the vehicle because of
optional equipment that was not purchased
on the vehicle, model variants, country
specifications, features/applications that may
not be available in your region, or changes
subsequent to the printing of this owner’s
manual, including changes in standard or
optional content. Refer to the purchase documentation
relating to your specific vehicle to confirm
the features.
Keep this manual in the vehicle for quick
reference.
Canadian Vehicle Owners
A French language manual can be obtained
from your dealer, at www.helminc.com,
or from:
Propriétaires Canadiens
On peut obtenir un exemplaire de ce guide
en français auprès du concessionnaire ou à
l'adresse suivante:
Helm, Incorporated
Attention: Customer Service
47911 Halyard Drive
Plymouth, MI 48170
USA
Using this Manual
To quickly locate information about the
vehicle, use the Index in the back of the
manual. It is an alphabetical list of what is
in the manual and the page number where
it can be found.
About Driving the Vehicle
As with other vehicles of this type, failure to
operate this vehicle correctly may result in
loss of control or a crash. Be sure to read
the driving guidelines in this manual in the
section called
“Driving and Operating” and
specifically Driver Behavior 0186, Driving
Environment 0186, and Vehicle Design
0 186.
Danger, Warning, and Caution
Warning messages found on vehicle labels
and in this manual describe hazards and
what to do to avoid or reduce them.
{Danger
Danger indicates a hazard with a high
level of risk which will result in serious
injury or death.
{Warning
Warning indicates a hazard that could
result in injury or death.
Page 4 of 371
GMC Terrain/Terrain Denali Owner Manual (GMNA-Localizing-U.S./Canada/
Mexico-16540740) - 2023 - CRC - 6/16/22
Introduction 3
Caution
Caution indicates a hazard that could
result in property or vehicle damage.
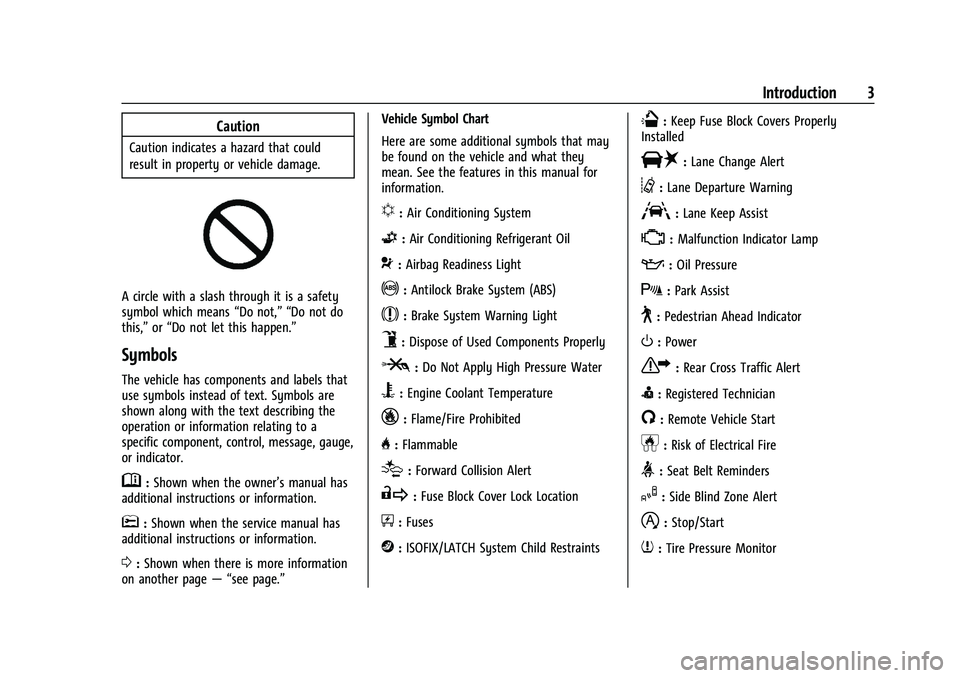
A circle with a slash through it is a safety
symbol which means“Do not,” “Do not do
this,” or“Do not let this happen.”
Symbols
The vehicle has components and labels that
use symbols instead of text. Symbols are
shown along with the text describing the
operation or information relating to a
specific component, control, message, gauge,
or indicator.
M:Shown when the owner’s manual has
additional instructions or information.
*: Shown when the service manual has
additional instructions or information.
0: Shown when there is more information
on another page — “see page.” Vehicle Symbol Chart
Here are some additional symbols that may
be found on the vehicle and what they
mean. See the features in this manual for
information.
u:
Air Conditioning System
G:Air Conditioning Refrigerant Oil
9:Airbag Readiness Light
!:Antilock Brake System (ABS)
$:Brake System Warning Light
9:Dispose of Used Components Properly
P:Do Not Apply High Pressure Water
B:Engine Coolant Temperature
_:Flame/Fire Prohibited
H: Flammable
[:Forward Collision Alert
R:Fuse Block Cover Lock Location
+:Fuses
j:ISOFIX/LATCH System Child Restraints
Q:Keep Fuse Block Covers Properly
Installed
|: Lane Change Alert
@:Lane Departure Warning
A:Lane Keep Assist
*: Malfunction Indicator Lamp
::Oil Pressure
X:Park Assist
~:Pedestrian Ahead Indicator
O:Power
7:Rear Cross Traffic Alert
I:Registered Technician
/:Remote Vehicle Start
h:Risk of Electrical Fire
>:Seat Belt Reminders
I:Side Blind Zone Alert
h:Stop/Start
7:Tire Pressure Monitor
Page 7 of 371
GMC Terrain/Terrain Denali Owner Manual (GMNA-Localizing-U.S./Canada/
Mexico-16540740) - 2023 - CRC - 6/16/22
6 Introduction
1.Air Vents 0182.
2. Turn Signal Lever. See Turn and
Lane-Change Signals 0126.
IntelliBeam System Button (If Equipped).
See Exterior Lamp Controls 0123.
3. Instrument Cluster (Base and Midlevel)
088 or
Instrument Cluster (Uplevel) 091 or
Instrument Cluster (Denali Only) 093.
Driver Information Center (DIC) Display.
See Driver Information Center (DIC) (Base
and Midlevel) 0108 or
Driver Information Center (DIC) (Uplevel
and Denali) 0112.
4. Windshield Wiper/Washer 081.
5. Infotainment Controls. See Overview
0 131.
6. Light Sensor. See Automatic Headlamp
System 0125.
7. Hazard Warning Flashers 0126.
Auto Stop Disable Switch. See Stop/Start
System 0202.
8. Climate Control Systems 0178 (If
Equipped).
Dual Automatic Climate Control System
0 180 (If Equipped). 9. Shift Switches. See
Automatic
Transmission 0208.
10. Power Outlets 083.
11. Assistance Systems for Parking or Backing
0233 (If Equipped).
12. Heated and Ventilated Front Seats 038
(If Equipped).
13. Wireless Charging 085 (If Equipped).
14. Driver Mode Control 0218 (If Equipped).
15. Lane Keep Assist (LKA) 0247 (If
Equipped).
Hill Descent Control (HDC) 0217 (If
Equipped).
16. USB Port 0140.
17. ENGINE START/STOP Button. See Ignition
Positions 0199.
18. Steering Wheel Controls 0133.
19. Horn 081.
20. Steering Wheel Adjustment 081 (Out
of View).
21. Hood Release. See Hood0262.
22. Cruise Control 0220.
Adaptive Cruise Control (Camera) 0222
(If Equipped).
Heated Steering Wheel 081 (If
Equipped). Forward Collision Alert (FCA) System
0
239 (If Equipped).
23. Data Link Connector (DLC) (Out of View). SeeMalfunction Indicator Lamp (Check
Engine Light) 0101.
24. Electric Parking Brake 0212.
25. Exterior Lamp Controls 0123.
Instrument Panel Illumination Control
0 127.
Fog Lamps 0126 (If Equipped).
Head-Up Display (HUD) 0115 (If
Equipped).
Page 8 of 371
GMC Terrain/Terrain Denali Owner Manual (GMNA-Localizing-U.S./Canada/
Mexico-16540740) - 2023 - CRC - 6/16/22
Keys, Doors, and Windows 7
Keys, Doors, and
Windows
Keys and Locks
Keys . . . . . . . . . . . . . . . . . . . . . . . . . . . . . . . . . . . . . 7
Remote Key . . . . . . . . . . . . . . . . . . . . . . . . . . . . . 8
Remote Key Operation . . . . . . . . . . . . . . . . . . 8
Remote Vehicle Start . . . . . . . . . . . . . . . . . . . 14
Door Locks . . . . . . . . . . . . . . . . . . . . . . . . . . . . . . 15
Power Door Locks . . . . . . . . . . . . . . . . . . . . . . . 17
Delayed Locking . . . . . . . . . . . . . . . . . . . . . . . . 17
Automatic Door Locks . . . . . . . . . . . . . . . . . . . 17
Lockout Protection . . . . . . . . . . . . . . . . . . . . . . 18
Safety Locks . . . . . . . . . . . . . . . . . . . . . . . . . . . . 18
Doors
Liftgate . . . . . . . . . . . . . . . . . . . . . . . . . . . . . . . . . 19
Vehicle Security
Vehicle Security . . . . . . . . . . . . . . . . . . . . . . . . 23
Vehicle Alarm System . . . . . . . . . . . . . . . . . . 23
Immobilizer . . . . . . . . . . . . . . . . . . . . . . . . . . . . . 24
Immobilizer Operation . . . . . . . . . . . . . . . . . . 24
Exterior Mirrors
Convex Mirrors . . . . . . . . . . . . . . . . . . . . . . . . . 25
Power Mirrors . . . . . . . . . . . . . . . . . . . . . . . . . . 25
Folding Mirrors . . . . . . . . . . . . . . . . . . . . . . . . . 25
Heated Mirrors . . . . . . . . . . . . . . . . . . . . . . . . . 26
Automatic Dimming Mirror . . . . . . . . . . . . . 26Reverse Tilt Mirrors . . . . . . . . . . . . . . . . . . . . 26
Interior Mirrors
Interior Rearview Mirrors . . . . . . . . . . . . . . . 26
Manual Rearview Mirror . . . . . . . . . . . . . . . . 26
Automatic Dimming Rearview Mirror . . . 26
Windows
Windows . . . . . . . . . . . . . . . . . . . . . . . . . . . . . . . 26
Power Windows . . . . . . . . . . . . . . . . . . . . . . . . 27
Sun Visors . . . . . . . . . . . . . . . . . . . . . . . . . . . . . . 28
Roof
Sunroof . . . . . . . . . . . . . . . . . . . . . . . . . . . . . . . . 29
Keys and Locks
Keys
{Warning
Leaving children in a vehicle with a
Remote Keyless Entry (RKE) transmitter is
dangerous and children or others could
be seriously injured or killed. They could
operate the power windows or other
controls or make the vehicle move. The
windows will function with the RKE
transmitter in the vehicle, and children or
others could be caught in the path of a
closing window. Do not leave children in
a vehicle with an RKE transmitter.
Page 14 of 371
GMC Terrain/Terrain Denali Owner Manual (GMNA-Localizing-U.S./Canada/
Mexico-16540740) - 2023 - CRC - 6/16/22
Keys, Doors, and Windows 13
2. With the vehicle in P (Park) orN (Neutral), press the brake pedal and
ENGINE START/STOP.
Replace the remote key battery as soon
as possible.
Battery Replacement
{Warning
Never allow children to play with the
remote key. The remote key contains a
small battery, which can be a choking
hazard. If swallowed, internal burns can
occur, resulting in severe injury or death.
Seek medical attention immediately if a
battery is swallowed.
{Warning
To avoid personal injury, do not touch
metal surfaces on the remote key when
it has been exposed to extreme heat.
These surfaces can be hot to the touch at
temperatures above 59 °C (138 °F).
Caution
When replacing the battery, do not touch
any of the circuitry on the remote key.
Static from your body could damage the
remote key.
Caution
Always replace the battery with the
correct type. Replacing the battery with
an incorrect type could potentially create
a risk of battery explosion. Dispose of
used batteries according to instructions
and local laws. Do not attempt to burn,
crush, or cut the used battery, and avoid
exposing the battery to environments
with extremely low air pressures or high
temperatures.
Caution
If the RKE transmitter is not reassembled
properly, liquids could enter the housing
and damage the circuitry, resulting in an
RKE transmitter malfunction and/or
failure. To prevent damage, always follow
the steps for RKE transmitter reassembly
(Continued)
Caution (Continued)
in this manual to ensure the transmitter
is sealed properly whenever the RKE
transmitter is opened.
Replace the battery in the transmitter soon
if the DIC displays REPLACE BATTERY IN
REMOTE KEY.
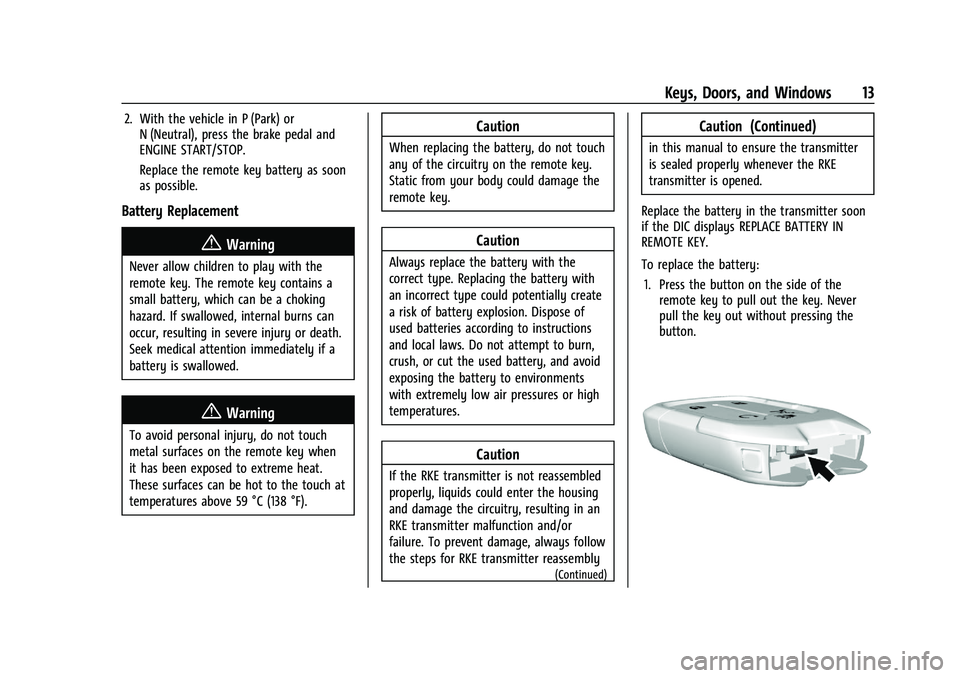
To replace the battery: 1. Press the button on the side of the remote key to pull out the key. Never
pull the key out without pressing the
button.
Page 16 of 371
GMC Terrain/Terrain Denali Owner Manual (GMNA-Localizing-U.S./Canada/
Mexico-16540740) - 2023 - CRC - 6/16/22
Keys, Doors, and Windows 15
A maximum of two remote starts or a start
with an extension are allowed between
ignition cycles.
The ignition must be turned on and then
back off to use remote start again.
Canceling a Remote Start
To shut off the engine:
.Press and hold/until the parking lamps
turn off.
.Turn on the hazard warning flashers.
.Turn the ignition on and then off.
Conditions in Which Remote Start Will
Not Work
The remote vehicle start feature will not
operate if:
.A remote key is in the vehicle.
.The vehicle is on.
.The hood is not closed.
.The hazard warning flashers are on.
.There is an emission control system
malfunction.
.The engine coolant temperature is
too high.
.The oil pressure is low.
.Two remote vehicle starts or a start with
an extension have already been used.
.The vehicle is not in P (Park).
Remote Start Ready
If the vehicle does not have the remote
vehicle start feature, it may have the
remote start ready feature. This feature
allows your dealer to add the
manufacturer's remote vehicle start feature.
See your dealer to add the manufacturer's
remote vehicle start feature to the vehicle.
Door Locks
{Warning
Unlocked doors can be dangerous.
.Passengers, especially children, can
easily open the doors and fall out of a
moving vehicle. The doors can be
unlocked and opened while the vehicle
is moving. The chance of being thrown
out of the vehicle in a crash is
increased if the doors are not locked.
So, all passengers should wear seat
belts properly and the doors should be
locked whenever the vehicle is driven.
.Young children who get into unlocked
vehicles may be unable to get out.
A child can be overcome by extreme (Continued)
Warning (Continued)
heat and can suffer permanent injuries
or even death from heat stroke.
Always lock the vehicle whenever
leaving it.
.Outsiders can easily enter through an
unlocked door when you slow down
or stop the vehicle. Locking the doors
can help prevent this from happening.
To lock or unlock the door from outside the
vehicle:
.PressQorKon the remote key. See
Remote Key Operation 08.
.Use the key in the driver door. The key
cylinder is covered with a cap.
To lock or unlock the door from inside the
vehicle:
.PressQorKon the power door lock
switch.
.Push down on a door lock knob to lock
a door.
.Pull the door handle once to unlock the
door. Pull the handle again to unlatch it.
Page 20 of 371
GMC Terrain/Terrain Denali Owner Manual (GMNA-Localizing-U.S./Canada/
Mexico-16540740) - 2023 - CRC - 6/16/22
Keys, Doors, and Windows 19
Doors
Liftgate
{Warning
Exhaust gases can enter the vehicle if it
is driven with the liftgate or trunk/hatch
open, or with any objects that pass
through the seal between the body and
the trunk/hatch or liftgate. Engine
exhaust contains carbon monoxide (CO)
which cannot be seen or smelled. It can
cause unconsciousness and even death.
If the vehicle must be driven with the
liftgate or trunk/hatch open:
.Close all of the windows.
.Fully open the air outlets on or under
the instrument panel.
.Adjust the climate control system to a
setting that brings in only outside air
and set the fan speed to the highest
setting. See“Climate Control Systems”
in the Index.
.If the vehicle is equipped with a
power liftgate, disable the power
liftgate function.
(Continued)
Warning (Continued)
SeeEngine Exhaust 0207.
Caution
To avoid damage to the liftgate or
liftgate glass, make sure the area above
and behind the liftgate is clear before
opening it.
Manual Liftgate
To unlock the liftgate, pressKon the
power door lock switch or press
Kon the
remote key twice within five seconds. See
Remote Key Operation 08.
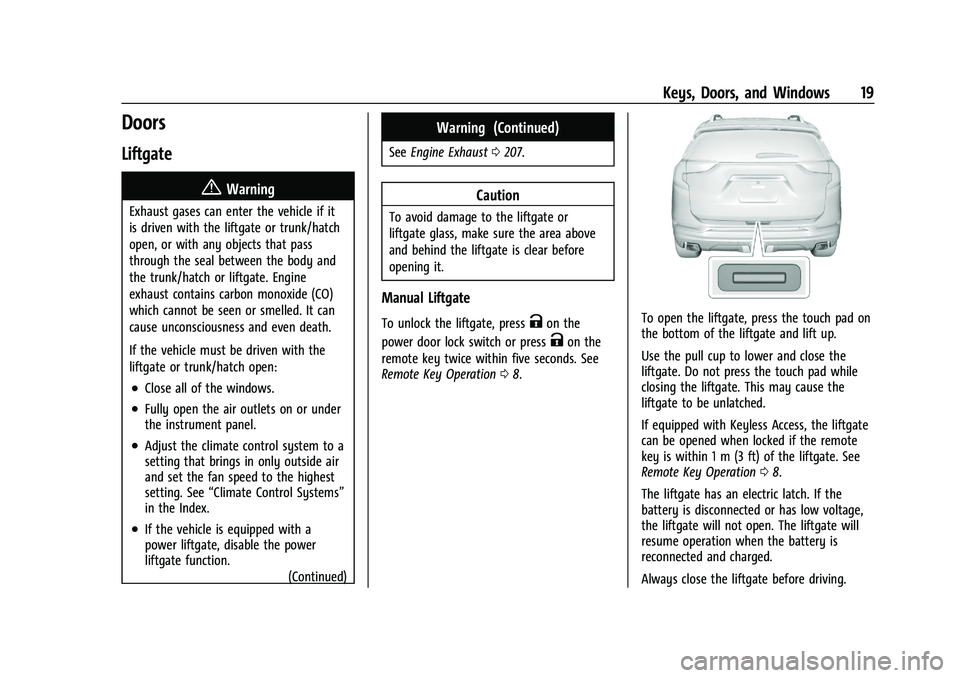
To open the liftgate, press the touch pad on
the bottom of the liftgate and lift up.
Use the pull cup to lower and close the
liftgate. Do not press the touch pad while
closing the liftgate. This may cause the
liftgate to be unlatched.
If equipped with Keyless Access, the liftgate
can be opened when locked if the remote
key is within 1 m (3 ft) of the liftgate. See
Remote Key Operation 08.
The liftgate has an electric latch. If the
battery is disconnected or has low voltage,
the liftgate will not open. The liftgate will
resume operation when the battery is
reconnected and charged.
Always close the liftgate before driving.
Page 21 of 371

GMC Terrain/Terrain Denali Owner Manual (GMNA-Localizing-U.S./Canada/
Mexico-16540740) - 2023 - CRC - 6/16/22
20 Keys, Doors, and Windows
Power Liftgate Operation
{Warning
You or others could be injured if caught
in the path of the power liftgate. Make
sure there is no one in the way of the
liftgate as it is opening and closing.
Caution
Driving with an open and unsecured
liftgate may result in damage to the
power liftgate components.
The power liftgate switch is on the driver
door. The vehicle must be in P (Park). The
taillamps flash when the power liftgate
moves.
The modes are:
.MAX: Opens to maximum height.
.3/4: Opens to a reduced height that can
be set from 3/4 to fully open. Use to
prevent the liftgate from opening into
overhead obstructions such as a garage
door or roof-mounted cargo. The liftgate
can be manually opened all the way.
.OFF: Opens manually only.
To power open or close the liftgate, select
MAX or 3/4 mode.
.Pressbtwice quickly on the remote
key until the liftgate moves.
.Press8on the driver door. The driver
door must be unlocked.
.Press the touch pad on the bottom of the
liftgate after unlocking all doors.
If equipped with Keyless Access, a locked
vehicle can be opened if the remote key
is within 1 m (3 ft) of the liftgate.
.Presslon the bottom of the liftgate
next to the pull cup to close.
Press any liftgate button, the touch pad,
or
bon the remote key while the liftgate
is moving to stop it. Pressing any liftgate
button or pressing
btwice quickly on the
remote key again restarts the operation in
the reverse direction. Pressing the touch pad
on the liftgate handle will restart the
motion, but only in the opening direction.
Caution
Manually forcing the liftgate to open or
close during a power cycle can damage
the vehicle. Allow the power cycle to
complete.
Page 26 of 371
GMC Terrain/Terrain Denali Owner Manual (GMNA-Localizing-U.S./Canada/
Mexico-16540740) - 2023 - CRC - 6/16/22
Keys, Doors, and Windows 25
Exterior Mirrors
Convex Mirrors
{Warning
A convex mirror can make things, like
other vehicles, look farther away than
they really are. If you cut too sharply
into the right lane, you could hit a
vehicle on the right. Check the inside
mirror or glance over your shoulder
before changing lanes.
The passenger side mirror is convex shaped.
A convex mirror surface is curved so more
can be seen from the driver seat.
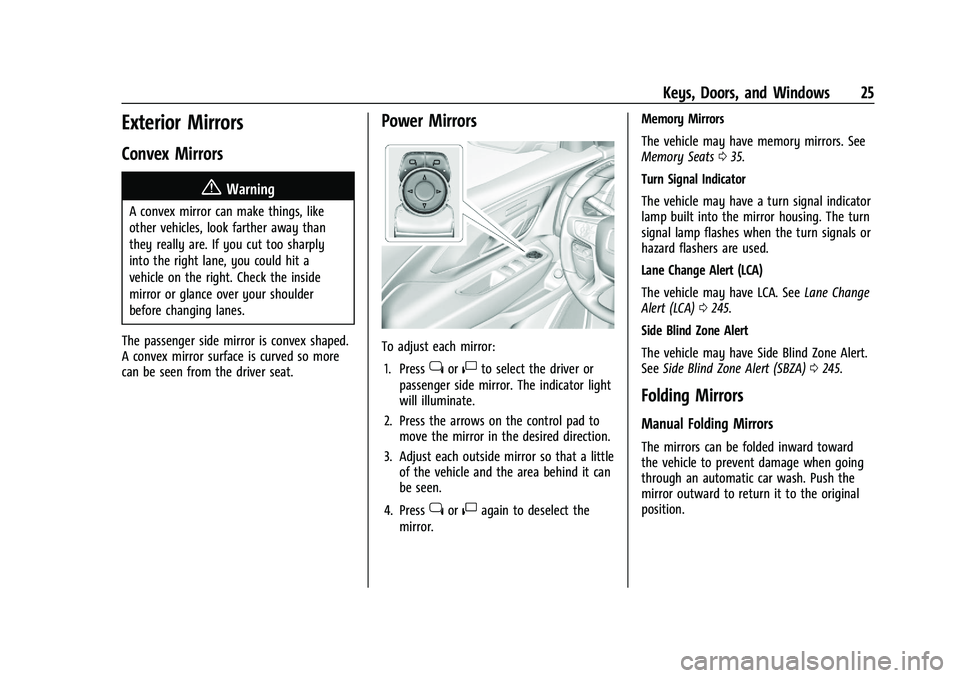
Power Mirrors
To adjust each mirror: 1. Press
jor|to select the driver or
passenger side mirror. The indicator light
will illuminate.
2. Press the arrows on the control pad to move the mirror in the desired direction.
3. Adjust each outside mirror so that a little of the vehicle and the area behind it can
be seen.
4. Press
jor|again to deselect the
mirror. Memory Mirrors
The vehicle may have memory mirrors. See
Memory Seats
035.
Turn Signal Indicator
The vehicle may have a turn signal indicator
lamp built into the mirror housing. The turn
signal lamp flashes when the turn signals or
hazard flashers are used.
Lane Change Alert (LCA)
The vehicle may have LCA. See Lane Change
Alert (LCA) 0245.
Side Blind Zone Alert
The vehicle may have Side Blind Zone Alert.
See Side Blind Zone Alert (SBZA) 0245.
Folding Mirrors
Manual Folding Mirrors
The mirrors can be folded inward toward
the vehicle to prevent damage when going
through an automatic car wash. Push the
mirror outward to return it to the original
position.