instrument cluster GMC TERRAIN 2023 User Guide
[x] Cancel search | Manufacturer: GMC, Model Year: 2023, Model line: TERRAIN, Model: GMC TERRAIN 2023Pages: 371, PDF Size: 17.71 MB
Page 100 of 371

GMC Terrain/Terrain Denali Owner Manual (GMNA-Localizing-U.S./Canada/
Mexico-16540740) - 2023 - CRC - 6/16/22
Instruments and Controls 99
When the vehicle is started, this light
flashes and a chime may come on to remind
the driver to fasten their seat belt.
Then the light stays on solid until the belt is
buckled. This cycle may continue several
times if the driver remains or becomes
unbuckled while the vehicle is moving.
If the driver seat belt is buckled, neither the
light nor the chime comes on.
Front Passenger Seat Belt Reminder
Light
The vehicle may have a front passenger seat
belt reminder light near the passenger
airbag status indicator. SeePassenger
Sensing System 054.
When the vehicle is started, this light
flashes and a chime may come on to remind
passengers to fasten their seat belt. Then the light stays on solid until the belt is
buckled. This cycle continues several times if
the front passenger remains or becomes
unbuckled while the vehicle is moving.
If the front passenger seat belt is buckled,
neither the chime nor the light comes on.
The front passenger seat belt reminder light
and chime may come on if an object is put
on the seat such as a briefcase, handbag,
grocery bag, laptop, or other electronic
device. To turn off the reminder light and/or
chime, remove the object from the seat or
buckle the seat belt.
Airbag Readiness Light
This light shows if there is an electrical
problem with the airbag system. It is
located in the instrument cluster. The
system check includes the airbag sensor(s),
the passenger sensing system, the
pretensioners, the airbag modules, the
wiring, and the crash sensing and diagnostic
module. For more information on the airbag
system, see
Airbag System 049.
The airbag readiness light comes on for
several seconds when the vehicle is started.
If the light does not come on then, have it
fixed immediately.
{Warning
If the airbag readiness light stays on
after the vehicle is started or comes on
while driving, it means the airbag system
might not be working properly. The
airbags in the vehicle might not inflate in
a crash, or they could even inflate
without a crash. To help avoid injury,
have the vehicle serviced right away.
If there is a problem with the airbag
system, a Driver Information Center (DIC)
message may also come on.
Page 109 of 371

GMC Terrain/Terrain Denali Owner Manual (GMNA-Localizing-U.S./Canada/
Mexico-16540740) - 2023 - CRC - 6/16/22
108 Instruments and Controls
Cruise Control Light
The cruise control light is white when the
cruise control is on and ready, and turns
green when the cruise control is set and
active. SeeCruise Control 0220.
Adaptive Cruise Control Light
This light is white when the Adaptive Cruise
Control (ACC, if equipped) is on and ready,
and turns green when the ACC is set and
active. See Adaptive Cruise Control (Camera)
0 222.
Door Ajar Light
This light comes on when a door is open or
not securely latched. Before driving, check
that all doors are properly closed.
Information Displays
Driver Information Center (DIC)
(Base and Midlevel)
The DIC displays are shown in the center of
the instrument cluster in the Info app. See
Instrument Cluster (Base and Midlevel) 088
or Instrument Cluster (Uplevel) 091 or
Instrument Cluster (Denali Only) 093. The
displays show the status of many vehicle
systems. The controls for the DIC are on the
right steering wheel control.
worx: Press to move up or down in
a list.
oorp: Press to move between the
interactive display zones in the cluster.
V: Press to open a menu or select a menu
item. Press and hold to reset values on
certain screens.
Base Level DIC
Useoorpto choose the Trip, Vehicle,
or Eco menus. Use
worxto scroll
through items in each menu.
Page 111 of 371

GMC Terrain/Terrain Denali Owner Manual (GMNA-Localizing-U.S./Canada/
Mexico-16540740) - 2023 - CRC - 6/16/22
110 Instruments and Controls
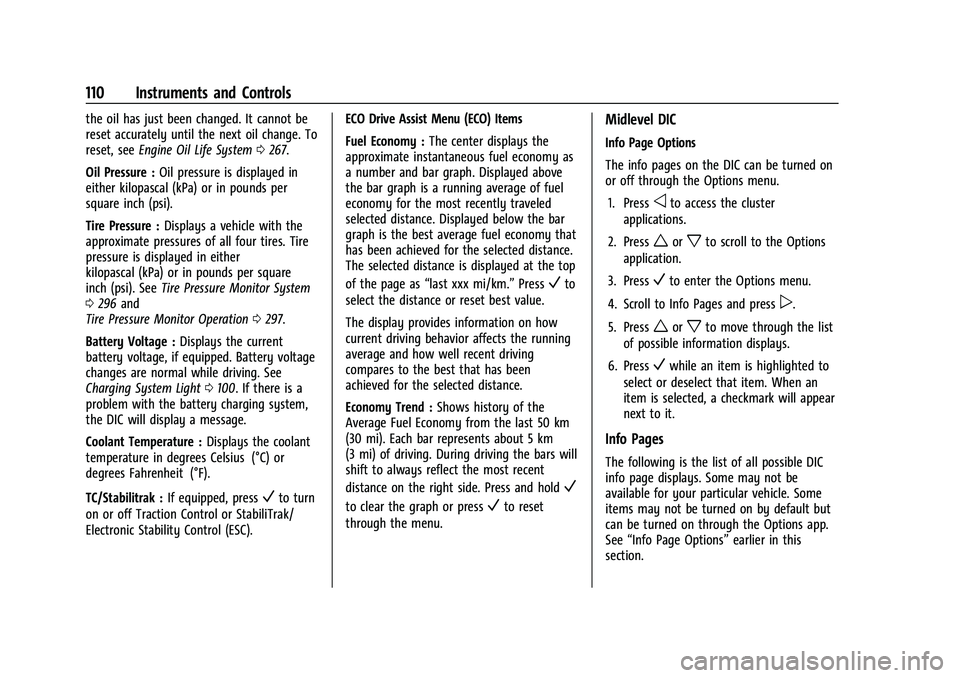
the oil has just been changed. It cannot be
reset accurately until the next oil change. To
reset, seeEngine Oil Life System 0267.
Oil Pressure : Oil pressure is displayed in
either kilopascal (kPa) or in pounds per
square inch (psi).
Tire Pressure : Displays a vehicle with the
approximate pressures of all four tires. Tire
pressure is displayed in either
kilopascal (kPa) or in pounds per square
inch (psi). See Tire Pressure Monitor System
0 296 and
Tire Pressure Monitor Operation 0297.
Battery Voltage : Displays the current
battery voltage, if equipped. Battery voltage
changes are normal while driving. See
Charging System Light 0100. If there is a
problem with the battery charging system,
the DIC will display a message.
Coolant Temperature : Displays the coolant
temperature in degrees Celsius (°C) or
degrees Fahrenheit (°F).
TC/Stabilitrak : If equipped, press
Vto turn
on or off Traction Control or StabiliTrak/
Electronic Stability Control (ESC). ECO Drive Assist Menu (ECO) Items
Fuel Economy :
The center displays the
approximate instantaneous fuel economy as
a number and bar graph. Displayed above
the bar graph is a running average of fuel
economy for the most recently traveled
selected distance. Displayed below the bar
graph is the best average fuel economy that
has been achieved for the selected distance.
The selected distance is displayed at the top
of the page as “last xxx mi/km.” Press
Vto
select the distance or reset best value.
The display provides information on how
current driving behavior affects the running
average and how well recent driving
compares to the best that has been
achieved for the selected distance.
Economy Trend : Shows history of the
Average Fuel Economy from the last 50 km
(30 mi). Each bar represents about 5 km
(3 mi) of driving. During driving the bars will
shift to always reflect the most recent
distance on the right side. Press and hold
V
to clear the graph or pressVto reset
through the menu.
Midlevel DIC
Info Page Options
The info pages on the DIC can be turned on
or off through the Options menu.
1. Press
oto access the cluster
applications.
2. Press
worxto scroll to the Options
application.
3. Press
Vto enter the Options menu.
4. Scroll to Info Pages and press
p.
5. Press
worxto move through the list
of possible information displays.
6. Press
Vwhile an item is highlighted to
select or deselect that item. When an
item is selected, a checkmark will appear
next to it.
Info Pages
The following is the list of all possible DIC
info page displays. Some may not be
available for your particular vehicle. Some
items may not be turned on by default but
can be turned on through the Options app.
See “Info Page Options” earlier in this
section.
Page 113 of 371

GMC Terrain/Terrain Denali Owner Manual (GMNA-Localizing-U.S./Canada/
Mexico-16540740) - 2023 - CRC - 6/16/22
112 Instruments and Controls
Presspto select the distance or reset best
value. Use
wandxto choose the
distance and press
V. Presswandxto
select “Reset Best Score.” Press
Vto reset
the best average fuel economy. After reset,
the best value displays “-,-”until the
selected distance has been traveled.
The display provides information on how
current driving behavior affects the running
average and how well recent driving
compares to the best that has been
achieved for the selected distance.
Average Speed : Displays the average
vehicle speed of the vehicle in kilometers
per hour (km/h) or miles per hour (mph).
This average is based on the various vehicle
speeds recorded since the last reset. Press
and hold
Vwhile this display is active to
reset the average speed. Average speed can
also be reset by pressing
pand choosing
reset.
Timer : This display can be used as a timer.
To start the timer, press
Vto open the
menu while this display is active. The
display will show the amount of time that
has passed since the timer was last reset. To
stop the timer, press
Vbriefly while this display is active and the timer is running. To
reset the timer to zero, press and hold
V
while this display is active, or presspand
select reset.
Follow Distance : If equipped, the current
follow time to the vehicle ahead is displayed
as a time value on this page.
Battery Voltage : Displays the current
battery voltage, if equipped. Battery voltage
changes are normal while driving. See
Charging System Light 0100. If there is a
problem with the battery charging system, a
DIC will display a message.
Coolant Temperature : Displays the coolant
temperature in degrees Celsius (°C) or
degrees Fahrenheit (°F).
Economy Trend : Shows history of the
Average Fuel Economy from the last 50 km
(30 mi). Each bar represents about 5 km
(3 mi) of driving. During driving the bars will
shift to always reflect the most recent
distance on the right side. Press and hold
V
to clear the graph or presspto reset
through the menu.
Oil Pressure : Oil pressure is displayed in
either kilopascal (kPa) or in pounds per
square inch (psi). Oil pressure can vary with engine speed, outside temperature, and oil
viscosity. On some models, the oil pump will
vary engine oil pressure according to engine
needs. Oil pressure may change quickly as
the engine speed or load varies. This is
normal. If the oil pressure warning light or
Driver Information Center (DIC) message
indicates oil pressure outside the normal
operating range, check the vehicle's oil as
soon as possible.
Driver Information Center (DIC)
(Uplevel and Denali)
The DIC displays are shown in the center of
the instrument cluster in the Info App. See
Instrument Cluster (Base and Midlevel)
088
or
Instrument Cluster (Uplevel) 091 or
Instrument Cluster (Denali Only) 093. The
displays show the status of many vehicle
systems.
Page 114 of 371

GMC Terrain/Terrain Denali Owner Manual (GMNA-Localizing-U.S./Canada/
Mexico-16540740) - 2023 - CRC - 6/16/22
Instruments and Controls 113
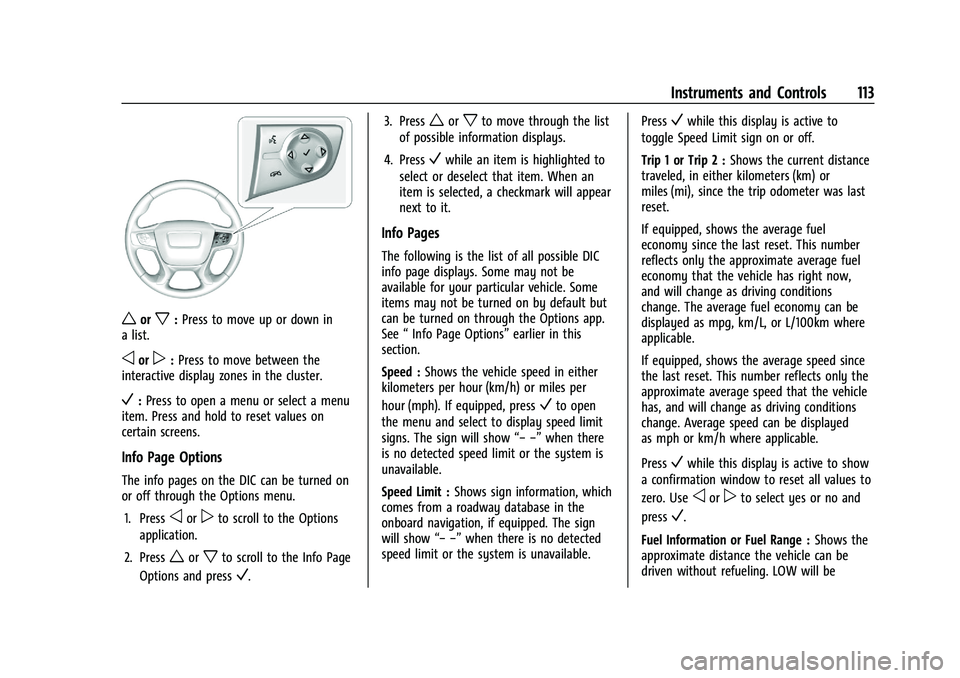
worx:Press to move up or down in
a list.
oorp: Press to move between the
interactive display zones in the cluster.
V: Press to open a menu or select a menu
item. Press and hold to reset values on
certain screens.
Info Page Options
The info pages on the DIC can be turned on
or off through the Options menu.
1. Press
oorpto scroll to the Options
application.
2. Press
worxto scroll to the Info Page
Options and press
V. 3. Press
worxto move through the list
of possible information displays.
4. Press
Vwhile an item is highlighted to
select or deselect that item. When an
item is selected, a checkmark will appear
next to it.
Info Pages
The following is the list of all possible DIC
info page displays. Some may not be
available for your particular vehicle. Some
items may not be turned on by default but
can be turned on through the Options app.
See “Info Page Options” earlier in this
section.
Speed : Shows the vehicle speed in either
kilometers per hour (km/h) or miles per
hour (mph). If equipped, press
Vto open
the menu and select to display speed limit
signs. The sign will show “− −”when there
is no detected speed limit or the system is
unavailable.
Speed Limit : Shows sign information, which
comes from a roadway database in the
onboard navigation, if equipped. The sign
will show “− −”when there is no detected
speed limit or the system is unavailable. Press
Vwhile this display is active to
toggle Speed Limit sign on or off.
Trip 1 or Trip 2 : Shows the current distance
traveled, in either kilometers (km) or
miles (mi), since the trip odometer was last
reset.
If equipped, shows the average fuel
economy since the last reset. This number
reflects only the approximate average fuel
economy that the vehicle has right now,
and will change as driving conditions
change. The average fuel economy can be
displayed as mpg, km/L, or L/100km where
applicable.
If equipped, shows the average speed since
the last reset. This number reflects only the
approximate average speed that the vehicle
has, and will change as driving conditions
change. Average speed can be displayed
as mph or km/h where applicable.
Press
Vwhile this display is active to show
a confirmation window to reset all values to
zero. Use
oorpto select yes or no and
press
V.
Fuel Information or Fuel Range : Shows the
approximate distance the vehicle can be
driven without refueling. LOW will be
Page 117 of 371

GMC Terrain/Terrain Denali Owner Manual (GMNA-Localizing-U.S./Canada/
Mexico-16540740) - 2023 - CRC - 6/16/22
116 Instruments and Controls
The language selection is changed through
the radio and the units of measurement are
changed through the instrument cluster. See
Settings0165 and "Options" under
Instrument Cluster (Base and Midlevel) 088
or Instrument Cluster (Uplevel) 091 or
Instrument Cluster (Denali Only) 093.
{Warning
.Do not attach any stickers, decals,
or accessories on the Head-Up
Display (HUD).
.Do not attempt to adjust or move the
HUD screen or the mechanical door on
top of the instrument panel by hand.
.Do not place any objects near the
HUD. Objects may obstruct the image
display, and/or interference from the
objects during activation may
influence the operation or could
damage the display.
.Do not put any drinks near the HUD.
If liquid flows into the display, the
unit could be damaged.
(Continued)
Warning (Continued)
.Use caution when opening or closing
the HUD screen to prevent objects
from falling inside the
mechanical door.
.Use only a soft cloth to clean the HUD
screen. Do not use any organic
solvents, detergents, or polishing
materials to prevent damage to the
HUD display.
HUD Display
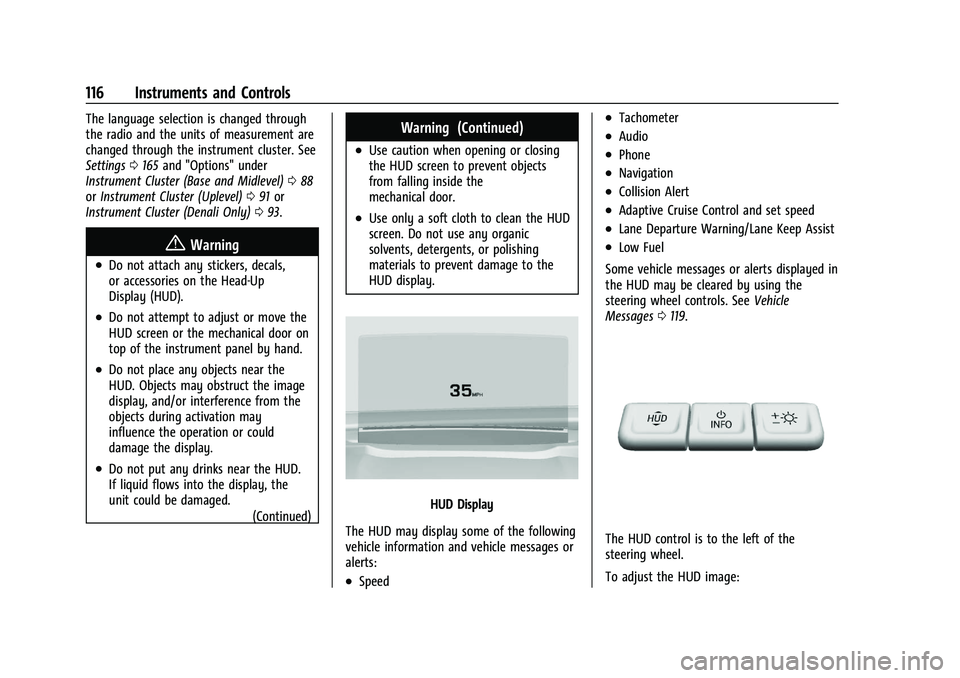
The HUD may display some of the following
vehicle information and vehicle messages or
alerts:
.Speed
.Tachometer
.Audio
.Phone
.Navigation
.Collision Alert
.Adaptive Cruise Control and set speed
.Lane Departure Warning/Lane Keep Assist
.Low Fuel
Some vehicle messages or alerts displayed in
the HUD may be cleared by using the
steering wheel controls. See Vehicle
Messages 0119.
The HUD control is to the left of the
steering wheel.
To adjust the HUD image:
Page 119 of 371

GMC Terrain/Terrain Denali Owner Manual (GMNA-Localizing-U.S./Canada/
Mexico-16540740) - 2023 - CRC - 6/16/22
118 Instruments and Controls
Metric
English
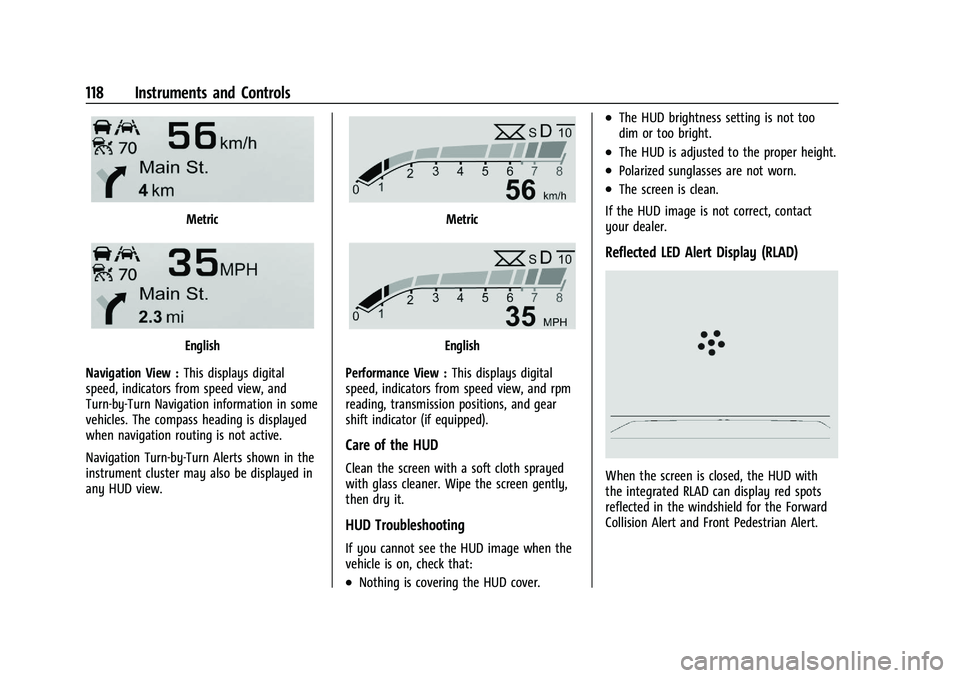
Navigation View : This displays digital
speed, indicators from speed view, and
Turn-by-Turn Navigation information in some
vehicles. The compass heading is displayed
when navigation routing is not active.
Navigation Turn-by-Turn Alerts shown in the
instrument cluster may also be displayed in
any HUD view.
Metric
English
Performance View : This displays digital
speed, indicators from speed view, and rpm
reading, transmission positions, and gear
shift indicator (if equipped).
Care of the HUD
Clean the screen with a soft cloth sprayed
with glass cleaner. Wipe the screen gently,
then dry it.
HUD Troubleshooting
If you cannot see the HUD image when the
vehicle is on, check that:
.Nothing is covering the HUD cover.
.The HUD brightness setting is not too
dim or too bright.
.The HUD is adjusted to the proper height.
.Polarized sunglasses are not worn.
.The screen is clean.
If the HUD image is not correct, contact
your dealer.
Reflected LED Alert Display (RLAD)
When the screen is closed, the HUD with
the integrated RLAD can display red spots
reflected in the windshield for the Forward
Collision Alert and Front Pedestrian Alert.
Page 124 of 371

GMC Terrain/Terrain Denali Owner Manual (GMNA-Localizing-U.S./Canada/
Mexico-16540740) - 2023 - CRC - 6/16/22
Lighting 123
Lighting
Exterior Lighting
Exterior Lamp Controls . . . . . . . . . . . . . . . . . 123
Headlamp High/Low-Beam Changer . . . . 124
Flash-to-Pass . . . . . . . . . . . . . . . . . . . . . . . . . . . 125
Daytime Running Lamps (DRL) . . . . . . . . . 125
Automatic Headlamp System . . . . . . . . . . 125
Hazard Warning Flashers . . . . . . . . . . . . . . 126
Turn and Lane-Change Signals . . . . . . . . . 126
Fog Lamps . . . . . . . . . . . . . . . . . . . . . . . . . . . . . 126
Interior Lighting
Instrument Panel IlluminationControl . . . . . . . . . . . . . . . . . . . . . . . . . . . . . . . 127
Courtesy Lamps . . . . . . . . . . . . . . . . . . . . . . . . 127
Dome Lamps . . . . . . . . . . . . . . . . . . . . . . . . . . . 127
Reading Lamps . . . . . . . . . . . . . . . . . . . . . . . . 128
Lighting Features
Entry Lighting . . . . . . . . . . . . . . . . . . . . . . . . . 128
Exit Lighting . . . . . . . . . . . . . . . . . . . . . . . . . . . 129
Battery Load Management . . . . . . . . . . . . 129
Battery Power Protection . . . . . . . . . . . . . . 129
Exterior Lighting Battery Saver . . . . . . . . 129
Exterior Lighting
Exterior Lamp Controls
If not Equipped with HUD System
The exterior lamp control is left of the
steering wheel.
If Equipped with HUD System
The exterior lamp control is on the left stalk.
There are four positions.
O: Turns the exterior lamps off and
deactivates the AUTO mode. Turn to
O
again to reactivate the AUTO mode.
For vehicles first sold in Canada, the
headlamps will automatically reactivate
when the vehicle is shifted out of P (Park).
AUTO : Turns the exterior lamps on and off
automatically depending on outside lighting.
;: Turns on all lamps, except the
headlamps.
5: Turns on the headlamps together with
the parking lamps and instrument panel
lights.
IntelliBeam System
If equipped, this system turns the vehicle's
high-beam headlamps on and off according
to surrounding traffic conditions.
The system turns the high-beam headlamps
on when it is dark enough and there is no
other traffic present.
This light
bcomes on in the instrument
cluster when the IntelliBeam system is
enabled.
Page 125 of 371

GMC Terrain/Terrain Denali Owner Manual (GMNA-Localizing-U.S./Canada/
Mexico-16540740) - 2023 - CRC - 6/16/22
124 Lighting
Turning On and Enabling IntelliBeam
To enable the IntelliBeam system, press
bon the turn signal lever when it is
dark outside and the exterior lamp control is
in AUTO or
5.
Driving with IntelliBeam
The system only activates the high beams
when driving over 40 km/h (25 mph).
The blue high-beam on light appears on the
instrument cluster when the high beams
are on.
There is a sensor near the top center of the
windshield that automatically controls the
system. Keep this area of the windshield
clear of debris to allow for best system
performance. The high-beam headlamps remain on, under
the automatic control, until one of the
following situations occurs:
.The system detects an approaching
vehicle's headlamps.
.The system detects a preceding vehicle's
taillamps.
.The outside light is bright enough that
high-beam headlamps are not required.
.The vehicle speed drops below 20 km/h
(12 mph).
.The IntelliBeam system is disabled by the
button on the turn signal lever. If this
happens, press
bon the turn signal
lever when the exterior lamp control is in
the AUTO or
5position to reactivate the
IntelliBeam system. The instrument
cluster light will come on to indicate the
IntelliBeam system is reactivated.
.The IntelliBeam system will turn off if the
fog lamps are turned on.
The high beams may not turn off
automatically if the system cannot detect
another vehicle's lamps because of any of
the following:
.The other vehicle's lamps are missing,
damaged, obstructed from view,
or otherwise undetected.
.The other vehicle's lamps are covered
with dirt, snow, and/or road spray.
.The other vehicle's lamps cannot be
detected due to dense exhaust, smoke,
fog, snow, road spray, mist, or other
airborne obstructions.
.The vehicle windshield is dirty, cracked,
or obstructed by something that blocks
the view of the light sensor.
.The vehicle is loaded such that the front
end points upward, causing the light
sensor to aim high and not detect
headlamps and taillamps.
.The vehicle is being driven on winding or
hilly roads.
The automatic high-beam headlamps may
need to be disabled if any of the above
conditions exist.
Headlamp High/Low-Beam
Changer
Push the turn signal lever away from you
and release, to turn the high beams on. To
return to low beams, push the lever again
or pull it toward you and release.
Page 126 of 371

GMC Terrain/Terrain Denali Owner Manual (GMNA-Localizing-U.S./Canada/
Mexico-16540740) - 2023 - CRC - 6/16/22
Lighting 125
This indicator light turns on in the
instrument cluster when the high-beam
headlamps are on.
Flash-to-Pass
The flash-to-pass feature works with the low
beams or Daytime Running Lamps (DRL) on
or off.
To flash the high beams, pull the turn signal
lever toward you momentarily and then
release it.
Daytime Running Lamps (DRL)
DRL can make it easier for others to see the
front of your vehicle during the day.
Fully functional DRL are required on all
vehicles first sold in Canada.
The DRL come on when all of the following
conditions are met:
.The vehicle is on.
.The exterior lamp control is in AUTO.
.The light sensor determines it is daytime.
The taillamps, instrument panel lights, and
other lamps will not turn on when this
feature is activated.
The DRL turn off when the headlamps are
turned to
Oor the vehicle is off.
For vehicles first sold in Canada, the DRL can
only be turned off when the vehicle is
parked.
Automatic Headlamp System
When the exterior lamp control is set to
AUTO and it is dark enough outside, the
headlamps come on automatically.
There is a light sensor on top of the
instrument panel. Do not cover the sensor;
otherwise the headlamps will come on when
they are not needed.
The system may also turn on the headlamps
when driving through a parking garage or
tunnel.
When it is bright enough outside, the
headlamps will turn off or may change to
Daytime Running Lamps (DRL).
The automatic headlamp system turns off
when the exterior lamp control is turned to
Oor the ignition is off.
Lights On with Wipers
If the windshield wipers are activated in
daylight with the engine on, and the
exterior lamp control is in AUTO, the
headlamps, parking lamps, and other
exterior lamps come on. The transition time
for the lamps coming on varies based on
wiper speed. When the wipers are not
operating, these lamps turn off. Move the
exterior lamp control to
Oor;to disable
this feature.