Index GMC YUKON 2001 Owner's Manual
[x] Cancel search | Manufacturer: GMC, Model Year: 2001, Model line: YUKON, Model: GMC YUKON 2001Pages: 419, PDF Size: 2.98 MB
Page 7 of 419
Table of Contents (cont'd)
Customer Assistance Information
In the Index you will find an alphabetical listing of almost every subject in this manual.
You can use it to quickly find something you want to read.
Section
8Customer Satisfaction Procedures
Customer Assistance Offices
Roadside Assistance and Courtesy Transportation
Warranty Information (See Warranty Manual)
Reporting Safety Defects on page 8-10
Service Publications
Index
Section
9
Please refer to the last page of this manual for your Service Station Guide
v
Page 11 of 419

ix
For example,
these symbols
are used on an
original battery:
CAUTION
POSSIBLE
INJURY
PROTECT
EYES BY
SHIELDING
CAUSTIC
BATTERY
ACID COULD
CAUSE
BURNS
AVOID
SPARKS OR
FLAMES
SPARK OR
FLAME
COULD
EXPLODE
BATTERY
These symbols
are important for
you and your
passengers
whenever your
vehicle is driven:
CHILD
RESTRAINT
TOP STRAP
ANCHOR
DOOR LOCK
UNLOCK
FASTEN
SEAT
BELTS
POWER
WINDOW
AIR BAG
These symbols
have to do with
your lamps:
MASTER
LIGHTING
SWITCH
TURN
SIGNALS
PARKING
LAMPS
HAZARD
WARNING
FLASHER
DAYTIME
RUNNING
LAMPS
FOG LAMPS
These symbols
are on some of
your controls:
WINDSHIELD
WIPER
WINDSHIELD
WASHER
WINDSHIELD
DEFROSTER
REAR
WINDOW
DEFOGGER
VENTILATING
FAN
These symbols
are used on
warning and
indicator lights:
ENGINE
COOLANT
TEMP
BATTERY
CHARGING
SYSTEM
BRAKE
COOLANT
ENGINE OIL
PRESSURE
ANTI-LOCK
BRAKES
Here are some
other symbols
you may see:
FUSE
LIGHTER
HORN
FUEL
Vehicle Symbols
These are some of the symbols you may find on your vehicle. Also see ªWarning Lights and Gagesº in the Index.
Page 17 of 419
1-4 Power Seat(s) (If Equipped)
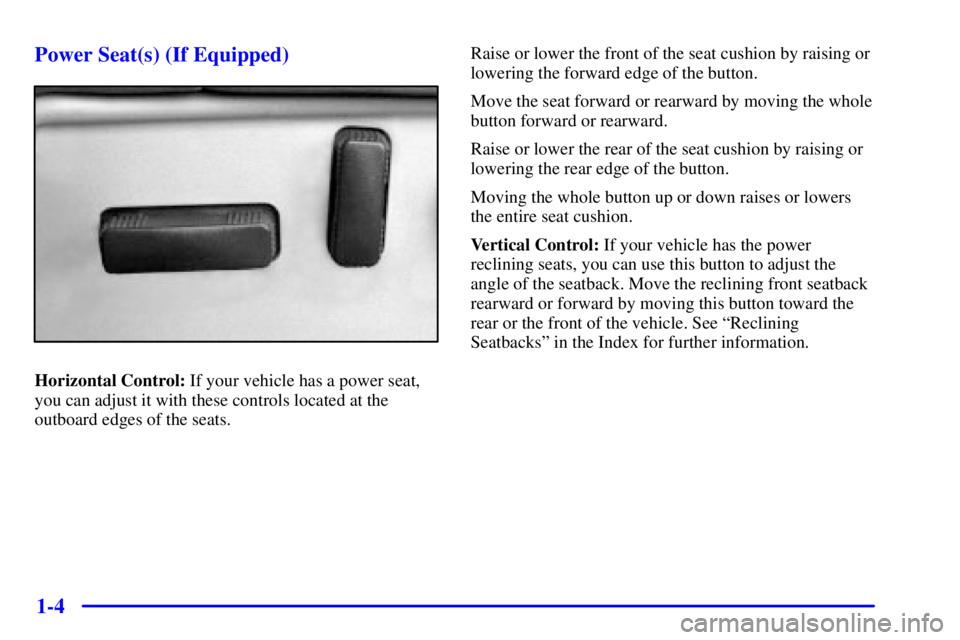
Horizontal Control: If your vehicle has a power seat,
you can adjust it with these controls located at the
outboard edges of the seats.Raise or lower the front of the seat cushion by raising or
lowering the forward edge of the button.
Move the seat forward or rearward by moving the whole
button forward or rearward.
Raise or lower the rear of the seat cushion by raising or
lowering the rear edge of the button.
Moving the whole button up or down raises or lowers
the entire seat cushion.
Vertical Control: If your vehicle has the power
reclining seats, you can use this button to adjust the
angle of the seatback. Move the reclining front seatback
rearward or forward by moving this button toward the
rear or the front of the vehicle. See ªReclining
Seatbacksº in the Index for further information.
Page 19 of 419
1-6 Heated Front Seats (If Equipped)
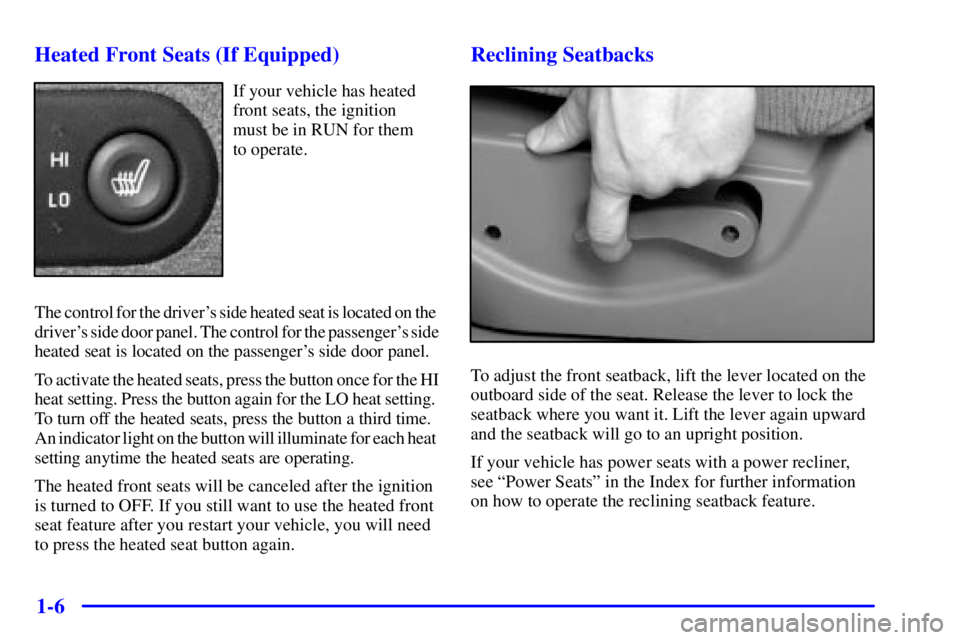
If your vehicle has heated
front seats, the ignition
must be in RUN for them
to operate.
The control for the driver's side heated seat is located on the
driver's side door panel. The control for the passenger's side
heated seat is located on the passenger's side door panel.
To activate the heated seats, press the button once for the HI
heat setting. Press the button again for the LO heat setting.
To turn off the heated seats, press the button a third time.
An indicator light on the button will illuminate for each heat
setting anytime the heated seats are operating.
The heated front seats will be canceled after the ignition
is turned to OFF. If you still want to use the heated front
seat feature after you restart your vehicle, you will need
to press the heated seat button again.
Reclining Seatbacks
To adjust the front seatback, lift the lever located on the
outboard side of the seat. Release the lever to lock the
seatback where you want it. Lift the lever again upward
and the seatback will go to an upright position.
If your vehicle has power seats with a power recliner,
see ªPower Seatsº in the Index for further information
on how to operate the reclining seatback feature.
Page 29 of 419
1-16
CAUTION:
It is extremely dangerous to ride in a cargo area,
inside or outside of a vehicle. In a collision,
people riding in these areas are more likely to
be seriously injured or killed. Do not allow
people to ride in any area of your vehicle that is
not equipped with seats and safety belts. Be sure
everyone in your vehicle is in a seat and using a
safety belt properly.
Your vehicle has a light
that comes on as a reminder
to buckle up. See ªSafety
Belt Reminder Lightº in
the Index.In most states and Canadian provinces, the law says to
wear safety belts. Here's why: They work.
You never know if you'll be in a crash. If you do have
a crash, you don't know if it will be a bad one.
A few crashes are mild, and some crashes can be so
serious that even buckled up a person wouldn't survive.
But most crashes are in between. In many of them,
people who buckle up can survive and sometimes walk
away. Without belts they could have been badly hurt
or killed.
After more than 30 years of safety belts in vehicles,
the facts are clear. In most crashes buckling up does
matter ... a lot!
Page 34 of 419
1-21
How to Wear Safety Belts Properly
Adults
This part is only for people of adult size.
Be aware that there are special things to know about safety
belts and children. And there are different rules for smaller
children and babies. If a child will be riding in your
vehicle, see the part of this manual called ªChildren.º
Follow those rules for everyone's protection.
First, you'll want to know which restraint systems your
vehicle has.
We'll start with the driver position.
Driver Position
This part describes the driver's restraint system.
Lap-Shoulder Belt
The driver has a lap-shoulder belt. Here's how to wear
it properly.
1. Close and lock the door.
2. Adjust the seat so you can sit up straight. To see
how, see ªSeatsº in the Index.
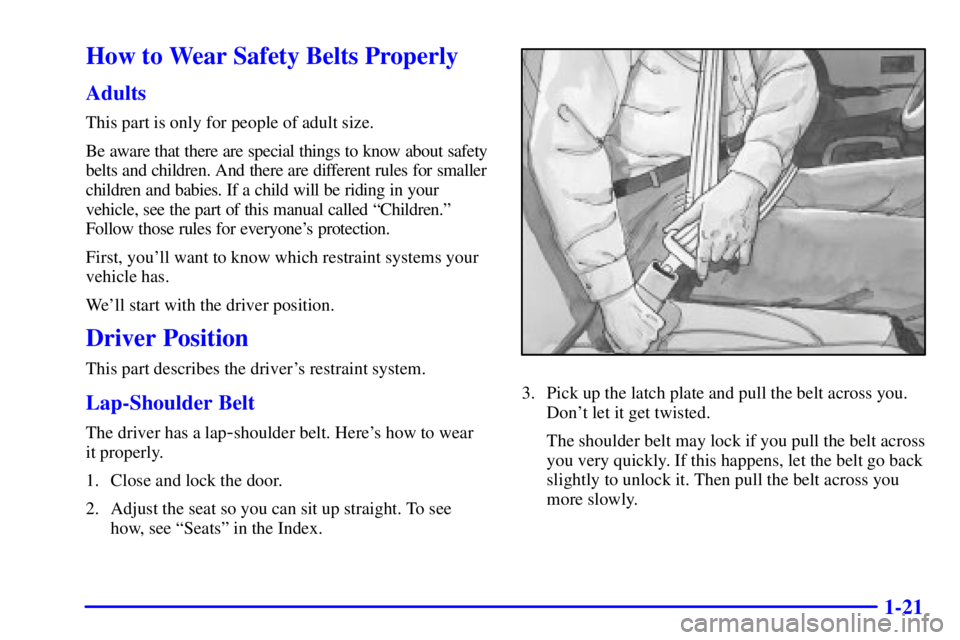
3. Pick up the latch plate and pull the belt across you.
Don't let it get twisted.
The shoulder belt may lock if you pull the belt across
you very quickly. If this happens, let the belt go back
slightly to unlock it. Then pull the belt across you
more slowly.
Page 43 of 419
1-30
CAUTION:
Anyone who is up against, or very close to, any
air bag when it inflates can be seriously injured
or killed. Air bags plus lap
-shoulder belts offer
the best protection for adults, but not for young
children and infants. Neither the vehicle's safety
belt system nor its air bag system is designed
for them. Young children and infants need the
protection that a child restraint system can
provide. Always secure children properly in your
vehicle. To read how, see the part of this
manual called ªChildren.º
There is an air bag
readiness light on the
instrument panel, which
shows the air bag symbol.
The system checks the air bag electrical system for
malfunctions. The light tells you if there is an electrical
problem. See ªAir Bag Readiness Lightº in the Index
for more information.
Page 46 of 419
1-33
When should an air bag inflate?
The driver's and right front passenger's frontal air bags
are designed to inflate in moderate to severe frontal or
near
-frontal crashes. But they are designed to inflate
only if the impact speed is above the system's designed
ªthreshold level.º
If your vehicle goes straight into a wall that doesn't move
or deform, the threshold level is about 9 to 16 mph
(14 to 26 km/h). The threshold level can vary, however,
with specific vehicle design, so that it can be somewhat
above or below this range.
If your vehicle strikes something that will move or
deform, such as a parked car, the threshold level will be
higher. The driver's and right front passenger's frontal
air bags are not designed to inflate in rollovers, side
impacts, or rear impacts, because inflation would not
help the occupant.
The side impact air bags are designed to inflate in
moderate to severe side crashes. A side impact air bag
will inflate if the crash severity is above the system's
designed ªthreshold level.º The threshold level can vary
with specific vehicle design. Side impact air bags are not
designed to inflate in frontal or near
-frontal impacts,
rollovers or rear impacts, because inflation would not
help the occupant. A side impact air bag will only
deploy on the side of the vehicle that is struck.In any particular crash, no one can say whether an air
bag should have inflated simply because of the damage
to a vehicle or because of what the repair costs were. For
frontal air bags, inflation is determined by the angle of
the impact and how quickly the vehicle slows down in
frontal and near
-frontal impacts. For side impact air
bags, inflation is determined by the location and severity
of the impact.
The air bag system is designed to work properly under
a wide range of conditions, including off
-road usage.
Observe safe driving speeds, especially on rough terrain.
As always, wear your safety belt. See ªOff
-Road
Drivingº in the Index for more tips on off
-road driving.
What makes an air bag inflate?
In an impact of sufficient severity, the air bag sensing
system detects that the vehicle is in a crash. For both
frontal and side impact air bags, the sensing system
triggers a release of gas from the inflator, which inflates
the air bag. The inflator, air bag and related hardware
are all part of the air bag modules inside the steering
wheel, instrument panel and the side of the front
seatbacks closest to the door.
Page 49 of 419
1-36 Servicing Your Air Bag-Equipped Vehicle
Air bags affect how your vehicle should be serviced.
There are parts of the air bag systems in several places
around your vehicle. Your dealer and the service manual
have information about servicing your vehicle and the
air bag systems. To purchase a service manual, see
ªService and Owner Publicationsº in the Index.
CAUTION:
For up to two minutes after the ignition key is
turned off and the battery is disconnected, an
air bag can still inflate during improper service.
You can be injured if you are close to an air bag
when it inflates. Avoid yellow connectors. They
are probably part of the air bag systems. Be sure
to follow proper service procedures, and make
sure the person performing work for you is
qualified to do so.
The air bag systems do not need regular maintenance.
Adding Equipment to Your
Air Bag-Equipped Vehicle
Q:If I add a push bumper or bicycle rack to the
front of my vehicle, will it keep the air bags
from working properly?
A:As long as the push bumper or bicycle rack is
attached to your vehicle so that the vehicle's basic
structure isn't changed, it's not likely to keep the
air bags from working properly in a crash.
Q:Is there anything I might add to the front or
sides of the vehicle that could keep the air bags
from working properly?
A:Yes. If you add things that change your vehicle's
frame, bumper system, front end or side sheet metal
or height, they may keep the air bag system from
working properly. Also, the air bag system may not
work properly if you relocate any of the air bag
sensors. If you have any questions about this,
you should contact Customer Assistance before
you modify your vehicle. The phone numbers and
addresses for Customer Assistance are in Step Two
of the Customer Satisfaction Procedure in this
manual. See ªCustomer Satisfaction Procedureº
in the Index.
Page 73 of 419
1-60
Your vehicle has a right front passenger air bag. Never
put a rear
-facing child restraint in this seat. Here's why:
CAUTION:
A child in a rear-facing child restraint can be
seriously injured or killed if the right front
passenger's air bag inflates. This is because the
back of the rear
-facing child restraint would be
very close to the inflating air bag. Always secure
a rear
-facing child restraint in the rear seat.
Although a rear seat is a safer place, you can secure a
forward
-facing child restraint in the right front seat.
You'll be using the lap
-shoulder belt. See the earlier
part about the top strap if the child restraint has one.
Be sure to follow the instructions that came with the
child restraint. Secure the child in the child restraint
when and as the instructions say.
1. Because your vehicle has a right front passenger air
bag, always move the seat as far back as it will go
before securing a forward
-facing child restraint.
See ªSeatsº in the Index.
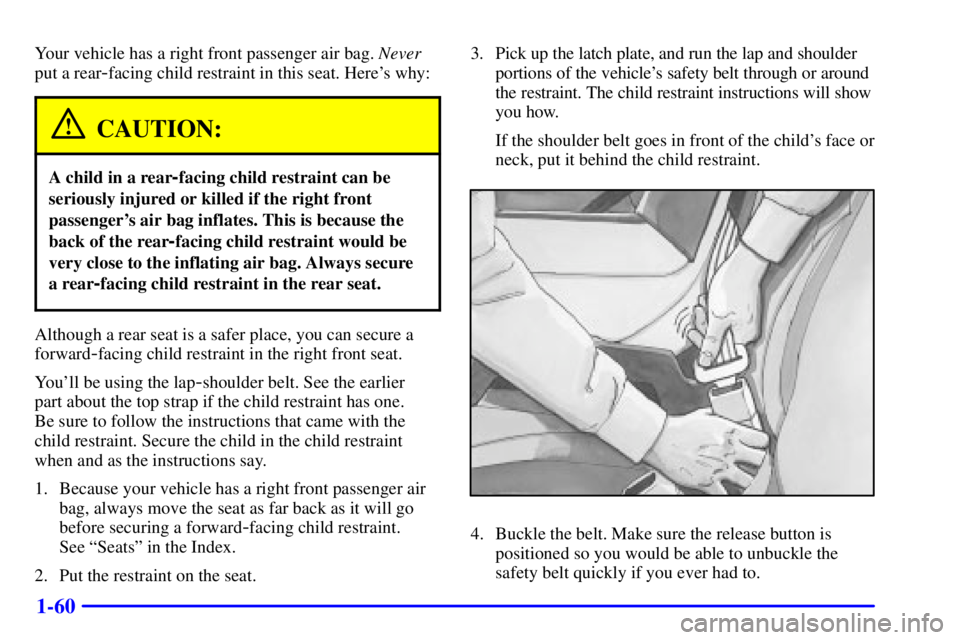
2. Put the restraint on the seat.3. Pick up the latch plate, and run the lap and shoulder
portions of the vehicle's safety belt through or around
the restraint. The child restraint instructions will show
you how.
If the shoulder belt goes in front of the child's face or
neck, put it behind the child restraint.4. Buckle the belt. Make sure the release button is
positioned so you would be able to unbuckle the
safety belt quickly if you ever had to.