Page 1 GMC YUKON 2004 Owner's Manual
[x] Cancel search | Manufacturer: GMC, Model Year: 2004, Model line: YUKON, Model: GMC YUKON 2004Pages: 554, PDF Size: 5.21 MB
Page 351 of 554
Rocking Your Vehicle To Get It Out
First, turn your steering wheel left and right. That will
clear the area around your front wheels. If you have a
four-wheel-drive vehicle, shift into 4HI or 4LO. If
your vehicle has the Traction Assist System, you should
turn it off by pressing the TAS on/off button. If your
vehicle has the Stabilitrak
®System, turn the
Stabilitrak®System off by pressing the
Stabilitrak®button so that the STABILITY SYSTEM
DISABLED and TRACTION OFF lights are illuminated
on the instrument panel cluster. Then shift back and
forth between REVERSE (R) and a forward gear,
spinning the wheels as little as possible. Release the
accelerator pedal while you shift, and press lightly on the
accelerator pedal when the transmission is in gear.
By slowly spinning your wheels in the forward and
reverse directions, you will cause a rocking motion that
may free your vehicle. If that does not get you out
after a few tries, you may need to be towed out. Or, you
can use your recovery hooks if your vehicle has
them. If you do need to be towed out, seeTowing Your
Vehicle on page 4-53.
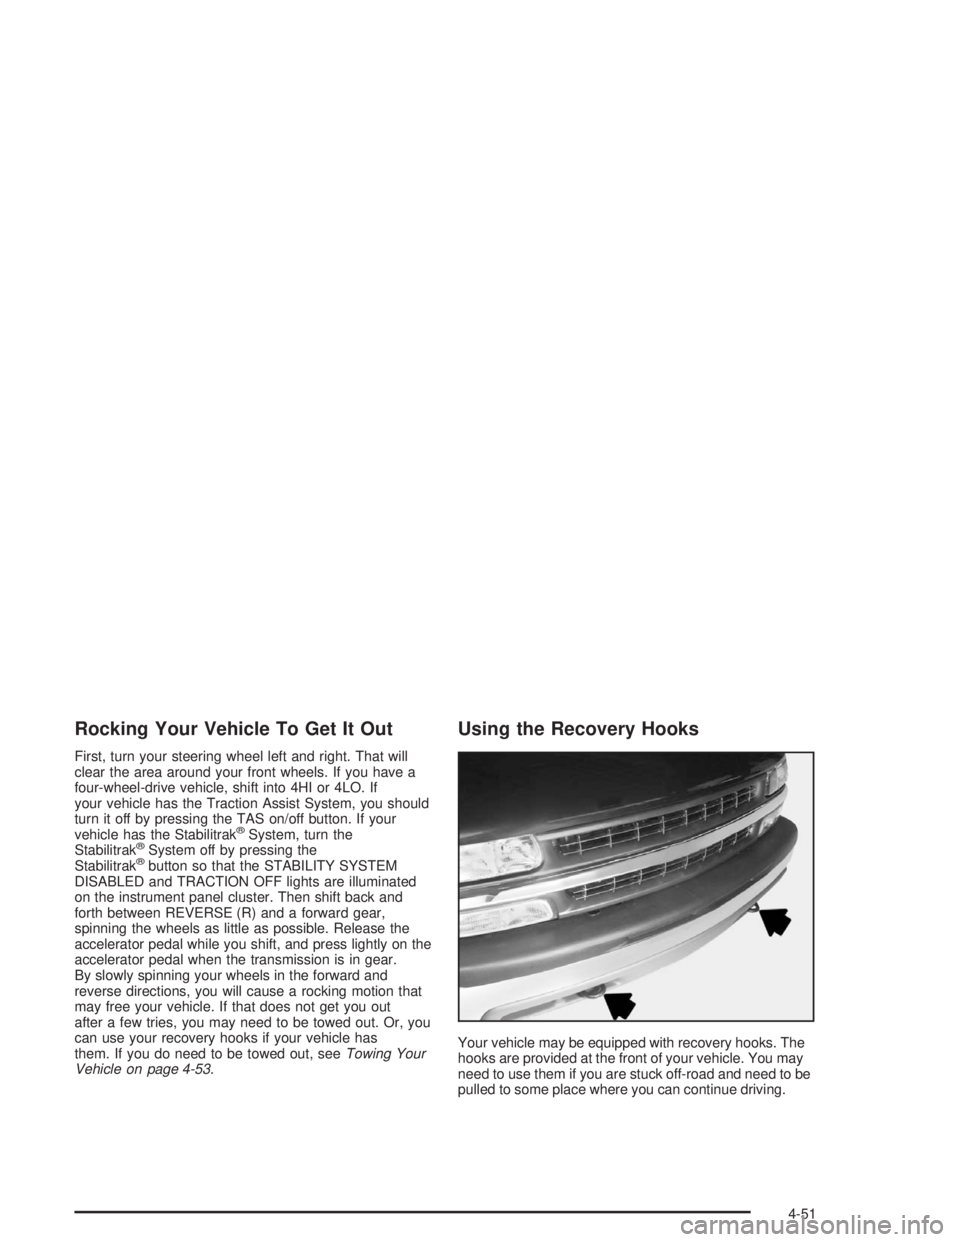
Using the Recovery Hooks
Your vehicle may be equipped with recovery hooks. The
hooks are provided at the front of your vehicle. You may
need to use them if you are stuck off-road and need to be
pulled to some place where you can continue driving.
4-51
Page 353 of 554
Towing
Towing Your Vehicle
Consult your dealer or a professional towing service if
you need to have your disabled vehicle towed. See
Roadside Assistance Program on page 7-6.
If you want to tow your vehicle behind another vehicle
for recreational purposes (such as behind a motorhome),
see “Recreational Vehicle Towing” following.
Recreational Vehicle Towing
Recreational vehicle towing means towing your vehicle
behind another vehicle – such as behind a motorhome.
The two most common types of recreational vehicle
towing are known as dinghy towing, towing your vehicle
with all four wheels on the ground, and dolly towing,
towing your vehicle with two wheels on the ground and
two wheels up on a device known as a “dolly”.
With the proper preparation and equipment, many
vehicles can be towed in these ways. SeeDinghy
TowingandDolly Towing, following.Here are some important things to consider before you
do recreational vehicle towing:
What’s the towing capacity of the towing vehicle?
Be sure you read the tow vehicle manufacturer’s
recommendations.
How far will you tow? Some vehicles have
restrictions on how far and how long they can tow.
Do you have the proper towing equipment?
See your dealer or trailering professional for
additional advice and equipment recommendations.
Is your vehicle ready to be towed? Just as you
would prepare your vehicle for a long trip, you’ll
want to make sure your vehicle is prepared to be
towed. SeeBefore Leaving on a Long Trip on
page 4-43.
4-53
Page 354 of 554
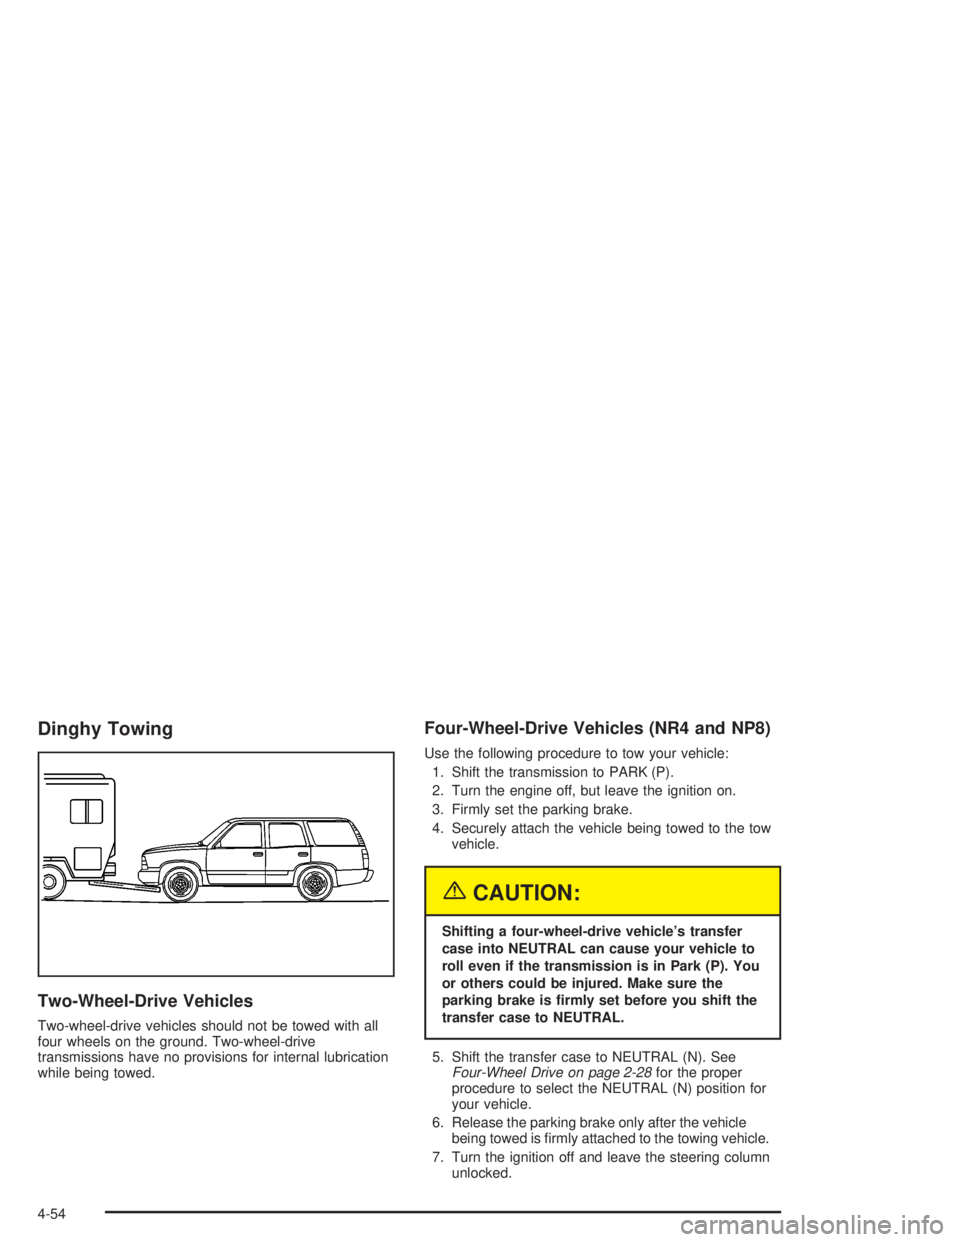
Dinghy Towing
Two-Wheel-Drive Vehicles
Two-wheel-drive vehicles should not be towed with all
four wheels on the ground. Two-wheel-drive
transmissions have no provisions for internal lubrication
while being towed.
Four-Wheel-Drive Vehicles (NR4 and NP8)
Use the following procedure to tow your vehicle:
1. Shift the transmission to PARK (P).
2. Turn the engine off, but leave the ignition on.
3. Firmly set the parking brake.
4. Securely attach the vehicle being towed to the tow
vehicle.
{CAUTION:
Shifting a four-wheel-drive vehicle’s transfer
case into NEUTRAL can cause your vehicle to
roll even if the transmission is in Park (P). You
or others could be injured. Make sure the
parking brake is �rmly set before you shift the
transfer case to NEUTRAL.
5. Shift the transfer case to NEUTRAL (N). See
Four-Wheel Drive on page 2-28for the proper
procedure to select the NEUTRAL (N) position for
your vehicle.
6. Release the parking brake only after the vehicle
being towed is �rmly attached to the towing vehicle.
7. Turn the ignition off and leave the steering column
unlocked.
4-54
Page 356 of 554
{CAUTION:
Shifting a four-wheel-drive vehicle’s transfer
case into NEUTRAL can cause your vehicle to
roll even if the transmission is in Park (P). You
or others could be injured. Make sure the
parking brake is �rmly set before you shift the
transfer case to NEUTRAL.
6. Shift the transfer case to NEUTRAL. See
Four-Wheel Drive on page 2-28for the proper
procedure to select the NEUTRAL position for your
vehicle.
7. Release the parking brake only after the vehicle
being towed is �rmly attached to the towing
vehicle.
8. Turn the ignition off and lock the steering column.
Loading Your Vehicle
It is very important to know how much weight your
vehicle can carry. This weight is called the vehicle
capacity weight and includes the weight of all occupants,
cargo and all nonfactory-installed options. Two labels
on your vehicle show how much weight it may properly
carry, the Tire and Loading Information label and the
Certi�cation/Tire label.
{CAUTION:
Do not load your vehicle any heavier than the
GVWR, or either the maximum front or rear
GAWR. If you do, parts on your vehicle can
break, and it can change the way your vehicle
handles. These could cause you to lose
control and crash. Also, overloading can
shorten the life of your vehicle.
4-56
Page 357 of 554
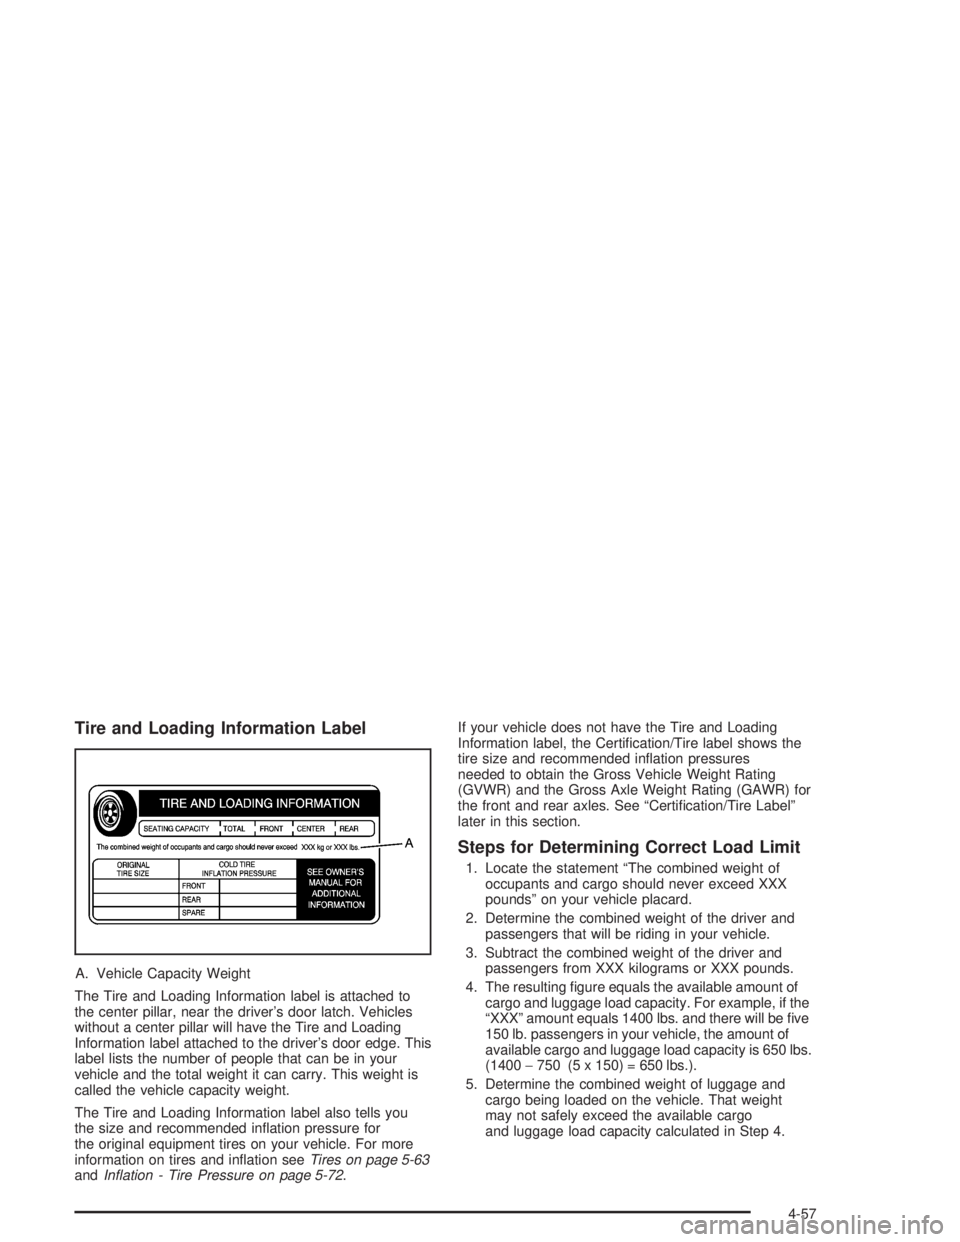
Tire and Loading Information Label
A. Vehicle Capacity Weight
The Tire and Loading Information label is attached to
the center pillar, near the driver’s door latch. Vehicles
without a center pillar will have the Tire and Loading
Information label attached to the driver’s door edge. This
label lists the number of people that can be in your
vehicle and the total weight it can carry. This weight is
called the vehicle capacity weight.
The Tire and Loading Information label also tells you
the size and recommended in�ation pressure for
the original equipment tires on your vehicle. For more
information on tires and in�ation seeTires on page 5-63
andIn�ation - Tire Pressure on page 5-72.If your vehicle does not have the Tire and Loading
Information label, the Certi�cation/Tire label shows the
tire size and recommended in�ation pressures
needed to obtain the Gross Vehicle Weight Rating
(GVWR) and the Gross Axle Weight Rating (GAWR) for
the front and rear axles. See “Certi�cation/Tire Label”
later in this section.
Steps for Determining Correct Load Limit
1. Locate the statement “The combined weight of
occupants and cargo should never exceed XXX
pounds” on your vehicle placard.
2. Determine the combined weight of the driver and
passengers that will be riding in your vehicle.
3. Subtract the combined weight of the driver and
passengers from XXX kilograms or XXX pounds.
4. The resulting �gure equals the available amount of
cargo and luggage load capacity. For example, if the
“XXX” amount equals 1400 lbs. and there will be �ve
150 lb. passengers in your vehicle, the amount of
available cargo and luggage load capacity is 650 lbs.
(1400−750 (5 x 150) = 650 lbs.).
5. Determine the combined weight of luggage and
cargo being loaded on the vehicle. That weight
may not safely exceed the available cargo
and luggage load capacity calculated in Step 4.
4-57
Page 358 of 554
6. If your vehicle will be towing a trailer, the load from
your trailer will be transferred to your vehicle.
Consult this manual to determine how this reduces
the available cargo and luggage load capacity of
your vehicle.
SeeTowing a Trailer on page 4-63for more
information on towing a trailer, towing safety rules
and trailering tips.
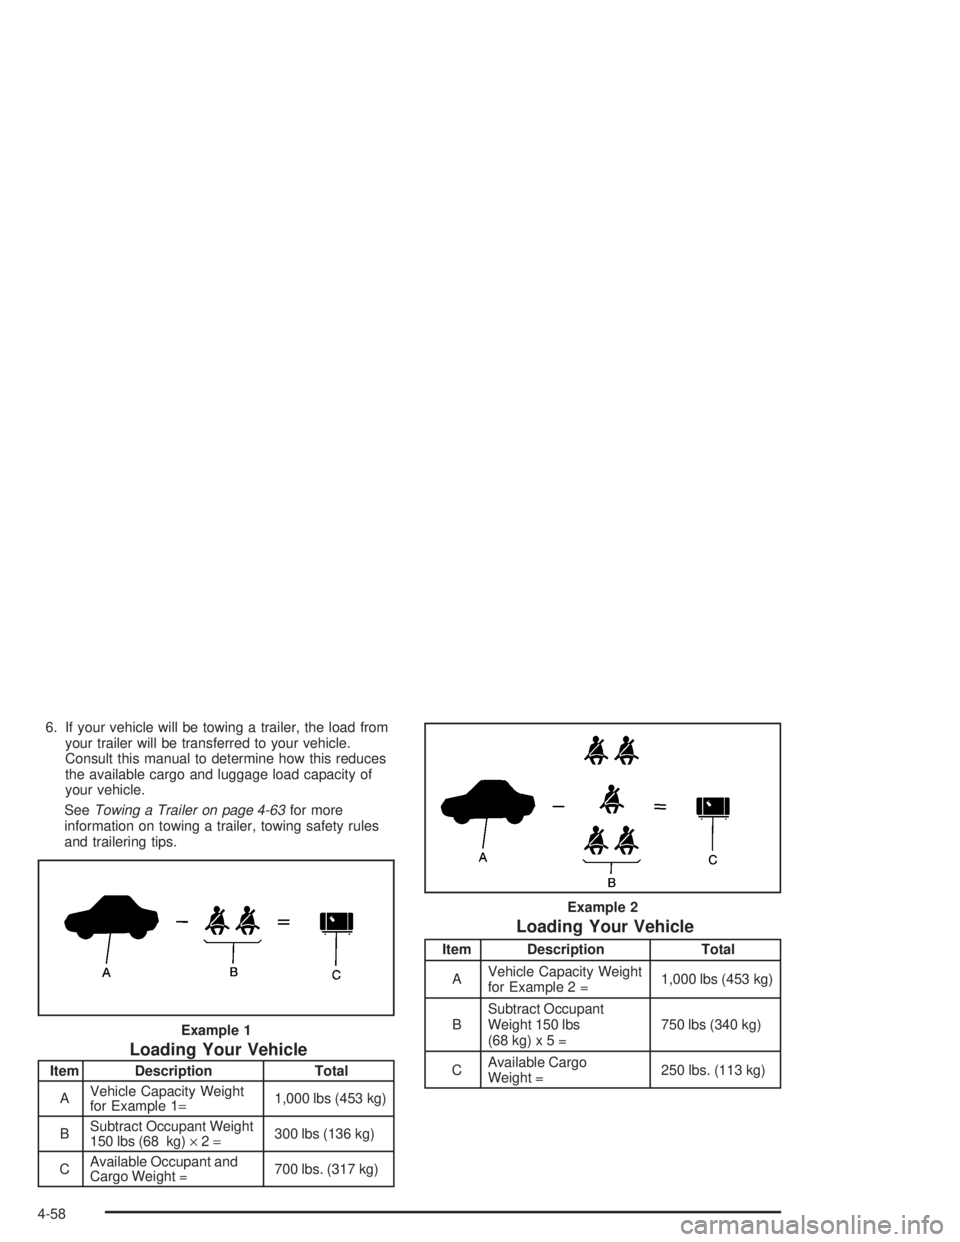
Loading Your Vehicle
Item Description Total
AVehicle Capacity Weight
for Example 1=1,000 lbs (453 kg)
BSubtract Occupant Weight
150 lbs (68 kg)×2=300 lbs (136 kg)
CAvailable Occupant and
Cargo Weight =700 lbs. (317 kg)
Loading Your Vehicle
Item Description Total
AVehicle Capacity Weight
for Example 2 =1,000 lbs (453 kg)
BSubtract Occupant
Weight 150 lbs
(68kg)x5=750 lbs (340 kg)
CAvailable Cargo
Weight =250 lbs. (113 kg) Example 1
Example 2
4-58
Page 362 of 554
Autoride™
If equipped, the Autoride™ feature will provide a
superior vehicle ride and handling under a variety of
passenger and loading conditions.
The system is fully automatic and uses a computer
controller to continuously monitor vehicle speed, wheel
to body position, lift/dive and steering position of the
vehicle. The controller then sends signals to each shock
absorber to independently adjust the damping level to
provide the optimum vehicle ride.
Autoride™ also interacts with the tow/haul switch that,
when engaged, will provide additional control of the
shock absorbers. This additional control results in better
ride and handling characteristics when the vehicle is
loaded or towing a trailer. SeeTow/Haul Mode Light on
page 3-56for more information.
Trailer Recommendations
You must subtract your hitch loads from the Cargo
Weight Rating (CWR) for your vehicle. CWR is the
maximum weight of the load your vehicle can carry. It
doesn’t include the weight of the people inside. But you
can �gure about 150 lbs. (68 kg) for each seat. The total
cargo load must not be more than your vehicle’s CWR.
Weigh your vehicle with the trailer attached, so that you
won’t go over the GVWR or GAWR. If you are using
a weight-distributing hitch, weigh the vehicle without the
spring bars in place.
You’ll get the best performance if you spread out the
weight of your load the right way, and if you choose the
correct hitch and trailer brakes.
For more information, seeTowing a Trailer on page 4-63
Towing a Trailer.
4-62
Page 364 of 554
Then, during the �rst 500 miles (800 km) that you
tow a trailer, don’t drive over 50 mph (80 km/h)
and don’t make starts at full throttle. This helps your
engine and other parts of your vehicle wear in at
the heavier loads.
You can tow in DRIVE (D). You may want to shift
the transmission to THIRD (3) or, if necessary, a
lower gear selection if the transmission shifts
too often (e.g., under heavy loads and/or hilly
conditions). See “Tow/Haul Mode” later in
this section.
Three important considerations have to do with weight:
The weight of the trailer
The weight of the trailer tongue
The weight on your vehicle’s tires
Tow/Haul Mode
Tow/Haul is a feature that assists when pulling a heavy
trailer or a large or heavy load. The purpose of the
Tow/Haul mode is to:
Reduce the frequency and improve the predictability
of transmission shifts when pulling a heavy trailer or
a large or heavy load.
Provide the same solid shift feel when pulling a
heavy trailer or a large or heavy load as when
the vehicle is unloaded.
Improve control of vehicle speed while requiring
less throttle pedal activity when pulling a heavy
trailer or a large or heavy load.
Your vehicle may be equipped with a button at the end of
the shift lever which, when pressed, enables tow/haul.
Your vehicle may be equipped with Autoride™
®which
further improves your vehicle’s ride while towing. See
Autoride™ on page 4-62for more information. When the
button is pressed, a light on the instrument panel will
illuminate to indicate that Tow/Haul has been selected.
Tow/Haul may be turned off by pressing the button again,
at which time the indicator light on the instrument panel
will turn off. The vehicle will automatically turn off Tow/
Haul every time it is started.
4-64
Page 371 of 554
Driving with a Trailer
{CAUTION:
If you have a rear-most window open and you
pull a trailer with your vehicle, carbon
monoxide (CO) could come into your vehicle.
You can not see or smell CO. It can cause
unconsciousness or death. SeeEngine
Exhaust on page 2-42. To maximize your safety
when towing a trailer:
Have your exhaust system inspected for
leaks, and make necessary repairs before
starting on your trip.
Keep the rear-most windows closed.
If exhaust does come into your vehicle
through a window in the rear or another
opening, drive with your front, main
heating or cooling system on and with the
fan on any speed. This will bring fresh,
outside air into your vehicle. Do not use
the climate control setting for maximum air
because it only recirculates the air inside
your vehicle. SeeClimate Control System
on page 3-22.Towing a trailer requires a certain amount of experience.
Before setting out for the open road, you’ll want to get
to know your rig. Acquaint yourself with the feel of
handling and braking with the added weight of the trailer.
And always keep in mind that the vehicle you are
driving is now a good deal longer and not nearly as
responsive as your vehicle is by itself.
Before you start, check all trailer hitch parts and
attachments, safety chains, electrical connector, lamps,
tires and mirror adjustment. If the trailer has electric
brakes, start your vehicle and trailer moving and then
apply the trailer brake controller by hand to be sure
the brakes are working. This lets you check your
electrical connection at the same time.
During your trip, check occasionally to be sure that the
load is secure, and that the lamps and any trailer
brakes are still working.
4-71
Page 373 of 554
Driving On Grades
Reduce speed and shift to a lower gearbeforeyou start
down a long or steep downgrade. If you don’t shift
down, you might have to use your brakes so much that
they would get hot and no longer work well.
You can tow in DRIVE (D). You may want to shift the
transmission to THIRD (3) or, if necessary, a lower gear
selection if the transmission shifts too often (e.g.,
under heavy loads and/or hilly conditions).
You may also want to activate the tow/haul mode if the
transmission shifts too often. See “Tow/Haul Mode”
earlier in this section for more information.
When towing at high altitude on steep uphill grades,
consider the following: Engine coolant will boil at a lower
temperature than at normal altitudes. If you turn your
engine off immediately after towing at high altitude on
steep uphill grades, your vehicle may show signs similar
to engine overheating. To avoid this, let the engine run
while parked (preferably on level ground) with the
automatic transmission in PARK (P) for a few minutes
before turning the engine off. If you do get the overheat
warning, seeEngine Overheating on page 5-29.
Parking on Hills
{CAUTION:
You really should not park your vehicle, with a
trailer attached, on a hill. If something goes
wrong, your rig could start to move. People
can be injured, and both your vehicle and the
trailer can be damaged.
But if you ever have to park your rig on a hill, here’s
how to do it:
1. Apply your regular brake, but don’t shift into
PARK (P) yet.
2. Have someone place chocks under the trailer
wheels.
3. When the wheel chocks are in place, release the
regular brakes until the chocks absorb the load.
4. Reapply the regular brakes. Then apply your
parking brake and shift into PARK (P).
4-73