ESP GMC YUKON 2005 User Guide
[x] Cancel search | Manufacturer: GMC, Model Year: 2005, Model line: YUKON, Model: GMC YUKON 2005Pages: 530, PDF Size: 3.2 MB
Page 224 of 530

If you accidentally choose a language that you do not
want or understand, press and hold the customization
button and the trip information button at the same
time. The DIC will begin scrolling through the languages
in their particular language. English will be in English,
Francais will be in French and Espanol will be in
Spanish. When you see the language that you would
like, release both buttons. The DIC will then display the
information in the language you chose.
You can also scroll through the different languages by
pressing and holding the trip reset stem for four seconds,
as long as you are in the odometer mode.
Display Units
Press the customization button until DISPLAY UNITS
appears in the display. To select English or metric, press
the select button while DISPLAY UNITS is displayed
on the DIC. Pressing the select button will scroll through
the following choices:
DISPLAY UNITS: ENGLISH
DISPLAY UNITS: METRIC
If you choose English, all information will be displayed
in English units. For example, distance in miles and fuel
economy in miles per gallon.
Choose one of the available options and press the
customization button while it is displayed on the DIC to
select it and end out of the customizable options.
Audio System(s)
Notice:Before adding any sound equipment to
your vehicle, such as an audio system, CD player,
CB radio, mobile telephone, or two-way radio, make
sure that it can be added by checking with your
dealer. Also, check federal rules covering mobile
radio and telephone units. If sound equipment can
be added, it is very important to do it properly.
Added sound equipment may interfere with
the operation of your vehicle’s engine, radio, or
other systems, and even damage them. Your
vehicle’s systems may interfere with the operation
of sound equipment that has been added.
Notice:The chime signals related to seat belts,
parking brake, and other functions of your vehicle
operate through the GM radio/entertainment system.
If that equipment is replaced or additional
equipment is added to your vehicle, the chimes may
not work. Make sure that replacement or additional
equipment is compatible with your vehicle before
installing it.
3-74
Page 263 of 530

To insert multiple CDs, do the following:
1. Turn the ignition on.
2. Press and hold the LOAD button for two seconds.
You will hear a beep and the indicator light, located
to the right of the slot, will begin to �ash and
MULTI LOAD # will appear on the display.
3. Once the light stops �ashing and turns green,
INSERT CD # will appear on the display, load
a CD. Insert the CD part way into the slot, label side
up. The player will pull the CD in.
Once the CD is loaded, the indicator light will begin
�ashing again. Once the light stops �ashing and
turns green, you can load another CD. The
CD player takes up to six CDs. Do not try to load
more than six.
To load more than one CD but less than six, complete
Steps 1 through 3. When �nished loading CDs,
press the LOAD button to cancel the loading function.
The radio will begin to play the last CD loaded.
If more than one CD has been loaded, a number for
each CD will appear on the display.Playing a Speci�c Loaded CD
For every CD loaded, a number will appear on the
display. To play a speci�c CD, �rst press the CD AUX
button, then press the numbered pushbutton that
corresponds to the CD. A small bar will appear under
the CD number that is playing and the track number will
appear on the display.
If an error appears on the display, see “CD Messages”
later in this section.
CD
Z(Eject):Press this button to eject CD(s).
To eject the CD that is currently playing, press and
release this button.
To eject multiple CDs, do the following:
1. Press and hold the CD eject button for �ve seconds.
You will hear a beep and the indicator light, located
to the right of the slot, will begin to �ash and
EJECT ALL will appear on the display.
2. Once the light stops �ashing and turns green,
REMOVE CD # will appear on the display. The
CD will eject and can be removed.
Once the CD is removed, the indicator light will
begin �ashing again and another CD will eject.
To stop ejecting the CDs, press the LOAD or the
eject button.
3-113
Page 282 of 530

PROG (Program):Press this button to play a station
you have programmed on the radio preset pushbuttons.
The radio will only seek preset stations with a strong
signal that are in the selected band.
When a cassette tape is playing, press this button to
play the other side of the tape.
When a CD is playing in the CD changer, press this
button to go to the next available CD, if multiple CDs are
loaded.
QSOURCER:Press this button to switch between
FM1, FM2, AM, or XM1 or XM2 (if equipped), or a
cassette tape or CD. The cassette or CD must be loaded
to play. Available loaded sources are shown on the
display as a tape or a CD symbol.
QSEEKR:Press the up or the down arrow to go to
the next or to the previous radio station and stay
there. The radio will only seek stations with a strong
signal that are in the selected band.
When a cassette tape or CD is playing, press the up or
the down arrow to fast forward or reverse.
QVOLR(Volume):Press the up or the down arrow
to increase or to decrease the volume.
Radio Reception
AM
The range for most AM stations is greater than for FM,
especially at night. The longer range can cause
station frequencies to interfere with each other. Static
can occur on AM stations caused by things like
storms and power lines. Try reducing the treble to
reduce this noise.
FM Stereo
FM stereo will give the best sound, but FM signals will
reach only about 10 to 40 miles (16 to 65 km). Tall
buildings or hills can interfere with FM signals, causing
the sound to fade in and out.
XM™ Satellite Radio Service
XM™ Satellite Radio Service gives digital radio
reception from coast to coast. Just as with FM, tall
buildings or hills can interfere with satellite radio signals,
causing the sound to fade in and out. The radio may
display NO SIGNAL to indicate interference.
3-132
Page 288 of 530

Your Driving, the Road, and
Your Vehicle
Defensive Driving
The best advice anyone can give about driving is: Drive
defensively.
Please start with a very important safety device in your
vehicle: Buckle up. SeeSafety Belts: They Are for
Everyone on page 1-22.
Defensive driving really means “be ready for anything.”
On city streets, rural roads, or freeways, it means
“always expect the unexpected.”
Assume that pedestrians or other drivers are going to
be careless and make mistakes. Anticipate what
they might do. Be ready for their mistakes.
Rear-end collisions are about the most preventable of
accidents. Yet they are common. Allow enough following
distance. It is the best defensive driving maneuver, in
both city and rural driving. You never know when
the vehicle in front of you is going to brake or turn
suddenly.
Defensive driving requires that a driver concentrate on
the driving task. Anything that distracts from the driving
task — such as concentrating on a cellular telephone call,
reading, or reaching for something on the �oor — makesproper defensive driving more difficult and can even
cause a collision, with resulting injury. Ask a passenger to
help do things like this, or pull off the road in a safe place
to do them yourself. These simple defensive driving
techniques could save your life.Drunken Driving
Death and injury associated with drinking and driving is
a national tragedy. It is the number one contributor
to the highway death toll, claiming thousands of victims
every year.
Alcohol affects four things that anyone needs to drive a
vehicle:
Judgment
Muscular Coordination
Vision
Attentiveness
Police records show that almost half of all motor
vehicle-related deaths involve alcohol. In most cases,
these deaths are the result of someone who was
drinking and driving. In recent years, more than
16,000 annual motor vehicle-related deaths have been
associated with the use of alcohol, with more than
300,000 people injured.
4-2
Page 290 of 530

There is a gender difference, too. Women generally
have a lower relative percentage of body water
than men. Since alcohol is carried in body water, this
means that a woman generally will reach a higher BAC
level than a man of her same body weight will when
each has the same number of drinks.
The law in most U.S. states, and throughout Canada,
sets the legal limit at 0.08 percent. In some other
countries, the limit is even lower. For example, it is
0.05 percent in both France and Germany. The
BAC limit for all commercial drivers in the United States
is 0.04 percent.
The BAC will be over 0.10 percent after three to
six drinks (in one hour). Of course, as we have seen,
it depends on how much alcohol is in the drinks,
and how quickly the person drinks them.
But the ability to drive is affected well below a BAC of
0.10 percent. Research shows that the driving skills
of many people are impaired at a BAC approaching
0.05 percent, and that the effects are worse at night. All
drivers are impaired at BAC levels above 0.05 percent.Statistics show that the chance of being in a collision
increases sharply for drivers who have a BAC of
0.05 percent or above. A driver with a BAC level of
0.06 percent has doubled his or her chance of having a
collision. At a BAC level of 0.10 percent, the chance
of this driver having a collision is 12 times greater; at a
level of 0.15 percent, the chance is 25 times greater!
The body takes about an hour to rid itself of the alcohol in
one drink. No amount of coffee or number of cold
showers will speed that up. “I will be careful” is not the
right answer. What if there is an emergency, a need to
take sudden action, as when a child darts into the street?
A person with even a moderate BAC might not be able to
react quickly enough to avoid the collision.
There is something else about drinking and driving that
many people do not know. Medical research shows
that alcohol in a person’s system can make crash
injuries worse, especially injuries to the brain, spinal
cord, or heart. This means that when anyone who has
been drinking — driver or passenger — is in a crash,
that person’s chance of being killed or permanently
disabled is higher than if the person had not been
drinking.
4-4
Page 294 of 530

Remember: Anti-lock does not change the time you
need to get your foot up to the brake pedal or always
decrease stopping distance. If you get too close to
the vehicle in front of you, you will not have time to apply
your brakes if that vehicle suddenly slows or stops.
Always leave enough room up ahead to stop, even
though you have anti-lock brakes.
Using Anti-Lock
Do not pump the brakes. Just hold the brake pedal
down �rmly and let anti-lock work for you. You may feel
the brakes vibrate, or you may notice some noise,
but this is normal.
Braking in Emergencies
With anti-lock brakes, you can steer and brake at the
same time. In many emergencies, steering can help you
more than even the very best braking.
Traction Assist System (TAS)
Your vehicle may have a Traction Assist System (TAS)
that limits wheel spin. This is especially useful in
slippery road conditions. The system operates only if it
senses that one or both of the rear wheels are
spinning or beginning to lose traction. When this
happens, the system reduces engine power to limit
wheel spin.The traction control system is enabled every time your
vehicle is started. The system will activate if it senses
that any of the wheels are spinning or beginning to lose
traction.
You may hear or feel the system working or notice a
lack of accelerator response, but this is normal.
The Traction Assist System may operate on dry roads
under some conditions. When this happens, you
may notice a reduction in acceleration. This is normal
and doesn’t mean there’s a problem with your vehicle.
Examples of these conditions include a hard
acceleration in a turn, an abrupt upshift or downshift of
the transmission or driving on rough roads.
If your vehicle is in cruise control when the TAS begins
to limit wheel spin, the cruise control will automatically
disengage. When road conditions allow you to safely
use it again, you may re-engage the cruise control.
SeeCruise Control on page 3-11.
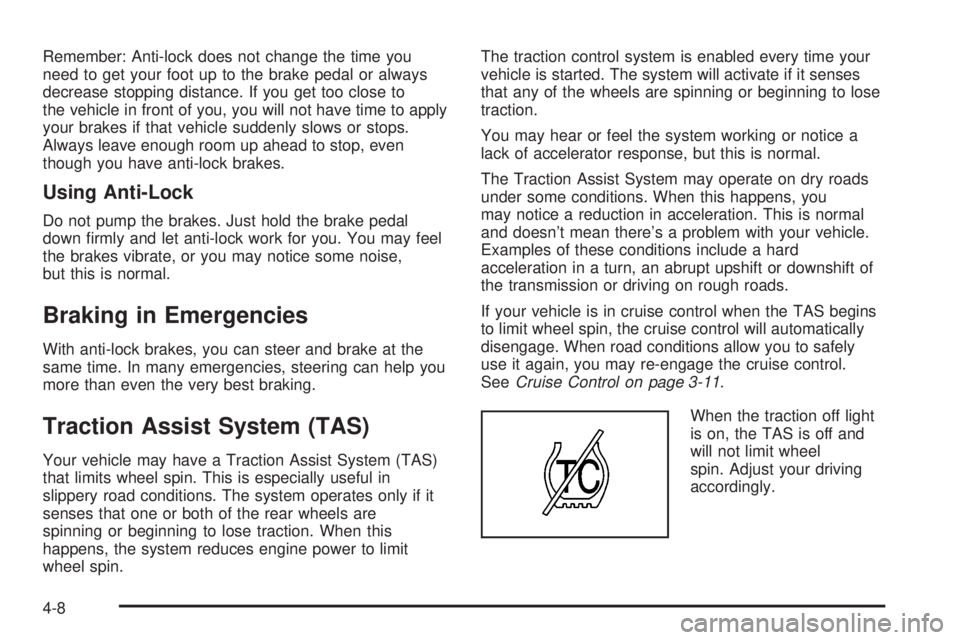
When the traction off light
is on, the TAS is off and
will not limit wheel
spin. Adjust your driving
accordingly.
4-8
Page 295 of 530

The traction off light will come on under the following
conditions:
The Traction Assist System is turned off, either by
pressing the TAS on/off button or turning off the
automatic engagement feature of the TAS.
The transmission is in FIRST (1); TAS will not
operate in this gear. This is normal.
The vehicle is driven on an extremely rough road.
When the vehicle leaves the rough surface, slows
down or stops, the light will go off and TAS will
be on again. This is normal.
A Traction Assist System, Anti-Lock Brake System
or engine-related problem has been detected and
the vehicle needs service.
If the vehicle has been driven with the TAS system
on for long periods of time, or if the vehicle has
gone through many high speed braking maneuvers
the system may be automatically disabled. The
system will automatically re-enable after
approximately two minutes of not using the brakes.
The Traction Assist System, as delivered from the
factory, will automatically come on whenever you start
your vehicle. To limit wheel spin, especially in
slippery road conditions, you should always leave the
system on. But you can turn the TAS off if you ever need
to. You should turn the TAS off if your vehicle evergets stuck in sand, mud or snow and rocking the vehicle
is required. SeeRocking Your Vehicle to Get It Out
on page 4-50.
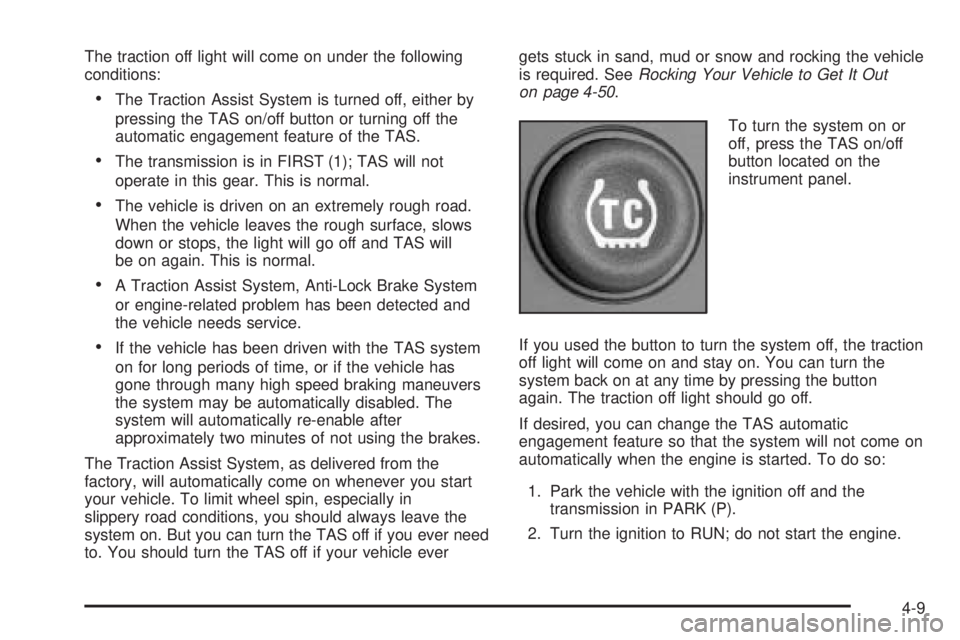
To turn the system on or
off, press the TAS on/off
button located on the
instrument panel.
If you used the button to turn the system off, the traction
off light will come on and stay on. You can turn the
system back on at any time by pressing the button
again. The traction off light should go off.
If desired, you can change the TAS automatic
engagement feature so that the system will not come on
automatically when the engine is started. To do so:
1. Park the vehicle with the ignition off and the
transmission in PARK (P).
2. Turn the ignition to RUN; do not start the engine.
4-9
Page 302 of 530

If you want to use tire chains, the vehicle needs to be
in 2-wheel steer mode. For more information see
Tire Chains on page 5-75.
4:In this mode, all four wheels will help steer the
vehicle. If you want to use 4, and your vehicle is not in
this mode, press the button, until the 4 indicator,
located to the right of the 4-Wheel Steer button, comes
on and stays on. If the 4 indicator is �ashing, you
will have to center the steering wheel by turning it to the
left or right.
At slower speeds the front and rear wheels will turn in
opposite directions. This helps the vehicle make
tighter turns, such as during parking, cornering and
turning into tight spaces.At higher speeds the front and rear wheels will turn in
the same direction. This improves stability of the vehicle
during lane changes and sweeping turns.
_(4-Wheel Steer Tow Mode):When towing a
trailer, the 4-wheel steer tow mode provides enhanced
stability allowing the trailer to follow the path of the tow
vehicle more closely, especially during lane changes.
In this mode the system operates much like the 4 mode,
but is enhanced for trailer towing. It is recommended
for all types and weights of trailers. Slower Speeds (below 40 mph (64 km/h))
Higher Speeds (40 mph (64 km/h), and above)
4-16
Page 305 of 530

Do not get too close to the vehicle you want to
pass while you are awaiting an opportunity. For one
thing, following too closely reduces your area of
vision, especially if you are following a larger
vehicle. Also, you will not have adequate space if
the vehicle ahead suddenly slows or stops.
Keep back a reasonable distance.
When it looks like a chance to pass is coming up,
start to accelerate but stay in the right lane and
do not get too close. Time your move so you will be
increasing speed as the time comes to move into
the other lane. If the way is clear to pass, you
will have a running start that more than makes up
for the distance you would lose by dropping
back. And if something happens to cause you to
cancel your pass, you need only slow down
and drop back again and wait for another
opportunity.
If other vehicles are lined up to pass a slow vehicle,
wait your turn. But take care that someone is not
trying to pass you as you pull out to pass the slow
vehicle. Remember to glance over your shoulder
and check the blind spot.
Check your mirrors, glance over your shoulder and
start your left lane change signal before moving out
of the right lane to pass. When you are far
enough ahead of the passed vehicle to see its front
in your inside mirror, activate your right lanechange signal and move back into the right lane.
Remember that if your right outside mirror is convex,
the vehicle you just passed may seem to be
farther away from you than it really is.
Try not to pass more than one vehicle at a time on
two-lane roads. Reconsider before passing the
next vehicle.
Do not overtake a slowly moving vehicle too rapidly.
Even though the brake lamps are not �ashing, it
may be slowing down or starting to turn.
If you are being passed, make it easy for the
following driver to get ahead of you. Perhaps
you can ease a little to the right.
Loss of Control
Let us review what driving experts say about what
happens when the three control systems — brakes,
steering, and acceleration — do not have enough friction
where the tires meet the road to do what the driver
has asked.
In any emergency, do not give up. Keep trying to steer
and constantly seek an escape route or area of less
danger.
4-19
Page 306 of 530

Skidding
In a skid, a driver can lose control of the vehicle.
Defensive drivers avoid most skids by taking reasonable
care suited to existing conditions, and by not overdriving
those conditions. But skids are always possible.
The three types of skids correspond to your vehicle’s
three control systems. In the braking skid, your wheels
are not rolling. In the steering or cornering skid, too much
speed or steering in a curve causes tires to slip and lose
cornering force. And in the acceleration skid, too much
throttle causes the driving wheels to spin.
A cornering skid is best handled by easing your foot off
the accelerator pedal.
If you have the Traction Assist System (TAS),
remember: It helps avoid only the acceleration skid. See
Traction Assist System (TAS) on page 4-8. If you do
not have this system, or if the system is off, then
an acceleration skid is also best handled by easing your
foot off the accelerator pedal.
If your vehicle starts to slide, ease your foot off the
accelerator pedal and quickly steer the way you want
the vehicle to go. If you start steering quickly enough,
your vehicle may straighten out. Always be ready
for a second skid if it occurs.Of course, traction is reduced when water, snow, ice,
gravel, or other material is on the road. For safety, you
will want to slow down and adjust your driving to
these conditions. It is important to slow down on slippery
surfaces because stopping distance will be longer and
vehicle control more limited.
While driving on a surface with reduced traction, try
your best to avoid sudden steering, acceleration,
or braking, including engine braking by shifting to a
lower gear. Any sudden changes could cause the tires
to slide. You may not realize the surface is slippery
until your vehicle is skidding. Learn to recognize warning
clues — such as enough water, ice, or packed snow
on the road to make a mirrored surface — and
slow down when you have any doubt.
Remember: Any anti-lock brake system (ABS) helps
avoid only the braking skid.
4-20