display GMC YUKON 2007 Owner's Manual
[x] Cancel search | Manufacturer: GMC, Model Year: 2007, Model line: YUKON, Model: GMC YUKON 2007Pages: 608, PDF Size: 3.06 MB
Page 17 of 608

Rear Seats
Heated Seats
The rear seats have the
heated seat feature,
the buttons used
to control this feature
are located on the
Rear Seat Audio (RSA)
panel.
M(Heated Seat):To heat the seat cushion,
press the button with the heated seat symbol.A heated seat symbol will be shown in the RSA
display to indicate that the feature is on. Press the
button to cycle through the temperature settings
of high, medium, and low, and to turn it off.
Indicator bars next to the symbol will designate
the level of heat selected: three for high,
two for medium, and one for low.
The heated seats will be canceled ten seconds
after the ignition is turned off. If the vehicle
is restarted, the heated seat button will need to
be pressed again to restart the feature.
Driver’s Side RSA
Heated Seat Button
Only shown
17
Page 111 of 608

Keys............................................................ 113
Remote Keyless Entry System.................. 114
Remote Keyless Entry System Operation ... 116
Doors and Locks........................................ 122
Door Locks................................................ 122
Power Door Locks..................................... 123
Delayed Locking........................................ 123
Programmable Automatic Door Locks........ 124
Rear Door Security Locks......................... 124
Lockout Protection..................................... 125
Liftgate/Liftglass......................................... 126
Power Liftgate........................................... 128
Power Running Boards.............................. 132
Windows...................................................... 132
Power Windows........................................ 133
Sun Visors................................................ 134
Theft-Deterrent Systems............................. 134
Content Theft-Deterrent............................. 135
PASS-Key
®III+......................................... 136
PASS-Key®III+ Operation......................... 137Starting and Operating Your Vehicle......... 139
New Vehicle Break-In................................ 139
Ignition Positions....................................... 140
Retained Accessory Power (RAP)............. 141
Starting the Engine.................................... 141
Adjustable Throttle and Brake Pedal.......... 143
Engine Coolant Heater.............................. 144
Automatic Transmission Operation............. 145
Tow/Haul Mode......................................... 150
Parking Brake........................................... 152
Shifting Into Park (P)................................. 153
Shifting Out of Park (P)............................. 154
Parking Over Things That Burn................. 155
Engine Exhaust......................................... 156
Running the Engine While Parked............. 157
Mirrors......................................................... 158
Automatic Dimming Rearview Mirror with
OnStar
®, Compass and Temperature
Display................................................... 158
Outside Power Foldaway Mirrors............... 161
Section 2 Features and Controls
111
Page 118 of 608

Matching Transmitter(s) to Your
Vehicle
Each RKE transmitter is coded to prevent another
transmitter from unlocking your vehicle. If a
transmitter is lost or stolen, a replacement can be
purchased through your GM dealer. Remember to
bring any additional transmitters so they can also
be re-coded to match the new transmitter. Once
your dealer has coded the new transmitter, the lost
transmitter will not unlock your vehicle. The vehicle
can have a maximum of eight transmitters matched
to it. See “Relearn Remote Key” underDIC
Operation and Displays (Using DIC Buttons) on
page 245orDIC Operation and Displays (Using
Trip Odometer Reset Stem) on page 250for
instructions on how to match RKE transmitters to
your vehicle.
Battery Replacement
Under normal use, the battery in your RKE
transmitter should last about four years.
You can tell the battery is weak if the transmitter
will not work at the normal range in any location.
If you have to get close to your vehicle before
the transmitter works, it is probably time to change
the battery.The REPLACE BATTERY IN REMOTE KEY
message in the vehicle’s DIC will display if the
RKE transmitter battery is low. See “REPLACE
BATTERY IN REMOTE KEY” underDIC Warnings
and Messages on page 252for additional
information.
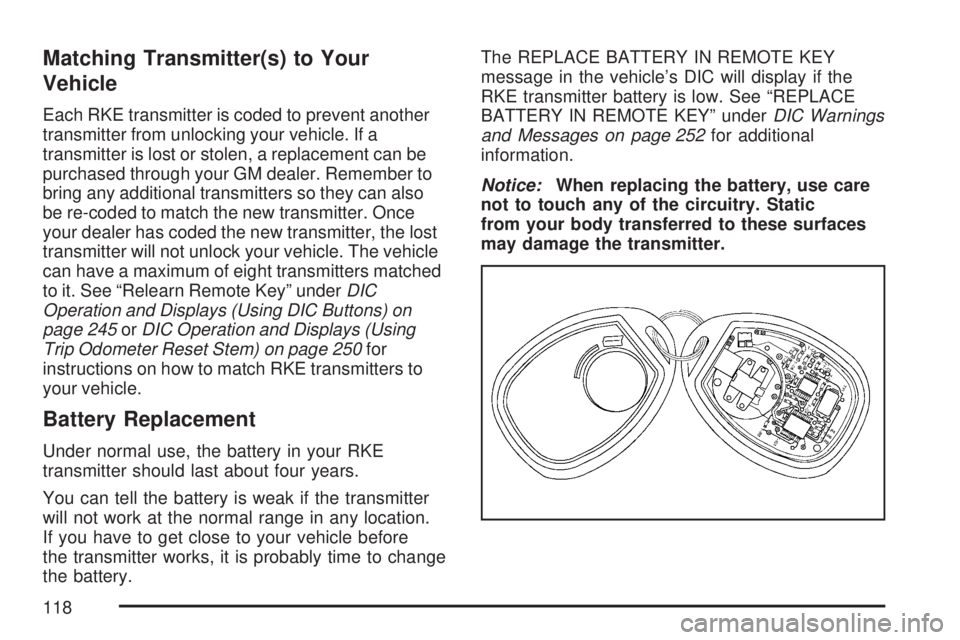
Notice:When replacing the battery, use care
not to touch any of the circuitry. Static
from your body transferred to these surfaces
may damage the transmitter.
118
Page 145 of 608

4. Before starting the engine, be sure to unplug
and store the cord as it was before to keep it
away from moving engine parts. If you do
not, it could be damaged.
How long should you keep the coolant heater
plugged in? The answer depends on the outside
temperature, the kind of oil you have, and
some other things. Instead of trying to list
everything here, we ask that you contact your
dealer in the area where you will be parking your
vehicle. The dealer can give you the best
advice for that particular area.Automatic Transmission Operation
Your vehicle has an Hydra-Matic®6L80
automatic transmission, and has an electronic
shift position indicator within the instrument panel
cluster. The electronic shift position indicator
displays when the shift lever is moved out
of PARK (P).
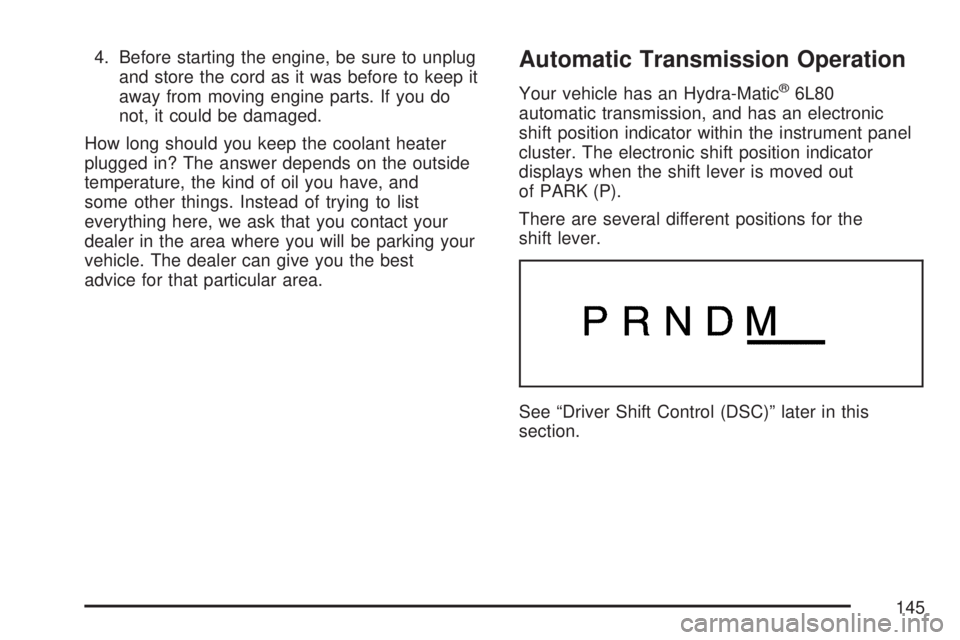
There are several different positions for the
shift lever.
See “Driver Shift Control (DSC)” later in this
section.
145
Page 150 of 608

When in the MANUAL MODE (M) a number will
display next to the M, indicating the current gear
that has been selected. The number displayed in
the gear indicator is the highest gear that can be
used. However, your vehicle can automatically shift
to lower gears as it adjusts to driving conditions.
This means that all gears below that number are
available. When FIFTH (5) is selected, FIRST (1)
through FIFTH (5) gears are automatically shifted
by the vehicle, but SIXTH (6) cannot be used until
the plus/minus button located on the steering
column lever is used to change to the gear.
The DSC controls the vehicle and engine speed
while driving down a hill or towing a trailer, by
allowing you to select a desired range of gears.
The transmission will prevent a gear range until a
speed that is appropriate for current driving
conditions is achieved. If shifting is prevented for
any reason, the currently selected gear will
�ash multiple times in the instrument panel cluster.
Grade Braking is not available when the Driver
Shift Control is active. SeeTow/Haul Mode
on page 150for more information.
While using the DSC, Cruise Control and the
Tow/Haul mode can be used.Tow/Haul Mode
Your vehicle has a tow/haul mode. The tow/haul
mode adjusts the transmission shift pattern to
reduce shift cycling, providing increased
performance, vehicle control, and transmission
cooling when towing or hauling heavy loads.
150
Page 158 of 608

Mirrors
Automatic Dimming Rearview Mirror
with OnStar
®, Compass and
Temperature Display
When on, an automatic dimming mirror
automatically dims to the proper level to minimize
glare from lights behind you after dark.
The mirror also includes a dual display in the
upper right corner of the mirror face. The compass
reading and the outside temperature will both
appear in the display at the same time.
P(On/Off):This is the on/off button.
Temperature and Compass Display
Press the on/off button, located to the far
left, brie�y to turn the compass/temperature
display on or off.
If the display reads CAL, you will need to calibrate
the compass. For more information on calibration,
see below.To adjust between Fahrenheit and Celsius do the
following:
1. Press and hold the on/off button for
approximately four seconds until either a
�ashing F or C appears.
2. Press the button again to change the display
to the desired unit of measurement. After
approximately four seconds of inactivity,
the new unit will be locked in and the
compass/temperature display will return.
If an abnormal temperature reading is displayed
for an extended period of time, please consult your
dealer. Under certain circumstances, a delay in
updating the temperature is normal.
158
Page 160 of 608

2. Press and hold the on/off button untilaZand
a zone number appear in the display. The
compass is now in zone mode.
3. Keep pressing the on/off button until the
desired zone number appears in the display.
Release the button. After approximately
four seconds of inactivity, the new zone
number will be locked in and the compass/
temperature display will return.
4. Calibrate the compass as described below.
Compass Calibration
The compass may need calibration if one of the
following occurs:
After approximately �ve seconds, the display
does not show a compass heading (N for
North, for example), there may be a strong
magnetic �eld interfering with the compass.
Such interference may be caused by a
magnetic antenna mount, magnetic note pad
holder or a similar magnetic item.
The compass does not display the correct
heading and the compass zone variance
is set correctly.In order to calibrate, CAL must be displayed in the
mirror compass windows. If CAL is not displayed,
push the on/off button for approximately
12 seconds or until CAL is displayed.
The compass can be calibrated by driving the
vehicle in circles at 5 mph (8 km/h) or less until the
display reads a direction.
Cleaning the Mirror
When cleaning the mirror, use a paper towel or
similar material dampened with glass cleaner. Do
not spray glass cleaner directly on the mirror
as that may cause the liquid cleaner to enter the
mirror housing.
160
Page 162 of 608

Resetting the Power Foldaway Mirrors
You will need to reset the power foldaway mirrors
if the following occurs:
The mirrors are accidentally obstructed while
folding.
They are accidentally manually
folded/unfolded.
The mirrors will not stay in the unfolded
position.
The mirrors shake and �utter at normal driving
speeds.
To reset the power foldaway mirrors, fold and
unfold them one time using the mirror controls.
This will reset them to their normal position.
This mirror has the following features.
Automatic Dimming
The driver’s outside mirror will adjust for the glare
of the headlamps behind you. SeeAutomatic
Dimming Rearview Mirror with OnStar
®, Compass
and Temperature Display on page 158.
Curb View Assist
If your vehicle has the memory package, the
outside mirrors are able to perform the curb view
assist mirror function. This feature may be
useful in allowing the driver to view the curb when
parallel parking. This feature will cause the
passenger’s and/or driver’s mirror to tilt to a
preselected position when the vehicle is in
REVERSE (R).
The passenger’s and/or driver’s mirror will return
to its original position when the vehicle is
shifted out of REVERSE (R), or the ignition is
turned off or to LOCK.
This feature can be turned on or off through the
Driver Information Center (DIC). SeeDriver
Information Center (DIC) on page 244.
162
Page 188 of 608

Anti-Lock Brake System Warning Light...... 234
StabiliTrak®Indicator Light......................... 235
Engine Coolant Temperature Gage............ 236
Tire Pressure Light.................................... 236
Malfunction Indicator Lamp........................ 237
Oil Pressure Gage..................................... 240
Oil Pressure Light..................................... 241
Security Light............................................ 241
Fog Lamp Light......................................... 242
Cruise Control Light.................................. 242
Highbeam On Light................................... 242
Tow/Haul Mode Light................................ 242
Fuel Gage................................................. 243
Low Fuel Warning Light............................ 244
Driver Information Center (DIC).................. 244
DIC Operation and Displays
(Using DIC Buttons)............................... 245
DIC Operation and Displays
(Using Trip Odometer Reset Stem)........ 250
DIC Warnings and Messages.................... 252
DIC Vehicle Customization
(With DIC Buttons)................................. 262Audio System(s)......................................... 272
Setting the Time (Radio with a
Six-Disc CD Player)............................... 274
Setting the Time (Radio with a
Single CD and DVD Player)................... 275
Radio with Six-Disc CD (MP3)................... 276
Radio with CD and DVD........................... 294
XM Radio Messages................................. 319
Navigation/Radio System........................... 321
Rear Seat Entertainment System............... 321
Rear Seat Audio (RSA)............................. 333
Theft-Deterrent Feature............................. 335
Audio Steering Wheel Controls.................. 335
Radio Reception........................................ 336
Care of Your CDs and DVDs.................... 338
Care of the CD and DVD Player............... 338
Rear Side Window Antenna....................... 338
XM™ Satellite Radio Antenna System....... 339
Section 3 Instrument Panel
188
Page 207 of 608

Instrument Panel Brightness
D(Instrument Panel Brightness):This feature
controls the brightness of the instrument panel
lights.
The knob for this feature is located next to the
headlamp control.
Turn the knob clockwise or counterclockwise to
adjust the brightness of the instrument panel lights.
Turn the knob clockwise to return the instrument
panel cluster or radio display to full brightness
when the headlamps or parking lamps are on.
To turn on the dome lamps, turn the knob to the
farthest clockwise position.
Dome Lamps
The dome lamps come on when a door is opened.
The dome lamps can also be turned on by
turning the knob, located next to the exterior lamps
control, clockwise to the farthest position. In this
position, the dome lamps will remain on whether a
door is opened or closed.
Dome Lamp Override
E(Dome Lamp Override):Press the dome
override button, located next to the exterior lamps
control, to keep the dome lamps off when a
door is open. To set the lamps to the automatic
operation, press the button again so that it is
extended. With the button in this position,
the dome lamps will come on when a door is
opened.
Entry Lighting
Your vehicle has an illuminated entry feature.
When the doors are opened, the dome lamps will
come on if the dome override button is in the
extended position. If the dome override button is
pressed in, the lamps will not come on.
Exit Lighting
With exit lighting, the interior lamps will come on
when you remove the key from the ignition. They
will turn off automatically in 20 seconds. The lights
will not come on if the dome override button is
pressed in.
207