height GMC YUKON 2007 Owner's Manual
[x] Cancel search | Manufacturer: GMC, Model Year: 2007, Model line: YUKON, Model: GMC YUKON 2007Pages: 608, PDF Size: 3.06 MB
Page 7 of 608
Front Seats..................................................... 9
Power Seats................................................. 9
Power Lumbar............................................. 10
Heated Seats.............................................. 11
Memory Seat, Mirrors, and Pedals.............. 12
Power Reclining Seatbacks......................... 14
Head Restraints.......................................... 16
Rear Seats.................................................... 17
Heated Seats.............................................. 17
60/40 Split Bench Seat (Second Row)........ 18
Bucket Seats (Second Row)........................ 25
Third Row Seat........................................... 32
Safety Belts.................................................. 38
Safety Belts: They Are for Everyone........... 38
Questions and Answers About
Safety Belts............................................. 42
How to Wear Safety Belts Properly............. 43
Driver Position............................................. 43
Shoulder Belt Height Adjustment................. 50
Safety Belt Use During Pregnancy.............. 51Right Front Passenger Position................... 51
Center Front Passenger Position................. 52
Rear Seat Passengers................................ 53
Rear Safety Belt Comfort Guides................ 56
Safety Belt Pretensioners............................ 60
Safety Belt Extender................................... 60
Child Restraints............................................ 61
Older Children............................................. 61
Infants and Young Children......................... 64
Child Restraint Systems.............................. 68
Where to Put the Restraint.......................... 72
Lower Anchors and Tethers for
Children (LATCH).................................... 74
Securing a Child Restraint in a
Rear Seat Position................................... 83
Securing a Child Restraint in the
Center Front Seat Position....................... 85
Securing a Child Restraint in the
Right Front Seat Position......................... 86
Section 1 Seats and Restraint Systems
7
Page 10 of 608
Power Lumbar
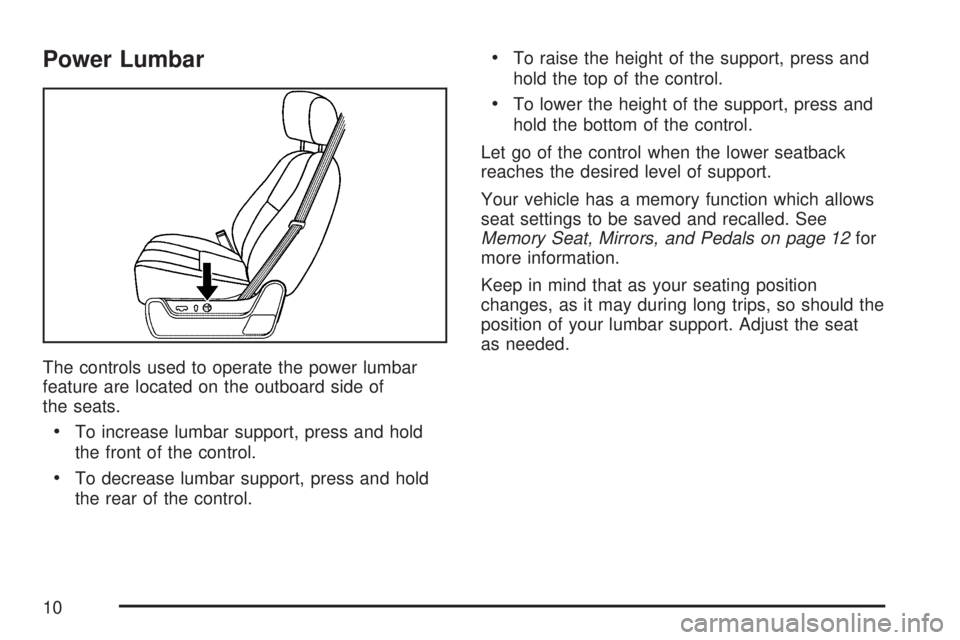
The controls used to operate the power lumbar
feature are located on the outboard side of
the seats.
To increase lumbar support, press and hold
the front of the control.
To decrease lumbar support, press and hold
the rear of the control.
To raise the height of the support, press and
hold the top of the control.
To lower the height of the support, press and
hold the bottom of the control.
Let go of the control when the lower seatback
reaches the desired level of support.
Your vehicle has a memory function which allows
seat settings to be saved and recalled. See
Memory Seat, Mirrors, and Pedals on page 12for
more information.
Keep in mind that as your seating position
changes, as it may during long trips, so should the
position of your lumbar support. Adjust the seat
as needed.
10
Page 16 of 608
Head Restraints
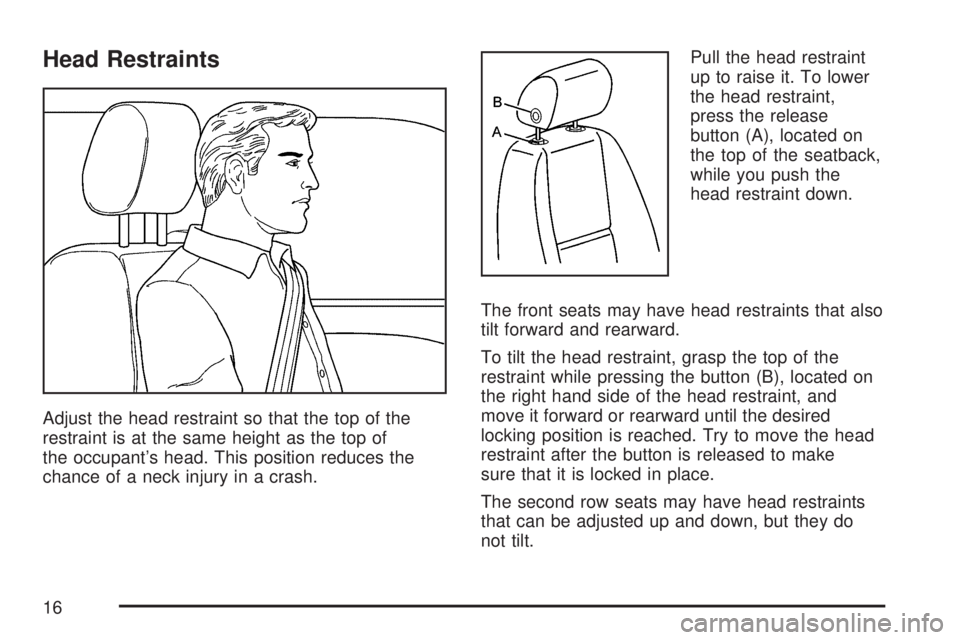
Adjust the head restraint so that the top of the
restraint is at the same height as the top of
the occupant’s head. This position reduces the
chance of a neck injury in a crash.Pull the head restraint
up to raise it. To lower
the head restraint,
press the release
button (A), located on
the top of the seatback,
while you push the
head restraint down.
The front seats may have head restraints that also
tilt forward and rearward.
To tilt the head restraint, grasp the top of the
restraint while pressing the button (B), located on
the right hand side of the head restraint, and
move it forward or rearward until the desired
locking position is reached. Try to move the head
restraint after the button is released to make
sure that it is locked in place.
The second row seats may have head restraints
that can be adjusted up and down, but they do
not tilt.
16
Page 44 of 608

3. Pick up the latch plate and pull the belt across
you. Do not let it get twisted.
The shoulder belt may lock if you pull the belt
across you very quickly. If this happens, let
the belt go back slightly to unlock it. Then pull
the belt across you more slowly.
4. Push the latch plate into the buckle until it
clicks.
Pull up on the latch plate to make sure it
is secure. If the belt is not long enough, see
Safety Belt Extender on page 60.Make sure the release button on the buckle is
positioned so you would be able to unbuckle
the safety belt quickly if you ever had to.
5. Move the shoulder belt height adjuster to the
height that is right for you. Improper shoulder
belt height adjustment could reduce the
effectiveness of the safety belt in a crash. See
Shoulder Belt Height Adjustment on page 50.
6. To make the lap part tight, pull up on the
shoulder belt.
44
Page 50 of 608
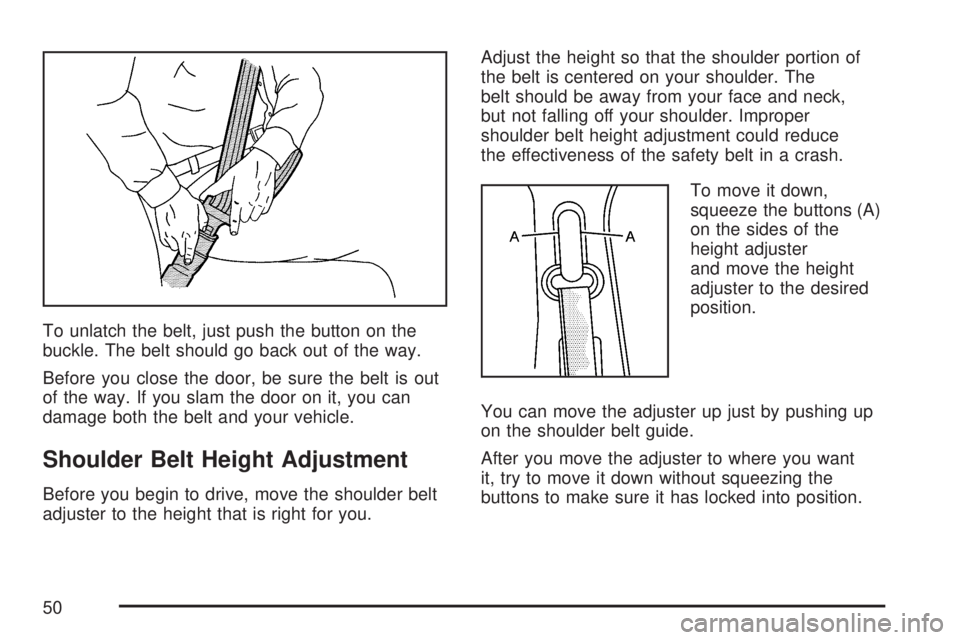
To unlatch the belt, just push the button on the
buckle. The belt should go back out of the way.
Before you close the door, be sure the belt is out
of the way. If you slam the door on it, you can
damage both the belt and your vehicle.
Shoulder Belt Height Adjustment
Before you begin to drive, move the shoulder belt
adjuster to the height that is right for you.Adjust the height so that the shoulder portion of
the belt is centered on your shoulder. The
belt should be away from your face and neck,
but not falling off your shoulder. Improper
shoulder belt height adjustment could reduce
the effectiveness of the safety belt in a crash.
To move it down,
squeeze the buttons (A)
on the sides of the
height adjuster
and move the height
adjuster to the desired
position.
You can move the adjuster up just by pushing up
on the shoulder belt guide.
After you move the adjuster to where you want
it, try to move it down without squeezing the
buttons to make sure it has locked into position.
50
Page 67 of 608

Q:What are the different types of add-on
child restraints?
A:Add-on child restraints, which are purchased by
the vehicle’s owner, are available in four basic
types. Selection of a particular restraint should
take into consideration not only the child’s
weight, height, and age but also whether or not
the restraint will be compatible with the motor
vehicle in which it will be used.
For most basic types of child restraints, there
are many different models available. When
purchasing a child restraint, be sure it is
designed to be used in a motor vehicle. If it is,
the restraint will have a label saying that it
meets federal motor vehicle safety standards.
The restraint manufacturer’s instructions that
come with the restraint, state the weight and
height limitations for a particular child restraint.
In addition, there are many kinds of restraints
available for children with special needs.
{CAUTION:
Newborn infants need complete support,
including support for the head and neck.
This is necessary because a newborn
infant’s neck is weak and its head weighs
so much compared with the rest of its
body. In a crash, an infant in a rear-facing
seat settles into the restraint, so the crash
forces can be distributed across the
strongest part of an infant’s body, the
back and shoulders. Infants always
should be secured in appropriate infant
restraints.
67
Page 107 of 608

Adding Equipment to Your
Airbag-Equipped Vehicle
Q:Is there anything I might add to the front
or sides of the vehicle that could keep the
airbags from working properly?
A:Yes. If you add things that change your
vehicle’s frame, bumper system, height,
front end or side sheet metal, they may keep
the airbag system from working properly.
Also, the airbag system may not work properly
if you relocate any of the airbag sensors. If
you have any questions about this, you should
contact Customer Assistance before you
modify your vehicle. The phone numbers and
addresses for Customer Assistance are in
Step Two of the Customer Satisfaction
Procedure in this manual. SeeCustomer
Satisfaction Procedure on page 570.
Q:Because I have a disability, I have to get
my vehicle modi�ed. How can I �nd out
whether this will affect my airbag system?
A:Changing or moving any parts of the
front seats, safety belts, the airbag sensing
and diagnostic module, rollover sensor
module, instrument panel, steering wheel,
ceiling headliner, ceiling and pillar garnish trim,
roof-mounted rollover airbag modules, or
airbag wiring can affect the operation of the
airbag system. If you have questions, call
Customer Assistance. The phone numbers
and addresses for Customer Assistance are
in Step Two of the Customer Satisfaction
Procedure in this manual. SeeCustomer
Satisfaction Procedure on page 570.
107
Page 397 of 608

If you put things inside your vehicle – like
suitcases, tools, packages, or anything else – they
go as fast as the vehicle goes. If you have to
stop or turn quickly, or if there is a crash, they’ll
keep going.
{CAUTION:
Things you put inside your vehicle can
strike and injure people in a sudden stop
or turn, or in a crash.
Put things in the cargo area of your
vehicle. Try to spread the weight
evenly.
Never stack heavier things, like
suitcases, inside the vehicle so that
some of them are above the tops of
the seats.
Do not leave an unsecured child
restraint in your vehicle.
When you carry something inside the
vehicle, secure it whenever you can.
Do not leave a seat folded down
unless you need to.There’s also important loading information for
off-road driving in this manual. See “Loading Your
Vehicle for Off-Road Driving” underOff-Road
Driving on page 359.
Automatic Level Control
The automatic level control rear suspension
comes as a part of the Autoride®suspension. See
Autoride®on page 399.
This type of level control is fully automatic and will
provide a better leveled riding position as well
as better handling under a variety of passenger
and loading conditions. An air compressor
connected to the rear shocks will raise or lower
the rear of the vehicle to maintain proper vehicle
height. The system is activated when the
ignition key is turned to RUN and will automatically
adjust vehicle height thereafter. The system
may exhaust (lower vehicle height) for up to
10 minutes after the ignition key has been turned
to OFF. You may hear the air compressor
operating when the height is being adjusted.
If a weight-distributing hitch is being used, it is
recommended to allow the shocks to in�ate,
thereby leveling the vehicle prior to adjusting the
height.
397
Page 399 of 608

Level Control
Automatic Level Control
The automatic level control rear suspension is
available on light-duty vehicles and comes
as a part of the Autoride
®suspension, if equipped.
This type of level control is fully automatic and
will provide a better leveled riding position as well
as better handling under a variety of passenger
and loading conditions. An air compressor
connected to the rear shocks will raise or lower
the rear of the vehicle to maintain proper vehicle
height. The system is activated when the
ignition key is turned to RUN and will automatically
adjust vehicle height thereafter. The system
may exhaust (lower vehicle height) for up to
ten minutes after the ignition key has been turned
off. You may hear the air compressor operating
when the height is being adjusted.
If a weight-distributing hitch is being used, it is
recommended to allow the shocks to in�ate,
thereby leveling the vehicle prior to adjusting the
hitch.
Autoride®
The Autoride®feature provides improved vehicle
ride and handling under a variety of passenger and
loading conditions.
The system is fully automatic and uses a computer
controller to continuously monitor vehicle speed,
wheel to body position, lift/dive and steering
position of the vehicle. The controller then sends
signals to each shock absorber to independently
adjust the damping level to provide the optimum
vehicle ride.
Autoride
®also interacts with the tow/haul mode
that, when activated, will provide additional control
of the shock absorbers. This additional control
results in better ride and handling characteristics
when the vehicle is loaded or towing a trailer. See
“Tow/Haul Mode” underTowing a Trailer on
page 400for more information.
399
Page 462 of 608
Properly torqued wheel nuts are necessary to help
prevent brake pulsation. When tires are rotated,
inspect brake pads for wear and evenly tighten
wheel nuts in the proper sequence to GM torque
speci�cations.
Brake linings should always be replaced as
complete axle sets.
Brake Pedal Travel
See your dealer if the brake pedal does not return
to normal height, or if there is a rapid increase
in pedal travel. This could be a sign of brake
trouble.
Brake Adjustment
Every time you make a brake stop, your disc
brakes adjust for wear.
Replacing Brake System Parts
The braking system on a vehicle is complex. Its
many parts have to be of top quality and work well
together if the vehicle is to have really good
braking. Your vehicle was designed and tested with
top-quality GM brake parts. When you replace parts
of your braking system — for example, when your
brake linings wear down and you need new ones
put in — be sure you get new approved GM
replacement parts. If you do not, your brakes may
no longer work properly. For example, if someone
puts in brake linings that are wrong for your vehicle,
the balance between your front and rear brakes can
change — for the worse. The braking performance
you have come to expect can change in many other
ways if someone puts in the wrong replacement
brake parts.
462