display GMC YUKON 2008 Owner's Guide
[x] Cancel search | Manufacturer: GMC, Model Year: 2008, Model line: YUKON, Model: GMC YUKON 2008Pages: 546, PDF Size: 6.4 MB
Page 205 of 546
Sensors
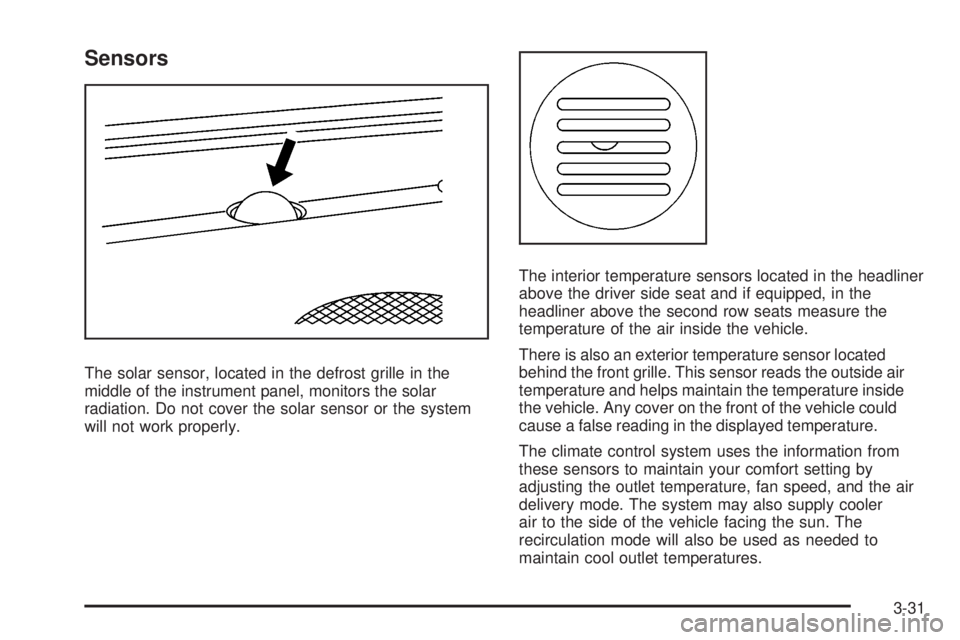
The solar sensor, located in the defrost grille in the
middle of the instrument panel, monitors the solar
radiation. Do not cover the solar sensor or the system
will not work properly.The interior temperature sensors located in the headliner
above the driver side seat and if equipped, in the
headliner above the second row seats measure the
temperature of the air inside the vehicle.
There is also an exterior temperature sensor located
behind the front grille. This sensor reads the outside air
temperature and helps maintain the temperature inside
the vehicle. Any cover on the front of the vehicle could
cause a false reading in the displayed temperature.
The climate control system uses the information from
these sensors to maintain your comfort setting by
adjusting the outlet temperature, fan speed, and the air
delivery mode. The system may also supply cooler
air to the side of the vehicle facing the sun. The
recirculation mode will also be used as needed to
maintain cool outlet temperatures.
3-31
Page 210 of 546
Automatic Operation, If Equipped.
AUTO:Press the mode button until this setting is
selected to control the inside temperature, the air
delivery, and the fan speed. AUTO will illuminate in the
display when automatic operation is active.
+/−(Increase/Decrease Temperature):Press the + or
−buttons to increase or decrease the cabin temperature.
The rear control temperature display will show the
temperature setting decreasing or increasing.
The display only indicates climate control functions
when the system is in rear independent mode.
Manual Operation
DC(Fan):Use the fan buttons on the rear seat audio
control panel to manually adjust the fan speed. To
increase or decrease the air�ow, press the
DorC
button. Pressing the fan up button when the system is
off will turn the system on. The air delivery mode
will remain under automatic control. To turn the rear
system off, keep pressing the
Cbutton.
+/−(Increase/Decrease Temperature):These buttons
select the temperature of the air �owing into the
passenger area. Press the + button for warmer air and
press the−button for cooler air.
N(Mode):Press the mode button to manually change
the direction of the air�ow in the vehicle. Repeatedly
press the button until the desired mode appears on the
display. Multiple presses will cycle through the
delivery selections.
3-36
Page 213 of 546
Speedometer and Odometer
Your speedometer lets you see your speed in both
miles per hour (mph) and kilometers per hour (km/h).
Your odometer shows how far your vehicle has
been driven, in either miles (used in the United States)
or kilometers (used in Canada).
Trip Odometer
The trip odometer can tell you how far your vehicle has
been driven since you last set the trip odometer to zero.
Press the reset button, located on the instrument panel
cluster next to the trip odometer display, to toggle
between the trip odometer and the regular odometer.
Holding the reset button for approximately one second
while the trip odometer is displayed will reset it.
To display the odometer reading with the ignition off,
press the reset button.
Tachometer
Your tachometer displays the engine speed in
revolutions per minute (rpm).
Safety Belt Reminders
Safety Belt Reminder Light
When the engine is started, a chime will come on for
several seconds to remind people to fasten their safety
belts, unless the driver’s safety belt is already buckled.
The safety belt light will
also come on and stay on
for several seconds, then it
will �ash for several more.
This chime and light is repeated if the driver remains
unbuckled and the vehicle is in motion. If the driver’s belt
is already buckled, neither the chime nor the light will
come on.
3-39
Page 218 of 546
Voltmeter Gage
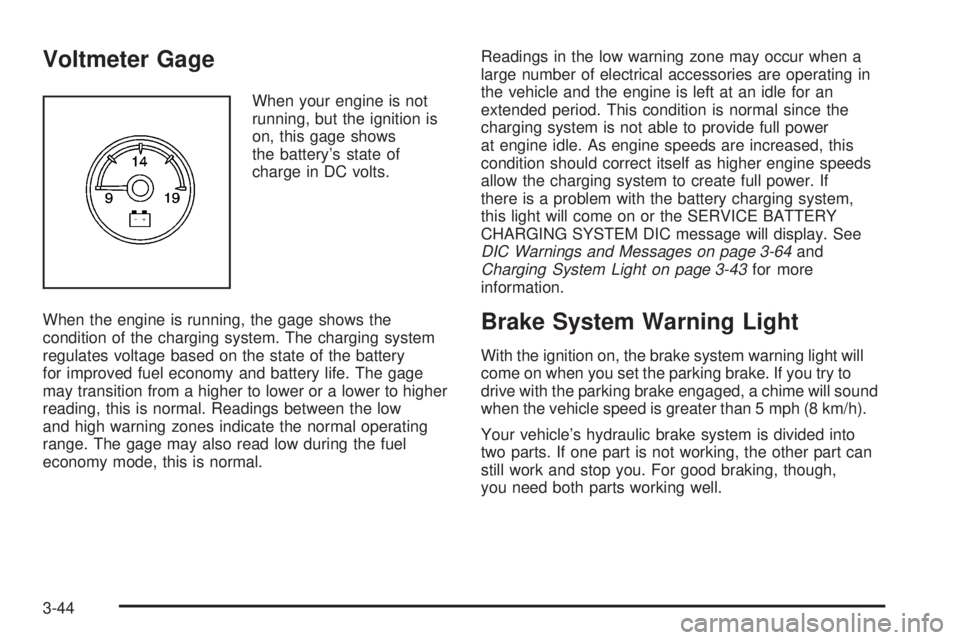
When your engine is not
running, but the ignition is
on, this gage shows
the battery’s state of
charge in DC volts.
When the engine is running, the gage shows the
condition of the charging system. The charging system
regulates voltage based on the state of the battery
for improved fuel economy and battery life. The gage
may transition from a higher to lower or a lower to higher
reading, this is normal. Readings between the low
and high warning zones indicate the normal operating
range. The gage may also read low during the fuel
economy mode, this is normal.Readings in the low warning zone may occur when a
large number of electrical accessories are operating in
the vehicle and the engine is left at an idle for an
extended period. This condition is normal since the
charging system is not able to provide full power
at engine idle. As engine speeds are increased, this
condition should correct itself as higher engine speeds
allow the charging system to create full power. If
there is a problem with the battery charging system,
this light will come on or the SERVICE BATTERY
CHARGING SYSTEM DIC message will display. See
DIC Warnings and Messages on page 3-64and
Charging System Light on page 3-43for more
information.
Brake System Warning Light
With the ignition on, the brake system warning light will
come on when you set the parking brake. If you try to
drive with the parking brake engaged, a chime will sound
when the vehicle speed is greater than 5 mph (8 km/h).
Your vehicle’s hydraulic brake system is divided into
two parts. If one part is not working, the other part can
still work and stop you. For good braking, though,
you need both parts working well.
3-44
Page 229 of 546
Low Fuel Warning Light
This light, under the fuel
gage, will come on brie�y
when you are starting
the engine.
This light and a chime will come on when the fuel tank is
low on fuel. There will also be a “FUEL LEVEL LOW”
message on the Driver Information Center, seeDIC
Warnings and Messages on page 3-64for more
information. When you add fuel this light and message
should go off. If it does not, have your vehicle serviced.
Driver Information Center (DIC)
Your vehicle has a Driver Information Center (DIC).
The DIC displays information about your vehicle. It also
displays warning messages if a system problem is
detected.
All messages will appear in the DIC display located
below the tachometer in the instrument panel cluster.
The DIC comes on when the ignition is on. After a short
delay, the DIC will display the information that was
last displayed before the engine was turned off.
If your vehicle has DIC buttons, see “DIC Operation and
Displays (With DIC Buttons)” later in this section and
DIC Vehicle Customization (With DIC Buttons) on
page 3-72for the displays available.
If your vehicle does not have DIC buttons, see “DIC
Operation and Displays (Without DIC Buttons)” later in
this section for the displays available.
3-55
Page 230 of 546
DIC Operation and Displays
(With DIC Buttons)
If your vehicle has DIC buttons, the information below
explains the operation of this system.
The DIC has different displays which can be accessed
by pressing the DIC buttons located on the instrument
panel, next to the steering wheel.
The DIC displays trip, fuel, and vehicle system
information, and warning messages if a system problem
is detected.
The DIC also allows some features to be customized.
SeeDIC Vehicle Customization (With DIC Buttons)
on page 3-72for more information.
If your vehicle has DIC buttons, you can also use the
trip odometer reset stem to view some of the DIC
displays. See “DIC Operation and Displays (Without DIC
Buttons)” later in this section.
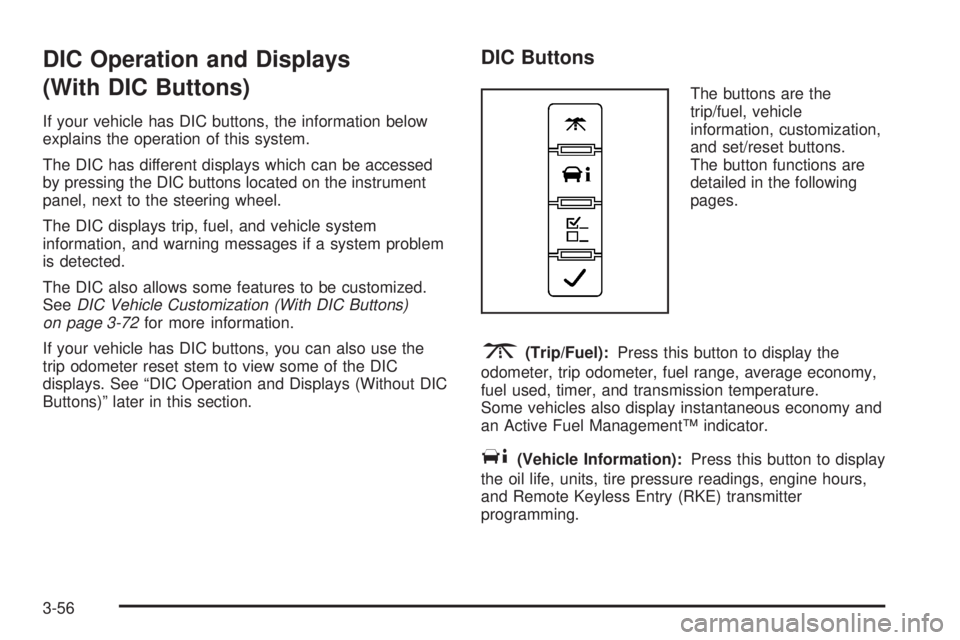
DIC Buttons
The buttons are the
trip/fuel, vehicle
information, customization,
and set/reset buttons.
The button functions are
detailed in the following
pages.
3(Trip/Fuel):Press this button to display the
odometer, trip odometer, fuel range, average economy,
fuel used, timer, and transmission temperature.
Some vehicles also display instantaneous economy and
an Active Fuel Management™ indicator.
T(Vehicle Information):Press this button to display
the oil life, units, tire pressure readings, engine hours,
and Remote Keyless Entry (RKE) transmitter
programming.
3-56
Page 231 of 546
U(Customization):Press this button to customize the
feature settings on your vehicle. SeeDIC Vehicle
Customization (With DIC Buttons) on page 3-72for more
information.
V(Set/Reset):Press this button to set or reset certain
functions and to turn off or acknowledge messages
on the DIC.
Trip/Fuel Menu Items
3
(Trip/Fuel):Press this button to scroll through
the following menu items:
Odometer
Press the trip/fuel button until ODOMETER displays.
This display shows the distance the vehicle has
been driven in either miles (mi) or kilometers (km).
Pressing the trip odometer reset stem will also display
the odometer.
To switch between English and metric measurements,
see “Units” later in this section.
Trip Odometer
Press the trip/fuel button until TRIP displays. This
display shows the current distance traveled in either
miles (mi) or kilometers (km) since the last reset for the
trip odometer. Pressing the trip odometer reset stem
will also display the trip odometer.
The trip odometer can be reset to zero by pressing the
set/reset button while the trip odometer is displayed.
You can also reset the trip odometer while it is displayed
by pressing and holding the trip odometer reset stem.
The trip odometer has a feature called the retro-active
reset. This can be used to set the trip odometer to
the number of miles (kilometers) driven since the ignition
was last turned on. This can be used if the trip
odometer is not reset at the beginning of the trip.
To use the retro-active reset feature, press and hold the
set/reset button for at least four seconds. The trip
odometer will display the number of miles (mi) or
kilometers (km) driven since the ignition was last turned
on and the vehicle was moving. Once the vehicle
begins moving, the trip odometer will accumulate
mileage. For example, if the vehicle was driven 5 miles
(8 km) before it is started again, and then the
retro-active reset feature is activated, the display will
show 5 miles (8 km). As the vehicle begins moving, the
display will then increase to 5.1 miles (8.2 km),
5.2 miles (8.4 km), etc.
3-57
Page 232 of 546
Fuel Range
Press the trip/fuel button until FUEL RANGE displays.
This display shows the approximate number of
remaining miles (mi) or kilometers (km) the vehicle can
be driven without refueling. The display will show
LOW if the fuel level is low.
The fuel range estimate is based on an average of the
vehicle’s fuel economy over recent driving history
and the amount of fuel remaining in the fuel tank. This
estimate will change if driving conditions change.
For example, if driving in traffic and making frequent
stops, this display may read one number, but if
the vehicle is driven on a freeway, the number may
change even though the same amount of fuel is in the
fuel tank. This is because different driving conditions
produce different fuel economies. Generally, freeway
driving produces better fuel economy than city driving.
Fuel range cannot be reset.
Average Economy
Press the trip/fuel button until AVG ECONOMY displays.
This display shows the approximate average miles
per gallon (mpg) or liters per 100 kilometers (L/100 km).
This number is calculated based on the number of
mpg (L/100 km) recorded since the last time this menu
item was reset. To reset AVG ECONOMY, press
and hold the set/reset button.
Fuel Used
Press the trip/fuel button until FUEL USED displays.
This display shows the number of gallons (gal) or
liters (L) of fuel used since the last reset of this menu
item. To reset the fuel used information, press and hold
the set/reset button while FUEL USED is displayed.
Timer
Press the trip/fuel button until TIMER displays. This
display can be used as a timer.
To start the timer, press the set/reset button while
TIMER is displayed. The display will show the amount
of time that has passed since the timer was last
reset, not including time the ignition is off. Time will
continue to be counted as long as the ignition is
on, even if another display is being shown on the DIC.
The timer will record up to 99 hours, 59 minutes
and 59 seconds (99:59:59) after which the display will
return to zero.
To stop the timer, press the set/reset button brie�y while
TIMER is displayed.
To reset the timer to zero, press and hold the set/reset
button while TIMER is displayed.
3-58
Page 233 of 546
Transmission Temperature
Press the trip/fuel button until TRANS TEMP displays.
This display shows the temperature of the automatic
transmission �uid in either degrees Fahrenheit (°F) or
degrees Celsius (°C).
Instantaneous Economy and Active Fuel
Management™ Indicator
If your vehicle has this display, press the trip/fuel button
until INST ECONOMY V8 MODE displays. This
display shows the current fuel economy at a particular
moment and will change frequently as driving conditions
change. This display shows the instantaneous fuel
economy in miles per gallon (mpg) or liters per
100 kilometers (L/100 km). Unlike average economy,
this screen cannot be reset.
An Active Fuel Management™ indicator will display on
the right side of the DIC, while INST ECONOMY
displays on the left side. Active Fuel Management™
allows the engine to operate on either four or eight
cylinders, depending on your driving demands. When
Active Fuel Management™ is active, V4 MODE will
display on the DIC. When Active Fuel Management™ is
inactive, V8 MODE will display. SeeActive Fuel
Management™ on page 2-31for more information.
Blank Display
This display shows no information.
Vehicle Information Menu Items
T
(Vehicle Information):Press this button to scroll
through the following menu items:
Oil Life
Press the vehicle information button until OIL LIFE
REMAINING displays. This display shows an estimate
of the oil’s remaining useful life. If you see 99% OIL LIFE
REMAINING on the display, that means 99% of the
current oil life remains. The engine oil life system
will alert you to change the oil on a schedule consistent
with your driving conditions.
When the remaining oil life is low, the CHANGE
ENGINE OIL SOON message will appear on the display.
See “CHANGE ENGINE OIL SOON” underDIC
Warnings and Messages on page 3-64. You should
change the oil as soon as you can. SeeEngine Oil on
page 5-15. In addition to the engine oil life system
monitoring the oil life, additional maintenance is
recommended in the Maintenance Schedule in this
manual. SeeScheduled Maintenance on page 6-4for
more information.
3-59
Page 234 of 546
Remember, you must reset the OIL LIFE display
yourself after each oil change. It will not reset itself.
Also, be careful not to reset the OIL LIFE display
accidentally at any time other than when the oil has just
been changed. It cannot be reset accurately until the
next oil change. To reset the engine oil life system, see
Engine Oil Life System on page 5-18.
Units
Press the vehicle information button until UNITS
displays. This display allows you to select between
English or Metric units of measurement. Once in this
display, press the set/reset button to select between
ENGLISH or METRIC units. All of the vehicle information
will then be displayed in the unit of measurement
selected.
Tire Pressure
The pressure for each tire can be viewed in the DIC.
The tire pressure will be shown in either pounds
per square inch (psi) or kilopascals (kPa). Press the
vehicle information button until the DIC displays FRONT
TIRES PSI (kPa) LEFT ## RIGHT ##. Press the
vehicle information button again until the DIC displays
REAR TIRES PSI (kPa) LEFT ## RIGHT ##.If a low or high tire pressure condition is detected by the
system while driving, a message advising you to
check the pressure in a speci�c tire will appear in the
display. SeeInflation - Tire Pressure on page 5-72and
DIC Warnings and Messages on page 3-64for more
information.
If the tire pressure display shows dashes instead of a
value, there may be a problem with your vehicle. If this
consistently occurs, see your dealer/retailer for service.
Engine Hours
Press the vehicle information button until ENGINE
HOURS displays. This display shows the total number
of hours the engine has run.
Relearn Remote Key
This display allows you to match Remote Keyless
Entry (RKE) transmitters to your vehicle. To match an
RKE transmitter to your vehicle:
1. Press the vehicle information button until PRESS
V
TO RELEARN REMOTE KEY displays.
2. Press the set/reset button until REMOTE KEY
LEARNING ACTIVE is displayed.
3-60