ECO mode GMC YUKON 2009 Get To Know Guide
[x] Cancel search | Manufacturer: GMC, Model Year: 2009, Model line: YUKON, Model: GMC YUKON 2009Pages: 24, PDF Size: 1.31 MB
Page 10 of 24
Getting to Know Your Yukon/Yukon Denali10
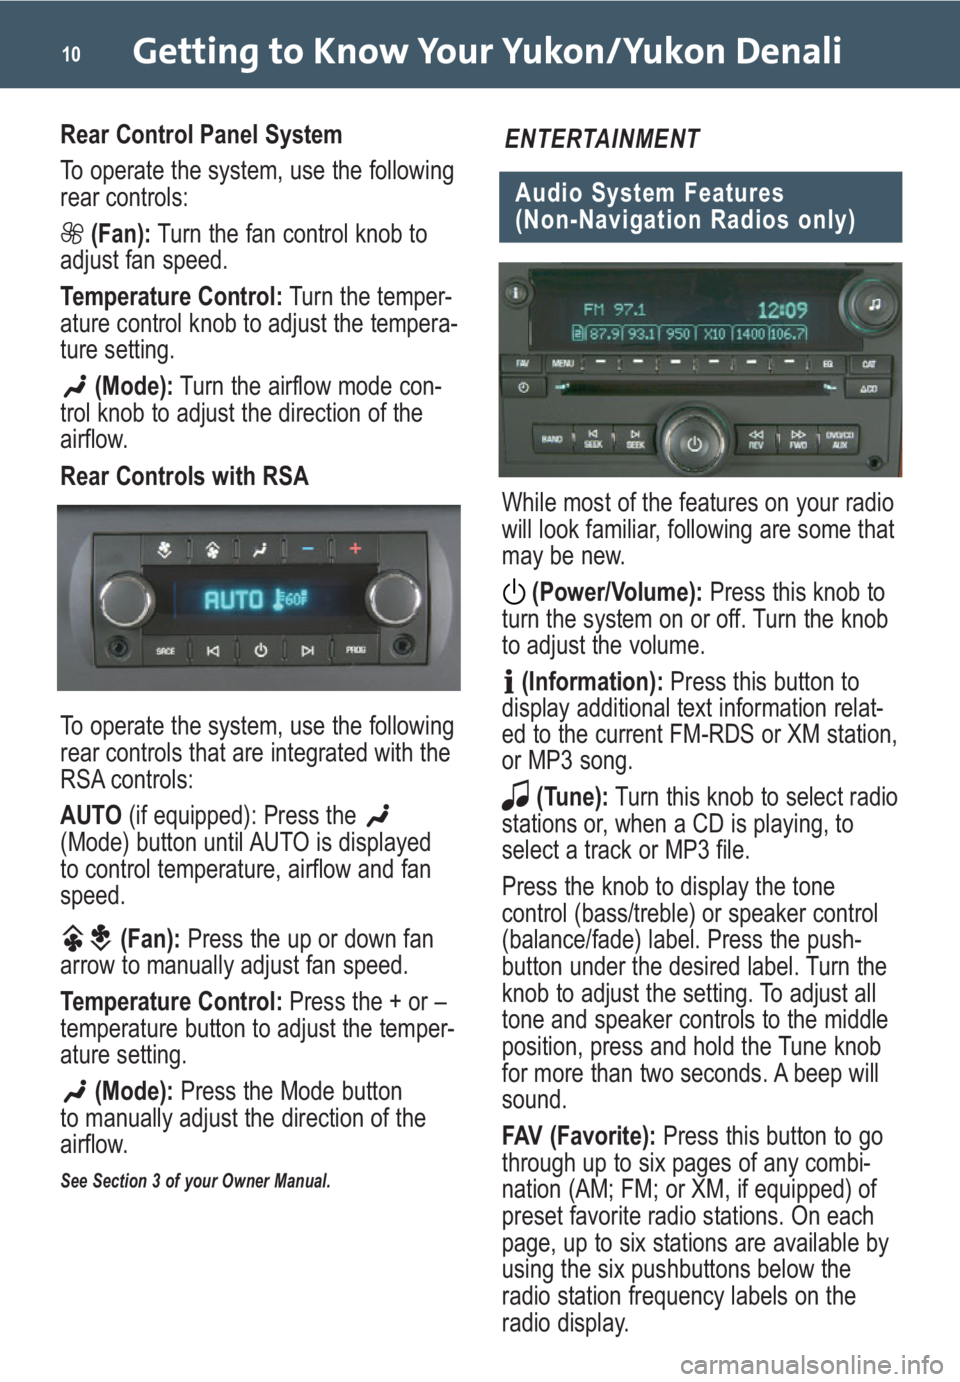
Rear Control Panel System
To operate the system, use the following
rear controls:
(Fan):Turn the fan control knob to
adjust fan speed.
Temperature Control:Turn the temper-
ature control knob to adjust the tempera-
ture setting.
(Mode):Turn the airflow mode con-
trol knob to adjust the direction of the
airflow.
Rear Controls with RSA
To operate the system, use the following
rear controls that are integrated with the
RSA controls:
AUTO (if equipped): Press the
(Mode) button until AUTO is displayed
to control temperature, airflow and fan
speed.
(Fan):Press the up or down fan
arrow to manually adjust fan speed.
Temperature Control:Press the + or –
temperature button to adjust the temper-
ature setting.
(Mode):Press the Mode button
to manually adjust the direction of the
airflow.
See Section 3 of your Owner Manual.
While most of the features on your radio
will look familiar, following are some that
may be new.
(Power/Volume):Press this knob to
turn the system on or off. Turn the knob
to adjust the volume.
(Information):Press this button to
display additional text information relat-
ed to the current FM-RDS or XM station,
or MP3 song.
(Tune):Turn this knob to select radio
stations or, when a CD is playing, to
select a track or MP3 file.
Press the knob to display the tone
control (bass/treble) or speaker control
(balance/fade) label. Press the push-
button under the desired label. Turn the
knob to adjust the setting. To adjust all
tone and speaker controls to the middle
position, press and hold the Tune knob
for more than two seconds. A beep will
sound.
FAV (Favorite):Press this button to go
through up to six pages of any combi-
nation (AM; FM; or XM, if equipped) of
preset favorite radio stations. On each
page, up to six stations are available by
using the six pushbuttons below the
radio station frequency labels on the
radio display.
Audio System Features
(Non-Navigation Radios only)
ENTERTAINMENT
Page 11 of 24
11
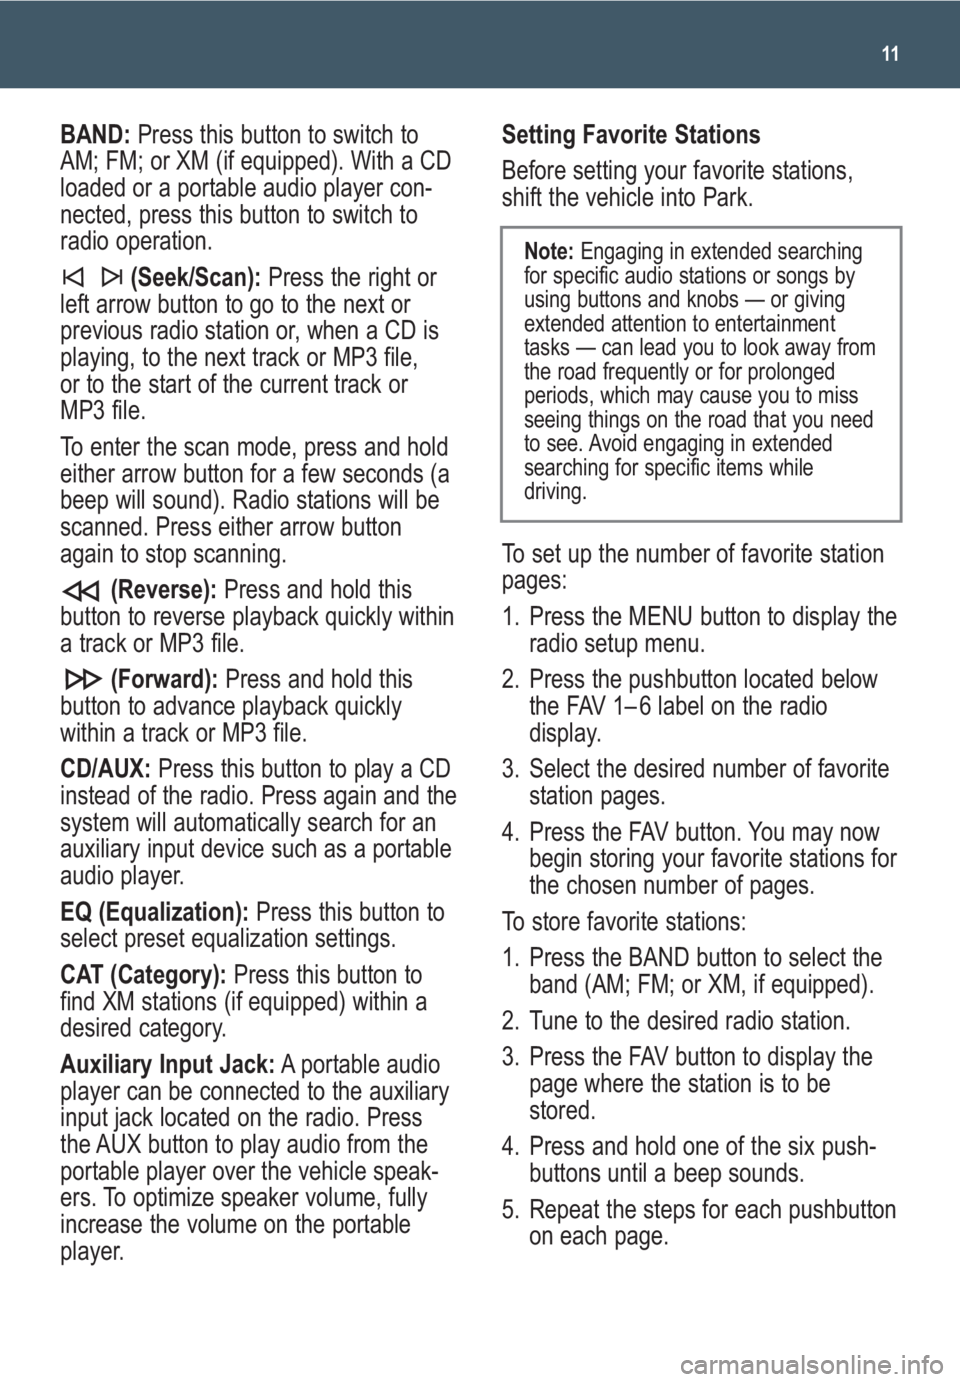
BAND:Press this button to switch to
AM; FM; or XM (if equipped). With a CD
loaded or a portable audio player con-
nected, press this button to switch to
radio operation.
(Seek/Scan): Press the right or
left arrow button to go to the next or
previous radio station or, when a CD is
playing, to the next track or MP3 file,
or to the start of the current track or
MP3 file.
To enter the scan mode, press and hold
either arrow button for a few seconds (a
beep will sound). Radio stations will be
scanned. Press either arrow button
again to stop scanning.
(Reverse):Press and hold this
button to reverse playback quickly within
a track or MP3 file.
(Forward):Press and hold this
button to advance playback quickly
within a track or MP3 file.
CD/AUX:Press this button to play a CD
instead of the radio. Press again and the
system will automatically search for an
auxiliary input device such as a portable
audio player.
EQ (Equalization):Press this button to
select preset equalization settings.
CAT (Category):Press this button to
find XM stations (if equipped) within a
desired category.
Auxiliary Input Jack:A portable audio
player can be connected to the auxiliary
input jack located on the radio. Press
the AUX button to play audio from the
portable player over the vehicle speak-
ers. To optimize speaker volume, fully
increase the volume on the portable
player.Setting Favorite Stations
Before setting your favorite stations,
shift the vehicle into Park.
To set up the number of favorite station
pages:
1. Press the MENU button to display the
radio setup menu.
2. Press the pushbutton located below
the FAV 1– 6 label on the radio
display.
3. Select the desired number of favorite
station pages.
4. Press the FAV button. You may now
begin storing your favorite stations for
the chosen number of pages.
To store favorite stations:
1. Press the BAND button to select the
band (AM; FM; or XM, if equipped).
2. Tune to the desired radio station.
3. Press the FAV button to display the
page where the station is to be
stored.
4. Press and hold one of the six push-
buttons until a beep sounds.
5. Repeat the steps for each pushbutton
on each page.
Note:Engaging in extended searching
for specific audio stations or songs by
using buttons and knobs — or giving
extended attention to entertainment
tasks — can lead you to look away from
the road frequently or for prolonged
periods, which may cause you to miss
seeing things on the road that you need
to see. Avoid engaging in extended
searching for specific items while
driving.
Page 16 of 24
Getting to Know Your Yukon/Yukon Denali16
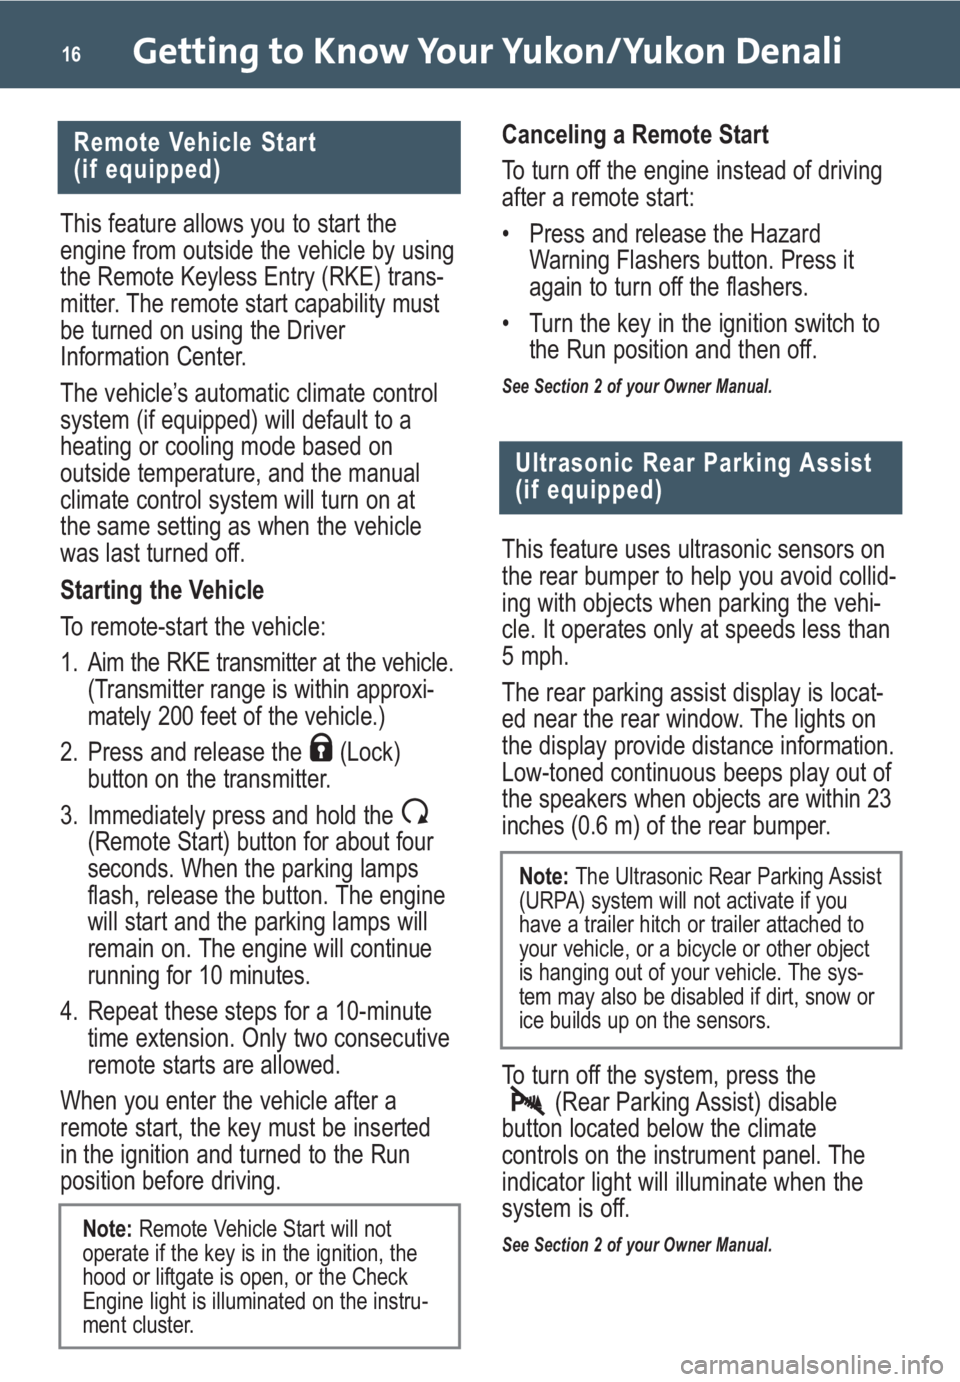
This feature allows you to start the
engine from outside the vehicle by using
the Remote Keyless Entry (RKE) trans-
mitter. The remote start capability must
be turned on using the Driver
Information Center.
The vehicle’s automatic climate control
system (if equipped) will default to a
heating or cooling mode based on
outside temperature, and the manual
climate control system will turn on at
the same setting as when the vehicle
was last turned off.
Starting the Vehicle
To remote-start the vehicle:
1.
Aim the RKE transmitter at the vehicle.
(Transmitter range is within approxi-
mately 200 feet of the vehicle.)
2. Press and release the (Lock)
button on the transmitter.
3. Immediately press and hold the
(Remote Start) button for about four
seconds.When the parking lamps
flash, release the button. The engine
will start and the parking lamps will
remain on.
The engine will continue
running for 10 minutes.
4. Repeat these steps for a 10-minute
time extension. Only two consecutive
remote starts are allowed.
When you enter the vehicle after a
remote start, the key must be inserted
in the ignition and turned to the Run
position before driving.
Remote Vehicle Start
(if equipped)
Ultrasonic Rear Parking Assist
(if equipped)
This feature uses ultrasonic sensors on
the rear bumper to help you avoid collid-
ing with objects when parking the vehi-
cle. It operates only at speeds less than
5 mph.
The rear parking assist display is locat-
ed near the rear window. The lights on
the display provide distance information.
Low-toned continuous beeps play out of
the speakers when objects are within 23
inches (0.6 m) of the rear bumper.
To turn off the system, press the
(Rear Parking Assist) disable
button located below the climate
controls on the instrument panel. The
indicator light will illuminate when the
system is off.
See Section 2 of your Owner Manual.
Canceling a Remote Start
To turn off the engine instead of driving
after a remote start:
• Press and release the Hazard
Warning Flashers button. Press it
again to turn off the flashers.
• Turn the key in the ignition switch to
the Run position and then off.
See Section 2 of your Owner Manual.
Note: Remote Vehicle Start will not
operate if the key is in the ignition, the
hood or liftgate is open, or the Check
Engine light is illuminated on the instru-
ment cluster.
Note: The Ultrasonic Rear Parking Assist
(URPA) system will not activate if you
have a trailer hitch or trailer attached to
your vehicle, or a bicycle or other object
is hanging out of your vehicle. The sys-
tem may also be disabled if dirt, snow or
ice builds up on the sensors.
Page 21 of 24
21
Sunroof (if equipped)
2. Pull down the seat until it latches to
the floor.
3. Lift up the seatback until it locks in
place. Pull on the seatback to make
sure it is locked.
To remove the seat:
• With the seat folded down, pull rear-
ward on the handle located in the
center of the seat. The latches will
become disengaged, allowing the
seat to be easily pulled rearward.
To install the seat:
1. Align the rollers on the bottom of the
seat track with the latches on the
floor.
2. Push the seat forward until it latches.
Make sure the seat is locked in place.
See Section 1 of your Owner Manual.
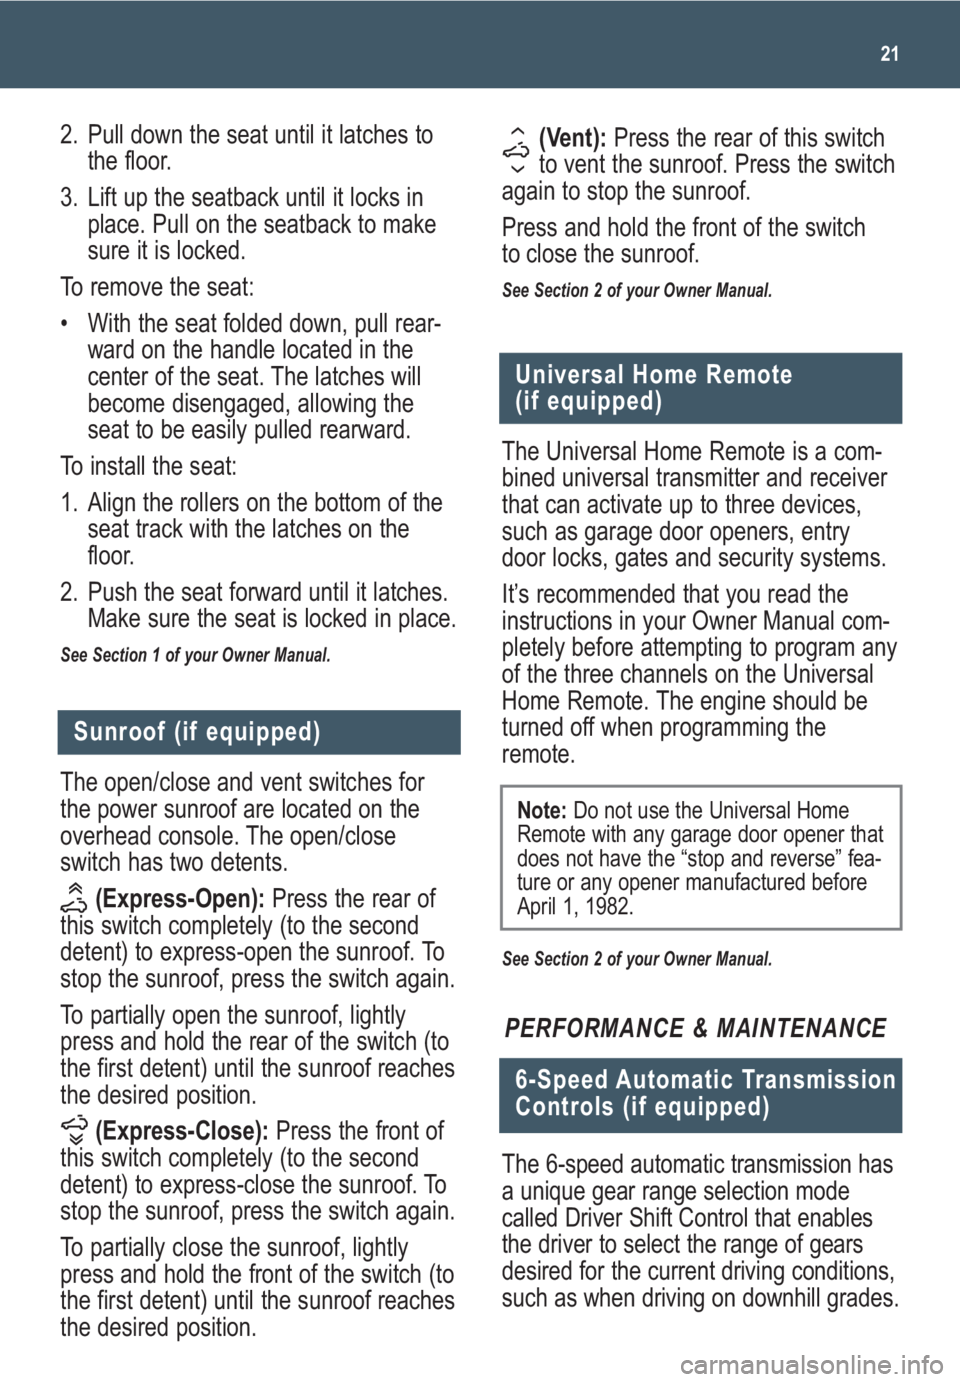
The open/close and vent switches for
the power sunroof are located on the
overhead console. The open/close
switch has two detents.
(Express-Open):Press the rear of
this switch completely (to the second
detent) to express-open the sunroof. To
stop the sunroof, press the switch again.
To partially open the sunroof, lightly
press and hold the rear of the switch (to
the first detent) until the sunroof reaches
the desired position.
(Express-Close):Press the front of
this switch completely (to the second
detent) to express-close the sunroof. To
stop the sunroof, press the switch again.
To partially close the sunroof, lightly
press and hold the front of the switch (to
the first detent) until the sunroof reaches
the desired position.
(Vent): Press the rear of this switch
to vent the sunroof. Press the switch
again to stop the sunroof.
Press and hold the front of the switch
to close the sunroof.
See Section 2 of your Owner Manual.
The Universal Home Remote is a com-
bined universal transmitter and receiver
that can activate up to three devices,
such as garage door openers, entry
door locks, gates and security systems.
It’s recommended that you read the
instructions in your Owner Manual com-
pletely before attempting to program any
of the three channels on the Universal
Home Remote. The engine should be
turned off when programming the
remote.
See Section 2 of your Owner Manual.
Universal Home Remote
(if equipped)
Note: Do not use the Universal Home
Remote with any garage door opener that
does not have the “stop and reverse” fea-
ture or any opener manufactured before
April 1, 1982.
PERFORMANCE & MAINTENANCE
6-Speed Automatic Transmission
Controls (if equipped)
The 6-speed automatic transmission has
a unique gear range selection mode
called Driver Shift Control that enables
the driver to select the range of gears
desired for the current driving conditions,
such as when driving on downhill grades.
Page 23 of 24
23
The Oil Life System calculates engine oil
life based on vehicle use and displays
CHANGE ENGINE OIL in the Driver
Information Center (DIC) when it’s nec-
essary to change your engine oil and
filter. The Oil Life System should be reset
to 100% only following an oil change.
Reset the Oil Life System using the DIC:
1. Turn on the ignition.
2. Press the (Vehicle Information)
button until the DIC displays OIL LIFE
REMAINING.
3. Press and hold the (Set/Reset)
button until 100% is displayed.
4. Turn off the ignition.
Reset the Oil Life System without the DIC:
1. Turn on the ignition, with the engine off.
2. Fully press and release the accelera-
tor pedal slowly three times within
five seconds.
3. If the CHANGE ENGINE OIL mes-
sage flashes, the system is reset;
otherwise, repeat the procedure.
4. Turn off the ignition.
See Section 5 of your Owner Manual.
Reset the Engine Oil Life
System
Refueling the Vehicle
To open the fuel door, press the center-
rear edge of the door and it will pop
open slightly. Pull the door to open it
fully.
When closing the fuel door, press the
rear edge of the door until it latches and
is flush with the side of the vehicle.
See Section 5 of your Owner Manual.
Maximizing Fuel Economy
Your driving behavior is a big contributor
to your vehicle’s fuel economy.
Modifying your driving habits will
improve your fuel mileage. Here are
several fuel-saving tips:
• Combine short trips to minimize cold
engine starts, which reduce fuel
economy.
• Avoid quick starts and stops.
Accelerate moderately and drive at a
steady speed.
• Anticipate traffic flow and brake mod-
erately or coast.
• Use the air conditioning and defrost
modes only when necessary.
• Minimize electrical accessory opera-
tion by turning off items such as the
rear defogger and heated seats when
they are not needed.
• Use the remote start feature sparing-
ly. This feature turns the engine on,
consuming fuel at idle.
• Do not warm up the engine by idling.
Even on the coldest days, driving will
help the engine warm up faster.
• Selecting the AUTO feature on 4WD
models will be less economical than
2WD.
• Unload unnecessary cargo to reduce
the amount of weight in the vehicle.
• Regularly check and maintain proper
tire pressure.
• Maintain your vehicle. Regular main-
tenance will keep your vehicle run-
ning cleaner and more efficiently.
Page 24 of 24
Getting to Know Your Yukon/Yukon Denali24
15911401 A
Roadside Assistance
My GMLink
The GMC Owner Center at My GMLink
is a complimentary service for GMC
owners, a one-stop resource to enhance
your GMC ownership experience.
Exclusive member benefits include
online service reminders, vehicle main-
tenance tips, online owner manual,
special privileges and more. Sign up
today at www.mygmlink.com.
Certain restrictions, precautions and safety procedures apply to your vehicle. Please read your Owner
Manual for complete instructions. All information contained herein is based on information available at the
time of printing and is subject to change without notice. Copyright 2008 by GM Corp. All rights reserved.
!15911401=A!
1-800-GMC-8782
(1-800-462-8782)
TTY Users: 1-888-889-2438
As the proud owner of a new GMC
vehicle, you are automatically enrolled in
the GMC Roadside Assistance program.
This value-added service is intended to
provide you with peace of mind as you
drive in the city or travel the open road.
GMC’s Roadside Assistance toll-free
number is staffed by a team of technically
trained advisors, who are available
24 hours a day, 365 days a year. The
advisors can provide minor repair infor-
mation or make arrangements to tow
your vehicle to the nearest GMC dealer.
GMC will provide the following services
for 5 years/100,000 miles at no expense
to you:
• Fuel delivery
• Lockout service (identification
required)
• Tow to nearest dealership for warranty
service
• Flat tire assistance
• Jump starts
In many instances, mechanical failures
are covered under GMC’s comprehensive
warranty. However, when other services
are utilized, our advisors will explain any
payment obligations you might incur.
OWNER INFORMATIONFor prompt and efficient assistance when
calling, please provide the following infor-
mation to the advisor:
• Location of the vehicle
• Telephone number and your location
• Vehicle model, year and color
• Vehicle mileage
• Vehicle Identification Number (VIN)
• Vehicle license plate number
GMC reserves the right to limit services
or reimbursement to an owner or driver
when, in GMC’s judgment, the claims
become excessive in frequency or type
of occurrence.
Roadside Assistance and OnStar
®
(if equipped)
If you have a current OnStar subscrip-
tion, press the OnStar button and the
vehicle will send your current GPS
location to an OnStar Advisor who will
speak to you, assess your problem,
contact Roadside Assistance and relay
your exact location
so you will get the
help you need.