service GMC YUKON 2009 User Guide
[x] Cancel search | Manufacturer: GMC, Model Year: 2009, Model line: YUKON, Model: GMC YUKON 2009Pages: 576, PDF Size: 3.06 MB
Page 121 of 576
{CAUTION:
You or others could be injured if caught in the
path of the power liftgate. Make sure there is no
one in the way of the liftgate as it is opening and
closing.
Notice:If you open the liftgate without checking for
overhead obstructions such as a garage door,
you could damage the liftgate or the liftgate glass.
Always check to make sure the area above and
behind the liftgate is clear before opening it.
The power liftgate can be power opened and closed in
the following ways:
Press and hold the power liftgate button on the
Remote Keyless Entry (RKE) transmitter until
the liftgate starts moving.Remote Keyless Entry
(RKE) System Operation on page 2-5for more
information.
Pressing the liftgate button on the overhead
console.
Pressing the touchpad switch on the outside liftgate
handle.Pressing the buttons, or touchpad switch a second time
while the liftgate is moving reverses the direction.
l:The liftgate can also be closed by pressing the
power liftgate button next to the liftgate latch.
Press the button a second time during liftgate operation
to reverse that operation.
The power liftgate may be temporarily disabled under
extreme temperatures, or under low battery conditions.
If this occurs, the liftgate can still be operated
manually.
If you shift the transmission out of PARK (P) while the
power function is in progress, the liftgate power function
will continue to completion. If you shift the transmission
out of PARK (P) and accelerate before the power
liftgate latches closed, the liftgate may reverse to the
open position. Cargo could fall out of the vehicle. Always
make sure the power liftgate is closed and latched
before you drive away.
If you power open the liftgate and the liftgate support
struts have lost pressure, the lights will �ash and a
chime will sound. The liftgate will stay open temporarily,
then slowly close. See your dealer/retailer for service
before using the liftgate.
2-15
Page 123 of 576
It is not recommended that you drive with the liftgate
open, however, if you must drive with the liftgate open,
the liftgate should be set to manual operation by
pressing the OFF switch on the center console.
The liftgate has an electric latch. If the battery is
disconnected or has low voltage, the liftgate will not
open. The liftgate will resume operation when the battery
is reconnected and charged.
If the battery is properly connected with adequate
voltage, the switch is not disabled, and the liftgate still
will not function, your vehicle should be taken to a
dealer/retailer for service.Power Assist Steps
Your vehicle may have power assist steps.
The power assist steps automatically extend from
beneath the vehicle on the side in which the door has
been opened. Once the door is closed, the assist steps
automatically move back under the vehicle after a
brief delay. The vehicle must not be moving for the
assist steps to extend or retract.
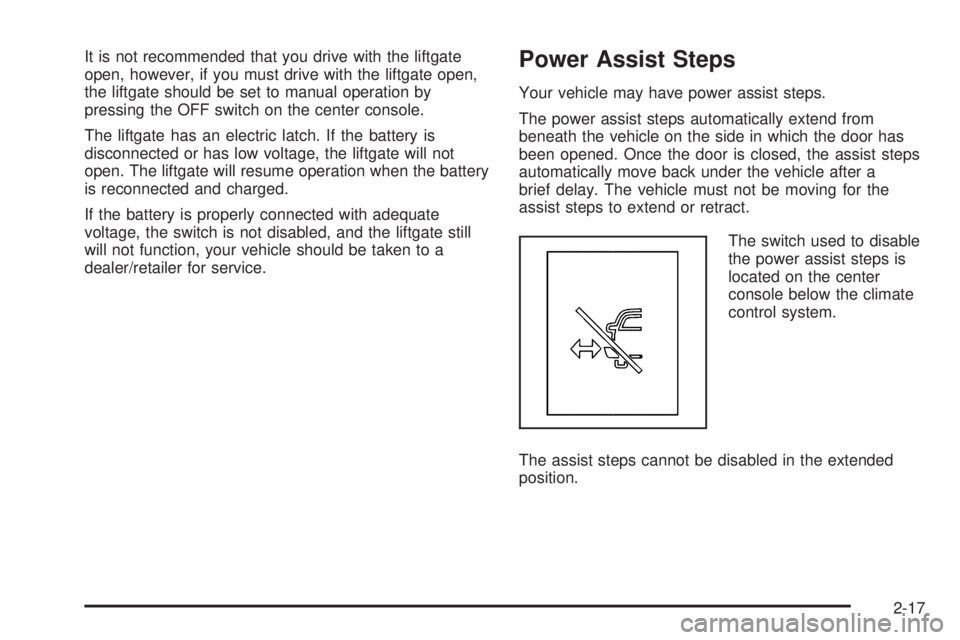
The switch used to disable
the power assist steps is
located on the center
console below the climate
control system.
The assist steps cannot be disabled in the extended
position.
2-17
Page 128 of 576
Testing the Alarm
To test the alarm:
1. From inside the vehicle, lower the driver’s window
and open the driver’s door.
2. Activate the system by locking the doors with the
power door lock switch while the door is open, or
with the RKE transmitter.
3. Get out of the vehicle, close the door and wait for
the security light to go out.
4. Then reach in through the window, unlock the
door with the manual door lock and open the
door. This should set off the alarm.
While the alarm is set, the power door unlock switch will
not work.
If the alarm does not sound when it should but the
headlamps �ash, check to see if the horn works. The
horn fuse may be blown. To replace the fuse, seeFuses
and Circuit Breakers on page 5-116.
If the alarm does not sound or the headlamps do not
�ash, the vehicle should be serviced by your
dealer/retailer.
PASS-Key®III+ Electronic
Immobilizer
The PASS-Key III+ system operates on a radio
frequency subject to Federal Communications
Commission (FCC) Rules and with Industry Canada.
This device complies with Part 15 of the FCC Rules.
Operation is subject to the following two conditions:
1. This device may not cause harmful interference.
2. This device must accept any interference received,
including interference that may cause undesired
operation.
This device complies with RSS-210 of Industry Canada.
Operation is subject to the following two conditions:
1. This device may not cause interference.
2. This device must accept any interference received,
including interference that may cause undesired
operation of the device.
Changes or modi�cations to this system by other than
an authorized service facility could void authorization to
use this equipment.
PASS-Key III+ uses a radio frequency transponder in
the key that matches a decoder in the vehicle.
2-22
Page 129 of 576
PASS-Key®III+ Electronic
Immobilizer Operation
Your vehicle has PASS-Key®III+ (Personalized
Automotive Security System) theft-deterrent system.
PASS-Key
®III+ is a passive theft-deterrent system.
The system is automatically armed when the key
is removed from the ignition.
The system is automatically disarmed when the key is
turned to ON/RUN, ACC/ACCESSORY or START
from the LOCK/OFF position.
You do not have to manually arm or disarm the system.
The security light will come on if there is a problem
with arming or disarming the theft-deterrent system.
When the PASS-Key
®III+ system senses that someone
is using the wrong key, it prevents the vehicle from
starting. Anyone using a trial-and-error method to start
the vehicle will be discouraged because of the high
number of electrical key codes.
If the engine does not start and the security light on
the instrument panel cluster comes on when trying to
start the vehicle, there may be a problem with your
theft-deterrent system. Turn the ignition off and try again.If the engine still does not start, and the key appears to
be undamaged, try another ignition key. At this time,
you may also want to check the fuse, seeFuses
and Circuit Breakers on page 5-116. If the engine still
does not start with the other key, your vehicle needs
service. If your vehicle does start, the �rst key may be
faulty. See your dealer/retailer who can service the
PASS-Key
®III+ to have a new key made. In an
emergency, contact Roadside Assistance.
It is possible for the PASS-Key
®III+ decoder to learn
the transponder value of a new or replacement key. Up
to 10 keys may be programmed for the vehicle. The
following procedure is for programming additional keys
only. If all the currently programmed keys are lost or
do not operate, you must see your dealer/retailer
or a locksmith who can service PASS-Key
®III+ to have
keys made and programmed to the system.
See your dealer/retailer or a locksmith who can service
PASS-Key
®III+ to get a new key blank that is cut
exactly as the ignition key that operates the system.
2-23
Page 130 of 576
To program the new additional key:
1. Verify that the new key has a
1stamped on it.
2. Insert the original, already programmed, key in the
ignition and start the engine. If the engine will not
start, see your dealer/retailer for service.
3. After the engine has started, turn the key to
LOCK/OFF, and remove the key.
4. Insert the new key to be programmed and turn it to
the ON/RUN position within �ve seconds of turning
the ignition to the LOCK/OFF position in Step 3.
The security light will turn off once the key has been
programmed.
5. Repeat Steps 1 through 4 if additional keys are to
be programmed.
If you lose or damage your PASS-Key
®III+ key, see
your dealer/retailer or a locksmith who can service
PASS-Key
®III+ to have a new key made.
Do not leave the key or device that disarms or
deactivates the theft deterrent system in the vehicle.
Starting and Operating Your
Vehicle
New Vehicle Break-In
Notice:The vehicle does not need an elaborate
break-in. But it will perform better in the long run if
you follow these guidelines:
Keep your speed at 55 mph (88 km/h) or less for
the �rst 500 miles (805 km).
Do not drive at any one constant speed, fast or
slow, for the �rst 500 miles (805 km). Do not
make full-throttle starts. Avoid downshifting to
brake or slow the vehicle.
Avoid making hard stops for the �rst 200 miles
(322 km) or so. During this time the new brake
linings are not yet broken in. Hard stops
with new linings can mean premature wear and
earlier replacement. Follow this breaking-in
guideline every time you get new brake linings.
Do not tow a trailer during break-in. SeeTowing
a Trailer on page 4-52for the trailer towing
capabilities of the vehicle and more information.
Following break-in, engine speed and load can
be gradually increased.
2-24
Page 131 of 576
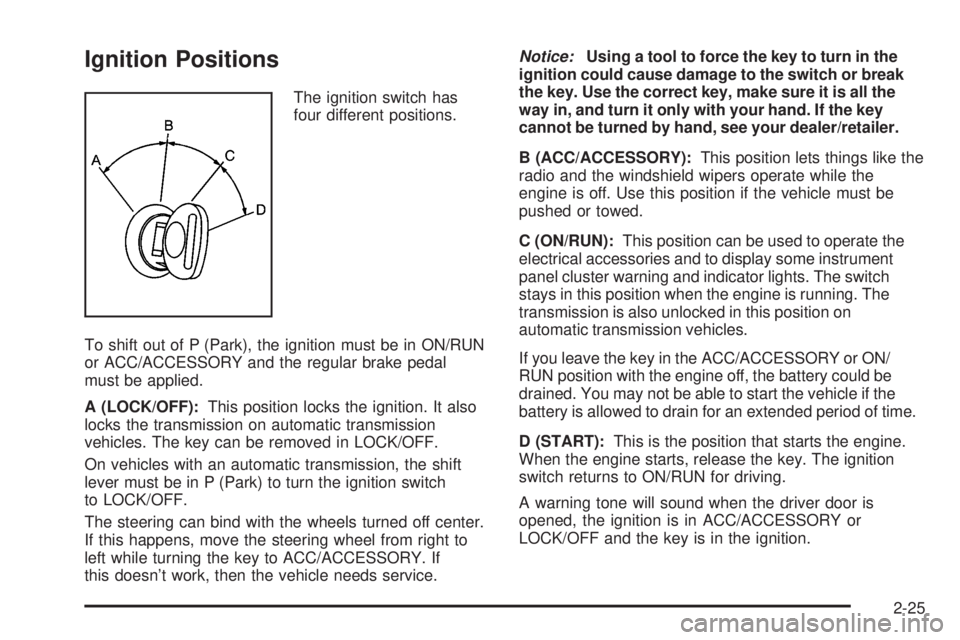
Ignition Positions
The ignition switch has
four different positions.
To shift out of P (Park), the ignition must be in ON/RUN
or ACC/ACCESSORY and the regular brake pedal
must be applied.
A (LOCK/OFF):This position locks the ignition. It also
locks the transmission on automatic transmission
vehicles. The key can be removed in LOCK/OFF.
On vehicles with an automatic transmission, the shift
lever must be in P (Park) to turn the ignition switch
to LOCK/OFF.
The steering can bind with the wheels turned off center.
If this happens, move the steering wheel from right to
left while turning the key to ACC/ACCESSORY. If
this doesn’t work, then the vehicle needs service.Notice:Using a tool to force the key to turn in the
ignition could cause damage to the switch or break
the key. Use the correct key, make sure it is all the
way in, and turn it only with your hand. If the key
cannot be turned by hand, see your dealer/retailer.
B (ACC/ACCESSORY):This position lets things like the
radio and the windshield wipers operate while the
engine is off. Use this position if the vehicle must be
pushed or towed.
C (ON/RUN):This position can be used to operate the
electrical accessories and to display some instrument
panel cluster warning and indicator lights. The switch
stays in this position when the engine is running. The
transmission is also unlocked in this position on
automatic transmission vehicles.
If you leave the key in the ACC/ACCESSORY or ON/
RUN position with the engine off, the battery could be
drained. You may not be able to start the vehicle if the
battery is allowed to drain for an extended period of time.
D (START):This is the position that starts the engine.
When the engine starts, release the key. The ignition
switch returns to ON/RUN for driving.
A warning tone will sound when the driver door is
opened, the ignition is in ACC/ACCESSORY or
LOCK/OFF and the key is in the ignition.
2-25
Page 143 of 576
Four-Wheel Drive
If the vehicle has four-wheel drive, you can send the
engine’s driving power to all four wheels for extra
traction. Read the following before using four-wheel
drive.
Notice:Driving on clean, dry pavement in
Four-Wheel-Drive High or Four-Wheel-Drive Low for
an extended period of time may cause premature
wear on your vehicle’s powertrain. Do not drive on
clean, dry pavement in Four-Wheel-Drive High or
Four-Wheel-Drive Low for extended periods of time.
While driving on clean dry pavement and during tight
turns, you may experience a vibration in the steering
system.
The vehicle has StabiliTrak
®. Shifting into
Four-Wheel-Drive Low will turn Traction Control and
StabiliTrak
®off. SeeStabiliTrak®System on page 4-6.
Front Axle
The front axle engages and disengages automatically
when you shift the transfer case. Some delay for
the axle to engage or disengage is normal.
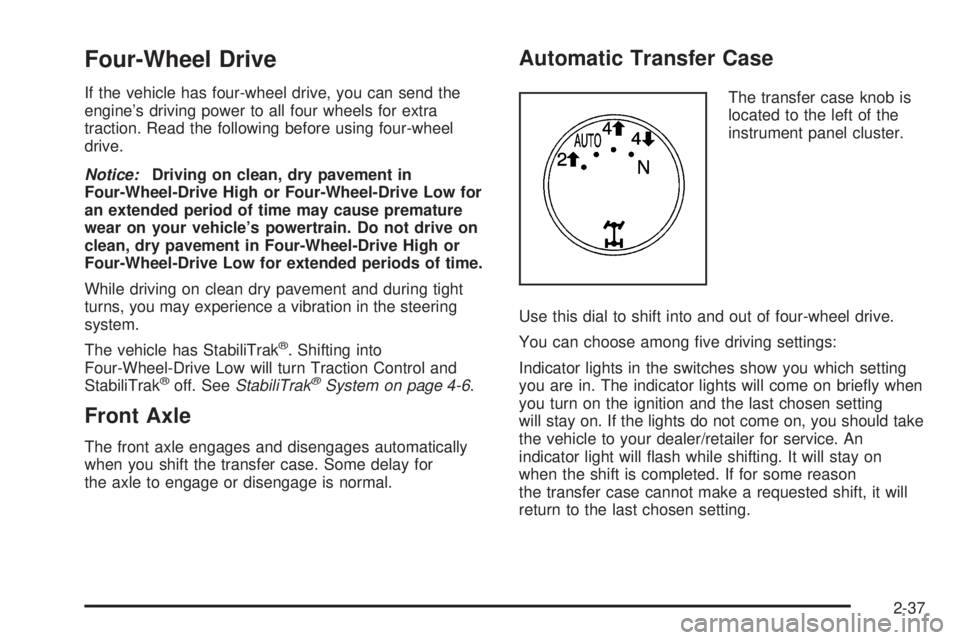
Automatic Transfer Case
The transfer case knob is
located to the left of the
instrument panel cluster.
Use this dial to shift into and out of four-wheel drive.
You can choose among �ve driving settings:
Indicator lights in the switches show you which setting
you are in. The indicator lights will come on brie�y when
you turn on the ignition and the last chosen setting
will stay on. If the lights do not come on, you should take
the vehicle to your dealer/retailer for service. An
indicator light will �ash while shifting. It will stay on
when the shift is completed. If for some reason
the transfer case cannot make a requested shift, it will
return to the last chosen setting.
2-37
Page 144 of 576
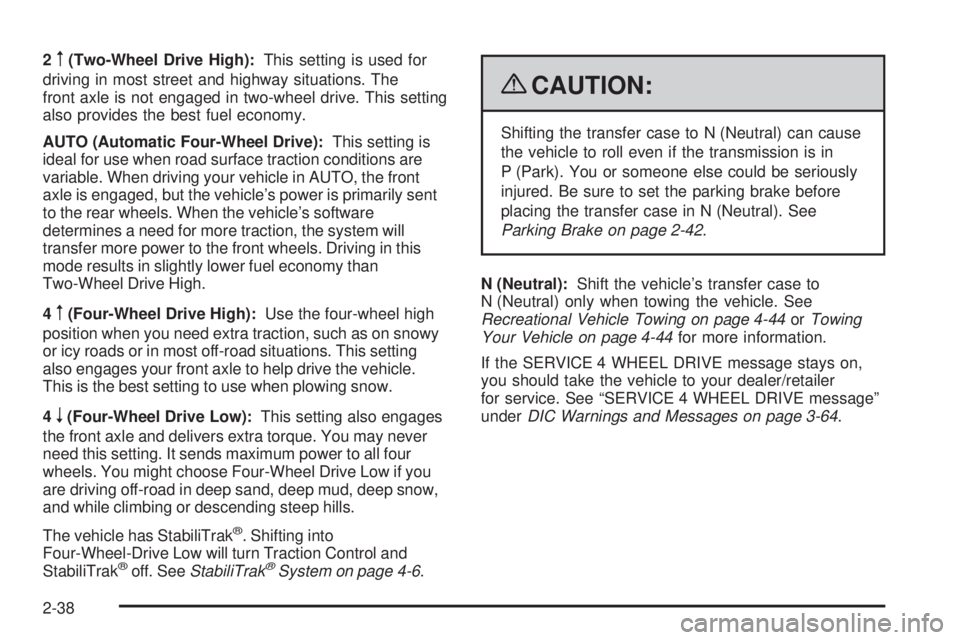
2m(Two-Wheel Drive High):This setting is used for
driving in most street and highway situations. The
front axle is not engaged in two-wheel drive. This setting
also provides the best fuel economy.
AUTO (Automatic Four-Wheel Drive):This setting is
ideal for use when road surface traction conditions are
variable. When driving your vehicle in AUTO, the front
axle is engaged, but the vehicle’s power is primarily sent
to the rear wheels. When the vehicle’s software
determines a need for more traction, the system will
transfer more power to the front wheels. Driving in this
mode results in slightly lower fuel economy than
Two-Wheel Drive High.
4
m(Four-Wheel Drive High):Use the four-wheel high
position when you need extra traction, such as on snowy
or icy roads or in most off-road situations. This setting
also engages your front axle to help drive the vehicle.
This is the best setting to use when plowing snow.
4
n(Four-Wheel Drive Low):This setting also engages
the front axle and delivers extra torque. You may never
need this setting. It sends maximum power to all four
wheels. You might choose Four-Wheel Drive Low if you
are driving off-road in deep sand, deep mud, deep snow,
and while climbing or descending steep hills.
The vehicle has StabiliTrak
®. Shifting into
Four-Wheel-Drive Low will turn Traction Control and
StabiliTrak
®off. SeeStabiliTrak®System on page 4-6.
{CAUTION:
Shifting the transfer case to N (Neutral) can cause
the vehicle to roll even if the transmission is in
P (Park). You or someone else could be seriously
injured. Be sure to set the parking brake before
placing the transfer case in N (Neutral). See
Parking Brake on page 2-42.
N (Neutral):Shift the vehicle’s transfer case to
N (Neutral) only when towing the vehicle. See
Recreational Vehicle Towing on page 4-44orTowing
Your Vehicle on page 4-44for more information.
If the SERVICE 4 WHEEL DRIVE message stays on,
you should take the vehicle to your dealer/retailer
for service. See “SERVICE 4 WHEEL DRIVE message”
underDIC Warnings and Messages on page 3-64.
2-38
Page 151 of 576
If you have to leave the vehicle with the engine running,
be sure your vehicle is in P (Park) and the parking brake
is �rmly set before you leave it. After you move the shift
lever into P (Park), hold the regular brake pedal down.
Then, see if you can move the shift lever away from
P (Park) without �rst pulling it toward you. If you can, it
means that the shift lever was not fully locked into
P (Park).
Torque Lock
If you are parking on a hill and you do not shift your
transmission into P (Park) properly, the weight of the
vehicle may put too much force on the parking pawl in
the transmission. You may �nd it difficult to pull the shift
lever out of P (Park). This is called torque lock. To
prevent torque lock, set the parking brake and then shift
into P (Park) properly before you leave the driver seat.
To �nd out how, seeShifting Into Park on page 2-44.
When you are ready to drive, move the shift lever out
of P (Park) before you release the parking brake.
If torque lock does occur, you may need to have another
vehicle push yours a little uphill to take some of the
pressure from the parking pawl in the transmission, then
you will be able to pull the shift lever out of P (Park).
Shifting Out of Park
This vehicle is equipped with an electronic shift lock
release system. The shift lock release is designed to:
Prevent ignition key removal unless the shift
lever is in P (Park) with the shift lever button fully
released, and
Prevent movement of the shift lever out of
P (Park), unless the ignition is in ON/RUN or
ACC/ACCESSORY and the regular brake pedal is
applied.
The shift lock release is always functional except in the
case of an uncharged or low voltage (less than 9 volt)
battery.
If the vehicle has an uncharged battery or a battery with
low voltage, try charging or jump starting the battery.
SeeJump Starting on page 5-45for more information.
To shift out of P (Park) use the following:
1. Apply the brake pedal.
2. Move the shift lever to the desired position.
If you still are unable to shift out of P (Park):
1. Ease the pressure on the shift lever.
2. While holding down the brake pedal, press the shift
lever all the way into P (Park).
3. Move the shift lever to the desired position.
If you are still having a problem shifting, then have the
vehicle serviced soon.
2-45
Page 154 of 576
{CAUTION:
It can be dangerous to get out of the vehicle if the
automatic transmission shift lever is not fully in
P (Park) with the parking brake �rmly set. The
vehicle can roll. Do not leave the vehicle when the
engine is running unless you have to. If you have
left the engine running, the vehicle can move
suddenly. You or others could be injured. To be
sure the vehicle will not move, even when you are
on fairly level ground, always set the parking
brake and move the shift lever to P (Park).
{CAUTION:
Four-wheel drive vehicles with the transfer case
in N (Neutral) will allow the vehicle to roll, even
if the automatic transmission shift lever is in
P (Park). So, be sure the transfer case is in a
drive gear — not in N (Neutral). Always set the
parking brake.Follow the proper steps to be sure the vehicle will not
move. SeeShifting Into Park on page 2-44.
If pulling a trailer, seeTowing a Trailer on page 4-52.
Mirrors
Manual Rearview Mirror
Hold the inside rearview mirror in the center to move it
for a clearer view behind your vehicle. Adjust the
mirror to avoid glare from the headlamps behind you.
Push the tab forward for daytime use and pull it for
nighttime use.
Automatic Dimming Rearview Mirror
The vehicle may have an automatic dimming rearview
mirror.
Vehicles with OnStar
®have three additional control
buttons for the OnStar®system. See your dealer/retailer
for more information about OnStar®and how to
subscribe to it. SeeOnStar®System on page 2-64for
more information about the services OnStar®provides.
2-48