navigation GMC YUKON 2010 Owner's Manual
[x] Cancel search | Manufacturer: GMC, Model Year: 2010, Model line: YUKON, Model: GMC YUKON 2010Pages: 614, PDF Size: 3.55 MB
Page 7 of 614
Section 1 In Brief
Instrument Panel. . . . . . . . . . . . . . . . . . . . . . . . . . . . . . . . . . . 1-2
Initial Drive Information . . . . . . . . . . . . . . . . . . . . . . . . . . . 1-4
Remote Keyless Entry (RKE) System . . . . . . . . . . . 1-4
Remote Vehicle Start . . . . . . . . . . . . . . . . . . . . . . . . . . . 1-5
Door Locks . . . . . . . . . . . . . . . . . . . . . . . . . . . . . . . . . . . . . 1-5
Liftgate . . . . . . . . . . . . . . . . . . . . . . . . . . . . . . . . . . . . . . . . . . 1-6
Windows . . . . . . . . . . . . . . . . . . . . . . . . . . . . . . . . . . . . . . . . 1-7
Seat Adjustment . . . . . . . . . . . . . . . . . . . . . . . . . . . . . . . . 1-7
Second Row Seats . . . . . . . . . . . . . . . . . . . . . . . . . . . . 1-11
Third Row Seats . . . . . . . . . . . . . . . . . . . . . . . . . . . . . . . 1-11
Heated Seats . . . . . . . . . . . . . . . . . . . . . . . . . . . . . . . . . . 1-12
Head Restraint Adjustment . . . . . . . . . . . . . . . . . . . . 1-12
Safety Belt . . . . . . . . . . . . . . . . . . . . . . . . . . . . . . . . . . . . . 1-13
Sensing System for Passenger Airbag . . . . . . . . . 1-13
Mirror Adjustment . . . . . . . . . . . . . . . . . . . . . . . . . . . . . . 1-14
Steering Wheel Adjustment . . . . . . . . . . . . . . . . . . . . 1-15
Interior Lighting . . . . . . . . . . . . . . . . . . . . . . . . . . . . . . . . 1-16
Exterior Lighting . . . . . . . . . . . . . . . . . . . . . . . . . . . . . . . 1-16
Windshield Wiper/Washer . . . . . . . . . . . . . . . . . . . . . . 1-17
Climate Controls . . . . . . . . . . . . . . . . . . . . . . . . . . . . . . . 1-18
Transmission . . . . . . . . . . . . . . . . . . . . . . . . . . . . . . . . . . 1-19
Four-Wheel Drive . . . . . . . . . . . . . . . . . . . . . . . . . . . . . . 1-20 Vehicle Features
. . . . . . . . . . . . . . . . . . . . . . . . . . . . . . . . . . 1-21
Radio(s) . . . . . . . . . . . . . . . . . . . . . . . . . . . . . . . . . . . . . . . 1-21
Satellite Radio . . . . . . . . . . . . . . . . . . . . . . . . . . . . . . . . . 1-22
Portable Audio Devices . . . . . . . . . . . . . . . . . . . . . . . . 1-22
Steering Wheel Controls . . . . . . . . . . . . . . . . . . . . . . . 1-23
Bluetooth
®. . . . . . . . . . . . . . . . . . . . . . . . . . . . . . . . . . . . . 1-23
Navigation System . . . . . . . . . . . . . . . . . . . . . . . . . . . . . 1-23
Cruise Control . . . . . . . . . . . . . . . . . . . . . . . . . . . . . . . . . 1-24
Side Blind Zone Alert (SBZA) . . . . . . . . . . . . . . . . . . 1-24
Rear Vision Camera (RVC) . . . . . . . . . . . . . . . . . . . . 1-24
Ultrasonic Parking Assist . . . . . . . . . . . . . . . . . . . . . . 1-25
Power Outlets . . . . . . . . . . . . . . . . . . . . . . . . . . . . . . . . . 1-25
Universal Remote System . . . . . . . . . . . . . . . . . . . . . 1-25
Sunroof . . . . . . . . . . . . . . . . . . . . . . . . . . . . . . . . . . . . . . . . 1-26
Performance and Maintenance . . . . . . . . . . . . . . . . . .1-27
StabiliTrak
®. . . . . . . . . . . . . . . . . . . . . . . . . . . . . . . . . . . . 1-27
Tire Pressure Monitor . . . . . . . . . . . . . . . . . . . . . . . . . . 1-27
Engine Oil Life System . . . . . . . . . . . . . . . . . . . . . . . . 1-28
Fuel E85 (85% Ethanol) . . . . . . . . . . . . . . . . . . . . . . . 1-28
Driving for Better Fuel Economy . . . . . . . . . . . . . . . 1-29
Roadside Assistance Program . . . . . . . . . . . . . . . . . 1-29
OnStar
®. . . . . . . . . . . . . . . . . . . . . . . . . . . . . . . . . . . . . . . 1-30
1-1
Page 29 of 614
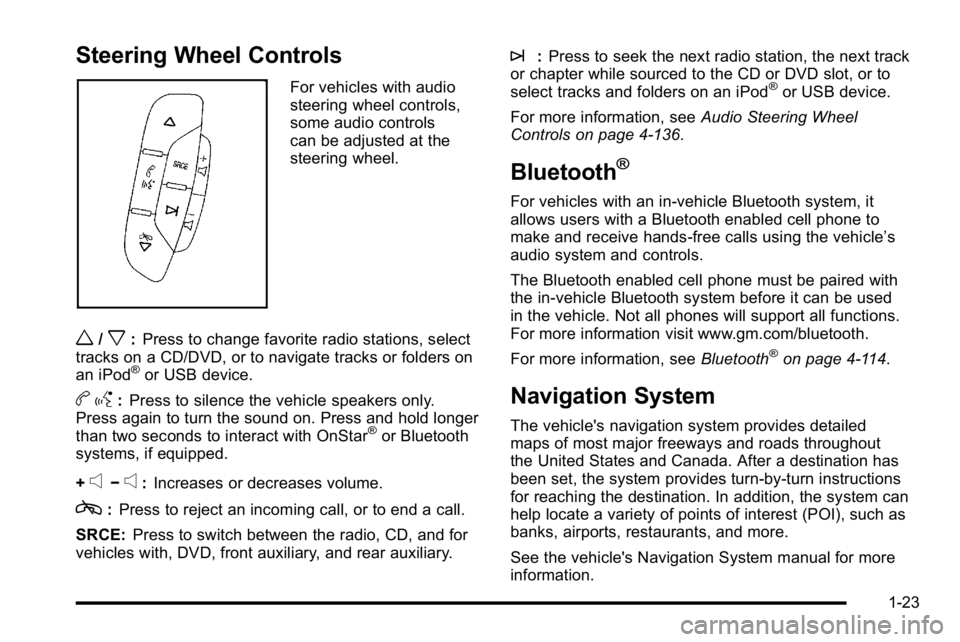
Steering Wheel Controls
For vehicles with audio
steering wheel controls,
some audio controls
can be adjusted at the
steering wheel.
w/x:Press to change favorite radio stations, select
tracks on a CD/DVD, or to navigate tracks or folders on
an iPod
®or USB device.
b g:Press to silence the vehicle speakers only.
Press again to turn the sound on. Press and hold longer
than two seconds to interact with OnStar
®or Bluetooth
systems, if equipped.
+
e−e: Increases or decreases volume.
c:Press to reject an incoming call, or to end a call.
SRCE: Press to switch between the radio, CD, and for
vehicles with, DVD, front auxiliary, and rear auxiliary.
¨: Press to seek the next radio station, the next track
or chapter while sourced to the CD or DVD slot, or to
select tracks and folders on an iPod
®or USB device.
For more information, see Audio Steering Wheel
Controls on page 4‑136.
Bluetooth®
For vehicles with an in-vehicle Bluetooth system, it
allows users with a Bluetooth enabled cell phone to
make and receive hands-free calls using the vehicle’s
audio system and controls.
The Bluetooth enabled cell phone must be paired with
the in-vehicle Bluetooth system before it can be used
in the vehicle. Not all phones will support all functions.
For more information visit www.gm.com/bluetooth.
For more information, see Bluetooth
®on page 4‑114.
Navigation System
The vehicle's navigation system provides detailed
maps of most major freeways and roads throughout
the United States and Canada. After a destination has
been set, the system provides turn-by-turn instructions
for reaching the destination. In addition, the system can
help locate a variety of points of interest (POI), such as
banks, airports, restaurants, and more.
See the vehicle's Navigation System manual for more
information.
1-23
Page 30 of 614
Cruise Control
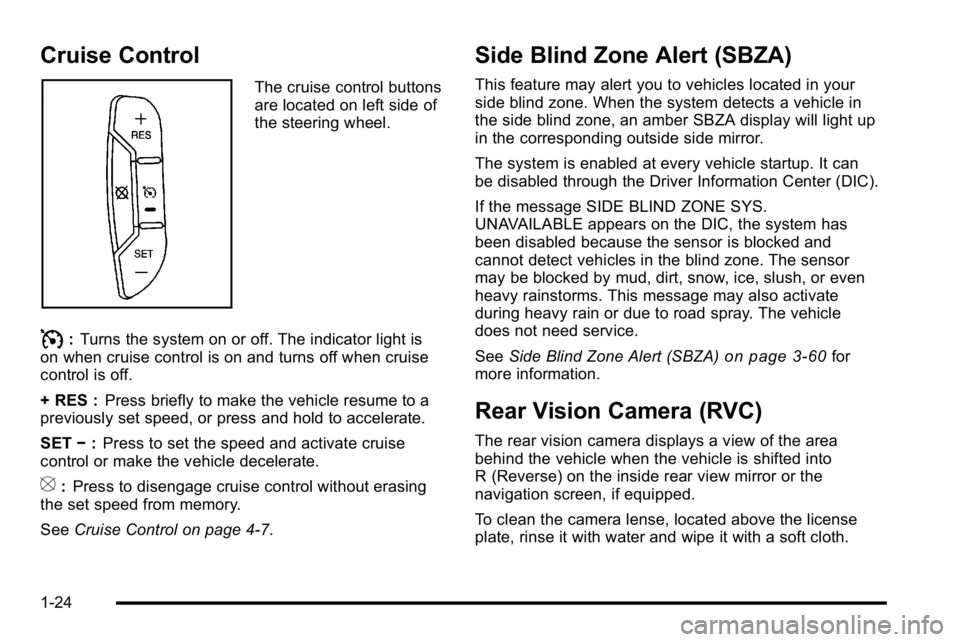
The cruise control buttons
are located on left side of
the steering wheel.
I:Turns the system on or off. The indicator light is
on when cruise control is on and turns off when cruise
control is off.
+ RES : Press briefly to make the vehicle resume to a
previously set speed, or press and hold to accelerate.
SET −:Press to set the speed and activate cruise
control or make the vehicle decelerate.
[: Press to disengage cruise control without erasing
the set speed from memory.
See Cruise Control on page 4‑7.
Side Blind Zone Alert (SBZA)
This feature may alert you to vehicles located in your
side blind zone. When the system detects a vehicle in
the side blind zone, an amber SBZA display will light up
in the corresponding outside side mirror.
The system is enabled at every vehicle startup. It can
be disabled through the Driver Information Center (DIC).
If the message SIDE BLIND ZONE SYS.
UNAVAILABLE appears on the DIC, the system has
been disabled because the sensor is blocked and
cannot detect vehicles in the blind zone. The sensor
may be blocked by mud, dirt, snow, ice, slush, or even
heavy rainstorms. This message may also activate
during heavy rain or due to road spray. The vehicle
does not need service.
SeeSide Blind Zone Alert (SBZA)
on page 3‑60for
more information.
Rear Vision Camera (RVC)
The rear vision camera displays a view of the area
behind the vehicle when the vehicle is shifted into
R (Reverse) on the inside rear view mirror or the
navigation screen, if equipped.
To clean the camera lense, located above the license
plate, rinse it with water and wipe it with a soft cloth.
1-24
Page 36 of 614
OnStar®
OnStar®uses several innovative technologies and live
advisors to provide a wide range of safety, security,
navigation, diagnostics, and calling services.
Automatic Crash Response
In a crash, built in sensors can automatically alert an
OnStar advisor who is immediately connected to the
vehicle to see if you need help.
How OnStar Service Works
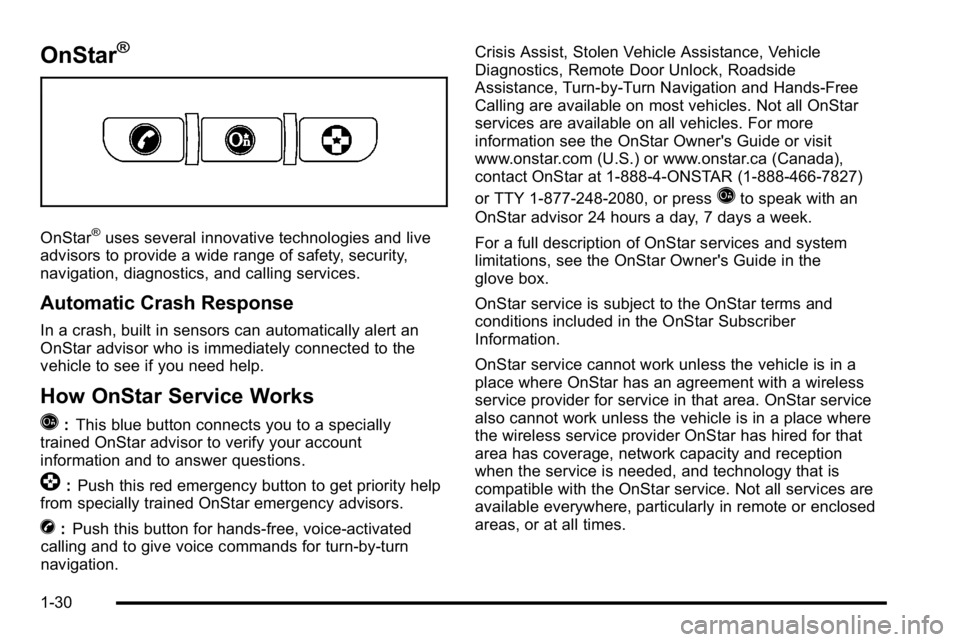
Q
: This blue button connects you to a specially
trained OnStar advisor to verify your account
information and to answer questions.
]: Push this red emergency button to get priority help
from specially trained OnStar emergency advisors.
X: Push this button for hands‐free, voice‐activated
calling and to give voice commands for turn‐by‐turn
navigation. Crisis Assist, Stolen Vehicle Assistance, Vehicle
Diagnostics, Remote Door Unlock, Roadside
Assistance, Turn‐by‐Turn Navigation and Hands‐Free
Calling are available on most vehicles. Not all OnStar
services are available on all vehicles. For more
information see the OnStar Owner's Guide or visit
www.onstar.com (U.S.) or www.onstar.ca (Canada),
contact OnStar at 1-888-4-ONSTAR (1‐888‐466‐7827)
or TTY 1‐877‐248‐2080, or press
Qto speak with an
OnStar advisor 24 hours a day, 7 days a week.
For a full description of OnStar services and system
limitations, see the OnStar Owner's Guide in the
glove box.
OnStar service is subject to the OnStar terms and
conditions included in the OnStar Subscriber
Information.
OnStar service cannot work unless the vehicle is in a
place where OnStar has an agreement with a wireless
service provider for service in that area. OnStar service
also cannot work unless the vehicle is in a place where
the wireless service provider OnStar has hired for that
area has coverage, network capacity and reception
when the service is needed, and technology that is
compatible with the OnStar service. Not all services are
available everywhere, particularly in remote or enclosed
areas, or at all times.
1-30
Page 206 of 614
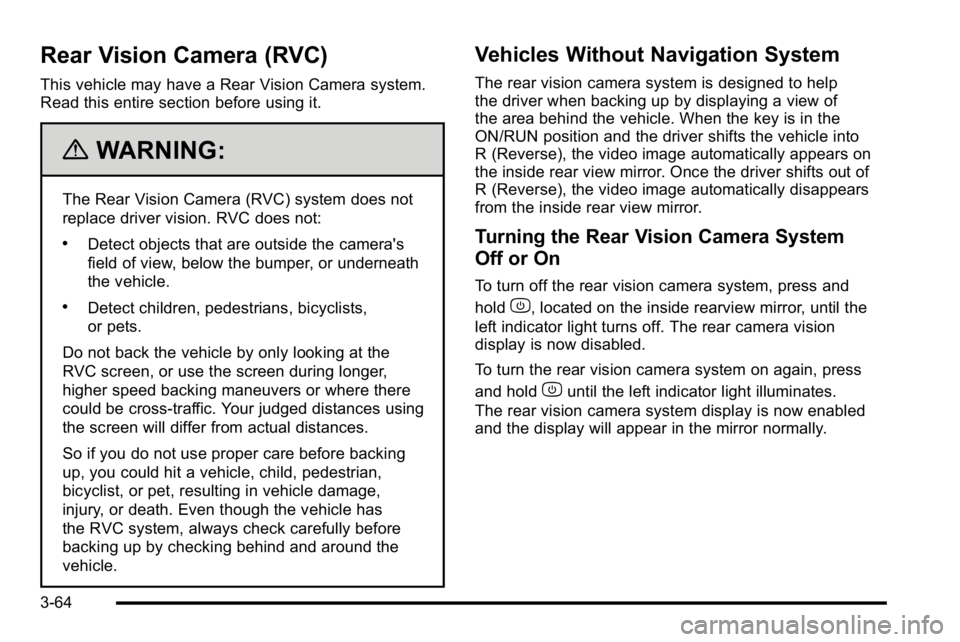
Rear Vision Camera (RVC)
This vehicle may have a Rear Vision Camera system.
Read this entire section before using it.
{WARNING:
The Rear Vision Camera (RVC) system does not
replace driver vision. RVC does not:
.Detect objects that are outside the camera's
field of view, below the bumper, or underneath
the vehicle.
.Detect children, pedestrians, bicyclists,
or pets.
Do not back the vehicle by only looking at the
RVC screen, or use the screen during longer,
higher speed backing maneuvers or where there
could be cross-traffic. Your judged distances using
the screen will differ from actual distances.
So if you do not use proper care before backing
up, you could hit a vehicle, child, pedestrian,
bicyclist, or pet, resulting in vehicle damage,
injury, or death. Even though the vehicle has
the RVC system, always check carefully before
backing up by checking behind and around the
vehicle.
Vehicles Without Navigation System
The rear vision camera system is designed to help
the driver when backing up by displaying a view of
the area behind the vehicle. When the key is in the
ON/RUN position and the driver shifts the vehicle into
R (Reverse), the video image automatically appears on
the inside rear view mirror. Once the driver shifts out of
R (Reverse), the video image automatically disappears
from the inside rear view mirror.
Turning the Rear Vision Camera System
Off or On
To turn off the rear vision camera system, press and
hold
z, located on the inside rearview mirror, until the
left indicator light turns off. The rear camera vision
display is now disabled.
To turn the rear vision camera system on again, press
and hold
zuntil the left indicator light illuminates.
The rear vision camera system display is now enabled
and the display will appear in the mirror normally.
3-64
Page 207 of 614
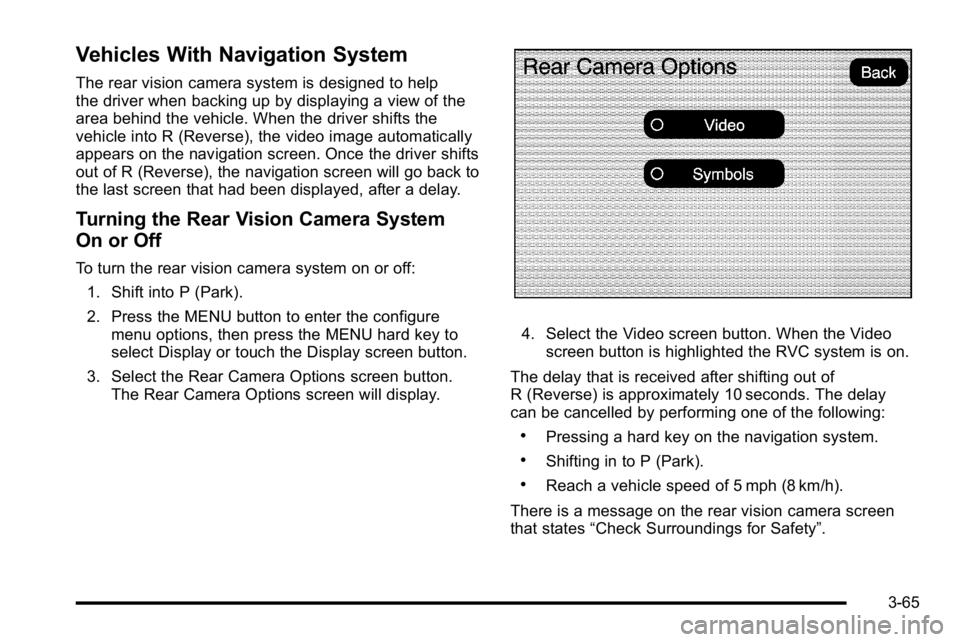
Vehicles With Navigation System
The rear vision camera system is designed to help
the driver when backing up by displaying a view of the
area behind the vehicle. When the driver shifts the
vehicle into R (Reverse), the video image automatically
appears on the navigation screen. Once the driver shifts
out of R (Reverse), the navigation screen will go back to
the last screen that had been displayed, after a delay.
Turning the Rear Vision Camera System
On or Off
To turn the rear vision camera system on or off:1. Shift into P (Park).
2. Press the MENU button to enter the configure menu options, then press the MENU hard key to
select Display or touch the Display screen button.
3. Select the Rear Camera Options screen button. The Rear Camera Options screen will display.
4. Select the Video screen button. When the Videoscreen button is highlighted the RVC system is on.
The delay that is received after shifting out of
R (Reverse) is approximately 10 seconds. The delay
can be cancelled by performing one of the following:
.Pressing a hard key on the navigation system.
.Shifting in to P (Park).
.Reach a vehicle speed of 5 mph (8 km/h).
There is a message on the rear vision camera screen
that states “Check Surroundings for Safety”.
3-65
Page 208 of 614
Adjusting the Brightness and Contrast of
the Screen
To adjust the brightness and contrast of the screen,
press the MENU button while the rear vision camera
image is on the display. Any adjustments made will only
affect the rear vision camera screen.
](Brightness) :Touch the + (plus) or –(minus)
screen buttons to increase or decrease the brightness
of the screen.
_(Contrast) : Touch the + (plus) or –(minus) screen
buttons to increase or decrease the contrast of the
screen.
Symbols
The navigation system may have a feature that lets the
driver view symbols on the navigation screen while
using the rear vision camera. The Ultrasonic Rear Park
Assist (URPA) system must not be disabled to use the
caution symbols. If URPA has been disabled and the
symbols have been turned on, the Rear Parking Assist
Symbols Unavailable error message may display. See
Ultrasonic Rear Parking Assist (URPA) on page 3‑58. The symbols appear when an object has been detected
by the URPA system. The symbol may cover the object
when viewing the navigation screen.
To turn the symbols on or off:
1. Make sure that URPA has not been disabled.
2. Shift into P (Park).
3. Press the MENU hard key to enter the configure menu options, then press the MENU hard key
repeatedly until Display is selected or touch the
Display screen button.
4. Select the Rear Camera Options screen button. The Rear Camera Options screen will display.
5. Touch the Symbols screen button. The screen button will be highlighted when on.
Rear Vision Camera Error Messages
Service Rear Vision Camera System: This message
can display when the system is not receiving
information it requires from other vehicle systems.
If any other problem occurs or if a problem persists, see
your dealer.
3-66
Page 224 of 614
Section 4 Instrument Panel
Tire Pressure Light . . . . . . . . . . . . . . . . . . . . . . . . . . . . 4-39
Malfunction Indicator Lamp . . . . . . . . . . . . . . . . . . . . 4-39
Oil Pressure Gauge . . . . . . . . . . . . . . . . . . . . . . . . . . . . 4-43
Oil Pressure Light . . . . . . . . . . . . . . . . . . . . . . . . . . . . . 4-44
Security Light . . . . . . . . . . . . . . . . . . . . . . . . . . . . . . . . . . 4-44
Fog Lamp Light . . . . . . . . . . . . . . . . . . . . . . . . . . . . . . . . 4-45
Cruise Control Light . . . . . . . . . . . . . . . . . . . . . . . . . . . 4-45
Highbeam On Light . . . . . . . . . . . . . . . . . . . . . . . . . . . . 4-45
Tow/Haul Mode Light . . . . . . . . . . . . . . . . . . . . . . . . . . 4-45
Fuel Gauge . . . . . . . . . . . . . . . . . . . . . . . . . . . . . . . . . . . . 4-46
Low Fuel Warning Light . . . . . . . . . . . . . . . . . . . . . . . . 4-47
Driver Information Center (DIC) . . . . . . . . . . . . . . . . . .4-47
DIC Operation and Displays (With DIC Buttons) . . . . . . . . . . . . . . . . . . . . . . . . . . . . . . . . . . . . . 4-48
DIC Operation and Displays (Without DIC Buttons) . . . . . . . . . . . . . . . . . . . . . . . . . . . . . . . . . . . . . 4-55
DIC Compass . . . . . . . . . . . . . . . . . . . . . . . . . . . . . . . . . . 4-58
DIC Warnings and Messages . . . . . . . . . . . . . . . . . . 4-61
DIC Vehicle Customization (With DIC Buttons) . . . . . . . . . . . . . . . . . . . . . . . . . . . . . . . . . . . . . 4-72 Audio System(s)
. . . . . . . . . . . . . . . . . . . . . . . . . . . . . . . . . . 4-80
Setting the Clock . . . . . . . . . . . . . . . . . . . . . . . . . . . . . . 4-81
Radio(s) . . . . . . . . . . . . . . . . . . . . . . . . . . . . . . . . . . . . . . . 4-82
Using an MP3 (Radios with CD) . . . . . . . . . . . . . . . 4-99
Using an MP3 (Radios with CD and DVD) . . . . 4-106
XM Radio Messages . . . . . . . . . . . . . . . . . . . . . . . . . 4-113
Navigation/Radio System . . . . . . . . . . . . . . . . . . . . . 4-114
Bluetooth
®. . . . . . . . . . . . . . . . . . . . . . . . . . . . . . . . . . . . 4-114
Rear Seat Entertainment (RSE) System . . . . . . 4-125
Rear Seat Audio (RSA) . . . . . . . . . . . . . . . . . . . . . . . 4-134
Theft-Deterrent Feature . . . . . . . . . . . . . . . . . . . . . . 4-136
Audio Steering Wheel Controls . . . . . . . . . . . . . . . 4-136
Radio Reception . . . . . . . . . . . . . . . . . . . . . . . . . . . . . . 4-139
Rear Side Window Antenna . . . . . . . . . . . . . . . . . . 4-140
XM™ Satellite Radio Antenna System . . . . . . . . 4-140
4-2
Page 316 of 614
Inserting a Disc
To play a disc, gently insert the disc, with the label side
up, into the loading slot. The DVD player might not
accept some paper labeled media. The player starts
loading the disc into the system and shows“Loading
Disc” on the radio display. At the same time, the radio
displays a softkey menu of option(s). Some discs
automatically play the movie while others default to the
softkey menu display, which requires the radio's Play,
Enter, or Navigation softkeys to be pressed. The rear
seat passenger can also start the disc with the remote
control.
Loading a disc into the system, depending on media
type and format, ranges from 5 to 20 seconds for a CD,
and up to 30 seconds for a DVD.
Ejecting a Disc
Press theZbutton on the radio to eject the disc.
If a disc is ejected from the radio, but not removed,
the radio reloads the disc after a short period of time.
The disc is stored in the radio. The radio does not
resume play of the disc automatically. If the RSA
system is sourced to the DVD, the movie when
reloaded into the DVD player begins to play again.
In case loading and reading of a DVD or CD cannot
be completed (unknown format, etc.), and the disc fails
to eject, press and hold the DVD
Zbutton more than
five seconds to force the disc to eject.
Playing a DVD
DVD/CD AUX (Auxiliary): Press this button to cycle
through DVD, CD, or Auxiliary when listening to the
radio. The DVD/CD text label and a message showing
track or chapter number displays when a disc is in
either slot. Press this button again and the system
automatically searches for an auxiliary input device,
such as a portable audio player. If a portable audio
player is not connected, “No Aux Input Device”displays.
If a disc is in both the DVD slot and the CD slot the
DVD/CD AUX button cycles between the two sources
and does not indicate “No Aux Input Device”. If a front
auxiliary device is connected, the DVD/CD AUX button
cycles through all available options, such as: DVD slot,
CD slot, Front Auxiliary, and Rear Auxiliary (if available).
See “Using the Auxiliary Input Jack(s)” later in this
section, or “Audio/Video (A/V) Jacks” under,Rear Seat
Entertainment (RSE) System
on page 4‑125for more
information.
O(Power): Press to turn the radio on or off. Turn
clockwise or counterclockwise to increase or decrease
the volume. Press and hold for more than two seconds
to turn off the radio and Rear Seat Entertainment (RSE)
system, and to start the parental control feature.
Parental control prevents the rear seat occupant from
operating the Rear Seat Audio (RSA) system or remote
control.
4-94
Page 318 of 614
Some DVDs begin playing after the previews have
finished, although there could be a delay of up to
30 seconds. If the DVD does not begin playing the
movie automatically, press the softkey under the
play/pause tab on the radio. If the DVD still does not
play, refer to the on-screen instructions, if available.
c(Stop):Press to stop playing, rewinding, or fast
forwarding a DVD.
r(Enter): Press to select the choices that are
highlighted in any menu.
y(Menu): Press to access the DVD menu. The DVD
menu is different on every DVD. Use the softkey under
the navigation arrows to navigate the cursor through the
DVD menu. After making a selection press this button.
This button only operates when using a DVD.
Nav (Navigate): Press to display directional arrows for
navigating through the menus.
q(Return): Press to exit the current active menu and
return to the previous menu. This tab operates only
when a DVD is playing and a menu is active.
DVD-A (Audio) Display Buttons
Once a DVD-A is inserted, radio display menu shows
several tab options for DVD playing. Press the softkeys
under any desired tab option during DVD playback.
See the tab options listed after, for more information.
The rear seat operator can navigate the DVD-A menus
and controls through the remote control. See “Remote
Control”, under Rear Seat Entertainment (RSE) System
on page 4‑125for more information. The Video Screen
does not automatically power on when the DVD-A is
inserted into the DVD slot. It must be manually turned
on by the rear seat occupant through the remote control
power button.
r/j(Play/Pause): Press either the play or pause
icon displayed on the radio system, to toggle between
pausing or restarting playback of a DVD. If the forward
arrow is showing on the display, the system is in pause
mode. If the pause icon is showing on the display, the
system is in playback mode.
qGroupr: Press to cycle through musical
groupings on the DVD-A disc.
Nav (Navigate): Press to display directional arrows for
navigating through the menus.
e(Audio Stream): Press to cycle through audio
stream formats located on the DVD-A disc. The video
screen shows the audio stream changing.
4-96