service indicator GMC YUKON 2010 Owner's Manual
[x] Cancel search | Manufacturer: GMC, Model Year: 2010, Model line: YUKON, Model: GMC YUKON 2010Pages: 614, PDF Size: 3.55 MB
Page 4 of 614
Safety Warnings and Symbols
Warning messages found on vehicle labels and in this
manual describe hazards and what to do to avoid or
reduce them.
Dangerindicates a hazard with a high level of risk
which will result in serious injury or death.
Warning orCaution indicates a hazard that could result
in injury or death.
{WARNING:
These mean there is something that could hurt
you or other people.
Notice: This means there is something that could
result in property or vehicle damage. This would not
be covered by the vehicle's warranty.
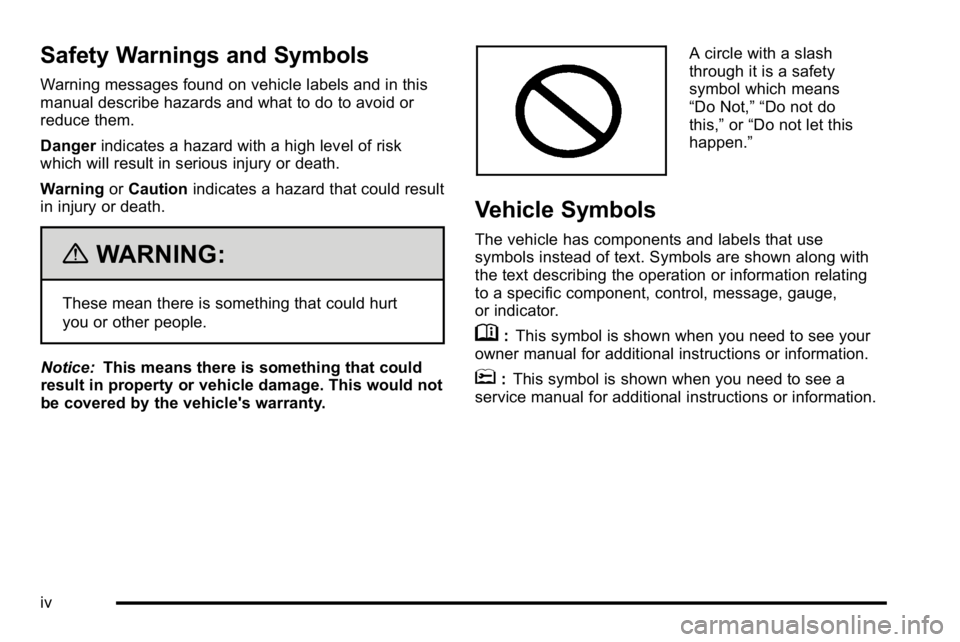
A circle with a slash
through it is a safety
symbol which means
“Do Not,” “Do not do
this,” or“Do not let this
happen.”
Vehicle Symbols
The vehicle has components and labels that use
symbols instead of text. Symbols are shown along with
the text describing the operation or information relating
to a specific component, control, message, gauge,
or indicator.
M: This symbol is shown when you need to see your
owner manual for additional instructions or information.
*: This symbol is shown when you need to see a
service manual for additional instructions or information.
iv
Page 30 of 614
Cruise Control
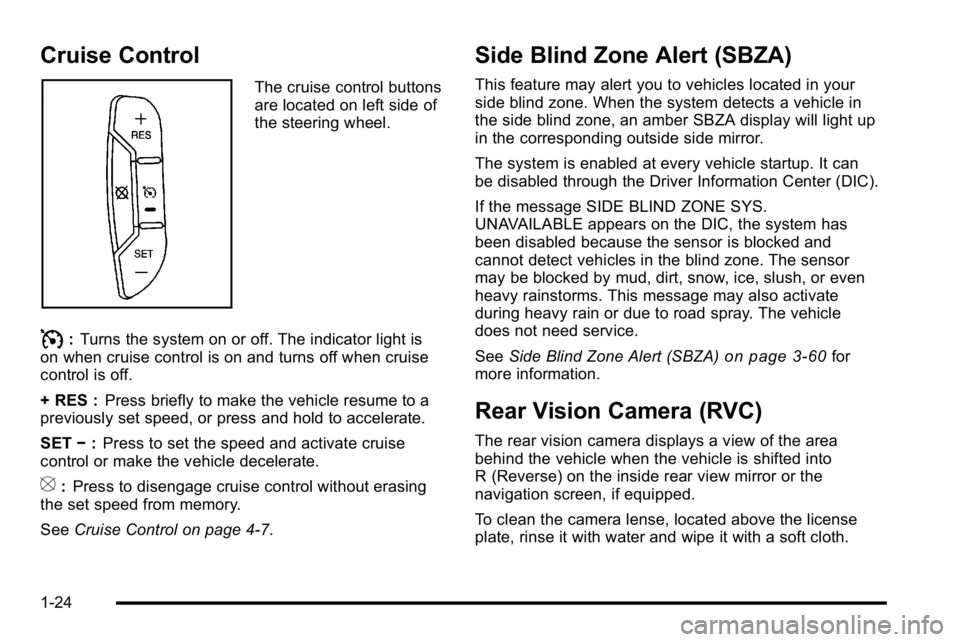
The cruise control buttons
are located on left side of
the steering wheel.
I:Turns the system on or off. The indicator light is
on when cruise control is on and turns off when cruise
control is off.
+ RES : Press briefly to make the vehicle resume to a
previously set speed, or press and hold to accelerate.
SET −:Press to set the speed and activate cruise
control or make the vehicle decelerate.
[: Press to disengage cruise control without erasing
the set speed from memory.
See Cruise Control on page 4‑7.
Side Blind Zone Alert (SBZA)
This feature may alert you to vehicles located in your
side blind zone. When the system detects a vehicle in
the side blind zone, an amber SBZA display will light up
in the corresponding outside side mirror.
The system is enabled at every vehicle startup. It can
be disabled through the Driver Information Center (DIC).
If the message SIDE BLIND ZONE SYS.
UNAVAILABLE appears on the DIC, the system has
been disabled because the sensor is blocked and
cannot detect vehicles in the blind zone. The sensor
may be blocked by mud, dirt, snow, ice, slush, or even
heavy rainstorms. This message may also activate
during heavy rain or due to road spray. The vehicle
does not need service.
SeeSide Blind Zone Alert (SBZA)
on page 3‑60for
more information.
Rear Vision Camera (RVC)
The rear vision camera displays a view of the area
behind the vehicle when the vehicle is shifted into
R (Reverse) on the inside rear view mirror or the
navigation screen, if equipped.
To clean the camera lense, located above the license
plate, rinse it with water and wipe it with a soft cloth.
1-24
Page 134 of 614
For some children, including children in child restraints,
and for very small adults, the passenger sensing
system may or may not turn off the right front passenger
frontal airbag, depending upon the person's seating
posture and body build. Everyone in your vehicle who
has outgrown child restraints should wear a safety belt
properly—whether or not there is an airbag for that
person.
{WARNING:
If the airbag readiness light ever comes on and
stays on, it means that something may be wrong
with the airbag system. To help avoid injury to
yourself or others, have the vehicle serviced right
away. See Airbag Readiness Light
on page 4‑32
for more information, including important safety
information.
If the On Indicator is Lit for a Child
Restraint
If a child restraint has been installed and the on
indicator is lit:
1. Turn the vehicle off.
2. Remove the child restraint from the vehicle.
3. Remove any additional items from the seat such as blankets, cushions, seat covers, seat heaters,
or seat massagers.
4. Reinstall the child restraint following the directions provided by the child restraint manufacturer and
refer to Securing a Child Restraint in the Right
Front Seat Position on page 2‑79.
2-96
Page 137 of 614
A thick layer of additional material, such as a blanket
or cushion, or aftermarket equipment such as seat
covers, seat heaters, and seat massagers can affect
how well the passenger sensing system operates.
We recommend that you not use seat covers or other
aftermarket equipment except when approved by GM
for your specific vehicle. SeeAdding Equipment to
Your Airbag-Equipped Vehicle
on page 2‑100for more
information about modifications that can affect how
the system operates.
The on indicator may be lit if an object, such as a
briefcase, handbag, grocery bag, laptop or other
electronic device, is put on an unoccupied seat.
If this is not desired remove the object from the seat.
{WARNING:
Stowing of articles under the passenger seat
or between the passenger seat cushion and
seatback may interfere with the proper operation
of the passenger sensing system.
Servicing Your Airbag-Equipped
Vehicle
Airbags affect how the vehicle should be serviced.
There are parts of the airbag system in several places
around the vehicle. Your dealer and the service manual
have information about servicing the vehicle and the
airbag system. To purchase a service manual, see
Service Publications Ordering Information
on
page 8‑16.
{WARNING:
For up to 10 seconds after the ignition is turned off
and the battery is disconnected, an airbag can still
inflate during improper service. You can be injured
if you are close to an airbag when it inflates. Avoid
yellow connectors. They are probably part of the
airbag system. Be sure to follow proper service
procedures, and make sure the person performing
work for you is qualified to do so.
2-99
Page 183 of 614
Four-Wheel Drive (Two Speed
Automatic Transfer Case)
If the vehicle has four-wheel drive, you can send the
engine's driving power to all four wheels for extra
traction. Read the following before using four-wheel
drive.
Notice:Driving on clean, dry pavement in
Four-Wheel Drive High or Four-Wheel Drive Low for
an extended period of time may cause premature
wear on your vehicle's powertrain. Do not drive on
clean, dry pavement in Four-Wheel Drive High or
Four-Wheel Drive Low for extended periods of time.
While driving on clean dry pavement and during tight
turns, you may experience a vibration in the steering
system.
The vehicle has StabiliTrak
®. Shifting into
Four-Wheel-Drive Low will turn Traction Control and
StabiliTrak
®off. See StabiliTrak®System on page 5‑6.
Front Axle
The front axle engages and disengages automatically
when you shift the transfer case. Some delay for the
axle to engage or disengage is normal.
Automatic Transfer Case
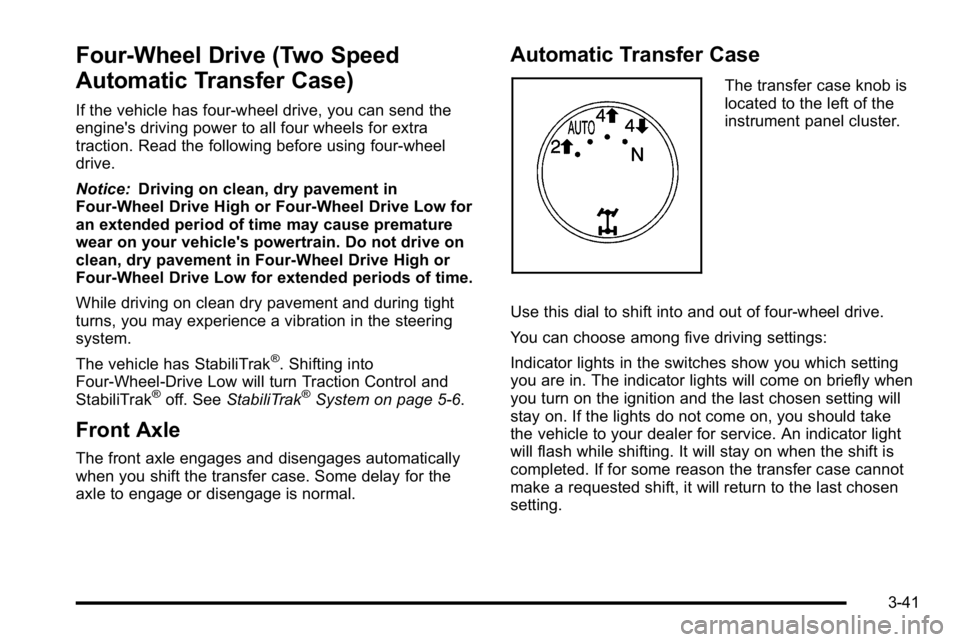
The transfer case knob is
located to the left of the
instrument panel cluster.
Use this dial to shift into and out of four-wheel drive.
You can choose among five driving settings:
Indicator lights in the switches show you which setting
you are in. The indicator lights will come on briefly when
you turn on the ignition and the last chosen setting will
stay on. If the lights do not come on, you should take
the vehicle to your dealer for service. An indicator light
will flash while shifting. It will stay on when the shift is
completed. If for some reason the transfer case cannot
make a requested shift, it will return to the last chosen
setting.
3-41
Page 189 of 614
Automatic Transfer Case
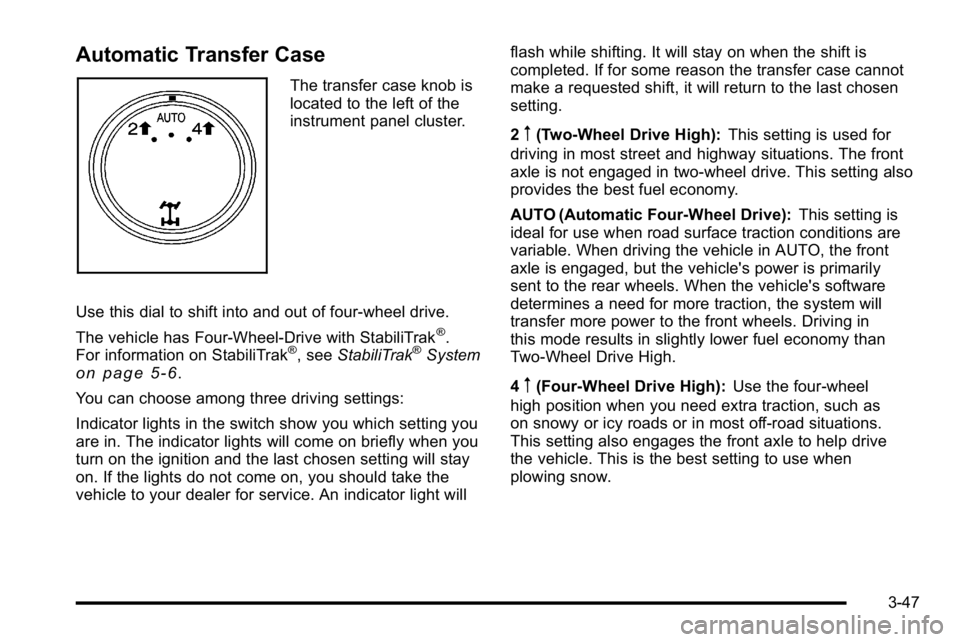
The transfer case knob is
located to the left of the
instrument panel cluster.
Use this dial to shift into and out of four-wheel drive.
The vehicle has Four-Wheel-Drive with StabiliTrak
®.
For information on StabiliTrak®, see StabiliTrak®Systemon page 5‑6.
You can choose among three driving settings:
Indicator lights in the switch show you which setting you
are in. The indicator lights will come on briefly when you
turn on the ignition and the last chosen setting will stay
on. If the lights do not come on, you should take the
vehicle to your dealer for service. An indicator light will flash while shifting. It will stay on when the shift is
completed. If for some reason the transfer case cannot
make a requested shift, it will return to the last chosen
setting.
2
m(Two-Wheel Drive High):
This setting is used for
driving in most street and highway situations. The front
axle is not engaged in two-wheel drive. This setting also
provides the best fuel economy.
AUTO (Automatic Four-Wheel Drive): This setting is
ideal for use when road surface traction conditions are
variable. When driving the vehicle in AUTO, the front
axle is engaged, but the vehicle's power is primarily
sent to the rear wheels. When the vehicle's software
determines a need for more traction, the system will
transfer more power to the front wheels. Driving in
this mode results in slightly lower fuel economy than
Two-Wheel Drive High.
4
m(Four-Wheel Drive High): Use the four-wheel
high position when you need extra traction, such as
on snowy or icy roads or in most off-road situations.
This setting also engages the front axle to help drive
the vehicle. This is the best setting to use when
plowing snow.
3-47
Page 190 of 614
Service Four Wheel Drive
If the SERVICE 4 WHEEL DRIVE message stays on,
you should take the vehicle to your dealer for service.
See“SERVICE 4 WHEEL DRIVE message” underDIC
Warnings and Messages on page 4‑61.
Shifting Into Four-Wheel Drive High or
AUTO (Automatic Four-Wheel Drive)
Turn the knob to the Four-Wheel High or AUTO
position. This can be done at any speed. The indicator
light will flash while shifting. It will remain on when the
shift is completed.
Shifting Into Two-Wheel Drive High
Turn the knob to the Two-Wheel High position. This can
be done at any speed. The indicator light will flash while
shifting. It will remain on when the shift is completed.
Excessively shifting the transfer case into or out of the
different modes may cause the transfer case to enter
the shift protection mode. This will protect the transfer
case from possible damage and will only allow the
transfer case to respond to one shift per 10 seconds.
The transfer case may stay in this mode for up to
three minutes.
Parking Brake
Set the parking brake by holding the regular brake
pedal down, then pushing down the parking brake
pedal.
If the ignition is on, the brake system warning light
will come on. See Brake System Warning Light
on
page 4‑36.
Notice: Driving with the parking brake on can
overheat the brake system and cause premature
wear or damage to brake system parts. Make sure
that the parking brake is fully released and the
brake warning light is off before driving.
3-48
Page 196 of 614

Mirrors
Manual Rearview Mirror
Hold the inside rearview mirror in the center to move it
for a clearer view behind your vehicle. Adjust the mirror
to avoid glare from the headlamps behind you. Push the
tab forward for daytime use and pull it for nighttime use.
Automatic Dimming Rearview Mirror
The vehicle may have an automatic dimming rearview
mirror.
Vehicles with OnStar
®have three additional control
buttons for the OnStar®system. See your dealer for
more information about OnStar®and how to subscribe
to it. See the OnStar®owner's guide for more
information about the services OnStar®provides.
O(On/Off): Press to turn the dimming feature on or off.
The vehicle may also have a Rear Vision Camera
(RVC). See Rear Vision Camera (RVC)
on page 3‑64for more information.
If the vehicle has RVC, the
O(On/Off) button for
turning the automatic dimming feature on or off will
not be available.
Automatic Dimming Mirror Operation
Automatic dimming reduces the glare from the
headlamps of the vehicle behind you. The dimming
feature comes on and the indicator light illuminates
each time the ignition is turned to start.
Cleaning the Mirror
Do not spray glass cleaner directly on the mirror.
Use a soft towel dampened with water.
Outside Manual Mirrors
Adjust the outside mirror for a clearer view.
Manually fold the mirrors inward to prevent damage
when going through an automatic car wash. To fold,
push the mirror toward the vehicle. Push the mirror
outward, to return to its original position.
Using hood-mounted air deflectors and add-on convex
mirror attachments could decrease mirror performance.
3-54
Page 201 of 614
WARNING: (Continued)
If you do not use proper care before and while
backing; vehicle damage, injury, or death could
occur. Even with URPA, always check behind the
vehicle before backing up. While backing, be sure
to look for objects and check the vehicle's mirrors.
How the System Works
URPA comes on automatically when the shift lever
is moved into R (Reverse). A single tone sounds to
indicate the system is working.
URPA operates only at speeds less than
5 mph (8 km/h).
An obstacle is indicated by audible beeps. The interval
between the beeps becomes shorter as the vehicle gets
closer to the obstacle. When the distance is less than
30 cm (12 in) the beeps are continuous.
To be detected, objects must be at least 25.4 cm (10 in)
off the ground and below liftgate level. Objects must
also be within 2.5 m (8 ft) from the rear bumper. This
distance may be less during warmer or humid weather.
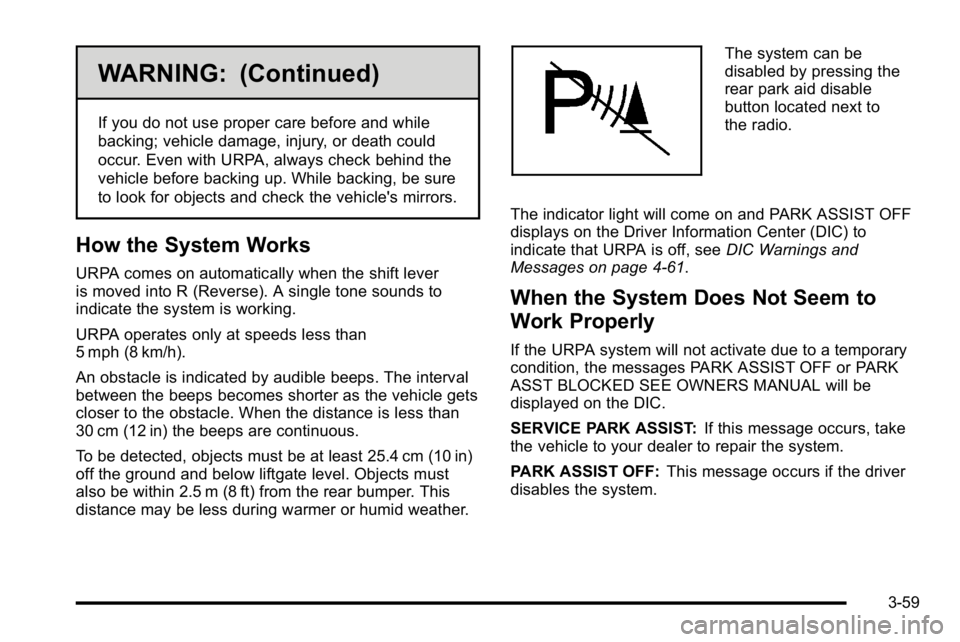
The system can be
disabled by pressing the
rear park aid disable
button located next to
the radio.
The indicator light will come on and PARK ASSIST OFF
displays on the Driver Information Center (DIC) to
indicate that URPA is off, see DIC Warnings and
Messages on page 4‑61.
When the System Does Not Seem to
Work Properly
If the URPA system will not activate due to a temporary
condition, the messages PARK ASSIST OFF or PARK
ASST BLOCKED SEE OWNERS MANUAL will be
displayed on the DIC.
SERVICE PARK ASSIST: If this message occurs, take
the vehicle to your dealer to repair the system.
PARK ASSIST OFF: This message occurs if the driver
disables the system.
3-59
Page 235 of 614

Fog Lamps
For vehicles with fog lamps, the control is located next
to the exterior lamps control on the instrument panel, to
the left of the steering column.
The ignition must be in the ON/RUN position for the fog
lamps to come on.
#(Fog Lamps):Press to turn the fog lamps on or off.
A light will come on in the instrument panel cluster.
When the fog lamps are turned on, the parking lamps
automatically turn on.
When the headlamps are changed to high-beam, the
fog lamps also go off. When the high-beam headlamps
are turned off, the fog lamps will come on again.
Some localities have laws that require the headlamps to
be on along with the fog lamps.
Auxiliary Roof-Mounted Lamp
If the vehicle has this feature, this button includes wiring
provisions for a dealer or a qualified service center to
install an auxiliary roof lamp.
This button is located on
the overhead console.
When the wiring is connected to an auxiliary roof
mounted lamp, pressing the bottom of the button will
activate the lamp and illuminate an indicator light at the
bottom of this button. Pressing the top of the button will
turn off the roof mounted lamp and indicator.
4-13