transmission oil GMC YUKON 2013 Owner's Manual
[x] Cancel search | Manufacturer: GMC, Model Year: 2013, Model line: YUKON, Model: GMC YUKON 2013Pages: 510, PDF Size: 6.36 MB
Page 7 of 510
Black plate (1,1)GMC Yukon/Yukon XL Owner Manual - 2013 - CRC 2nd edition - 8/15/12
In Brief 1-1
In Brief
Instrument Panel
Instrument Panel Overview . . . . 1-2
Initial Drive Information
Initial Drive Information . . . . . . . . 1-4
Remote Keyless Entry (RKE)System . . . . . . . . . . . . . . . . . . . . . . 1-4
Remote Vehicle Start . . . . . . . . . 1-5
Door Locks . . . . . . . . . . . . . . . . . . . 1-5
Liftgate . . . . . . . . . . . . . . . . . . . . . . . . 1-6
Windows . . . . . . . . . . . . . . . . . . . . . . 1-7
Seat Adjustment . . . . . . . . . . . . . . 1-7
Memory Features . . . . . . . . . . . . . 1-9
Second Row Seats . . . . . . . . . . 1-10
Third Row Seats . . . . . . . . . . . . . 1-10
Heated and Ventilated Seats . . . . . . . . . . . . . . . . . . . . . . . 1-10
Head Restraint Adjustment . . . . . . . . . . . . . . . . . 1-10 Safety Belts . . . . . . . . . . . . . . . . . . 1-11
Passenger Sensing
System . . . . . . . . . . . . . . . . . . . . . 1-11
Mirror Adjustment . . . . . . . . . . . . 1-12
Steering Wheel Adjustment . . . . . . . . . . . . . . . . . 1-14
Throttle and Brake Pedal Adjustment . . . . . . . . . . . . . . . . . 1-14
Interior Lighting . . . . . . . . . . . . . . 1-14
Exterior Lighting . . . . . . . . . . . . . 1-15
Windshield Wiper/Washer . . . . 1-16
Climate Controls . . . . . . . . . . . . . 1-17
Transmission . . . . . . . . . . . . . . . . 1-18
Four-Wheel Drive . . . . . . . . . . . . 1-19
Vehicle Features
Radio(s) . . . . . . . . . . . . . . . . . . . . . 1-20
Satellite Radio . . . . . . . . . . . . . . . 1-22
Portable Audio Devices . . . . . . 1-22
Bluetooth
®. . . . . . . . . . . . . . . . . . . 1-22
Steering Wheel Controls . . . . . 1-22
Cruise Control . . . . . . . . . . . . . . . 1-23 Navigation System . . . . . . . . . . . 1-23
Side Blind Zone
Alert (SBZA) . . . . . . . . . . . . . . . 1-24
Rear Vision Camera (RVC) . . . . . . . . . . . . . 1-24
Ultrasonic Parking Assist . . . . 1-24
Power Outlets . . . . . . . . . . . . . . . 1-24
Universal Remote System . . . 1-25
Sunroof . . . . . . . . . . . . . . . . . . . . . . 1-25
Performance and Maintenance
StabiliTrak®System . . . . . . . . . 1-26
Tire Pressure Monitor . . . . . . . . 1-26
Engine Oil Life System . . . . . . 1-27
Fuel E85 (85% Ethanol) . . . . . 1-27
Driving for Better Fuel Economy . . . . . . . . . . . . . . . . . . . 1-27
Roadside Assistance Program . . . . . . . . . . . . . . . . . . . . 1-28
OnStar
®. . . . . . . . . . . . . . . . . . . . . 1-28
Page 127 of 510
Black plate (1,1)GMC Yukon/Yukon XL Owner Manual - 2013 - CRC 2nd edition - 8/15/12
Instruments and Controls 5-1
Instruments and
Controls
Controls
Steering Wheel Adjustment . . . 5-2
Steering Wheel Controls . . . . . . 5-2
Horn . . . . . . . . . . . . . . . . . . . . . . . . . . 5-4
Windshield Wiper/Washer . . . . . 5-4
Rear Window Wiper/Washer . . . . . . . . . . . . . . . . . . . . . . 5-5
Compass . . . . . . . . . . . . . . . . . . . . . 5-5
Clock . . . . . . . . . . . . . . . . . . . . . . . . . 5-7
Power Outlets . . . . . . . . . . . . . . . . . 5-8
Warning Lights, Gauges, and
Indicators
Warning Lights, Gauges, and Indicators . . . . . . . . . . . . . . . . . . 5-10
Instrument Cluster . . . . . . . . . . . 5-11
Speedometer . . . . . . . . . . . . . . . . 5-12
Odometer . . . . . . . . . . . . . . . . . . . . 5-12
Trip Odometer . . . . . . . . . . . . . . . 5-12
Tachometer . . . . . . . . . . . . . . . . . . 5-12
Fuel Gauge . . . . . . . . . . . . . . . . . . 5-12
Engine Oil Pressure Gauge . . . . . . . . . . . . . . . . . . . . . . 5-13 Engine Coolant Temperature
Gauge . . . . . . . . . . . . . . . . . . . . . . 5-14
Voltmeter Gauge . . . . . . . . . . . . . 5-15
Safety Belt Reminders . . . . . . . 5-16
Airbag Readiness Light . . . . . . 5-16
Passenger Airbag Status Indicator . . . . . . . . . . . . . . . . . . . . 5-17
Charging System Light . . . . . . 5-18
Malfunction Indicator Lamp . . . . . . . . . . . . . 5-19
Brake System Warning Light . . . . . . . . . . . . . . . . . . . . . . . 5-21
Antilock Brake System (ABS) Warning Light . . . . . . . . . . . . . . 5-22
Tow/Haul Mode Light . . . . . . . . 5-22
StabiliTrak
®OFF Light . . . . . . . 5-23
Traction Control System (TCS)/StabiliTrak
®Light . . . . 5-23
Tire Pressure Light . . . . . . . . . . 5-23
Engine Oil Pressure Light . . . . 5-24
Low Fuel Warning Light . . . . . . 5-24
Security Light . . . . . . . . . . . . . . . . 5-25
High-Beam On Light . . . . . . . . . 5-25
Front Fog Lamp Light . . . . . . . . 5-25
Cruise Control Light . . . . . . . . . 5-26
Information Displays
Driver Information Center (DIC) . . . . . . . . . . . . . . . 5-26
Vehicle Messages
Vehicle Messages . . . . . . . . . . . 5-35
Battery Voltage and ChargingMessages . . . . . . . . . . . . . . . . . . 5-35
Brake System Messages . . . . 5-35
Door Ajar Messages . . . . . . . . . 5-36
Engine Cooling System Messages . . . . . . . . . . . . . . . . . . 5-37
Engine Oil Messages . . . . . . . . 5-37
Engine Power Messages . . . . 5-38
Fuel System Messages . . . . . . 5-38
Key and Lock Messages . . . . . 5-39
Lamp Messages . . . . . . . . . . . . . 5-39
Object Detection System Messages . . . . . . . . . . . . . . . . . . 5-39
Ride Control System Messages . . . . . . . . . . . . . . . . . . 5-40
Airbag System Messages . . . . 5-41
Security Messages . . . . . . . . . . 5-41
Tire Messages . . . . . . . . . . . . . . . 5-42
Transmission Messages . . . . . 5-42
Vehicle Reminder Messages . . . . . . . . . . . . . . . . . . 5-43
Washer Fluid Messages . . . . . 5-44
Vehicle Personalization
Vehicle Personalization (With DIC Buttons) . . . . . . . . . . . . . . . 5-45
Page 153 of 510
Black plate (27,1)GMC Yukon/Yukon XL Owner Manual - 2013 - CRC 2nd edition - 8/15/12
Instruments and Controls 5-27
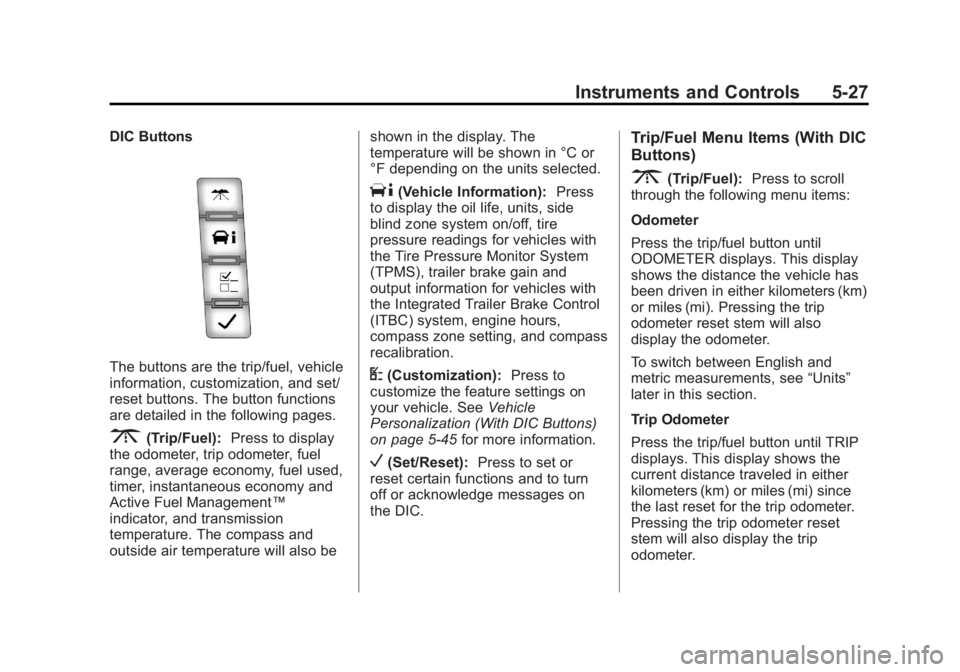
DIC Buttons
The buttons are the trip/fuel, vehicle
information, customization, and set/
reset buttons. The button functions
are detailed in the following pages.
3(Trip/Fuel):Press to display
the odometer, trip odometer, fuel
range, average economy, fuel used,
timer, instantaneous economy and
Active Fuel Management™
indicator, and transmission
temperature. The compass and
outside air temperature will also be shown in the display. The
temperature will be shown in °C or
°F depending on the units selected.
T(Vehicle Information):
Press
to display the oil life, units, side
blind zone system on/off, tire
pressure readings for vehicles with
the Tire Pressure Monitor System
(TPMS), trailer brake gain and
output information for vehicles with
the Integrated Trailer Brake Control
(ITBC) system, engine hours,
compass zone setting, and compass
recalibration.
U(Customization): Press to
customize the feature settings on
your vehicle. See Vehicle
Personalization (With DIC Buttons)
on page 5‑45 for more information.
V(Set/Reset):Press to set or
reset certain functions and to turn
off or acknowledge messages on
the DIC.
Trip/Fuel Menu Items (With DIC
Buttons)
3(Trip/Fuel): Press to scroll
through the following menu items:
Odometer
Press the trip/fuel button until
ODOMETER displays. This display
shows the distance the vehicle has
been driven in either kilometers (km)
or miles (mi). Pressing the trip
odometer reset stem will also
display the odometer.
To switch between English and
metric measurements, see “Units”
later in this section.
Trip Odometer
Press the trip/fuel button until TRIP
displays. This display shows the
current distance traveled in either
kilometers (km) or miles (mi) since
the last reset for the trip odometer.
Pressing the trip odometer reset
stem will also display the trip
odometer.
Page 155 of 510
Black plate (29,1)GMC Yukon/Yukon XL Owner Manual - 2013 - CRC 2nd edition - 8/15/12
Instruments and Controls 5-29
Speedometer
The speedometer shows how fast
the vehicle is moving in either
kilometers per hour (km/h) or miles
per hour (mph). The speedometer
cannot be reset.
Timer
Press the trip/fuel button until
TIMER displays. This display can be
used as a timer.
To start the timer, press the set/
reset button while TIMER is
displayed. The display will show the
amount of time that has passed
since the timer was last reset, not
including time the ignition is off.
Time will continue to be counted as
long as the ignition is on, even if
another display is being shown on
the DIC. The timer will record up to
99 hours, 59 minutes and
59 seconds (99:59:59) after which
the display will return to zero.
To stop the timer, press the set/reset
button briefly while TIMER is
displayed.To reset the timer to zero, press and
hold the set/reset button while
TIMER is displayed.
Transmission Temperature
Press the trip/fuel button until
TRANS TEMP displays. This
display shows the temperature of
the automatic transmission fluid in
either degrees Celsius (°C) or
degrees Fahrenheit (°F).
Instantaneous Economy and
Active Fuel Management™
Indicator
If your vehicle has this display,
press the trip/fuel button until INST
ECON V8 displays. This display
shows the current fuel economy at a
particular moment and will change
frequently as driving conditions
change. This display shows the
instantaneous fuel economy in liters
per 100 kilometers (L/100 km) or
miles per gallon (mpg). Unlike
average economy, this screen
cannot be reset.
An Active Fuel Management
indicator will display on the right
side of the DIC, while INST ECON
displays on the left side. Active Fuel
Management allows the engine to
operate on either four or eight
cylinders, depending on your driving
demands. When Active Fuel
Management is active, V4 will
display on the DIC. When Active
Fuel Management is inactive, V8
will display. See
Active Fuel
Management
®on page 9‑28 for
more information.
Blank Display
This display shows no information.
Vehicle Information Menu
Items (With DIC Buttons)
T(Vehicle Information): Press
to scroll through the following menu
items:
Oil Life
Press the vehicle information button
until OIL LIFE REMAINING
displays. This display shows an
Page 288 of 510

Black plate (24,1)GMC Yukon/Yukon XL Owner Manual - 2013 - CRC 2nd edition - 8/15/12
9-24 Driving and Operating
Starting Procedure
1. With your foot off the acceleratorpedal, turn the ignition to START.
When the engine starts, let go of
the key. The idle speed will go
down as the engine warms. Do
not race the engine immediately
after starting it. Operate the
engine and transmission gently
to allow the oil to warm up and
lubricate all moving parts.
The vehicle has a
Computer-Controlled Cranking
System. This feature assists in
starting the engine and protects
components. If the ignition key is
turned to the START position,
and then released when the
engine begins cranking, the
engine will continue cranking for
a few seconds or until the
vehicle starts. If the engine does
not start and the key is held in
START, cranking will be stopped
after 15 seconds to prevent
cranking motor damage. To
prevent gear damage, this
system also prevents cranking if the engine is already running.
Engine cranking can be stopped
by turning the ignition switch to
the ACC/ACCESSORY or
LOCK/OFF position.
When the Low Fuel warning
lamp is on and the FUEL LEVEL
LOW message is displayed in
the Driver Information Center
(DIC), the Computer-Controlled
Cranking System is disabled to
prevent possible vehicle
component damage. When this
happens, hold the ignition switch
in the START position to
continue engine cranking.
Notice: Cranking the engine for
long periods of time, by returning
the key to the START position
immediately after cranking has
ended, can overheat and damage
the cranking motor, and drain the
battery. Wait at least 15 seconds
between each try, to let the
cranking motor cool down. 2. If the engine does not start after
5-10 seconds, especially in very
cold weather (below −18°C or 0°
F), it could be flooded with too
much gasoline. Try pushing the
accelerator pedal all the way to
the floor and holding it there as
you hold the key in START for
up to a maximum of 15 seconds.
Wait at least 15 seconds
between each try, to allow the
cranking motor to cool down.
When the engine starts, let go of
the key and accelerator. If the
vehicle starts briefly but then
stops again, repeat these steps.
This clears the extra gasoline
from the engine. Do not race the
engine immediately after starting
it. Operate the engine and
transmission gently until the oil
warms up and lubricates all
moving parts.
Notice: If you add electrical parts
or accessories, you could change
the way the engine operates. Any
resulting damage would not be
Page 329 of 510

Black plate (65,1)GMC Yukon/Yukon XL Owner Manual - 2013 - CRC 2nd edition - 8/15/12
Driving and Operating 9-65
The Tow/Haul Mode may be used if
the transmission shifts too often.
SeeTow/Haul Mode on page 9‑33.
When towing at high altitude on
steep uphill grades, consider the
following: Engine coolant will boil at
a lower temperature than at normal
altitudes. If the engine is turned off
immediately after towing at high
altitude on steep uphill grades, the
vehicle may show signs similar to
engine overheating. To avoid this,
let the engine run while parked,
preferably on level ground, with the
automatic transmission in P (Park)
for a few minutes before turning the
engine off. If the overheat warning
comes on, see Engine Overheating
on page 10‑18.Parking on Hills
{WARNING
Parking the vehicle on a hill with
the trailer attached can be
dangerous. If something goes
wrong, the rig could start to move.
People can be injured, and both
the vehicle and the trailer can be
damaged. When possible, always
park the rig on a flat surface.
If parking the rig on a hill:
1. Press the brake pedal, but do not shift into P (Park) yet. Turn
the wheels into the curb if facing
downhill or into traffic if facing
uphill.
2. Have someone place chocks under the trailer wheels.
3. When the wheel chocks are in place, release the regular brakes
until the chocks absorb the load. 4. Reapply the brake pedal. Then
apply the parking brake and shift
into P (Park).
5. Release the brake pedal.Leaving After Parking on a Hill
1. Apply and hold the brake pedal.
2. Start the engine.
3. Shift into a gear.
4. Release the parking brake.
5. Let up on the brake pedal.
6. Drive slowly until the trailer is clear of the chocks.
7. Stop and have someone pick up and store the chocks.
Maintenance when Trailer
Towing
The vehicle needs service more
often when pulling a trailer. See
Maintenance Schedule on
page 11‑2. Things that are
especially important in trailer
operation are automatic
transmission fluid, engine oil, axle
Page 349 of 510
Black plate (1,1)GMC Yukon/Yukon XL Owner Manual - 2013 - CRC 2nd edition - 8/15/12
Vehicle Care 10-1
Vehicle Care
General Information
General Information . . . . . . . . . . 10-2
California Proposition65 Warning . . . . . . . . . . . . . . . . . 10-2
California Perchlorate Materials Requirements . . . . 10-3
Accessories and Modifications . . . . . . . . . . . . . . . 10-3
Vehicle Checks
Doing Your OwnService Work . . . . . . . . . . . . . . . 10-3
Hood . . . . . . . . . . . . . . . . . . . . . . . . 10-4
Engine Compartment Overview . . . . . . . . . . . . . . . . . . . 10-5
Engine Oil . . . . . . . . . . . . . . . . . . . 10-6
Engine Oil Life System . . . . . . 10-9
Automatic Transmission Fluid . . . . . . . . . . . . . . . . . . . . . . 10-10
Engine Air Cleaner/Filter . . . . 10-13
Cooling System . . . . . . . . . . . . 10-14
Engine Coolant . . . . . . . . . . . . . 10-15
Engine Overheating . . . . . . . . 10-18
Overheated Engine Protection
Operating Mode . . . . . . . . . . . 10-20 Engine Fan . . . . . . . . . . . . . . . . . 10-20
Power Steering Fluid . . . . . . . 10-21
Washer Fluid . . . . . . . . . . . . . . . 10-22
Brakes . . . . . . . . . . . . . . . . . . . . . 10-22
Brake Fluid . . . . . . . . . . . . . . . . . 10-23
Battery . . . . . . . . . . . . . . . . . . . . . 10-25
Four-Wheel Drive . . . . . . . . . . . 10-26
Front Axle . . . . . . . . . . . . . . . . . . 10-26
Rear Axle . . . . . . . . . . . . . . . . . . 10-27
Starter Switch Check . . . . . . . 10-28
Automatic Transmission Shift
Lock Control Function
Check . . . . . . . . . . . . . . . . . . . . . 10-29
Ignition Transmission Lock Check . . . . . . . . . . . . . . . . . . . . . 10-29
Park Brake and P (Park) Mechanism Check . . . . . . . . 10-29
Wiper Blade Replacement . . . . . . . . . . . . . . 10-30
Glass Replacement . . . . . . . . 10-31
Headlamp Aiming
Headlamp Aiming . . . . . . . . . . 10-31
Bulb Replacement
Bulb Replacement . . . . . . . . . . 10-31
Halogen Bulbs . . . . . . . . . . . . . . 10-31 Taillamps, Turn Signal,
Sidemarker, Stoplamps,
and Back-Up Lamps . . . . . . 10-31
License Plate Lamp . . . . . . . . 10-32
Replacement Bulbs . . . . . . . . . 10-33
Electrical System
Electrical System Overload . . . . . . . . . . . . . . . . . . 10-33
Fuses and Circuit Breakers . . . . . . . . . . . . . . . . . . 10-34
Engine Compartment Fuse Block . . . . . . . . . . . . . . . . . . . . . 10-34
Instrument Panel Fuse Block . . . . . . . . . . . . . . . . . . . . . 10-38
Wheels and Tires
Tires . . . . . . . . . . . . . . . . . . . . . . . . 10-41
All-Season Tires . . . . . . . . . . . . 10-42
Winter Tires . . . . . . . . . . . . . . . . 10-43
Summer Tires . . . . . . . . . . . . . . 10-43
Tire Sidewall Labeling . . . . . . 10-43
Tire Designations . . . . . . . . . . . 10-46
Tire Terminology andDefinitions . . . . . . . . . . . . . . . . 10-47
Tire Pressure . . . . . . . . . . . . . . . 10-50
Tire Pressure Monitor System . . . . . . . . . . . . . . . . . . . 10-51
Page 354 of 510
Black plate (6,1)GMC Yukon/Yukon XL Owner Manual - 2013 - CRC 2nd edition - 8/15/12
10-6 Vehicle Care
A.Engine Air Cleaner/Filter on
page 10‑13.
B. Coolant Surge Tank and Pressure Cap. See Cooling
System on page 10‑14.
C. Remote Positive (+) Terminal. See Jump Starting on
page 10‑79.
D. Battery on page 10‑25.
E. Remote Negative (−) Terminal (Out of View). See Jump
Starting on page 10‑79.
F. Automatic Transmission Dipstick (Out of View). See
“Checking the Fluid Level”
under Automatic Transmission
Fluid on page 10‑10.
G. Engine Oil Fill Cap. See “When
to Add Engine Oil” under
Engine Oil on page 10‑6.
H. Engine Oil Dipstick (Out of View). See “Checking Engine
Oil” under Engine Oil on
page 10‑6. I. Engine Cooling Fan (Out of
View). See Cooling System on
page 10‑14.
J. Power Steering Fluid Reservoir. See Power Steering Fluid on
page 10‑21.
K. Brake Master Cylinder Reservoir. See “Brake Fluid”
under Brake Fluid on
page 10‑23.
L. Engine Compartment Fuse
Block on page 10‑34.
M. Windshield Washer Fluid Reservoir. See “Adding Washer
Fluid” under Washer Fluid on
page 10‑22.
If the vehicle is a hybrid, see the
hybrid supplement for more
information.Engine Oil
To ensure proper engine
performance and long life, careful
attention must be paid to engine oil.
Following these simple, but
important steps will help protect
your investment:
.Always use engine oil approved
to the proper specification and of
the proper viscosity grade. See
“Selecting the Right Engine Oil”
in this section.
.Check the engine oil level
regularly and maintain the
proper oil level. See “Checking
Engine Oil” and“When to Add
Engine Oil” in this section.
.Change the engine oil at the
appropriate time. See Engine Oil
Life System on page 10‑9.
.Always dispose of engine oil
properly. See “What to Do with
Used Oil” in this section.
Page 358 of 510
Black plate (10,1)GMC Yukon/Yukon XL Owner Manual - 2013 - CRC 2nd edition - 8/15/12
10-10 Vehicle Care
On all vehicles, the Engine Oil Life
System can be reset as follows:
1. Turn the ignition to ON/RUN withthe engine off.
2. Fully press the accelerator pedal slowly three times within
five seconds.
3. Display the OIL LIFE REMAINING on the DIC. If the
display shows 100%, the system
is reset. See Driver Information
Center (DIC) on page 5‑26.
If the vehicle has a CHANGE
ENGINE OIL SOON message and it
comes back on when the vehicle is
started and/or the OIL LIFE
REMAINING is near 0%, the engine
oil life system has not been reset.
Repeat the procedure.Automatic Transmission
Fluid
When to Check and Change
Automatic Transmission Fluid
It is usually not necessary to check
the transmission fluid level. The only
reason for fluid loss is a
transmission leak or overheated
transmission. If a small leak is
suspected, then use the following
checking procedures to check the
fluid level. However, if there is a
large leak, then it may be necessary
to have the vehicle towed to a
dealer and have it repaired before
driving the vehicle further.
Notice: Use of the incorrect
automatic transmission fluid may
damage the vehicle, and the
damages may not be covered by
the vehicle warranty. Always use
the automatic transmission fluid
listed in Recommended Fluids
and Lubricants on page 11‑11. Change the fluid and filter at the
scheduled maintenance intervals
listed in
Maintenance Schedule on
page 11‑2. Be sure to use the
transmission fluid listed in
Recommended Fluids and
Lubricants on page 11‑11.
How to Check Automatic
Transmission Fluid
Notice: Too much or too little
fluid can damage the
transmission. Too much can
mean that some of the fluid could
come out and fall on hot engine
parts or exhaust system parts,
starting a fire. Too little fluid
could cause the transmission to
overheat. Be sure to get an
accurate reading if checking the
transmission fluid.
Before checking the fluid level,
prepare the vehicle as follows:
1. Start the engine and park the vehicle on a level surface. Keep
the engine running.
Page 361 of 510
Black plate (13,1)GMC Yukon/Yukon XL Owner Manual - 2013 - CRC 2nd edition - 8/15/12
Vehicle Care 10-13
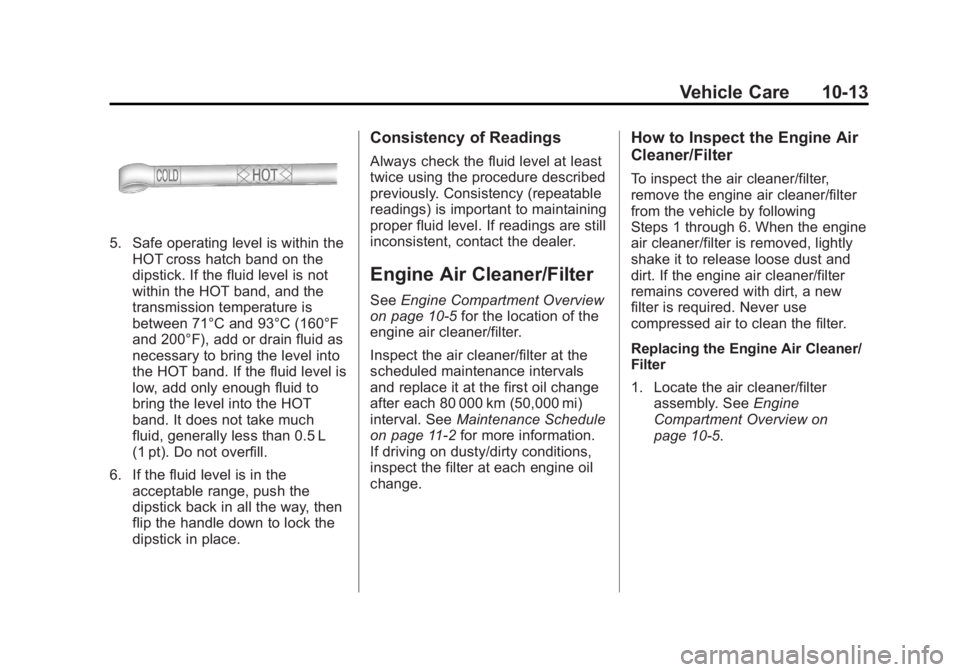
5. Safe operating level is within theHOT cross hatch band on the
dipstick. If the fluid level is not
within the HOT band, and the
transmission temperature is
between 71°C and 93°C (160°F
and 200°F), add or drain fluid as
necessary to bring the level into
the HOT band. If the fluid level is
low, add only enough fluid to
bring the level into the HOT
band. It does not take much
fluid, generally less than 0.5 L
(1 pt). Do not overfill.
6. If the fluid level is in the acceptable range, push the
dipstick back in all the way, then
flip the handle down to lock the
dipstick in place.
Consistency of Readings
Always check the fluid level at least
twice using the procedure described
previously. Consistency (repeatable
readings) is important to maintaining
proper fluid level. If readings are still
inconsistent, contact the dealer.
Engine Air Cleaner/Filter
See Engine Compartment Overview
on page 10‑5 for the location of the
engine air cleaner/filter.
Inspect the air cleaner/filter at the
scheduled maintenance intervals
and replace it at the first oil change
after each 80 000 km (50,000 mi)
interval. See Maintenance Schedule
on page 11‑2 for more information.
If driving on dusty/dirty conditions,
inspect the filter at each engine oil
change.
How to Inspect the Engine Air
Cleaner/Filter
To inspect the air cleaner/filter,
remove the engine air cleaner/filter
from the vehicle by following
Steps 1 through 6. When the engine
air cleaner/filter is removed, lightly
shake it to release loose dust and
dirt. If the engine air cleaner/filter
remains covered with dirt, a new
filter is required. Never use
compressed air to clean the filter.
Replacing the Engine Air Cleaner/
Filter
1. Locate the air cleaner/filter
assembly. See Engine
Compartment Overview on
page 10‑5.