brake GMC YUKON 2015 Get To Know Guide
[x] Cancel search | Manufacturer: GMC, Model Year: 2015, Model line: YUKON, Model: GMC YUKON 2015Pages: 20, PDF Size: 3.15 MB
Page 2 of 20
2
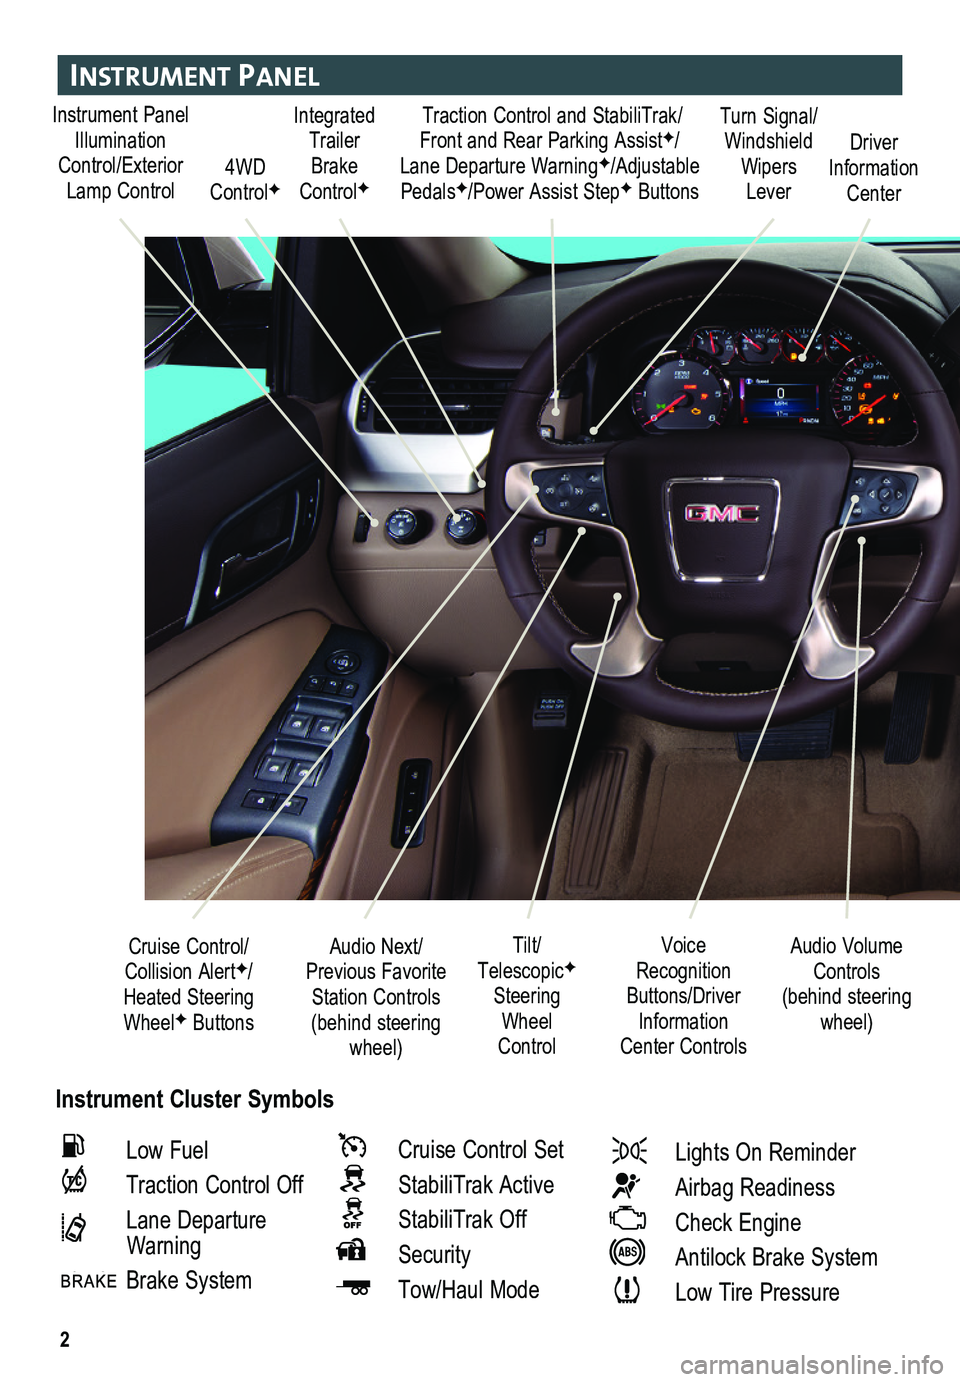
Instrument Panel
Instrument Cluster Symbols
Audio Next/Previous Favorite Station Controls (behind steering wheel)
Cruise Control/ Collision AlertF/Heated Steering WheelF Buttons
Voice Recognition Buttons/Driver Information Center Controls
Audio Volume Controls (behind steering wheel)
Tilt/ TelescopicF Steering Wheel Control
Instrument Panel Illumination Control/Exterior Lamp Control4WD ControlF
Traction Control and StabiliTrak/ Front and Rear Parking AssistF/Lane Departure WarningF/Adjustable PedalsF/Power Assist StepF Buttons
Driver Information Center
Turn Signal/ Windshield Wipers Lever
Integrated Trailer Brake ControlF
Low Fuel
Traction Control Off
Lane Departure Warning
Brake System
Cruise Control Set
StabiliTrak Active
StabiliTrak Off
Security
Tow/Haul Mode
Lights On Reminder
Airbag Readiness
Check Engine
Antilock Brake System
Low Tire Pressure
Page 5 of 20
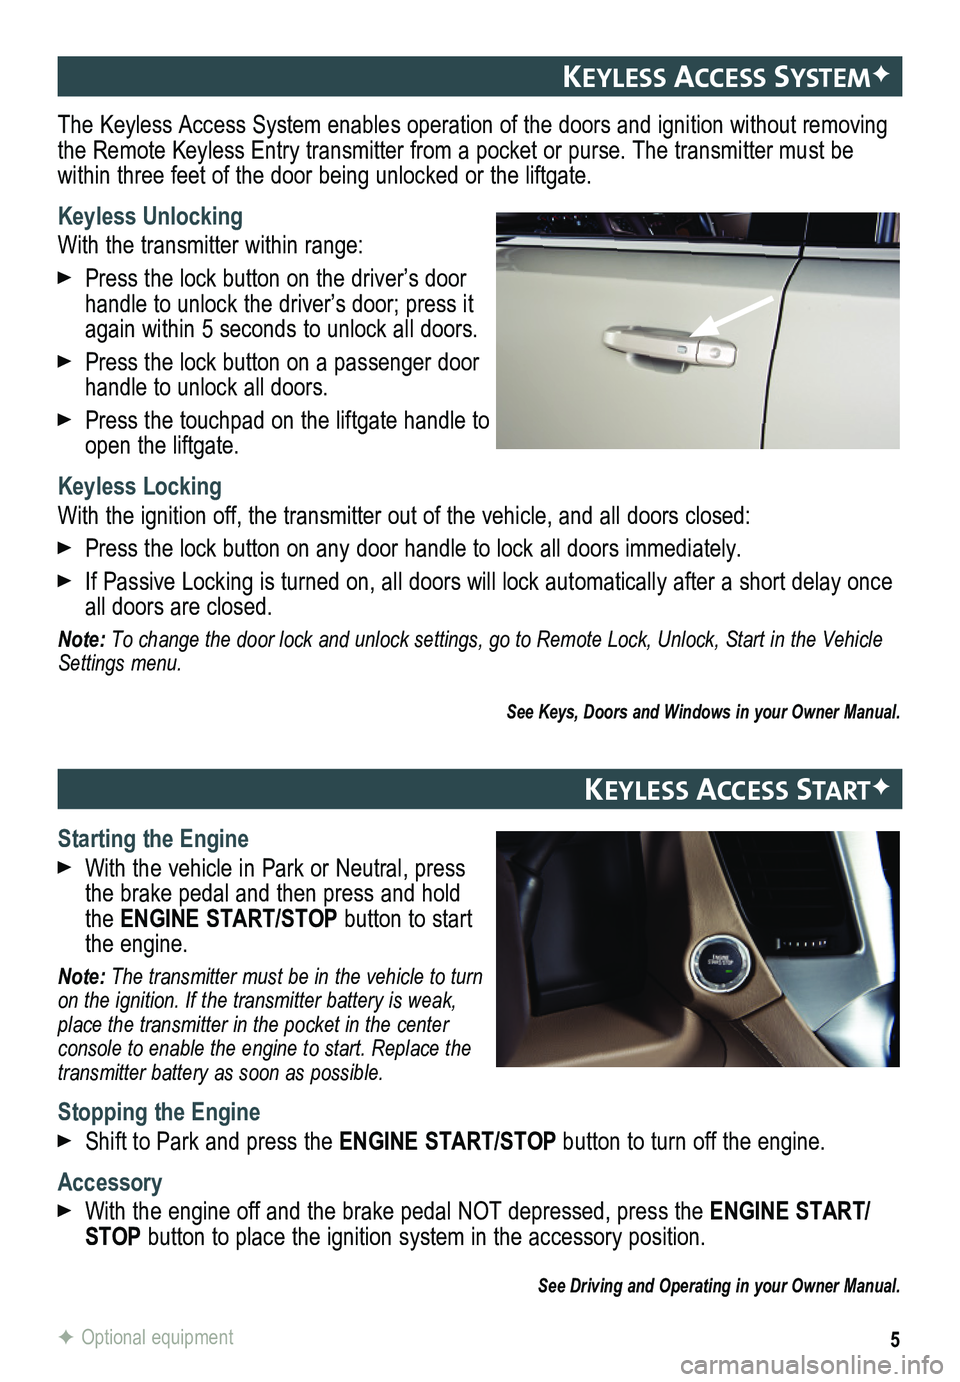
The Keyless Access System enables operation of the doors and ignition wi\
thout removing the Remote Keyless Entry transmitter from a pocket or purse. The transmi\
tter must be within three feet of the door being unlocked or the liftgate.
Keyless Unlocking
With the transmitter within range:
Press the lock button on the driver’s door handle to unlock the driver’s door; press it again within 5 seconds to unlock all doors.
Press the lock button on a passenger door handle to unlock all doors.
Press the touchpad on the liftgate handle to open the liftgate.
Keyless Locking
With the ignition off, the transmitter out of the vehicle, and all doors closed:
Press the lock button on any door handle to lock all doors immediately.
If Passive Locking is turned on, all doors will lock automatically after a short delay once all doors are closed.
Note: To change the door lock and unlock settings, go to Remote Lock, Unlock, Start in the Vehicle Settings menu.
See Keys, Doors and Windows in your Owner Manual.
5F Optional equipment
Keyless access systemF
Keyless access startF
Starting the Engine
With the vehicle in Park or Neutral, press the brake pedal and then press and hold the ENGINE START/STOP button to start the engine.
Note: The transmitter must be in the vehicle to turn on the ignition. If the transmitter battery is weak, place the transmitter in the pocket in the center console to enable the engine to start. Replace the transmitter battery as soon as possible.
Stopping the Engine
Shift to Park and press the ENGINE START/STOP button to turn off the engine.
Accessory
With the engine off and the brake pedal NOT depressed, press the ENGINE START/STOP button to place the ignition system in the accessory position.
See Driving and Operating in your Owner Manual.
Page 15 of 20
15
DrIver assIstance systems
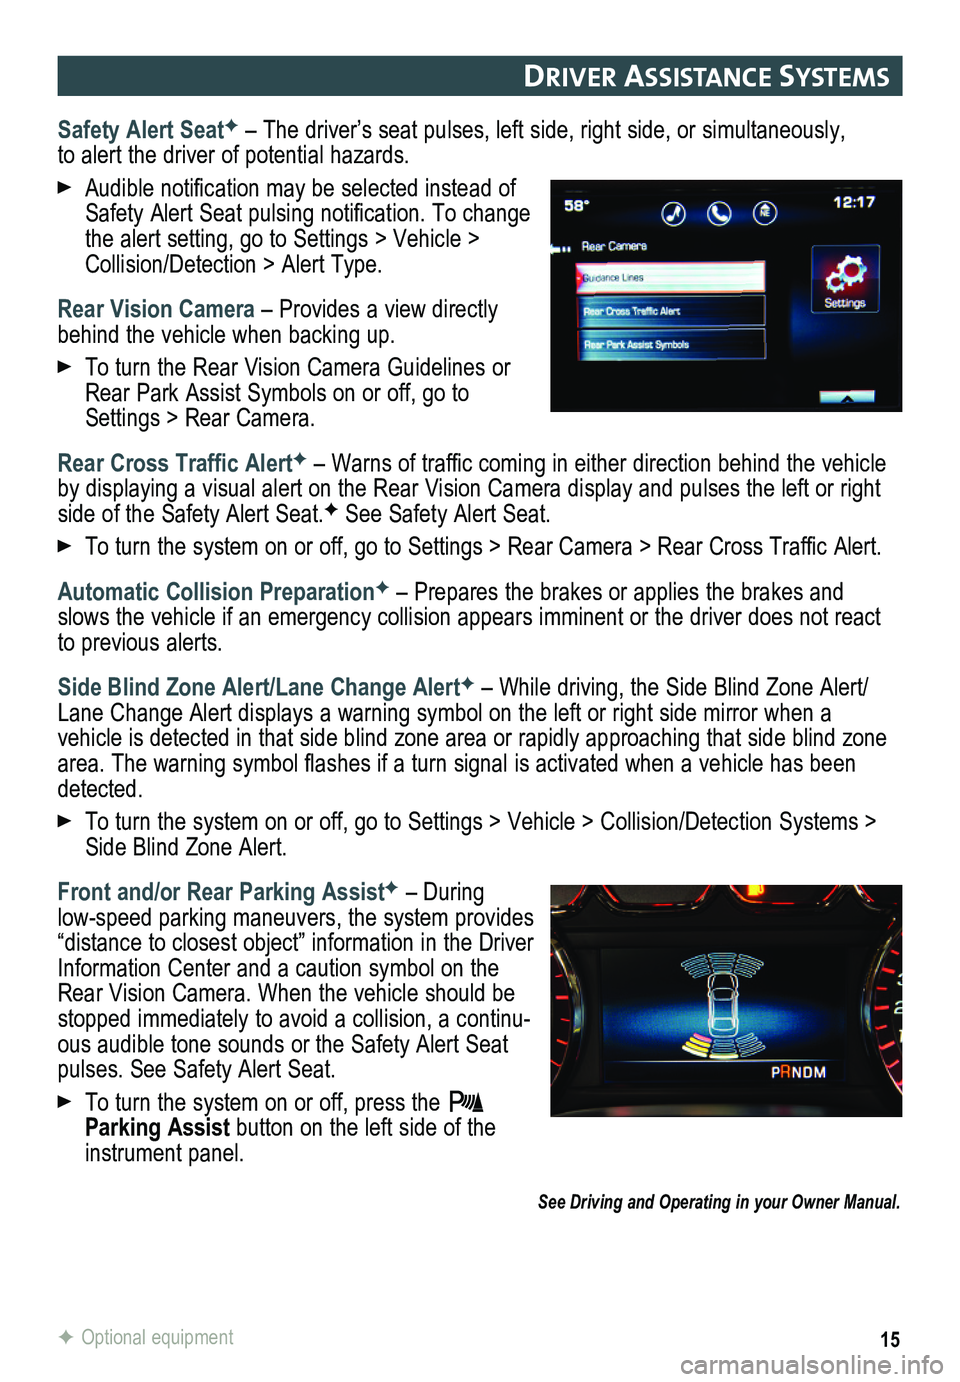
Safety Alert SeatF – The driver’s seat pulses, left side, right side, or simultaneou\
sly, to alert the driver of potential hazards.
Audible notification may be selected instead of Safety Alert Seat pulsing notification. To change the alert setting, go to Settings > Vehicle > Collision/Detection > Alert Type.
Rear Vision Camera – Provides a view directly behind the vehicle when backing up.
To turn the Rear Vision Camera Guidelines or Rear Park Assist Symbols on or off, go to Settings > Rear Camera.
Rear Cross Traffic AlertF – Warns of traffic coming in either direction behind the vehicle by displaying a visual alert on the Rear Vision Camera display and pulses the left or right side of the Safety Alert Seat.F See Safety Alert Seat.
To turn the system on or off, go to Settings > Rear Camera > Rear Cross Traffic Alert.
Automatic Collision PreparationF – Prepares the brakes or applies the brakes and slows the vehicle if an emergency collision appears imminent or the driver does not react to previous alerts.
Side Blind Zone Alert/Lane Change AlertF – While driving, the Side Blind Zone Alert/Lane Change Alert displays a warning symbol on the left or right side mirror when a vehicle is detected in that side blind zone area or rapidly approaching that sid\
e blind zone area. The warning symbol flashes if a turn signal is activated when a vehicle has been detected.
To turn the system on or off, go to Settings > Vehicle > Collision/Detection Systems > Side Blind Zone Alert.
Front and/or Rear Parking AssistF – During
low-speed parking maneuvers, the system provides “distance to closest object” information in the Driver Information Center and a caution symbol on the Rear Vision Camera. When the vehicle should be stopped immediately to avoid a collision, a continu-ous audible tone sounds or the Safety Alert Seat pulses. See Safety Alert Seat.
To turn the system on or off, press the Parking Assist button on the left side of the instrument panel.
See Driving and Operating in your Owner Manual.
F Optional equipment
Page 18 of 20
18
cruIse control
F Optional equipment
Setting Cruise Control
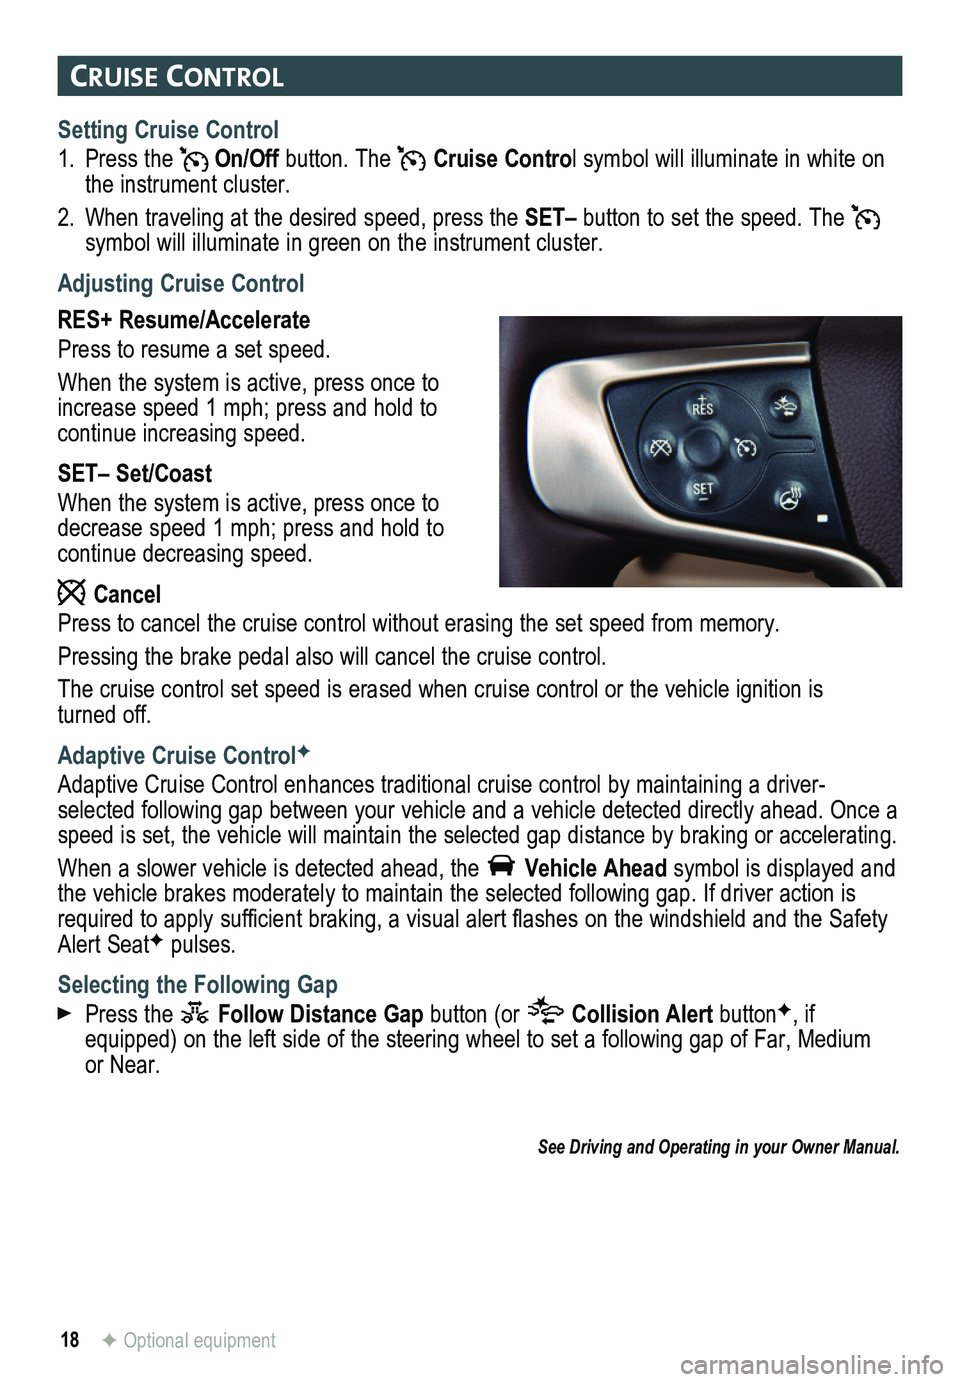
1. Press the On/Off button. The Cruise Control symbol will illuminate in white on the instrument cluster.
2. When traveling at the desired speed, press the SET– button to set the speed. The symbol will illuminate in green on the instrument cluster.
Adjusting Cruise Control
RES+ Resume/Accelerate
Press to resume a set speed.
When the system is active, press once to increase speed 1 mph; press and hold to continue increasing speed.
SET– Set/Coast
When the system is active, press once to decrease speed 1 mph; press and hold to continue decreasing speed.
Cancel
Press to cancel the cruise control without erasing the set speed from me\
mory.
Pressing the brake pedal also will cancel the cruise control.
The cruise control set speed is erased when cruise control or the vehicl\
e ignition is turned off.
Adaptive Cruise ControlF
Adaptive Cruise Control enhances traditional cruise control by maintaini\
ng a driver-selected following gap between your vehicle and a vehicle detected directly ahead. Once a speed is set, the vehicle will maintain the selected gap distance by braking or accelerating.
When a slower vehicle is detected ahead, the Vehicle Ahead symbol is displayed and the vehicle brakes moderately to maintain the selected following gap. If\
driver action is required to apply sufficient braking, a visual alert flashes on the windshield and the Safety Alert SeatF pulses.
Selecting the Following Gap
Press the Follow Distance Gap button (or Collision Alert buttonF, if equipped) on the left side of the steering wheel to set a following gap\
of Far, Medium or Near.
See Driving and Operating in your Owner Manual.
Page 19 of 20
19F Optional equipment
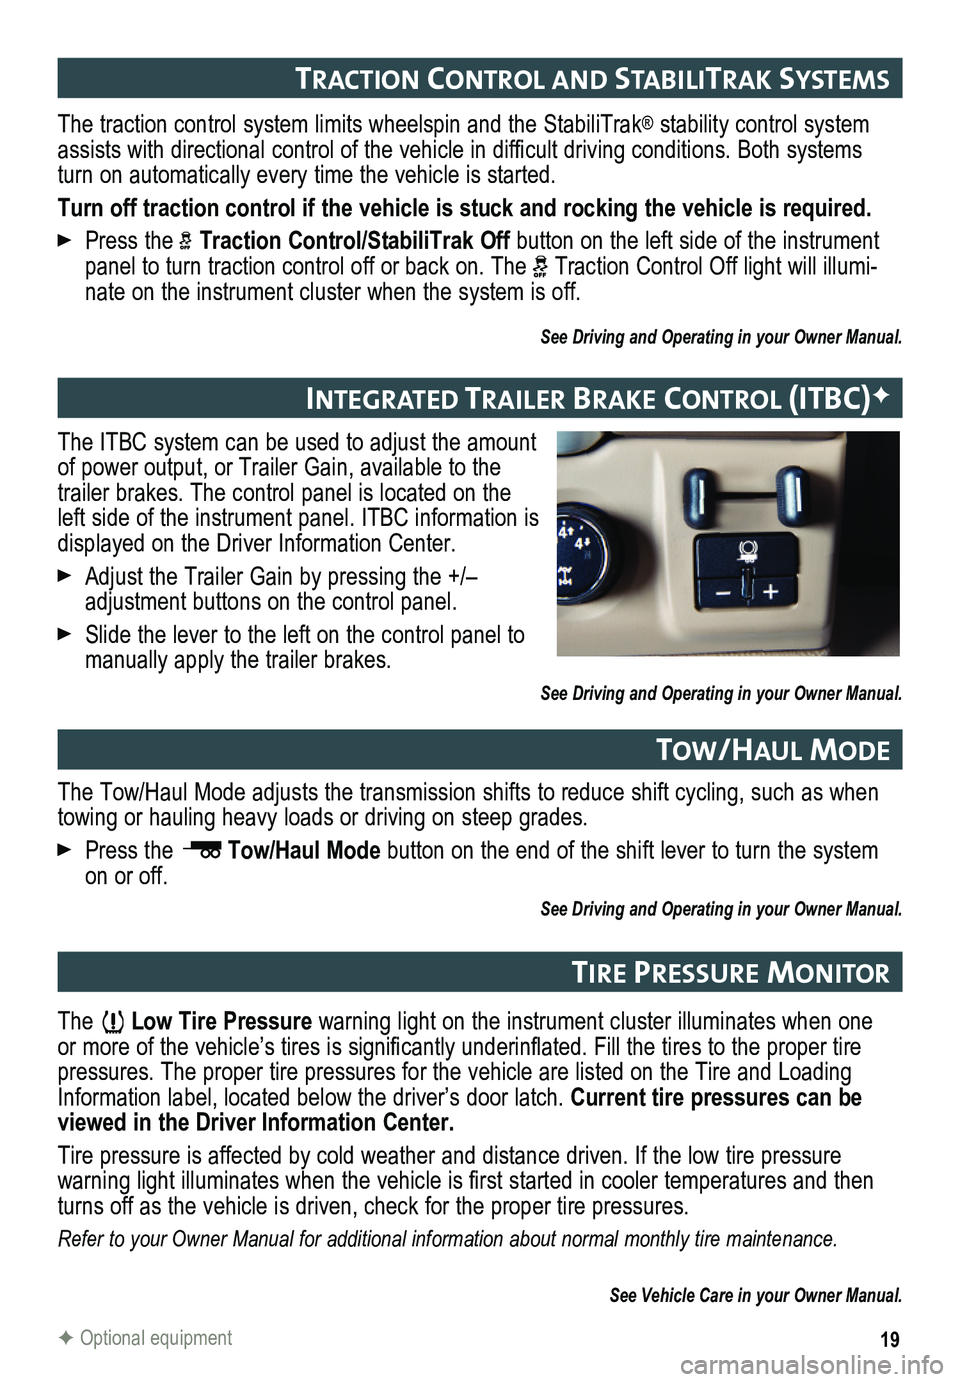
The ITBC system can be used to adjust the amount of power output, or Trailer Gain, available to the trailer brakes. The control panel is located on the left side of the instrument panel. ITBC information is displayed on the Driver Information Center.
Adjust the Trailer Gain by pressing the +/– adjustment buttons on the control panel.
Slide the lever to the left on the control panel to manually apply the trailer brakes.
See Driving and Operating in your Owner Manual.
IntegrateD traI ler braKe control (Itbc)F
The traction control system limits wheelspin and the StabiliTrak® stability control system assists with directional control of the vehicle in difficult
driving conditions. Both systems turn on automatically every time the vehicle is started.
Turn off traction control if the vehicle is stuck and rocking the vehicl\
e is required.
Press the Traction Control/StabiliTrak Off button on the left side of the instrument panel to turn traction control off or back on. The Traction Control Off light will illumi-nate on the instrument cluster when the system is off.
See Driving and Operating in your Owner Manual.
tractIon control anD stab IlItraK systems
The Low Tire Pressure warning light on the instrument cluster illuminates when one or more of the vehicle’s tires is significantly underinflated. Fill the tires to the proper tire pressures. The proper tire pressures for the vehicle are listed on the T\
ire and Loading Information label, located below the driver’s door latch. Current tire pressures can be viewed in the Driver Information Center.
Tire pressure is affected by cold weather and distance driven. If the low tire pressure
warning light illuminates when the vehicle is first started in cooler temperatures and then turns off as the vehicle is driven, check for the proper tire pressures.\
Refer to your Owner Manual for additional information about normal monthly tire maintenance.
See Vehicle Care in your Owner Manual.
tIre Pressure mon Itor
The Tow/Haul Mode adjusts the transmission shifts to reduce shift cycling, such as when towing or hauling heavy loads or driving on steep grades.
Press the Tow/Haul Mode button on the end of the shift lever to turn the system on or off.
See Driving and Operating in your Owner Manual.
tow/haul moDe