ignition GMC YUKON 2015 Get To Know Guide
[x] Cancel search | Manufacturer: GMC, Model Year: 2015, Model line: YUKON, Model: GMC YUKON 2015Pages: 20, PDF Size: 3.15 MB
Page 4 of 20

4
remote Keyless entry transmI tter (Key Fob)
F Optional equipment
Unlock
Press to unlock the driver’s door. Press again to unlock all doors.
Lock
Press to lock all doors.
Note: Press and hold the Lock/Unlock
buttons to automatically fold/unfold the power mirrorsF. To change the Auto Mirror Folding setting, go to Comfort and Convenience in the Vehicle Settings menu.
LiftglassF
Press twice to open the liftglass.
Power LiftgateF
Press twice to open or close the power liftgate.
Vehicle Locator/Panic Alarm
Press and release to locate your vehicle. The turn signal lamps will flash and the horn will sound.
Press and hold to activate the alarm. The turn signal lamps will flash and the horn will sound until the button is pressed again or the ignition is turned on.
Remote Vehicle Start
Press and release the Lock button and then press and hold the button until the turn signal lamps flash (about 4 seconds) to start the engine from outside the vehicle. After entering the vehicle, turn on the ignition.
• During a remote start, the engine will run for 10 minutes.
• Remote Start can be extended once by repeating the remote start procedure.
• Press and hold the button until the parking lamps turn off to cancel a remote start.
• The heated/cooled seatsF will turn on during a remote start (if selected in the Vehicle Settings menu) when outside temperatures warrant.
Note: To change the remote lock, unlock, and remote start settings, go to Remote Lock, Unlock, Start in the Vehicle Settings menu.
See Keys, Doors and Windows in your Owner Manual.
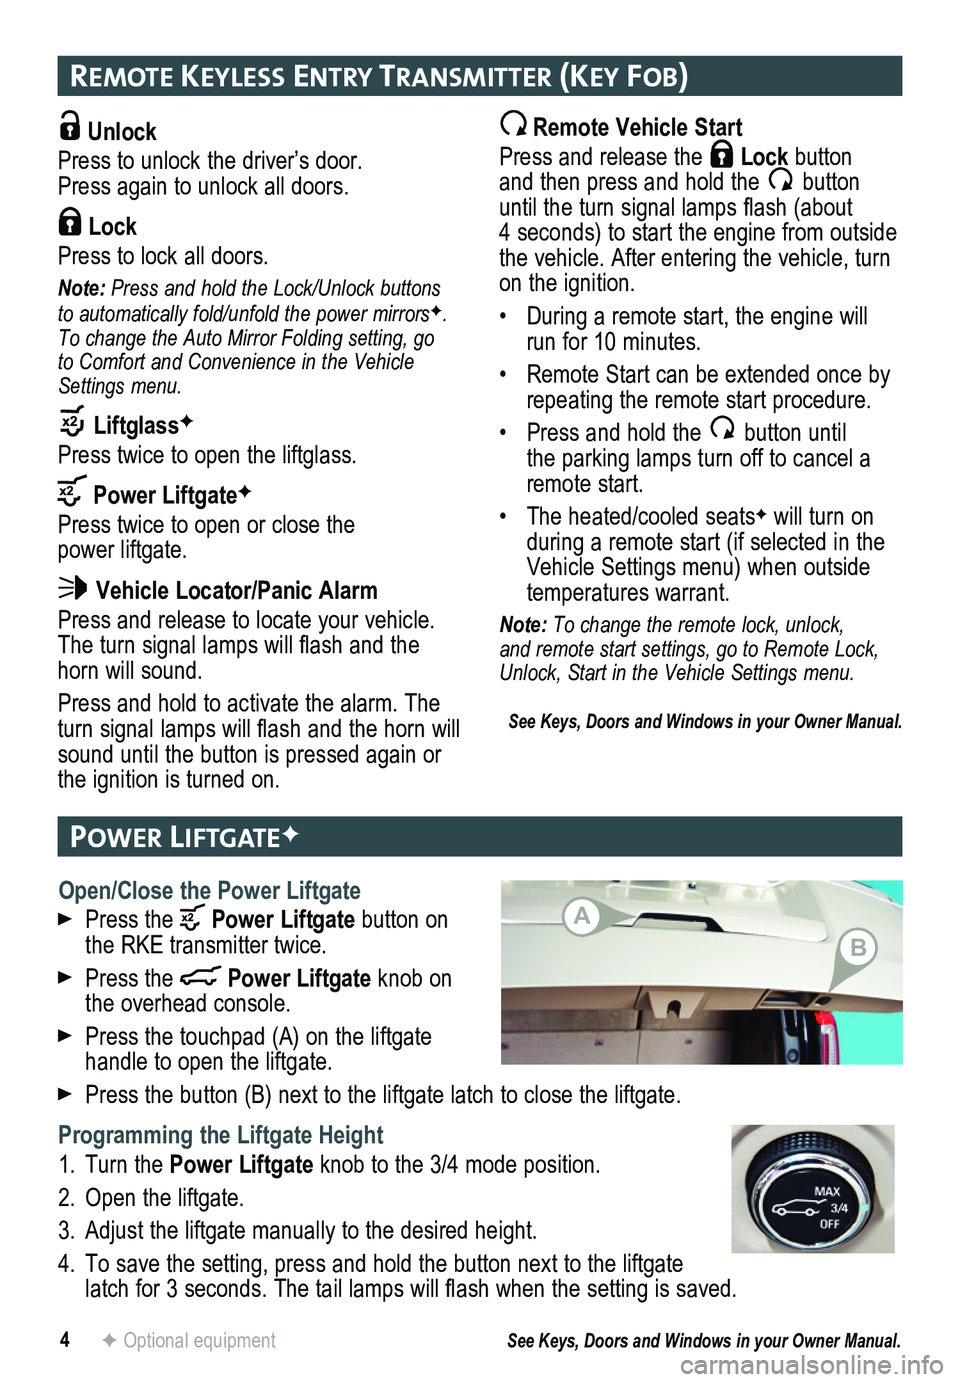
Open/Close the Power Liftgate
Press the Power Liftgate button on the RKE transmitter twice.
Press the Power Liftgate knob on the overhead console.
Press the touchpad (A) on the liftgate
handle to open the liftgate.
Press the button (B) next to the liftgate latch to close the liftgate.\
Programming the Liftgate Height
1. Turn the Power Liftgate knob to the 3/4 mode position.
2. Open the liftgate.
3. Adjust the liftgate manually to the desired height.
4. To save the setting, press and hold the button next to the liftgate latch for 3 seconds. The tail lamps will flash when the setting is saved.
See Keys, Doors and Windows in your Owner Manual.
Power lIFtgateF
A
B
Page 5 of 20

The Keyless Access System enables operation of the doors and ignition wi\
thout removing the Remote Keyless Entry transmitter from a pocket or purse. The transmi\
tter must be within three feet of the door being unlocked or the liftgate.
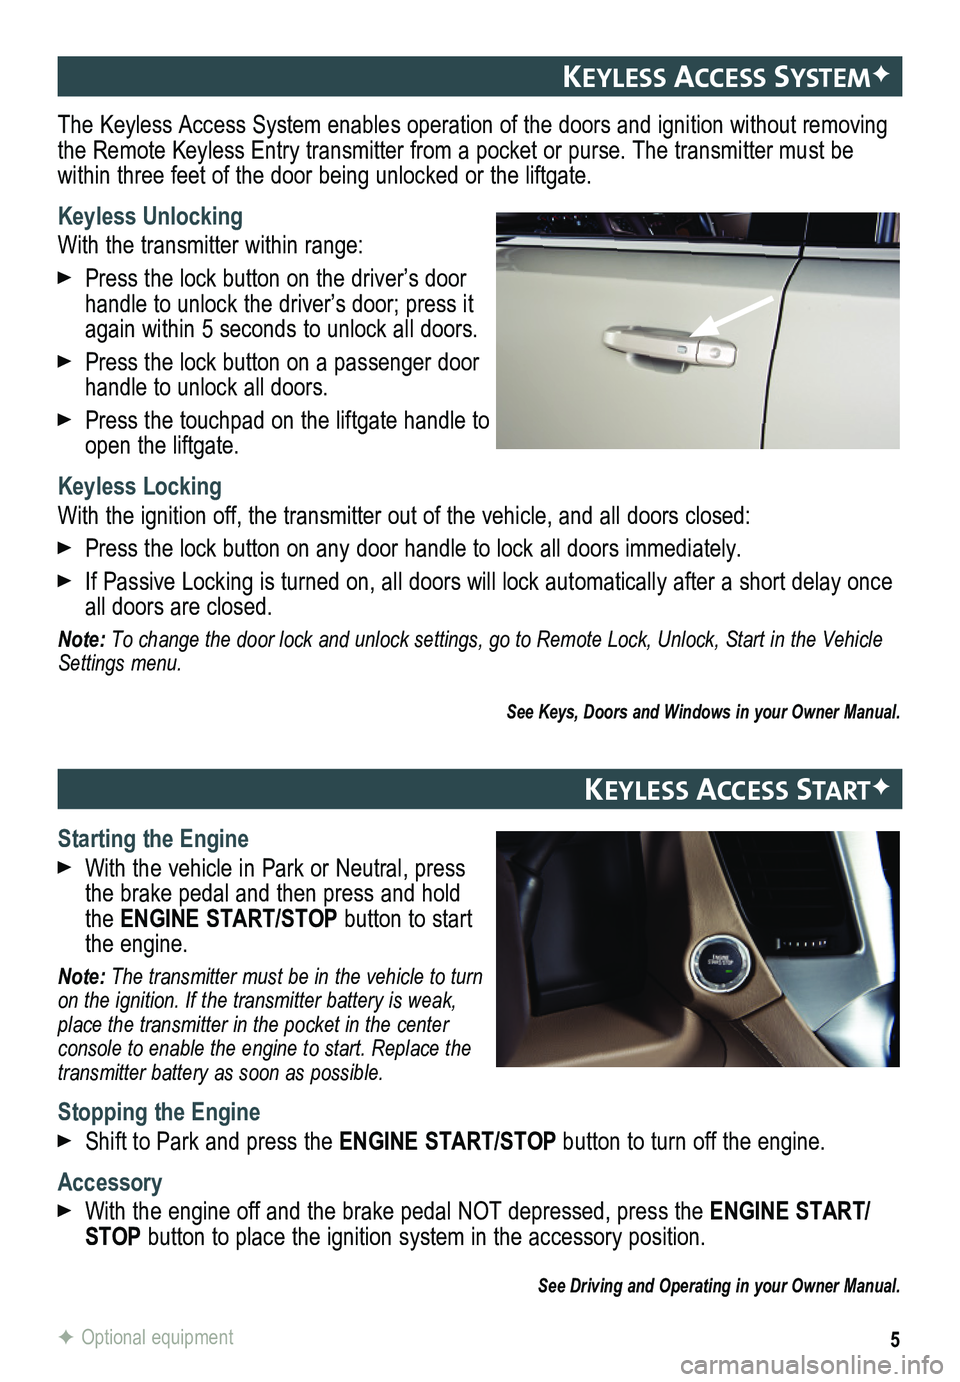
Keyless Unlocking
With the transmitter within range:
Press the lock button on the driver’s door handle to unlock the driver’s door; press it again within 5 seconds to unlock all doors.
Press the lock button on a passenger door handle to unlock all doors.
Press the touchpad on the liftgate handle to open the liftgate.
Keyless Locking
With the ignition off, the transmitter out of the vehicle, and all doors closed:
Press the lock button on any door handle to lock all doors immediately.
If Passive Locking is turned on, all doors will lock automatically after a short delay once all doors are closed.
Note: To change the door lock and unlock settings, go to Remote Lock, Unlock, Start in the Vehicle Settings menu.
See Keys, Doors and Windows in your Owner Manual.
5F Optional equipment
Keyless access systemF
Keyless access startF
Starting the Engine
With the vehicle in Park or Neutral, press the brake pedal and then press and hold the ENGINE START/STOP button to start the engine.
Note: The transmitter must be in the vehicle to turn on the ignition. If the transmitter battery is weak, place the transmitter in the pocket in the center console to enable the engine to start. Replace the transmitter battery as soon as possible.
Stopping the Engine
Shift to Park and press the ENGINE START/STOP button to turn off the engine.
Accessory
With the engine off and the brake pedal NOT depressed, press the ENGINE START/STOP button to place the ignition system in the accessory position.
See Driving and Operating in your Owner Manual.
Page 6 of 20

6
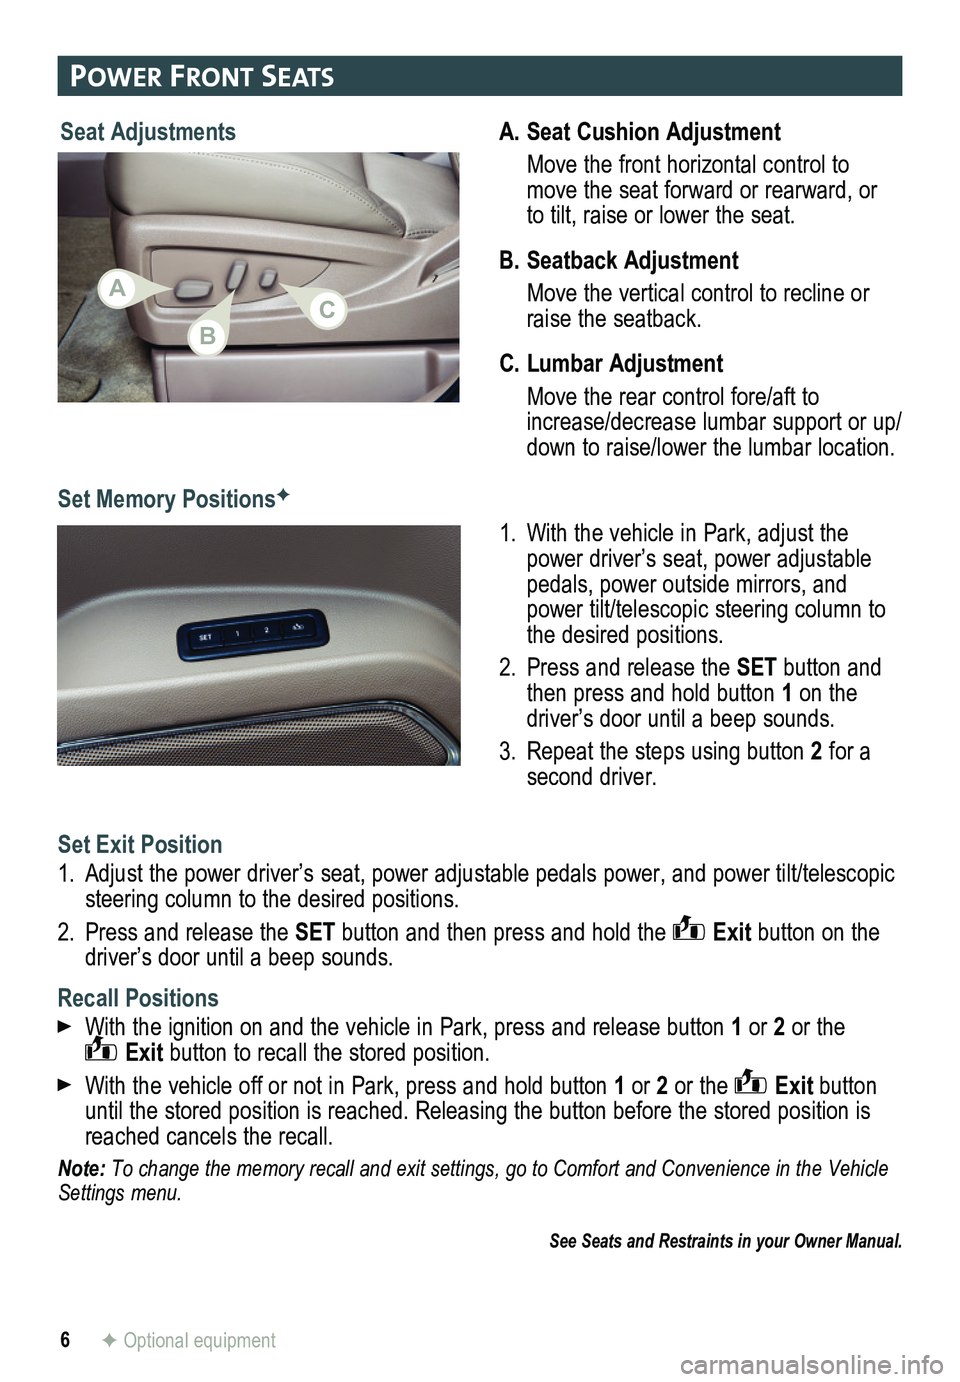
A. Seat Cushion Adjustment
Move the front horizontal control to move the seat forward or rearward, or to tilt, raise or lower the seat.
B. Seatback Adjustment
Move the vertical control to recline or raise the seatback.
C. Lumbar Adjustment
Move the rear control fore/aft to increase/decrease lumbar support or up/down to raise/lower the lumbar location.
1. With the vehicle in Park, adjust the power driver’s seat, power adjustable pedals, power outside mirrors, and power tilt/telescopic steering column to the desired positions.
2. Press and release the SET button and then press and hold button 1 on the driver’s door until a beep sounds.
3. Repeat the steps using button 2 for a second driver.
Power Front seats
F Optional equipment
Set Memory PositionsF
Seat Adjustments
Set Exit Position
1. Adjust the power driver’s seat, power adjustable pedals power, and power tilt/telescopic steering column to the desired positions.
2. Press and release the SET button and then press and hold the Exit button on the driver’s door until a beep sounds.
Recall Positions
With the ignition on and the vehicle in Park, press and release button 1 or 2 or the Exit button to recall the stored position.
With the vehicle off or not in Park, press and hold button 1 or 2 or the Exit button until the stored position is reached. Releasing the button before the st\
ored position is reached cancels the recall.
Note: To change the memory recall and exit settings, go to Comfort and Conveni\
ence in the Vehicle Settings menu.
See Seats and Restraints in your Owner Manual.
CA
B
Page 18 of 20

18
cruIse control
F Optional equipment
Setting Cruise Control
1. Press the On/Off button. The Cruise Control symbol will illuminate in white on the instrument cluster.
2. When traveling at the desired speed, press the SET– button to set the speed. The symbol will illuminate in green on the instrument cluster.
Adjusting Cruise Control
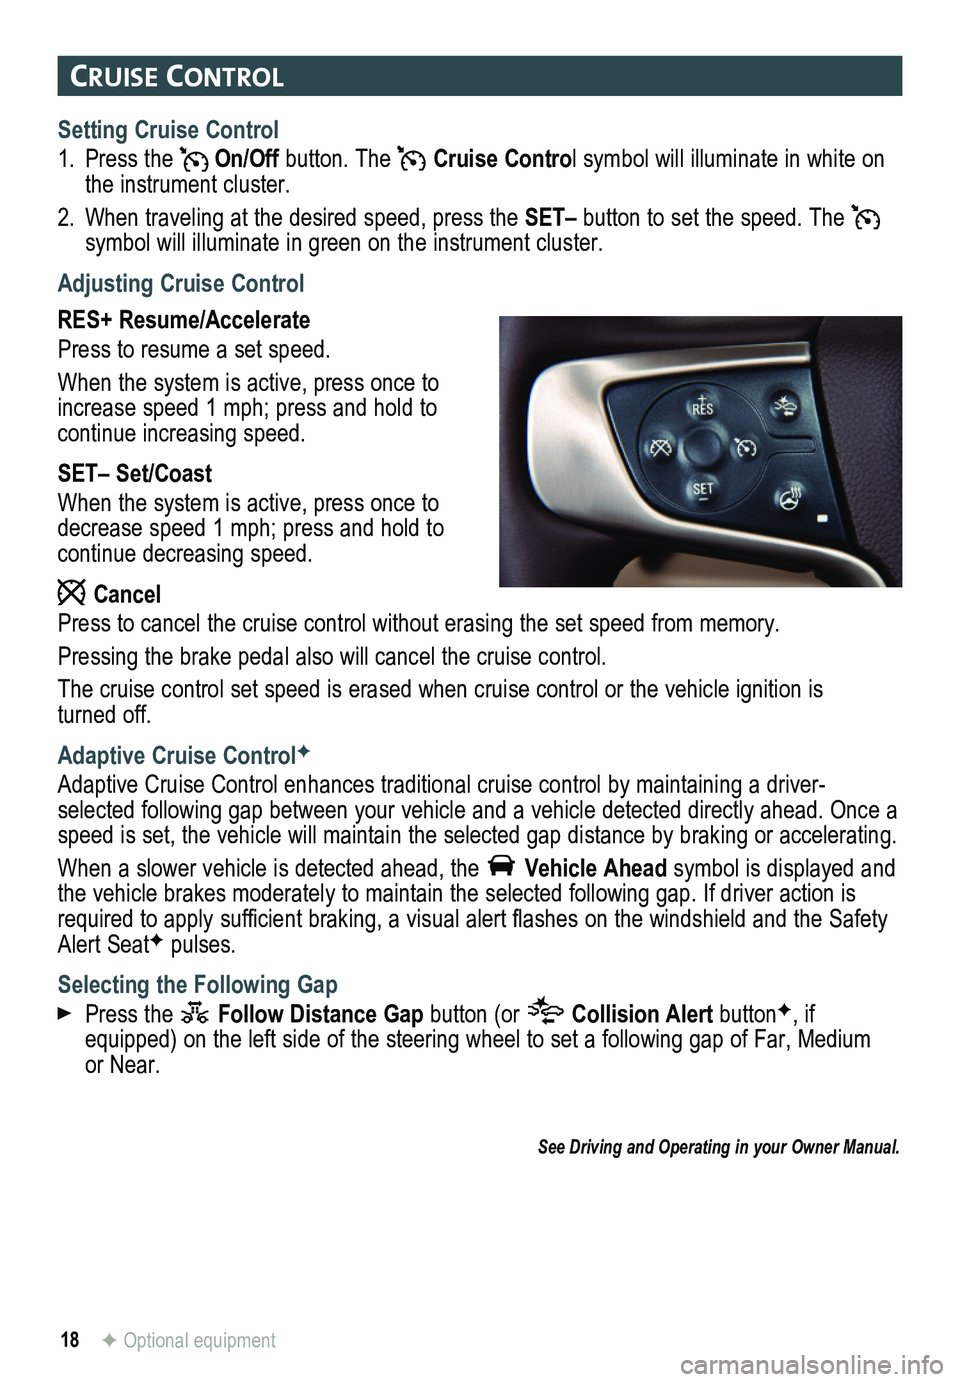
RES+ Resume/Accelerate
Press to resume a set speed.
When the system is active, press once to increase speed 1 mph; press and hold to continue increasing speed.
SET– Set/Coast
When the system is active, press once to decrease speed 1 mph; press and hold to continue decreasing speed.
Cancel
Press to cancel the cruise control without erasing the set speed from me\
mory.
Pressing the brake pedal also will cancel the cruise control.
The cruise control set speed is erased when cruise control or the vehicl\
e ignition is turned off.
Adaptive Cruise ControlF
Adaptive Cruise Control enhances traditional cruise control by maintaini\
ng a driver-selected following gap between your vehicle and a vehicle detected directly ahead. Once a speed is set, the vehicle will maintain the selected gap distance by braking or accelerating.
When a slower vehicle is detected ahead, the Vehicle Ahead symbol is displayed and the vehicle brakes moderately to maintain the selected following gap. If\
driver action is required to apply sufficient braking, a visual alert flashes on the windshield and the Safety Alert SeatF pulses.
Selecting the Following Gap
Press the Follow Distance Gap button (or Collision Alert buttonF, if equipped) on the left side of the steering wheel to set a following gap\
of Far, Medium or Near.
See Driving and Operating in your Owner Manual.