mirror GMC YUKON 2016 Get To Know Guide
[x] Cancel search | Manufacturer: GMC, Model Year: 2016, Model line: YUKON, Model: GMC YUKON 2016Pages: 20, PDF Size: 3.14 MB
Page 4 of 20
4
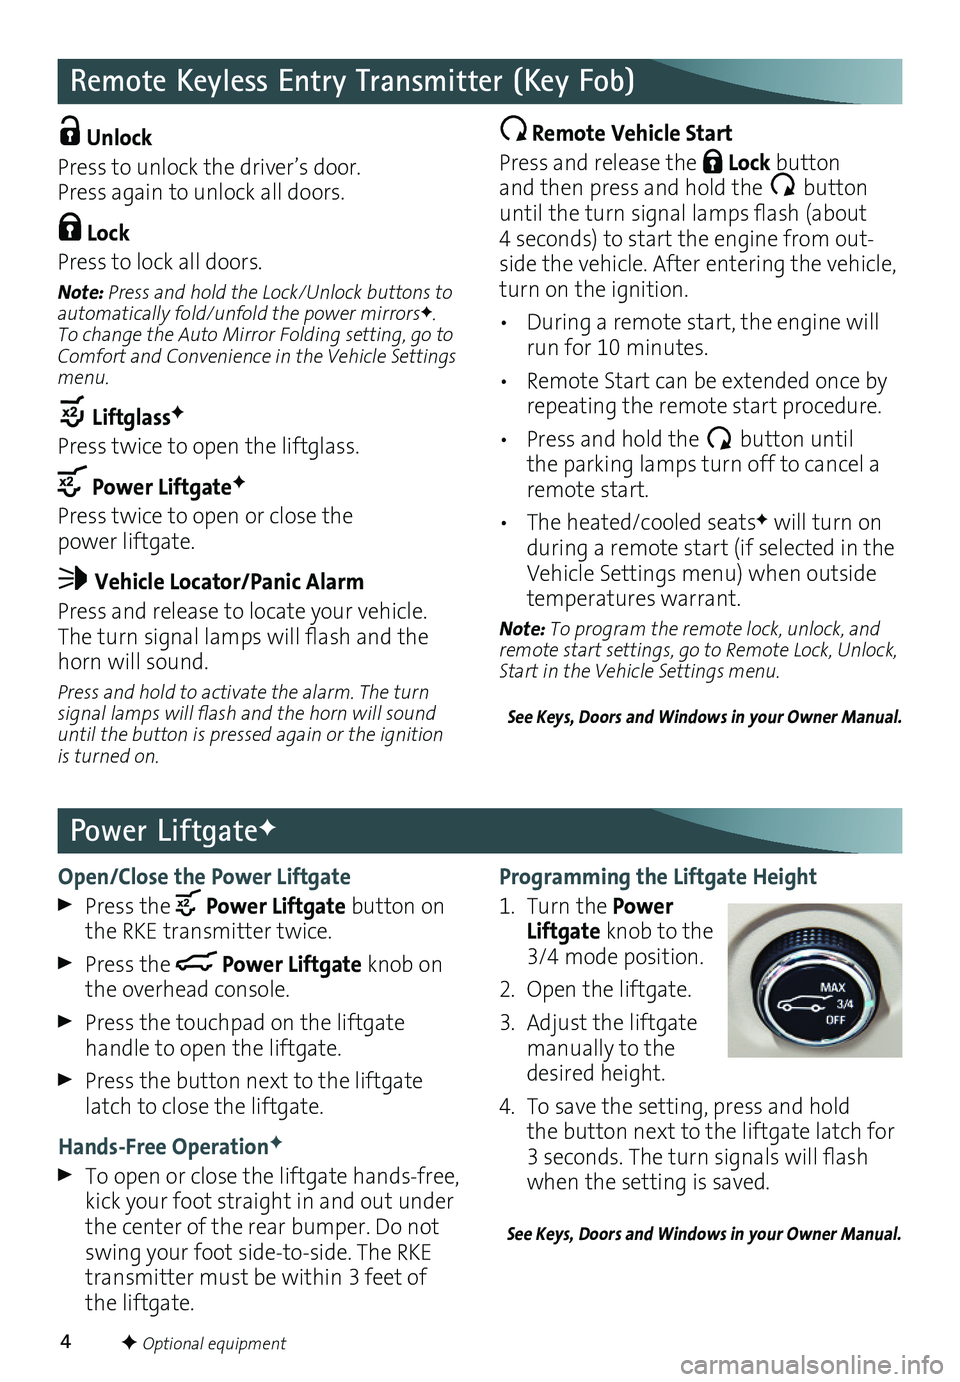
Programming the Liftgate Height
1. Turn the Power Liftgate knob to the 3/4 mode position.
2. Open the liftgate.
3. Adjust the liftgate manually to the desired height.
4. To save the setting, press and hold the button next to the liftgate latch for 3 seconds. The turn signals will flash when the setting is saved.
See Keys, Doors and Windows in your Owner Manual.
Remote Keyless Entry Transmitter (Key Fob)
Unlock
Press to unlock the driver’s door. Press again to unlock all doors.
Lock
Press to lock all doors.
Note: Press and hold the Lock/Unlock
buttons to automatically fold/unfold the power mirrorsF. To change the Auto Mirror Folding setting, go to Comfort and Convenience in the Vehicle Settings menu.
LiftglassF
Press twice to open the
liftglass.
Power LiftgateF
Press twice to open or close the power liftgate.
Vehicle Locator/Panic Alarm
Press and release to locate your vehicle. The turn signal lamps will flash and the horn will sound.
Press and hold to activate the alarm. The turn signal lamps will flash and the horn will sound until the button is pressed again or the ignition is turned on.
Remote Vehicle Start
Press and release the Lock button and then press and hold the button until the turn signal lamps flash (about 4 seconds) to start the engine from out-side the vehicle. After entering the vehicle, turn on the
ignition.
• During a remote start, the engine will run for 10 minutes.
• Remote Start can be extended once by repeating the remote start procedure.
• Press and hold the button until the parking lamps turn off to cancel a remote start.
• The heated/cooled seatsF will turn on during a remote start (if selected in the Vehicle Settings menu) when outside temperatures warrant.
Note: To program the remote lock, unlock, and remote start settings, go to Remote Lock, Unlock, Start in the Vehicle Settings menu.
See Keys, Doors and Windows in your Owner Manual.
Open/Close the Power Liftgate
Press the Power Liftgate button on the RKE transmitter twice.
Press the Power Liftgate knob on the overhead console.
Press the touchpad on the liftgate
handle to open the liftgate.
Press the button next to the liftgate latch to close the liftgate.
Hands-Free OperationF
To open or close the liftgate hands-free, kick your foot straight in and out under the center of the rear bumper. Do not swing your foot side-to-side. The RKE transmitter must be within 3 feet of the liftgate.
Power LiftgateF
F Optional equipment
Page 6 of 20
6
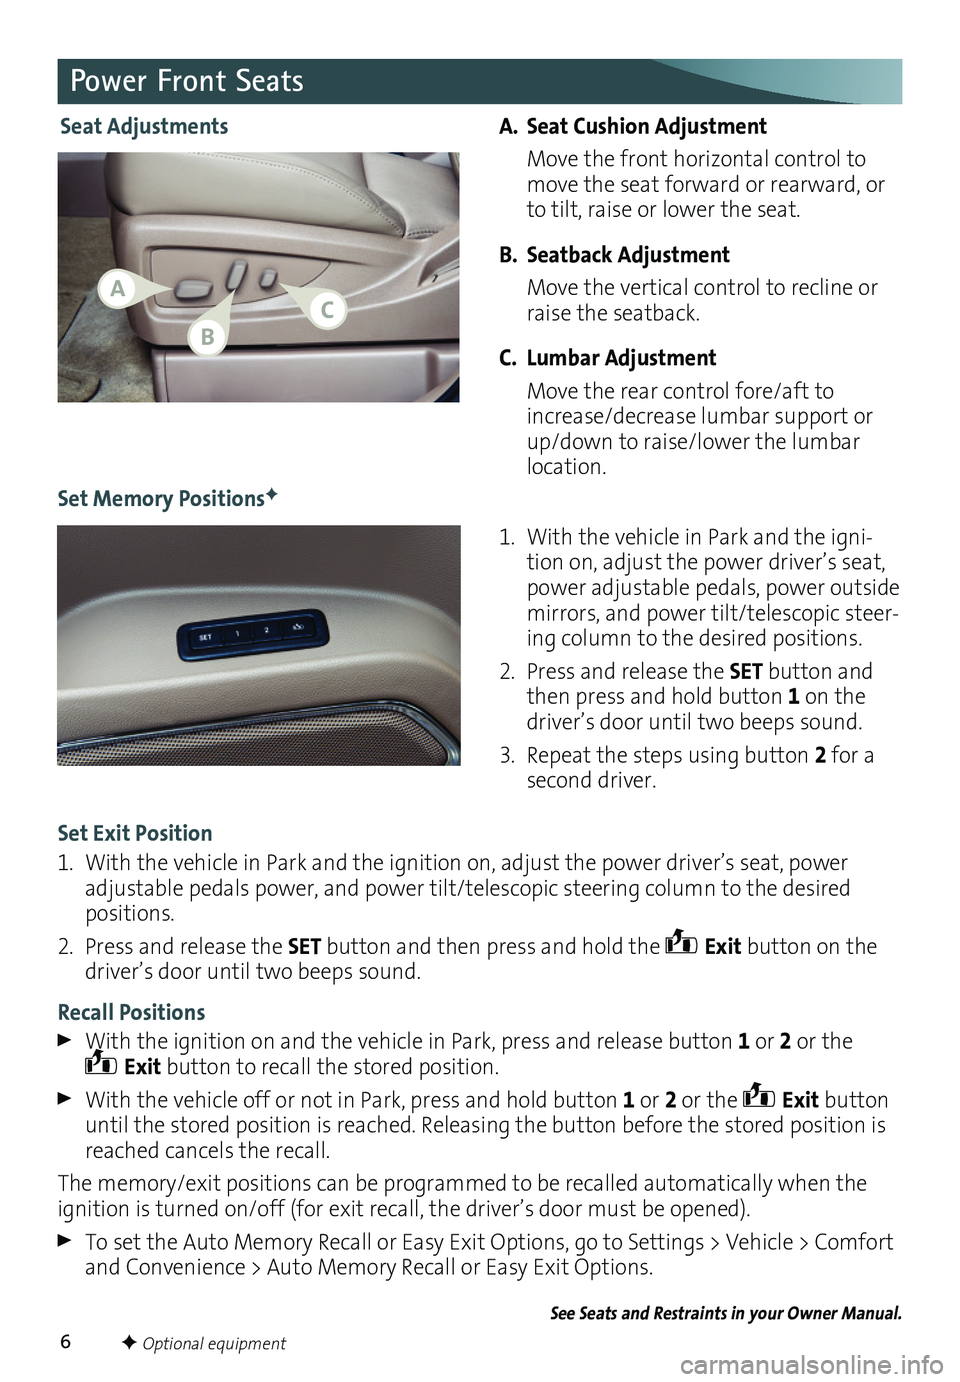
A. Seat Cushion Adjustment
Move the front horizontal control to move the seat forward or rearward, or to tilt, raise or lower the seat.
B. Seatback Adjustment
Move the vertical control to recline or raise the seatback.
C. Lumbar Adjustment
Move the rear control fore/aft to increase/decrease lumbar support or up/down to raise/lower the lumbar location.
1. With the vehicle in Park and the igni-tion on, adjust the power driver’s seat, power adjustable pedals, power outside mirrors, and power tilt/telescopic steer-ing column to the desired positions.
2. Press and release the SET button and then press and hold button 1 on the driver’s door until two beeps sound.
3. Repeat the steps using button 2 for a second driver.
Power Front Seats
Set Memory PositionsF
Seat Adjustments
Set Exit Position
1. With the vehicle in Park and the ignition on, adjust the power driver’s seat, power adjustable pedals power, and power tilt/telescopic steering column to the desired positions.
2. Press and release the SET button and then press and hold the Exit button on the driver’s door until two beeps sound.
Recall Positions
With the ignition on and the vehicle in Park, press and release button 1 or 2 or the Exit button to recall the stored position.
With the vehicle off or not in Park, press and hold button 1 or 2 or the Exit button until the stored position is reached. Releasing the button before the stored position is reached cancels the recall.
The memory/exit positions can be programmed to be recalled automatically when the ignition is turned on/off (for exit recall, the driver’s door must be opened).
To set the Auto Memory Recall or Easy Exit Options, go to Settings > Vehicle > Comfort and Convenience > Auto Memory Recall or Easy Exit Options.
See Seats and Restraints in your Owner Manual.
F Optional equipment
CA
B
Page 13 of 20
13
Bluetooth® System
Refer to your Owner Manual for important safety information about using the Bluetooth system while driving.
Before using a Bluetooth-enabled device in the vehicle, it must be paired with the in- vehicle Bluetooth system. The pairing process is disabled when the vehicle is moving. Not all devices will support all functions. Visit my.gmc.com/learn for more information.
Pair a Phone
1. To use voice recognition, press the Push to Talk button; after the beep, say “Pair phone,” or use the MENU knob or the touch screen to select the Phone icon > Phones > Pair Device.
2. Start the pairing process on the phone. Locate GMC IntelliLink on the phone.
3. Enter the four-digit code that appears on the touch screen into the phone or, if a six-digit code appears on the phone, confirm it on the touch screen.
4. If your phone prompts you to accept the connection or phone book download, select Always Accept and Allow.
Streaming Audio
With a paired device connected via Bluetooth, press the MEDIA button until Bluetooth is displayed on the touch screen to stream audio from the device. Control audio operation using the device controls. For full control of the device, connect it to a USB port.
See your Infotainment System Owner Manual.
OnStar® with 4G LTE
With OnStar 4G LTE and a Wi-Fi® hotspot, up to seven devices (smartphones, tablets and laptops) can be connected to a reliable, built-in Internet connection.
To retrieve the SSID and password for the hotspot, press the OnStar Voice Command button on the rearview mirror, wait for the prompt, and then say “Wi-Fi
settings.” The information will be displayed on the screen.
For assistance or to change the SSID and password, press the blue OnStar button or call 1-888-4ONSTAR (1-888-466-7827).
Note: See onstar.com for a detailed instruction guide, vehicle availability and system
limitations.
F Optional equipment
The Wireless Charging system is located on the storage tray on top of the center console. To check mobile device compatibility, visit my.gmc.com/learn. See your phone retailer for details on required phone accessories.
1. The vehicle must be on or Retained Accessory Power must be active.
2. Remove all objects from the charging pad.
3. Place the device, face up, on the symbol on the pad, aligned with the rear rib.
4. Move the device slowly until the battery charging symbol displays on the infotain\
ment screen. If not charging, remove the device for 3 seconds, and rotate it 180 degrees.
See your Infotainment System Owner Manual.
Wireless ChargingF
See your Infotainment System Owner Manual.
Page 15 of 20
15
Driver Assistance Systems
Lane Keep Assist with Lane Departure WarningF – The Lane Keep Assist indicator is green on the instrument cluster when a lane marking is detected. The system may assist by gently turning the steering wheel and display an amber if the vehicle approaches a detected lane marking without using a turn signal in that direction. It may also provide a Lane Departure Warning alert by flashing an amber and pulsing the left or right side of the Safety Alert SeatF as the lane marking is crossed.
Press the Lane Keep Assist button on the left side of the instrument panel to turn the system on or off.
Rear Vision Camera – Provides a view directly behind the vehicle when backing up.
To turn the Rear Vision Camera Guidelines or Rear Park Assist Symbols on or off, go to Settings > Rear Camera.
Rear Cross Traffic AlertF – Warns of traffic coming in either direction behind the vehicle by displaying a visual alert on the Rear Vision Camera display and pulses the left or right side of the Safety Alert Seat.F See Safety Alert Seat.
To turn the system on or off, go to Settings > Vehicle > Collision/Detection Systems > Rear Cross Traffic Alert.
Front Automatic BrakingF – Prepares the brakes or applies the brakes and slows the vehicle if an emergency collision appears imminent or the driver does not react to previous alerts.
Side Blind Zone Alert/Lane Change AlertF – While driving, the Side Blind Zone Alert/Lane Change Alert displays a warning symbol on the left or right side mirror when a vehicle is detected in that side blind zone area or rapidly approaching that side blind zone area. The warning symbol flashes if a turn signal is activated when a vehicle has been detected.
To turn the system on or off, go to Settings > Vehicle > Collision/Detection Systems > Lane Change Alert.
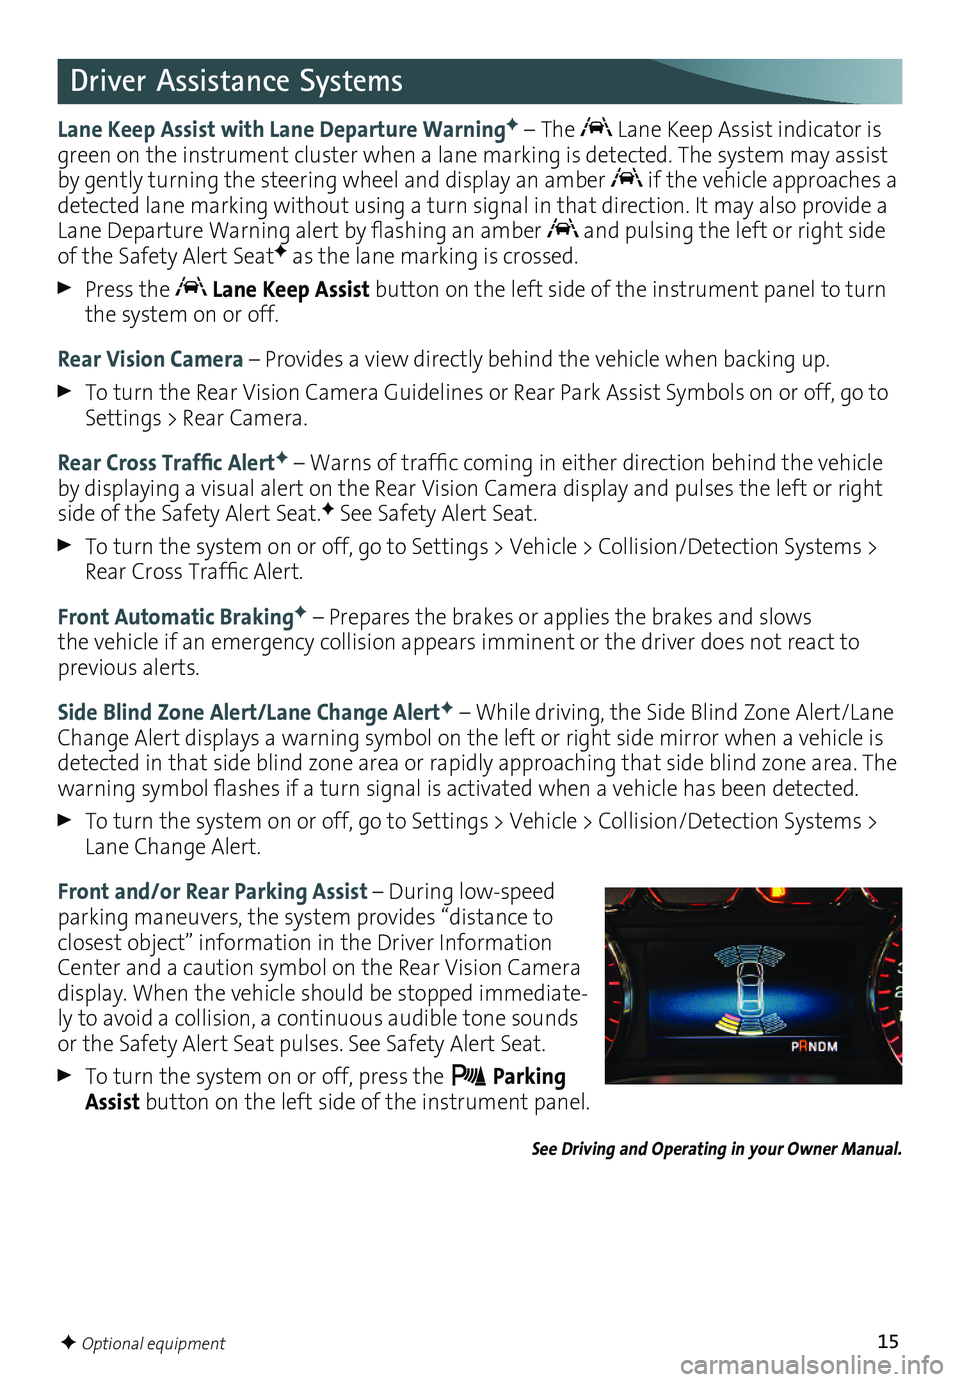
Front and/or Rear Parking Assist – During low-speed parking maneuvers, the system provides “distance to closest object” information in the Driver Information Center and a caution symbol on the Rear Vision Camera display. When the vehicle should be stopped immediate-ly to avoid a collision, a continuous audible tone sounds or the Safety Alert Seat pulses. See Safety Alert Seat.
To turn the system on or off, press the Parking Assist button on the left side of the instrument panel.
See Driving and Operating in your Owner Manual.
F Optional equipment
Page 16 of 20
16
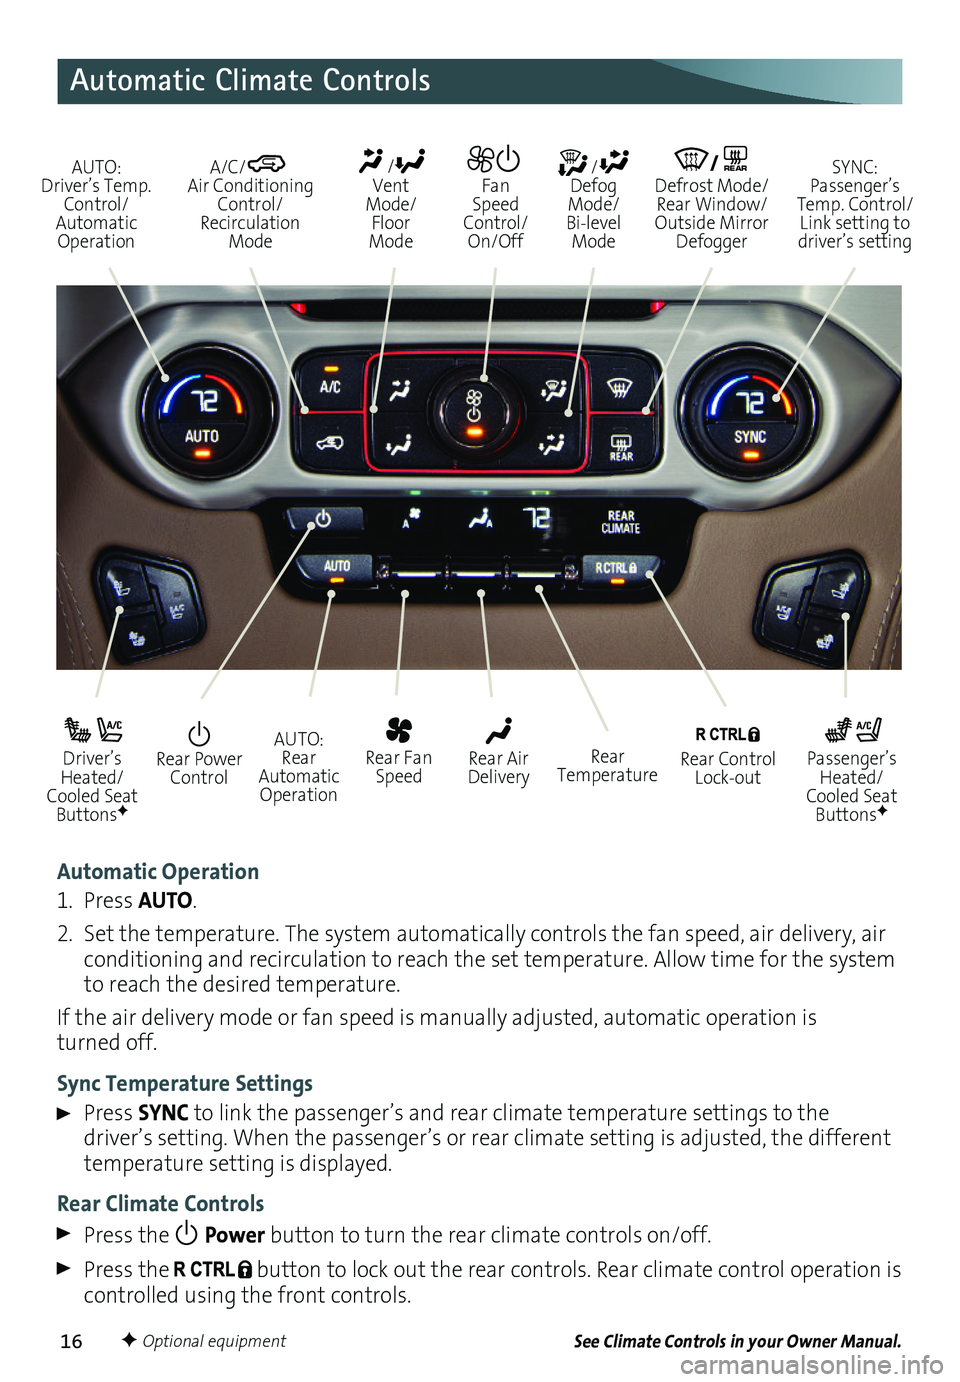
Automatic Climate Controls
Automatic Operation
1. Press AUTO.
2. Set the temperature. The system automatically
controls the fan speed, air delivery, air conditioning and recirculation to reach the set temperature. Allow time for the system to reach the desired
temperature.
If the air delivery mode or fan speed is manually adjusted, automatic operation is turned off.
Sync Temperature Settings
Press SYNC to link the passenger’s and rear climate temperature settings to the
driver’s setting. When the passenger’s or rear climate setting is adjusted, the different temperature setting is displayed.
Rear Climate Controls
Press the Power button to turn the rear climate controls on/off.
Press the button to lock out the rear controls. Rear climate control
operation is controlled using the front controls.
See Climate Controls in your Owner Manual.
Rear Power Control
Driver’s Heated/Cooled Seat ButtonsF
Passenger’s Heated/Cooled Seat ButtonsF
AUTO: Rear Automatic Operation
Rear Fan Speed
Rear Control Lock-out
Rear Air DeliveryRear Temperature
AUTO: Driver’s Temp. Control/Automatic Operation
/ Defog Mode/ Bi-level Mode
/REAR Defrost Mode/ Rear Window/Outside Mirror Defogger
SYNC: Passenger’s Temp. Control/Link setting to driver’s setting
/ Vent Mode/ Floor Mode
Fan Speed Control/On/Off
A/C/ Air Conditioning Control/Recirculation Mode
F Optional equipment