key GMC YUKON 2017 Service Manual
[x] Cancel search | Manufacturer: GMC, Model Year: 2017, Model line: YUKON, Model: GMC YUKON 2017Pages: 429, PDF Size: 5.79 MB
Page 68 of 429
GMC Yukon/Yukon XL/Denali Owner Manual (GMNA-Localizing-U.S./
Canada/Mexico-9955936) - 2017 - crc - 11/9/16
Seats and Restraints 67
release SET; a beep will sound.
Then immediately press and hold 1,
2, or
B(Exit) on the driver door
until two beeps sound. To manually
recall these positions, press and
hold 1, 2, or
Buntil the saved
position is reached.
The vehicle identifies the current
driver ’s RKE transmitter number
(1–8).
See Remote Keyless Entry (RKE)
System Operation (Keyless Access)
0 34 orRemote Keyless Entry
(RKE) System Operation (Key
Access) 032. Only RKE
transmitters 1 and 2 can be used for
automatic memory recalls. A Driver
Information Center (DIC) welcome
message indicating the transmitter
number may display for the first few
ignition cycles following a
transmitter change. For Auto
Memory Recall to work properly,
save the positions to the memory
button (1 or 2) matching the RKE
transmitter number displayed in the
DIC welcome message. Carry the
linked RKE transmitter when
entering the vehicle. Vehicle Personalization Settings
.
To have the Auto Memory Recall
movement begin when the
vehicle is started, select the
Settings menu, then Vehicle,
then Comfort and Convenience,
and then Auto Memory Recall.
Select On or Off. See “Auto
Memory Recall” later in this
section.
. To have the Easy Exit Recall
movement begin when the
vehicle is started, select the
Settings menu, then Vehicle,
then Comfort and Convenience,
and then Easy Exit Options.
Select On or Off. See “Easy Exit
Recall” later in this section.
. See Vehicle Personalization
0 171 for additional setting
information.
Saving Memory Positions
To save preferred driving positions
1 and 2: 1. Turn the ignition on or to ACC/ ACCESSORY. A DIC welcome message may
be displayed indicating number
1 or 2 for memory recalls.
2. Adjust all available memory features to the desired driving
position.
3. Press and release SET; a beep will sound.
4. Immediately press and hold the 1 or 2 memory button matching
the above DIC welcome
message until two beeps
sound.
If too much time passes
between releasing SET and
pressing 1 or 2, the positions
will not be saved and two
beeps will not sound. Repeat
steps 3 and 4.
5. Repeat Steps 1–4 for a second driver using 1 or 2.
To save positions for
Band easy
exit features, repeat Steps 1–4
using
B. This stores the positions
for getting out of the vehicle.
Page 69 of 429
GMC Yukon/Yukon XL/Denali Owner Manual (GMNA-Localizing-U.S./
Canada/Mexico-9955936) - 2017 - crc - 11/9/16
68 Seats and Restraints
Manually Recalling Memory
Positions
Press and hold 1, 2, or
Bto recall
the previously stored memory
positions.
To stop manual recall movement,
release 1, 2, or B. Recall can also
be stopped by pressing a power
seat, SET, power mirror control,
power steering wheel control,
or adjustable pedal control,
if memory equipped. The driver or
passenger side mirror must be
selected.
Auto Memory Recall
The vehicle identifies the number of
the current driver ’s RKE transmitter
(1–8).
See Remote Keyless Entry (RKE)
System Operation (Keyless Access)
0 34 orRemote Keyless Entry
(RKE) System Operation (Key
Access) 032. If the RKE transmitter
is 1 or 2, and Auto Memory Recall is
programmed on in vehicle
personalization, the positions saved
to the same memory button number
1 or 2 are automatically recalled when the ignition is turned on,
or turned from OFF to ACC/
ACCESSORY. RKE transmitters 3–8
will not provide automatic memory
recalls.
To turn Auto Memory Recall on or
off, see "Vehicle Personalization
Settings" previously in this section
and
Vehicle Personalization 0171.
The transmission must be in
P (Park) to initiate Auto Memory
Recall. Auto Memory Recall will
complete if the vehicle is shifted out
of P (Park) prior to reaching the
stored memory position.
To stop Auto Memory Recall
movement, turn the ignition off or
press any of the following memory
controls:
. Power seat
. Memory SET, 1, 2, or
B
.Power mirror, with the driver or
passenger side mirror selected
. Power steering wheel,
if equipped
. Adjustable pedals, if equipped If the stored memory seat position
does not automatically recall or
recalls to the wrong positions, the
driver
’s RKE transmitter number (1
or 2) may not match the memory
button number that positions were
saved to. Try storing the position to
the other memory button or try the
other RKE transmitter.
Easy Exit Recall
Easy Exit Recall is not linked to an
RKE transmitter. The position stored
to
Bis used for all drivers. To turn
Easy Exit Recall on or off, see
"Vehicle Personalization Settings"
previously in this section and
Vehicle Personalization 0171.
If turned on, the positions saved to
Bare automatically recalled when
one of the following occurs:
. The vehicle is turned off and the
driver door is opened within a
short time.
. The vehicle is turned off with the
driver door open.
Page 78 of 429
GMC Yukon/Yukon XL/Denali Owner Manual (GMNA-Localizing-U.S./
Canada/Mexico-9955936) - 2017 - crc - 11/9/16
Seats and Restraints 77
4. Disconnect the rear safety beltmini-latch, using a key in the
slot on the mini-buckle, and let
the belt retract into the
headliner. Stow the mini-latch
in the holder in the headliner.
5. Press and hold the switch (2) on the side trim of the cargo
area to fold the third row
seatback.
The left switch folds the left
seatback, and the right switch
folds the right seatback.
6. Repeat the steps for the other seatback, if desired. The switches (1) can be used to fold
or fold and tumble the second row
seats from the cargo area. See
Second Row Seats
071.
Returning the Third Row
Seatback to the Upright
Position
1. Second Row Power Seat
Fold and Tumble Switches
2. Third Row Power Seat Fold and Raise Switches
To return the third row seatback to
the upright position:
1. Open the liftgate to access the controls for the seat. 2. Press and hold the switch (2)
on the side trim of the cargo
area to raise the third row
seatback.
The left switch raises the left
seatback, and the right switch
raises the right seatback.
{Warning
A safety belt that is improperly
routed, not properly attached,
or twisted will not provide the
protection needed in a crash. The
person wearing the belt could be
seriously injured. After raising the
rear seatback, always check to be
sure that the safety belts are
properly routed and attached, and
are not twisted.
3. Reconnect the center safety belt mini-latch to the
mini-buckle. Do not let it twist.
4. Pull on the safety belt to be sure the mini-latch is secure.
5. Repeat the steps for the other seatback, if desired.
Page 85 of 429
GMC Yukon/Yukon XL/Denali Owner Manual (GMNA-Localizing-U.S./
Canada/Mexico-9955936) - 2017 - crc - 11/9/16
84 Seats and Restraints
3. Be sure that the belt is nottwisted and it lies flat. The
elastic cord must be behind the
belt with the plastic guide on
the front.
4. Buckle, position, and release
the safety belt as described
previously in this section. Make
sure the shoulder portion of the
belt is on the shoulder and not
falling off of it. The belt should
be close to, but not contacting,
the neck. To remove and store the comfort
guide, squeeze the belt edges
together so that the safety belt can
be removed from the guide. Slide
the guide onto its storage clip.
Third Row Seating Positions
Comfort guides are available
through your dealer for third row
seating positions. Instructions are
included with the guides.
Safety Belt Use During
Pregnancy
Safety belts work for everyone,
including pregnant women. Like all
occupants, they are more likely to
be seriously injured if they do not
wear safety belts.
A pregnant woman should wear a
lap-shoulder belt, and the lap
portion should be worn as low as
possible, below the rounding,
throughout the pregnancy.
The best way to protect the fetus is
to protect the mother. When a safety
belt is worn properly, it is more likely
that the fetus will not be hurt in a
crash. For pregnant women, as for
anyone, the key to making safety
belts effective is wearing them
properly.
Page 122 of 429
GMC Yukon/Yukon XL/Denali Owner Manual (GMNA-Localizing-U.S./
Canada/Mexico-9955936) - 2017 - crc - 11/9/16
Storage 121
Storage
Storage Compartments
Storage Compartments . . . . . . . 121
Instrument Panel Storage . . . . 121
Glove Box . . . . . . . . . . . . . . . . . . . . 121
Cupholders . . . . . . . . . . . . . . . . . . . 121
Sunglasses Storage . . . . . . . . . . 122
Armrest Storage . . . . . . . . . . . . . . 122
Rear Storage . . . . . . . . . . . . . . . . . 122
Center Console Storage . . . . . . 122
Additional Storage Features
Cargo Tie-Downs . . . . . . . . . . . . . 123
Convenience Net . . . . . . . . . . . . . 123
Roof Rack System
Roof Rack System . . . . . . . . . . . 123
Storage
Compartments
{Warning
Do not store heavy or sharp
objects in storage compartments.
In a crash, these objects may
cause the cover to open and
could result in injury.
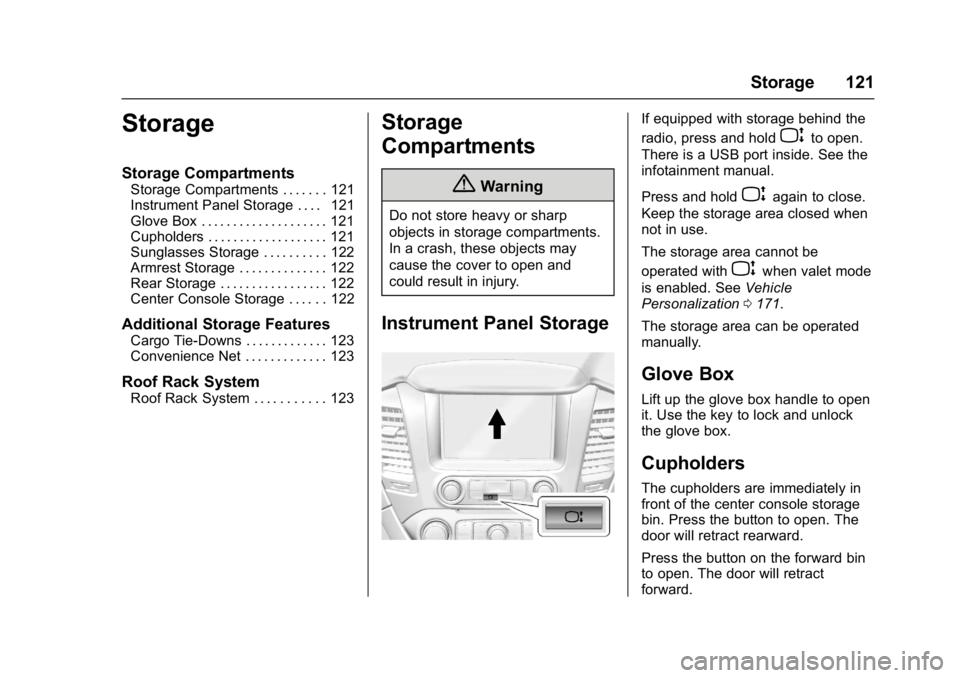
Instrument Panel Storage
If equipped with storage behind the
radio, press and hold
Pto open.
There is a USB port inside. See the
infotainment manual.
Press and hold
Pagain to close.
Keep the storage area closed when
not in use.
The storage area cannot be
operated with
Pwhen valet mode
is enabled. See Vehicle
Personalization 0171.
The storage area can be operated
manually.
Glove Box
Lift up the glove box handle to open
it. Use the key to lock and unlock
the glove box.
Cupholders
The cupholders are immediately in
front of the center console storage
bin. Press the button to open. The
door will retract rearward.
Press the button on the forward bin
to open. The door will retract
forward.
Page 126 of 429
GMC Yukon/Yukon XL/Denali Owner Manual (GMNA-Localizing-U.S./
Canada/Mexico-9955936) - 2017 - crc - 11/9/16
Instruments and Controls 125
Instruments and
Controls
Controls
Steering Wheel Adjustment . . . 126
Steering Wheel Controls . . . . . . 126
Heated Steering Wheel . . . . . . . 126
Horn . . . . . . . . . . . . . . . . . . . . . . . . . . 127
Windshield Wiper/Washer . . . . 127
Rear Window Wiper/Washer . . . . . . . . . . . . . . . . . . . . . 129
Compass . . . . . . . . . . . . . . . . . . . . . 129
Clock . . . . . . . . . . . . . . . . . . . . . . . . . 130
Power Outlets . . . . . . . . . . . . . . . . 131
Wireless Charging . . . . . . . . . . . . 133
Warning Lights, Gauges, and
Indicators
Warning Lights, Gauges, and Indicators . . . . . . . . . . . . . . . . . . . 134
Instrument Cluster . . . . . . . . . . . . 135
Speedometer . . . . . . . . . . . . . . . . . 138
Odometer . . . . . . . . . . . . . . . . . . . . . 138
Trip Odometer . . . . . . . . . . . . . . . . 138
Tachometer . . . . . . . . . . . . . . . . . . . 138
Fuel Gauge . . . . . . . . . . . . . . . . . . . 138
Engine Oil Pressure
Gauge . . . . . . . . . . . . . . . . . . . . . . 139 Engine Coolant Temperature
Gauge . . . . . . . . . . . . . . . . . . . . . . 140
Transmission Temperature Gauge . . . . . . . . . . . . . . . . . . . . . . 141
Voltmeter Gauge . . . . . . . . . . . . . 141
Safety Belt Reminders . . . . . . . . 142
Airbag Readiness Light . . . . . . . 143
Passenger Airbag Status
Indicator . . . . . . . . . . . . . . . . . . . . 143
Charging System Light . . . . . . . 144
Malfunction Indicator Lamp (Check Engine Light) . . . . . . . . 145
Brake System Warning Light . . . . . . . . . . . . . . . . . . . . . . . . 147
Antilock Brake System (ABS) Warning Light . . . . . . . . . . . . . . . 147
Four-Wheel-Drive Light . . . . . . . 148
Tow/Haul Mode Light . . . . . . . . . 148
Lane Keep Assist (LKA) Light . . . . . . . . . . . . . . . . . . . . . . . . 148
Vehicle Ahead Indicator . . . . . . 148
Traction Off Light . . . . . . . . . . . . . 149
StabiliTrak OFF Light . . . . . . . . . 149
Traction Control System (TCS)/ StabiliTrak Light . . . . . . . . . . . . . 149
Engine Coolant Temperature Warning Light . . . . . . . . . . . . . . . 150
Tire Pressure Light . . . . . . . . . . . 150
Engine Oil Pressure Light . . . . 151
Low Fuel Warning Light . . . . . . 151
Security Light . . . . . . . . . . . . . . . . . 151 High-Beam On Light . . . . . . . . . . 152
Front Fog Lamp Light . . . . . . . . . 152
Lamps On Reminder . . . . . . . . . 152
Cruise Control Light . . . . . . . . . . 152
Door Ajar Light . . . . . . . . . . . . . . . 153
Information Displays
Driver Information
Center (DIC) . . . . . . . . . . . . . . . . 153
Head-Up Display (HUD) . . . . . . 156
Vehicle Messages
Vehicle Messages . . . . . . . . . . . . 159
Battery Voltage and Charging Messages . . . . . . . . . . . . . . . . . . . 160
Brake System Messages . . . . . 160
Compass Messages . . . . . . . . . . 161
Cruise Control Messages . . . . . 161
Door Ajar Messages . . . . . . . . . . 162
Engine Cooling System Messages . . . . . . . . . . . . . . . . . . . 162
Engine Oil Messages . . . . . . . . . 163
Engine Power Messages . . . . . 163
Fuel System Messages . . . . . . . 163
Key and Lock Messages . . . . . 164
Lamp Messages . . . . . . . . . . . . . . 164
Object Detection System Messages . . . . . . . . . . . . . . . . . . . 164
Ride Control System
Messages . . . . . . . . . . . . . . . . . . . 166
Airbag System Messages . . . . 167
Page 132 of 429
GMC Yukon/Yukon XL/Denali Owner Manual (GMNA-Localizing-U.S./
Canada/Mexico-9955936) - 2017 - crc - 11/9/16
Instruments and Controls 131
To set the clock display:1. Touch SETTINGS on the Home Page, then touch Time
and Date.
2. Touch Clock Display, then touch Off or On to turn the
clock display off or on.
3. Touch
Sto go back to the
previous menu.
Power Outlets
Power Outlets 12-Volt Direct
Current
Accessory power outlets can be
used to plug in electrical equipment,
such as a cell phone, MP3
player, etc.
The vehicle may have up to five
accessory power outlets:
Vehicles with a Center Console
. One in front of the cupholders on
the center console.
. One inside the center storage
console.
. One on the rear of the center
storage console. .
One in the third row seat on the
driver side.
. One in the rear cargo area on
the passenger side.
Vehicles with Bench Seats
. One on the center stack below
the climate control system.
. One in the storage area on the
bench seat.
. One on the rear of the center
armrest storage.
. One in the third row seat area on
the driver side.
. One in the rear cargo area on
the passenger side.
Lift the cover to access and replace
when not in use.
The accessory power outlets are
powered as follows:
. The power outlet near the
cupholders for vehicles with a
center console or on the center
stack for vehicles with bench
seats, can be configured to
operate using Retained
Accessory Power (RAP) or battery power modes. If these
power outlets are used while in
the battery power mode, this
could cause interference
between the Remote Keyless
Entry (RKE) transmitter and the
vehicle, and the vehicle may not
start.
See
Ignition Positions (Keyless
Access) 0220 orIgnition
Positions (Key Access) 0218.
. The power outlets in the third
row seat area or in the rear
cargo area are powered at all
times. The power outlets inside
the storage area, on the rear of
the console, or on the bench
seat are only powered when the
ignition is in ON/RUN or ACC/
ACCESSORY, or when RAP is
active.
{Warning
Power is always supplied to the
outlet, if configured accordingly.
Do not leave electrical equipment
plugged in when the vehicle is not
(Continued)
Page 134 of 429
GMC Yukon/Yukon XL/Denali Owner Manual (GMNA-Localizing-U.S./
Canada/Mexico-9955936) - 2017 - crc - 11/9/16
Instruments and Controls 133
The power outlet is not designed for
the following, and may not work
properly if they are plugged in:
.Equipment with high initial peak
wattage, such as
compressor-driven refrigerators
and electric power tools.
. Other equipment requiring an
extremely stable power supply,
such as
microcomputer-controlled
electric blankets and touch
sensor lamps.
. Medical equipment.
Wireless Charging
The vehicle may have wireless
charging on top of the center
console. See Center Console
Storage 0122. The system
wirelessly charges one PMA or Qi
compatible mobile device.
To check for phone or other device
compatibility:
. In the U.S., see my.gmc.com/
learn. .
In Canada, see
gmtotalconnect.ca.
. Or, see your dealer for details.
{Warning
Wireless charging can affect the
operation of an implanted
pacemaker or other medical
devices. If you have one, it is
recommended to consult with
your doctor before using the
wireless charging system.
The vehicle must be in ON/RUN,
ACC/ACCESSORY, or Retained
Accessory Power (RAP). The
wireless charging feature may not
correctly indicate charging when the
vehicle is in RAP. See Retained
Accessory Power (RAP) 0225.
The operating temperature is −20 °C
(−4 °F) to 60 °C (140 °F) for the
charging system and 0 °C (32 °F) to
35 °C (95 °F) for the phone.
{Warning
Remove all objects from the
charging pad before charging
your mobile device. Objects, such
as coins, keys, rings, paper clips,
or cards, between the phone and
charging pad will become very
hot. On the rare occasion that the
charging system does not detect
an object, and the object gets
wedged between the phone and
charger, remove the phone and
allow the object to cool before
removing it from the charging
pad, to prevent burns.
Page 146 of 429
GMC Yukon/Yukon XL/Denali Owner Manual (GMNA-Localizing-U.S./
Canada/Mexico-9955936) - 2017 - crc - 11/9/16
Instruments and Controls 145
If a short distance must be driven
with the light on, be sure to turn off
all accessories, such as the radio
and air conditioner.
Malfunction Indicator
Lamp (Check Engine
Light)
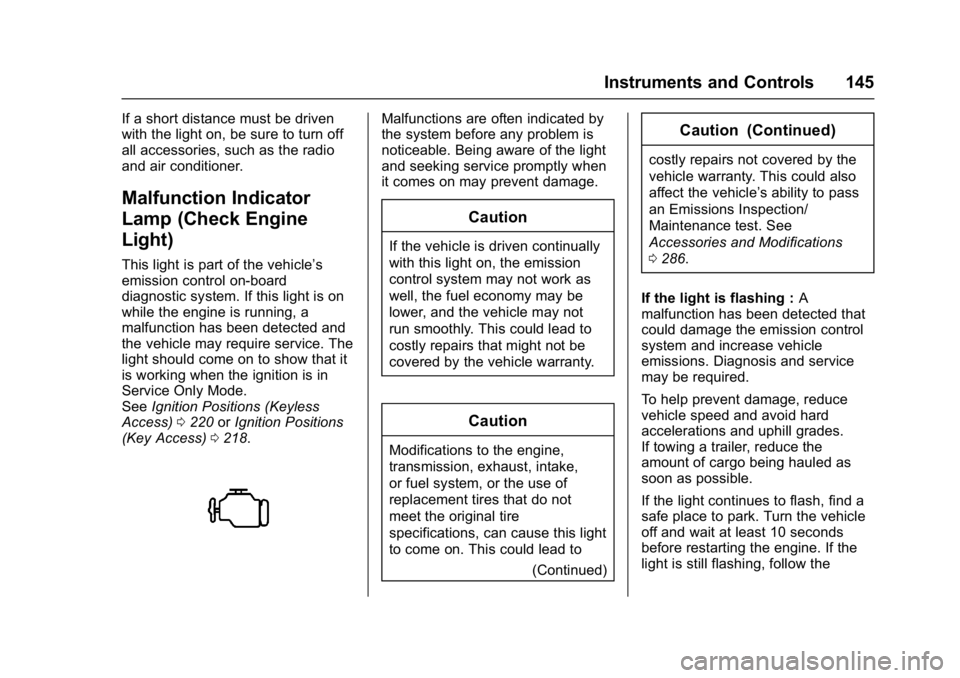
This light is part of the vehicle’s
emission control on-board
diagnostic system. If this light is on
while the engine is running, a
malfunction has been detected and
the vehicle may require service. The
light should come on to show that it
is working when the ignition is in
Service Only Mode.
SeeIgnition Positions (Keyless
Access) 0220 orIgnition Positions
(Key Access) 0218.
Malfunctions are often indicated by
the system before any problem is
noticeable. Being aware of the light
and seeking service promptly when
it comes on may prevent damage.
Caution
If the vehicle is driven continually
with this light on, the emission
control system may not work as
well, the fuel economy may be
lower, and the vehicle may not
run smoothly. This could lead to
costly repairs that might not be
covered by the vehicle warranty.
Caution
Modifications to the engine,
transmission, exhaust, intake,
or fuel system, or the use of
replacement tires that do not
meet the original tire
specifications, can cause this light
to come on. This could lead to
(Continued)
Caution (Continued)
costly repairs not covered by the
vehicle warranty. This could also
affect the vehicle’s ability to pass
an Emissions Inspection/
Maintenance test. See
Accessories and Modifications
0286.
If the light is flashing : A
malfunction has been detected that
could damage the emission control
system and increase vehicle
emissions. Diagnosis and service
may be required.
To help prevent damage, reduce
vehicle speed and avoid hard
accelerations and uphill grades.
If towing a trailer, reduce the
amount of cargo being hauled as
soon as possible.
If the light continues to flash, find a
safe place to park. Turn the vehicle
off and wait at least 10 seconds
before restarting the engine. If the
light is still flashing, follow the
Page 152 of 429
GMC Yukon/Yukon XL/Denali Owner Manual (GMNA-Localizing-U.S./
Canada/Mexico-9955936) - 2017 - crc - 11/9/16
Instruments and Controls 151
Engine Oil Pressure Light
Caution
Lack of proper engine oil
maintenance can damage the
engine. Driving with the engine oil
low can also damage the engine.
The repairs would not be covered
by the vehicle warranty. Check
the oil level as soon as possible.
Add oil if required, but if the oil
level is within the operating range
and the oil pressure is still low,
have the vehicle serviced. Always
follow the maintenance schedule
for changing engine oil.
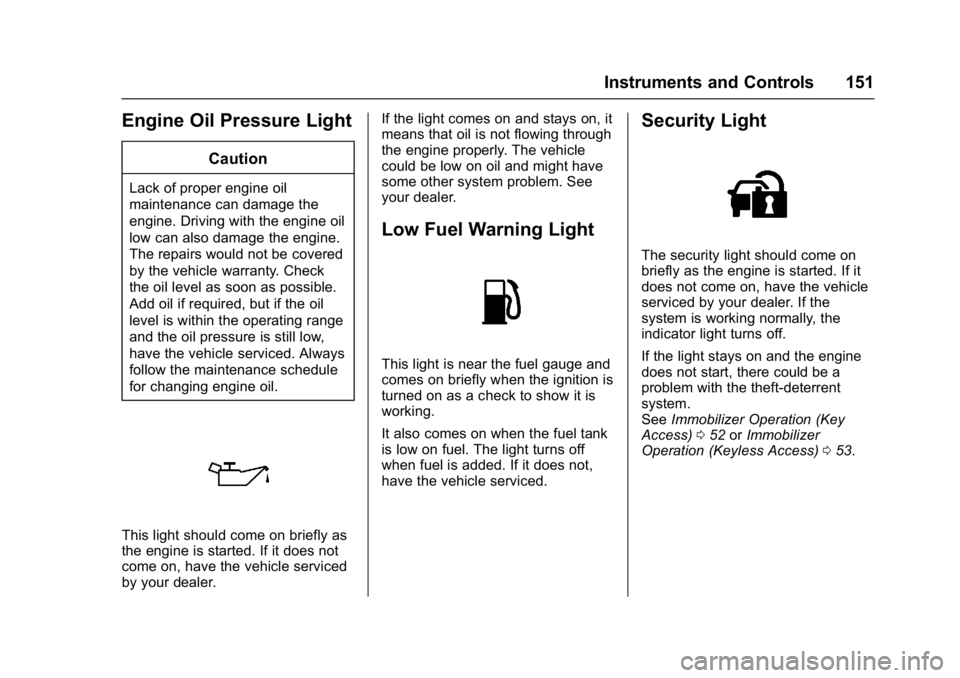
This light should come on briefly as
the engine is started. If it does not
come on, have the vehicle serviced
by your dealer.If the light comes on and stays on, it
means that oil is not flowing through
the engine properly. The vehicle
could be low on oil and might have
some other system problem. See
your dealer.
Low Fuel Warning Light
This light is near the fuel gauge and
comes on briefly when the ignition is
turned on as a check to show it is
working.
It also comes on when the fuel tank
is low on fuel. The light turns off
when fuel is added. If it does not,
have the vehicle serviced.
Security Light
The security light should come on
briefly as the engine is started. If it
does not come on, have the vehicle
serviced by your dealer. If the
system is working normally, the
indicator light turns off.
If the light stays on and the engine
does not start, there could be a
problem with the theft-deterrent
system.
See
Immobilizer Operation (Key
Access) 052 orImmobilizer
Operation (Keyless Access) 053.