ECO mode GMC YUKON 2020 Infotainment System Manual
[x] Cancel search | Manufacturer: GMC, Model Year: 2020, Model line: YUKON, Model: GMC YUKON 2020Pages: 116, PDF Size: 1.32 MB
Page 3 of 116
GMC Infotainment System (U.S./Canada 2.6) (GMNA-Localizing-U.S./Canada-
13583174) - 2020 - CRC - 8/2/19
2 Introduction
Introduction
The names, logos, emblems,
slogans, vehicle model names, and
vehicle body designs appearing in
this manual including, but not limited
to, GM, the GM logo, GMC, the
GMC Emblem, and the names
YUKON, YUKON DENALI, YUKON
XL, and YUKON XL DENALI are
registered trademarks of General
Motors Corporation LLC, its
subsidiaries, affiliates, or licensors.
For vehicles first sold in Canada,
substitute the name General Motors
of Canada Company for GMC Motor
Division whenever it appears in this
manual.The information in this manual
supplements the owner's manual.
This manual includes the latest
information available at the time it
was printed. We reserve the right to
make changes in the product after
that time without notice.
This manual describes features that
may or may not be on the vehicle
because of optional equipment that
was not purchased on the vehicle,
model variants, country
specifications, features/applications
that may not be available in your
region, or changes subsequent to
the printing of this manual.
Refer to the purchase
documentation relating to your
specific vehicle to confirm the
features.
Keep this manual with the owner's
manual in the vehicle, so it will be
there if it is needed. If the vehicle is
sold, leave this manual in the
vehicle.
Overview
Read the following pages to
become familiar with the
infotainment system features.
{Warning
Taking your eyes off the road for
too long or too often while using
any infotainment feature can
cause a crash. You or others
could be injured or killed. Do not
give extended attention to
infotainment tasks while driving.
Limit your glances at the vehicle
displays and focus your attention
on driving. Use voice commands
whenever possible.
The infotainment system has built-in
features intended to help avoid
distraction by disabling some
features when driving. These
features may gray out when they
are unavailable. Many infotainment
Litho in U.S.A.
Part No. 84368278 B Second Printing©2019 General Motors LLC. All Rights Reserved.
Page 15 of 116
GMC Infotainment System (U.S./Canada 2.6) (GMNA-Localizing-U.S./Canada-
13583174) - 2020 - CRC - 4/15/19
14 Radio
Direct Tune
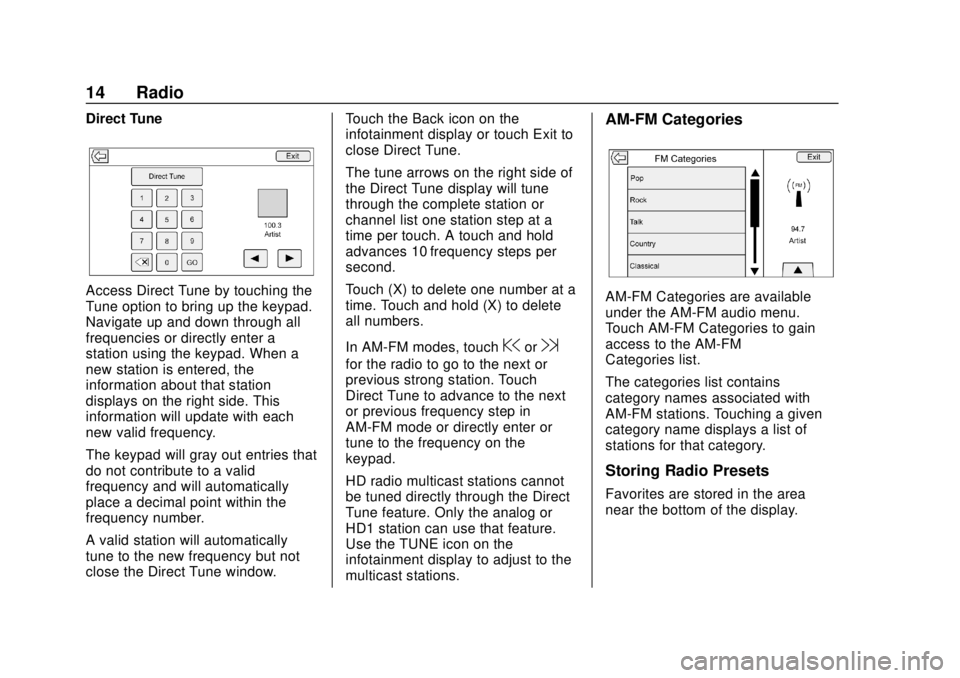
Access Direct Tune by touching the
Tune option to bring up the keypad.
Navigate up and down through all
frequencies or directly enter a
station using the keypad. When a
new station is entered, the
information about that station
displays on the right side. This
information will update with each
new valid frequency.
The keypad will gray out entries that
do not contribute to a valid
frequency and will automatically
place a decimal point within the
frequency number.
A valid station will automatically
tune to the new frequency but not
close the Direct Tune window.Touch the Back icon on the
infotainment display or touch Exit to
close Direct Tune.
The tune arrows on the right side of
the Direct Tune display will tune
through the complete station or
channel list one station step at a
time per touch. A touch and hold
advances 10 frequency steps per
second.
Touch (X) to delete one number at a
time. Touch and hold (X) to delete
all numbers.
In AM-FM modes, touch
@or9
for the radio to go to the next or
previous strong station. Touch
Direct Tune to advance to the next
or previous frequency step in
AM-FM mode or directly enter or
tune to the frequency on the
keypad.
HD radio multicast stations cannot
be tuned directly through the Direct
Tune feature. Only the analog or
HD1 station can use that feature.
Use the TUNE icon on the
infotainment display to adjust to the
multicast stations.
AM-FM Categories
AM-FM Categories are available
under the AM-FM audio menu.
Touch AM-FM Categories to gain
access to the AM-FM
Categories list.
The categories list contains
category names associated with
AM-FM stations. Touching a given
category name displays a list of
stations for that category.
Storing Radio Presets
Favorites are stored in the area
near the bottom of the display.
Page 32 of 116
GMC Infotainment System (U.S./Canada 2.6) (GMNA-Localizing-U.S./Canada-
13583174) - 2020 - CRC - 4/15/19
Rear Seat Infotainment 31
Press COLOR to display the four
color options: blue, yellow, red, and
green. Highlight a color and press
ENTER and the appropriate action
will be carried out. Press
0
(Back) or MENU, or wait for the
15-second time out to close the
menu. Press the down arrow on the
yellow color to keep the overlay
menu up, but close the color menu.
The color menu is disc dependent;
selecting colors for discs that do not
support this feature will have no
function.
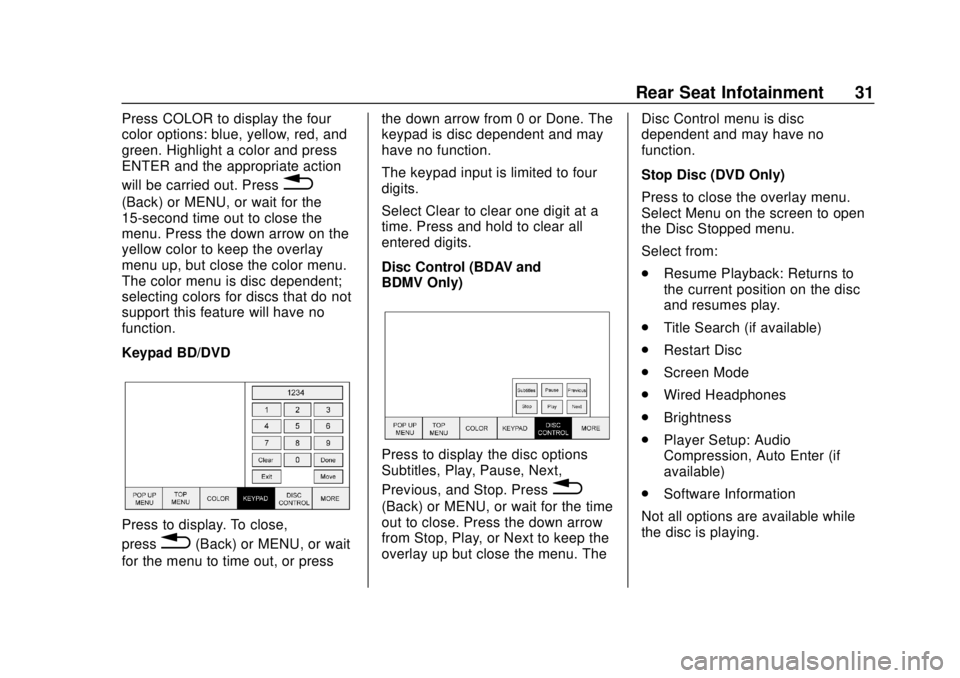
Keypad BD/DVD
Press to display. To close,
press
0(Back) or MENU, or wait
for the menu to time out, or press the down arrow from 0 or Done. The
keypad is disc dependent and may
have no function.
The keypad input is limited to four
digits.
Select Clear to clear one digit at a
time. Press and hold to clear all
entered digits.
Disc Control (BDAV and
BDMV Only)
Press to display the disc options
Subtitles, Play, Pause, Next,
Previous, and Stop. Press
0
(Back) or MENU, or wait for the time
out to close. Press the down arrow
from Stop, Play, or Next to keep the
overlay up but close the menu. The
Disc Control menu is disc
dependent and may have no
function.
Stop Disc (DVD Only)
Press to close the overlay menu.
Select Menu on the screen to open
the Disc Stopped menu.
Select from:
.
Resume Playback: Returns to
the current position on the disc
and resumes play.
. Title Search (if available)
. Restart Disc
. Screen Mode
. Wired Headphones
. Brightness
. Player Setup: Audio
Compression, Auto Enter (if
available)
. Software Information
Not all options are available while
the disc is playing.
Page 41 of 116
GMC Infotainment System (U.S./Canada 2.6) (GMNA-Localizing-U.S./Canada-
13583174) - 2020 - CRC - 4/15/19
40 Rear Seat Infotainment
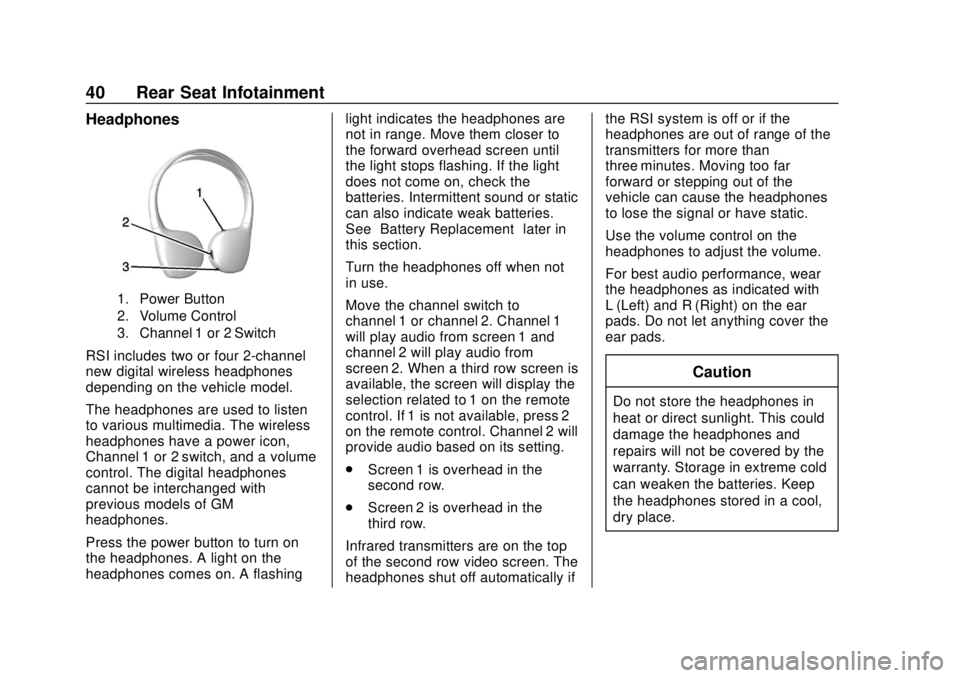
Headphones
1. Power Button
2. Volume Control
3. Channel 1 or 2 Switch
RSI includes two or four 2-channel
new digital wireless headphones
depending on the vehicle model.
The headphones are used to listen
to various multimedia. The wireless
headphones have a power icon,
Channel 1 or 2 switch, and a volume
control. The digital headphones
cannot be interchanged with
previous models of GM
headphones.
Press the power button to turn on
the headphones. A light on the
headphones comes on. A flashinglight indicates the headphones are
not in range. Move them closer to
the forward overhead screen until
the light stops flashing. If the light
does not come on, check the
batteries. Intermittent sound or static
can also indicate weak batteries.
See
“Battery Replacement” later in
this section.
Turn the headphones off when not
in use.
Move the channel switch to
channel 1 or channel 2. Channel 1
will play audio from screen 1 and
channel 2 will play audio from
screen 2. When a third row screen is
available, the screen will display the
selection related to 1 on the remote
control. If 1 is not available, press 2
on the remote control. Channel 2 will
provide audio based on its setting.
. Screen 1 is overhead in the
second row.
. Screen 2 is overhead in the
third row.
Infrared transmitters are on the top
of the second row video screen. The
headphones shut off automatically if the RSI system is off or if the
headphones are out of range of the
transmitters for more than
three minutes. Moving too far
forward or stepping out of the
vehicle can cause the headphones
to lose the signal or have static.
Use the volume control on the
headphones to adjust the volume.
For best audio performance, wear
the headphones as indicated with
L (Left) and R (Right) on the ear
pads. Do not let anything cover the
ear pads.
Caution
Do not store the headphones in
heat or direct sunlight. This could
damage the headphones and
repairs will not be covered by the
warranty. Storage in extreme cold
can weaken the batteries. Keep
the headphones stored in a cool,
dry place.
Page 47 of 116
GMC Infotainment System (U.S./Canada 2.6) (GMNA-Localizing-U.S./Canada-
13583174) - 2020 - CRC - 4/15/19
46 Rear Seat Infotainment
If a CD, Blu-ray/DVD, or MP3 disc is
in the CD slot, the remote control
O
power button can be used to turn on
the video screen display and start
the disc. The infotainment system
can also turn on the video screen
display.
Caution
Storing the remote controls in a
hot area or in direct sunlight can
damage them, and the repairs
would not be covered by the
vehicle warranty. Storage in
extreme cold can weaken the
batteries. Keep the remote
controls stored in a cool, dry
place.
Battery Replacement
To change the remote control
batteries: 1. Insert a coin or key to pull up the rear cover on the remote
control. 2. Replace the two AAA batteries
in the compartment.
3. Replace the battery cover.
Remove the batteries from the
remote control if it will not be used
for an extended period of time.
Video Voice Over
If equipped, the RSI system has a
Video Voice Over feature to benefit
the visually and hearing impaired.
When activated, the RSI will read
aloud menu titles, menu listings,
pop-ups, alerts, and file titles from
audio and video media. Titles with
gibberish, special characters,
or foreign text may not be read
aloud.
Use one of the following to turn
Video Voice Over on or off:
. Select Video Voice Over from
the Front Display menu.
. Select Video Voice Over from
the RSI menu.
. Press and hold the remote
control MENU and Play/Pause
for five seconds. Video Voice Over will remain active
over ignition cycles until it is
turned off.
RSI Troubleshooting
No power :
The ignition might not
be in ON/RUN or ACC/
ACCESSORY.
The picture does not fill the
screen. There are black borders
on the top and bottom or on both
sides, or it looks stretched out :
Press MENU on the remote control
to change the display mode setting.
The remote control does not
work : Check to make sure the
remote control is programmed to the
correct screen. Make sure there is
no obstruction between the remote
control and the transmitter window
and check the batteries to make
sure they are not dead or installed
incorrectly.
There is no sound from the
headphones with the indicator
light on : If the batteries are good,
make sure the headphones are
Page 48 of 116
GMC Infotainment System (U.S./Canada 2.6) (GMNA-Localizing-U.S./Canada-
13583174) - 2020 - CRC - 4/15/19
Rear Seat Infotainment 47
programmed to the correct screen
and on the correct channel for the
screen being viewed.
The HDMI source is running but
there is no picture or sound :
Check that the RSI video screen is
in the HDMI mode by pressing
MEDIA on the remote control.
Check the HDMI connections at
both devices.
Sometimes the wireless
headphone audio cuts out or
buzzes :Check for obstructions,
low batteries, reception range, and
interference from cell phone towers
or from cellular telephone use in the
vehicle. Check that the headphones
are on correctly using the L (Left)
and R (Right) on the headphones.
Check that the headphones are
positioned properly with the
headband across the top of
the head.
I lost the remote and/or the
headphones : See your dealer for
assistance. The Blu-ray/DVD is playing, but
there is no picture or sound :
Check that the RSI video screen is
sourced to the Blu-ray/DVD player
by pressing MEDIA on the remote
control.
Videos from my phone are played
back sideways or upside-down
when the phone is connected via
DLNA :
This cannot be corrected by
the RSI system. While playing
through DLNA, the RSI will only play
back videos in the orientation in
which they were recorded.
Video Display Error Messages
The video screen may display one
of the following:
Disc Error : There are disc load or
eject problems, the disc is inserted
with the disc label wrong side up,
the disc is damaged, or the disc is
not from the correct region. No Disc Inserted :
No disc is
present.
Disc Player Error : The
temperature is outside the operating
range of the RSI system. If the
temperature is within range, see
your dealer.
Video Distortion
Video distortion can occur when
operating cellular phones, scanners,
CB radios, Global Positioning
Systems (GPSs), two-way radios,
mobile faxes, or walkie talkies.
It might be necessary to turn off the
video player when operating one of
these devices in or near the vehicle.
Page 53 of 116
GMC Infotainment System (U.S./Canada 2.6) (GMNA-Localizing-U.S./Canada-
13583174) - 2020 - CRC - 4/15/19
52 Navigation
The audio status screen contains
the following elements:
.Station Frequency
. Artist Information
. Song Information
.
r/j g dStation and Channel
Controls
Press the
gordstation controls
to go to the next or previous strong
signal station or digital channel.
When the audio status pane
displays Artist and Song
Information, press
gordto go to
the next or previous track based on
the current media mode.
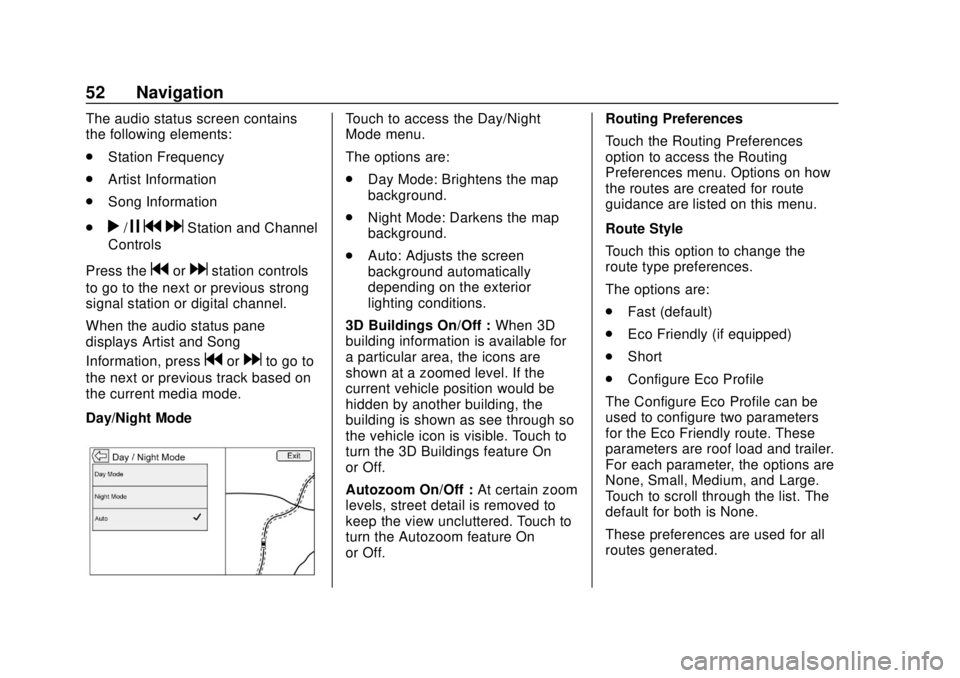
Day/Night Mode
Touch to access the Day/Night
Mode menu.
The options are:
. Day Mode: Brightens the map
background.
. Night Mode: Darkens the map
background.
. Auto: Adjusts the screen
background automatically
depending on the exterior
lighting conditions.
3D Buildings On/Off : When 3D
building information is available for
a particular area, the icons are
shown at a zoomed level. If the
current vehicle position would be
hidden by another building, the
building is shown as see through so
the vehicle icon is visible. Touch to
turn the 3D Buildings feature On
or Off.
Autozoom On/Off : At certain zoom
levels, street detail is removed to
keep the view uncluttered. Touch to
turn the Autozoom feature On
or Off. Routing Preferences
Touch the Routing Preferences
option to access the Routing
Preferences menu. Options on how
the routes are created for route
guidance are listed on this menu.
Route Style
Touch this option to change the
route type preferences.
The options are:
.
Fast (default)
. Eco Friendly (if equipped)
. Short
. Configure Eco Profile
The Configure Eco Profile can be
used to configure two parameters
for the Eco Friendly route. These
parameters are roof load and trailer.
For each parameter, the options are
None, Small, Medium, and Large.
Touch to scroll through the list. The
default for both is None.
These preferences are used for all
routes generated.
Page 80 of 116
GMC Infotainment System (U.S./Canada 2.6) (GMNA-Localizing-U.S./Canada-
13583174) - 2020 - CRC - 4/15/19
Voice Recognition 79
to be taking too long to finish,
press
gagain and the beep
should happen right away.
There are two voice prompt modes
supported:
. Long verbal prompts: The longer
prompts provide more
information regarding the
supported actions.
. Short prompts: The short
prompts provide simple
instructions about what can be
stated.
If a command is not spoken, the
voice recognition system says a
help prompt.
Prompts and Screen Displays
While a voice recognition session is
active, there will be corresponding
items on the Infotainment displays.
Manual interaction in the voice
recognition session is permitted.
Interaction during a voice session
may be completed entirely using
voice commands, or some
selections may expedite a session.
If a selection is made using a manual control, the dialog will
progress in the same way as if the
selection was made through a voice
command. Once the system is able
to complete the task, or the session
is terminated, the voice recognition
dialog stops.
An example of this type of manual
intervention is pressing on an entry
of a displayed number list instead of
speaking the number associated
with the entry desired.
Canceling Voice Recognition
.
Touch the voice icon. Touching
this will terminate a voice
recognition session which was
initiated by touching the icon on
the infotainment display.
. Touch or say “Cancel”or“Exit”
to terminate the voice
recognition session and show
the display from which voice
recognition was initiated. .
Press
ion the steering wheel
controls to terminate the voice
session and show the display
from which voice recognition
was initiated.
Helpful Hints for Speaking
Commands
Voice recognition can understand
commands that are either naturally
stated in sentence form, or direct
commands that state the application
and the task.
Most languages do not support
natural language commands in
sentence form. For those
languages, use direct commands
like the examples shown on the
display.
For best results:
. Listen for the prompt and wait
for the beep before saying a
command or reply.
. Say “Help” or look at the display
for example commands.
Page 87 of 116
GMC Infotainment System (U.S./Canada 2.6) (GMNA-Localizing-U.S./Canada-
13583174) - 2020 - CRC - 4/15/19
86 Phone
Phone
Bluetooth (Overview)
The Bluetooth-capable system can
interact with many cell phones,
allowing:
.Placement and receipt of calls in
a hands-free mode.
. Sharing of the cell phone’s
address book or contact list with
the vehicle.
To minimize driver distraction,
before driving, and with the vehicle
parked:
. Become familiar with the
features of the cell phone.
Organize the phone book and
contact lists clearly and delete
duplicate or rarely used entries.
If possible, program speed dial
or other shortcuts.
. Review the controls and
operation of the infotainment
system. .
Pair cell phone(s) to the vehicle.
The system may not work with
all cell phones. See “Pairing”in
this section.
Vehicles with a Bluetooth system
can use a Bluetooth-capable cell
phone with a Hands-Free Profile to
make and receive phone calls. The
infotainment system and voice
recognition are used to control the
system. The system can be used
while the ignition is on or in ACC/
ACCESSORY. The range of the
Bluetooth system can be up to 9.1 m
(30 ft). Not all phones support all
functions and not all phones work
with the Bluetooth system. See
www.gm.com/bluetooth for more
information about compatible
phones.
Bluetooth Controls
Use the controls and knobs on the
infotainment system and the
steering wheel to operate the
Bluetooth system. Steering Wheel Controls
g:
Press to answer incoming calls,
confirm system information, and
start voice recognition.
i: Press to end a call, decline a
call, or cancel an operation. Press
to mute or unmute the infotainment
system when not on a call.
Infotainment System Controls
For information about how to
navigate the menu system using the
infotainment controls, see Using the
System 08.
PHONE : Touch the phone icon on
the Home Page to enter the phone
main menu.
Audio System
When using the Bluetooth system,
sound comes through the vehicle's
front audio system speakers and
overrides the audio system. Turn
the volume knob during a call to
change the volume level. The
adjusted volume level remains in
memory for later calls. The system
maintains a minimum volume level.
Page 89 of 116

GMC Infotainment System (U.S./Canada 2.6) (GMNA-Localizing-U.S./Canada-
13583174) - 2020 - CRC - 4/15/19
88 Phone
7. If the phone prompts to acceptconnection or allow phone
book download, touch Always
Accept and Allow. The phone
book may not be available if
not accepted.
8. Repeat Steps 1−7 to pair additional phones.
Listing All Paired and Connected
Phones 1. Touch the Phone icon on the Home Page.
2. Touch Phones.
Disconnecting a Connected Phone 1. Touch the Phone icon on the Home Page.
2. Touch Phones.
3. Touch
znext to the phone to
disconnect.
Deleting a Paired Phone
Only disconnected phones can be
deleted. 1. Touch the Phone icon on the Home Page. 2. Touch Phones.
3. Touch
Mnext to the phone to
delete and follow the on-screen
prompts.
Linking to a Different Phone
To link to a different phone, the new
phone must be in the vehicle and
paired to the Bluetooth system. 1. Touch the Phone icon on the Home Page.
2. Touch Phones.
3. Touch the new phone to link to from the not connected
device list.
Switching to Handset or
Handsfree Mode
To switch between handset or
handsfree mode, touch the Phone
icon on the Home Page to display
“Call View.”
.While the active call is
hands-free, touch Handset to
switch to the handset mode. The
display item changes to Handsfree once the Bluetooth
device confirms it is operating as
handset.
. While the active call is handset,
touch Handsfree to switch to the
hands free mode. The display
item changes to Handset once
the Bluetooth device confirms it
is operating as handsfree.
Making a Call Using Contacts
and Recent Calls
Calls can be made through the
Bluetooth system using personal
cell phone contact information for all
phones that support the Phone
Book feature. Become familiar with
the phone settings and operation.
Verify the cell phone supports this
feature.
When supported, the Contacts and
Recent Calls menus are
automatically available.
The Contacts menu accesses the
phone book stored in the cell phone.
The Recent Calls menu accesses
the recent call list(s) from your cell
phone.