buttons GMC YUKON 2020 Owner's Manual
[x] Cancel search | Manufacturer: GMC, Model Year: 2020, Model line: YUKON, Model: GMC YUKON 2020Pages: 434, PDF Size: 6.45 MB
Page 7 of 434

GMC Yukon/Yukon XL/Denali Owner Manual (GMNA-Localizing-U.S./
Canada/Mexico-13566587) - 2020 - CRC - 4/15/19
6 Introduction
1.Air Vents 0180.
2. Head-Up Display (HUD) 0147
(If Equipped).
3.
gTraction Control/Electronic
Stability Control 0226.
jPower Assist Steps 032 (If
Equipped).
XPark Assist Button (If
Equipped). See Assistance
Systems for Parking or Backing
0 242.
ALane Keep Assist (LKA)
0 251 (If Equipped).
0Pedal Adjust Switch (If
Equipped). See Adjustable
Throttle and Brake Pedal
0 201.
4. Turn Signal Lever. See Turn
and Lane-Change Signals
0 169.
Windshield Wiper/Washer
0 116. 5. Favorite Switches (Out of
View). See “Steering Wheel
Controls” in the infotainment
manual.
Volume Switches (Out of View).
See “Steering Wheel Controls”
in the infotainment manual.
6. Hazard Warning Flashers
0168.
7. Instrument Cluster 0126.
8. Shift Lever. See Automatic
Transmission 0213.
Tow/Haul Selector Button. See
Tow/Haul Mode 0218.
Range Selection Mode (If
Equipped). See Manual Mode
0 216.
9. Light Sensor. See Automatic
Headlamp System 0167.
10. Infotainment 0174.
11. Dual Automatic Climate Control
System 0175.
12. Heated and Ventilated Front
Seats 054 (If Equipped). 13. Rear Climate Control Buttons.
SeeRear Climate Control
System 0179.
14. Ignition Positions (Keyless
Access) 0202 or
Ignition Positions (Key Access)
0 204.
15. Steering Wheel Controls. See the infotainment manual.
16. Horn 0116.
17. Steering Wheel Adjustment
0115.
18. Hood Release. See Hood
0 284.
19. Cruise Control 0230.
Adaptive Cruise Control 0232
(If Equipped).
Forward Collision Alert (FCA)
System 0245 (If Equipped).
Heated Steering Wheel 0116
(If Equipped).
20. Trailer Brake Control Panel (If Equipped). See Towing
Equipment 0270.
Page 42 of 434
GMC Yukon/Yukon XL/Denali Owner Manual (GMNA-Localizing-U.S./
Canada/Mexico-13566587) - 2020 - CRC - 4/15/19
Keys, Doors, and Windows 41
Interior Mirrors
Interior Rearview Mirrors
Adjust the rearview mirror for a clear
view of the area behind your
vehicle.
If equipped with OnStar, the vehicle
may have three control buttons at
the bottom of the mirror. SeeOnStar
Overview 0410.
To avoid accidental OnStar calls,
clean the mirror with the ignition off.
Do not spray glass cleaner directly
on the mirror. Use a soft towel
dampened with water.
Manual Rearview Mirror
If equipped with a manual rearview
mirror, push the tab forward for
daytime use and pull it for nighttime
use to avoid glare from the
headlamps from behind.
Automatic Dimming
Rearview Mirror
If equipped, automatic dimming
reduces the glare of headlamps
from behind. The dimming feature
comes on when the vehicle is
started.
Child-View Mirror
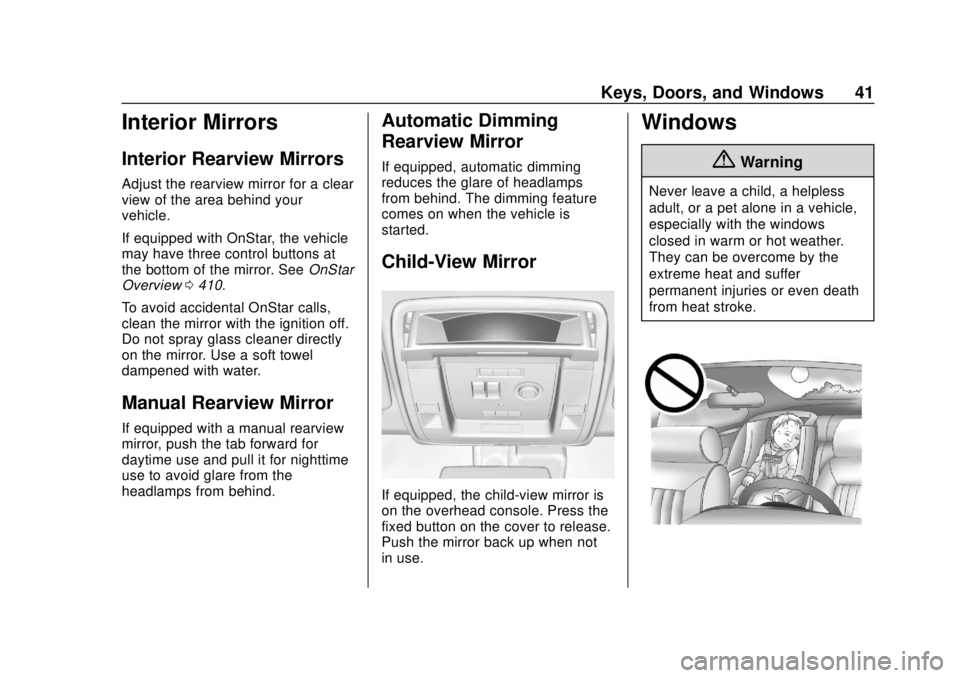
If equipped, the child-view mirror is
on the overhead console. Press the
fixed button on the cover to release.
Push the mirror back up when not
in use.
Windows
{Warning
Never leave a child, a helpless
adult, or a pet alone in a vehicle,
especially with the windows
closed in warm or hot weather.
They can be overcome by the
extreme heat and suffer
permanent injuries or even death
from heat stroke.
Page 55 of 434
GMC Yukon/Yukon XL/Denali Owner Manual (GMNA-Localizing-U.S./
Canada/Mexico-13566587) - 2020 - CRC - 4/15/19
54 Seats and Restraints
Heated and Ventilated
Front Seats
{Warning
If temperature change or pain to
the skin cannot be felt, the seat
heater may cause burns. To
reduce the risk of burns, use care
when using the seat heater,
especially for long periods of
time. Do not place anything on
the seat that insulates against
heat, such as a blanket, cushion,
cover, or similar item. This may
cause the seat heater to
overheat. An overheated seat
heater may cause a burn or may
damage the seat.
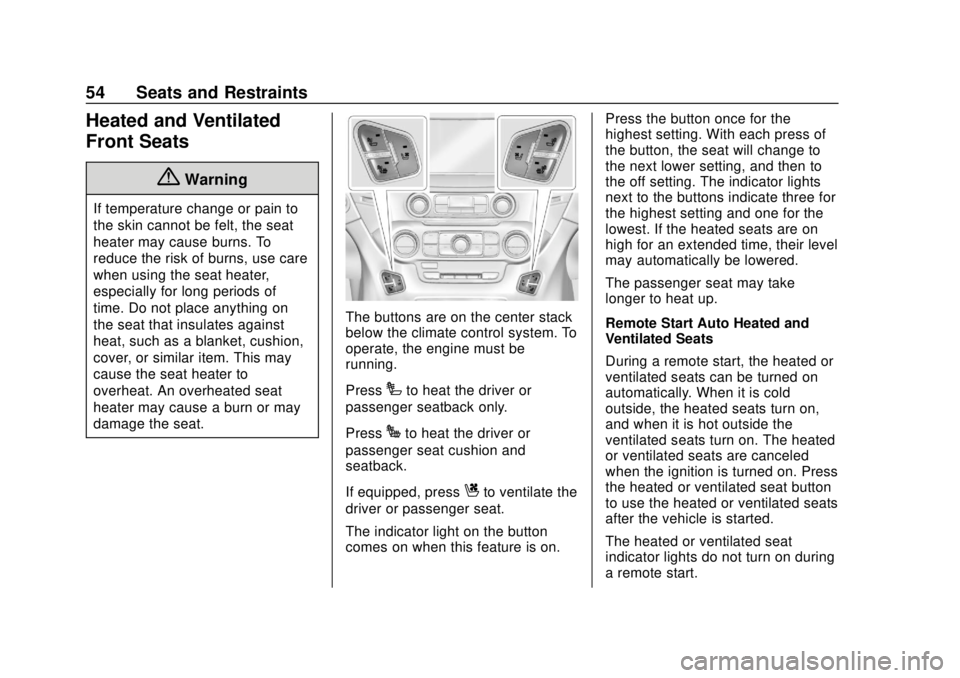
The buttons are on the center stack
below the climate control system. To
operate, the engine must be
running.
Press
Ito heat the driver or
passenger seatback only.
Press
Jto heat the driver or
passenger seat cushion and
seatback.
If equipped, press
Cto ventilate the
driver or passenger seat.
The indicator light on the button
comes on when this feature is on. Press the button once for the
highest setting. With each press of
the button, the seat will change to
the next lower setting, and then to
the off setting. The indicator lights
next to the buttons indicate three for
the highest setting and one for the
lowest. If the heated seats are on
high for an extended time, their level
may automatically be lowered.
The passenger seat may take
longer to heat up.
Remote Start Auto Heated and
Ventilated Seats
During a remote start, the heated or
ventilated seats can be turned on
automatically. When it is cold
outside, the heated seats turn on,
and when it is hot outside the
ventilated seats turn on. The heated
or ventilated seats are canceled
when the ignition is turned on. Press
the heated or ventilated seat button
to use the heated or ventilated seats
after the vehicle is started.
The heated or ventilated seat
indicator lights do not turn on during
a remote start.
Page 57 of 434
GMC Yukon/Yukon XL/Denali Owner Manual (GMNA-Localizing-U.S./
Canada/Mexico-13566587) - 2020 - CRC - 4/15/19
56 Seats and Restraints
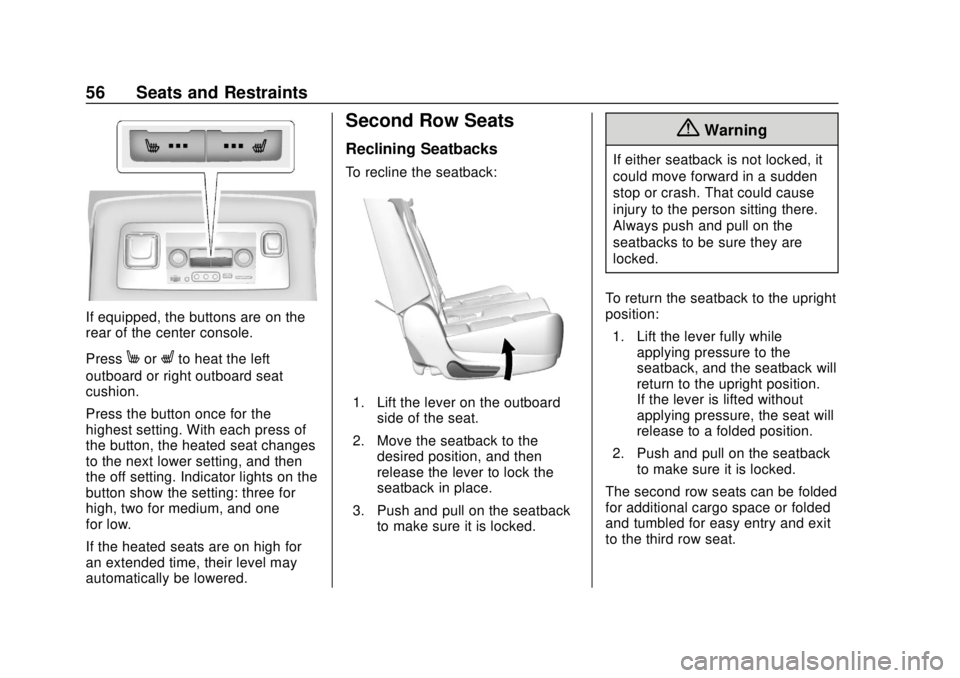
If equipped, the buttons are on the
rear of the center console.
Press
MorLto heat the left
outboard or right outboard seat
cushion.
Press the button once for the
highest setting. With each press of
the button, the heated seat changes
to the next lower setting, and then
the off setting. Indicator lights on the
button show the setting: three for
high, two for medium, and one
for low.
If the heated seats are on high for
an extended time, their level may
automatically be lowered.
Second Row Seats
Reclining Seatbacks
To recline the seatback:
1. Lift the lever on the outboard side of the seat.
2. Move the seatback to the desired position, and then
release the lever to lock the
seatback in place.
3. Push and pull on the seatback to make sure it is locked.
{Warning
If either seatback is not locked, it
could move forward in a sudden
stop or crash. That could cause
injury to the person sitting there.
Always push and pull on the
seatbacks to be sure they are
locked.
To return the seatback to the upright
position: 1. Lift the lever fully while applying pressure to the
seatback, and the seatback will
return to the upright position.
If the lever is lifted without
applying pressure, the seat will
release to a folded position.
2. Push and pull on the seatback to make sure it is locked.
The second row seats can be folded
for additional cargo space or folded
and tumbled for easy entry and exit
to the third row seat.
Page 103 of 434

GMC Yukon/Yukon XL/Denali Owner Manual (GMNA-Localizing-U.S./
Canada/Mexico-13566587) - 2020 - CRC - 4/15/19
102 Seats and Restraints
tether around the inboard
or outboard side of the
headrest or head
restraint.
If the position you are
using has a fixed or an
adjustable head restraint
and you are using a dual
tether, route the tether
around the head restraint.
3. Before placing a child in the child restraint, make sure it is
securely held in place. To
check, grasp the child restraint
at the LATCH path and attempt
to move it side to side and
back and forth. There should be no more than 2.5 cm (1 in) of
movement, for proper
installation.
Head Restraint Removal and
Reinstallation
1. Partially fold the seatback
forward. See Third Row Seats
0 60 for additional information.
2. Press the buttons on the head
restraint posts and pull up on
the head restraint.
3. Route the top tether of the child restraint under the head
restraint.
4. With the head restraint facingrearward, insert the head
restraint posts into the holes in
the top of the seatback.
5. Push the head restraint down.
6. Try to move the head restraint to make sure that it is locked in
place.
7. When the child restraint is removed, reinstall the head
restraint before the seating
position is used.
Page 161 of 434
GMC Yukon/Yukon XL/Denali Owner Manual (GMNA-Localizing-U.S./
Canada/Mexico-13566587) - 2020 - CRC - 4/15/19
160 Instruments and Controls
Restore Vehicle Settings
This allows selection of restoring
vehicle settings.
Select Restore or Cancel.
Clear All Private Data
This allows selection to clear all
private information from the vehicle.
Select Delete or Cancel.
Restore Radio Settings
This allows selection to restore
radio settings.
Select Restore or Cancel.
Software Information
Select to view or update the
infotainment system current
software information.
Wi-Fi
Select and the following may
display:
.Wi-Fi
. Manage Wi-Fi Networks
Wi-Fi
This feature allows Wi-Fi networks
to be turned off or on.
Select Off or On.
Manage Wi-Fi Networks
Select to manage Wi-Fi networks.
Wi-Fi must be on for this feature to
be accessed.
Universal Remote
System
See Radio Frequency Statement
0 405.
Universal Remote System
Programming
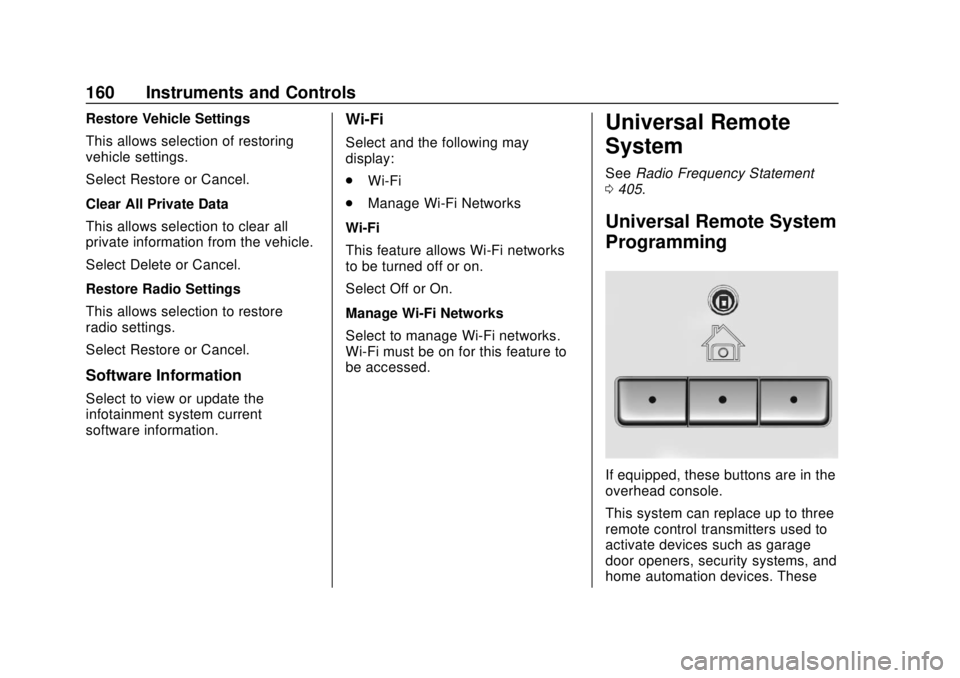
If equipped, these buttons are in the
overhead console.
This system can replace up to three
remote control transmitters used to
activate devices such as garage
door openers, security systems, and
home automation devices. These
Page 162 of 434
GMC Yukon/Yukon XL/Denali Owner Manual (GMNA-Localizing-U.S./
Canada/Mexico-13566587) - 2020 - CRC - 4/15/19
Instruments and Controls 161
instructions refer to a garage door
opener, but can be used for other
devices.
Do not use the Universal Remote
system with any garage door opener
that does not have the stop and
reverse feature. This includes any
garage door opener model
manufactured before April 1, 1982.
Read these instructions completely
before programming the Universal
Remote system. It may help to have
another person assist with the
programming process.
Keep the original hand-held
transmitter for use in other vehicles
as well as for future programming.
Erase the programming when
vehicle ownership is terminated.
See“Erasing Universal Remote
System Buttons” later in this
section.
To program a garage door opener,
park outside directly in line with and
facing the garage door opener
receiver. Clear all people and
objects near the garage door. Make sure the hand-held transmitter
has a new battery for quicker and
more accurate transmission of the
radio-frequency signal.
Programming the Universal
Remote System
For questions or programming help,
see www.homelink.com/gm or call
1-800-355-3515. For calls placed
outside the U.S.A, Canada,
or Puerto Rico, international rates
will apply and may differ based on
landline or mobile phone.
Programming involves
time-sensitive actions, and may time
out causing the procedure to be
repeated.
To program up to three devices:
1. Hold the end of the hand-held transmitter about 3 to 8 cm (1
to 3 in) away from the
Universal Remote system
buttons with the indicator light
in view. The hand-held
transmitter was supplied by the
manufacturer of the garage
door opener receiver. 2. At the same time, press and
hold both the hand-held
transmitter button and one of
the three Universal Remote
system buttons to be used to
operate the garage door. Do
not release either button until
the indicator light changes from
a slow to a rapid flash. Then
release both buttons.
Some garage door openers
may require substitution of
Step 2 with the procedure
under “Radio Signals for Some
Gate Operators” later in this
section.
3. Press and hold the newly programmed Universal Remote
system button for five seconds
while watching the indicator
light and garage door
activation.
.If the indicator light stays on
continuously or the garage
door moves when the
button is pressed, then
programming is complete.
There is no need to
complete Steps 4–6.
Page 163 of 434
GMC Yukon/Yukon XL/Denali Owner Manual (GMNA-Localizing-U.S./
Canada/Mexico-13566587) - 2020 - CRC - 4/15/19
162 Instruments and Controls
.If the indicator light does
not come on or the garage
door does not move, a
second button press may
be required. For a second
time, press and hold the
newly programmed button
for five seconds. If the light
stays on or the garage door
moves, programming is
complete.
. If the indicator light blinks
rapidly for two seconds,
then changes to a solid light
and the garage door does
not move, continue with
programming Steps 4–6.
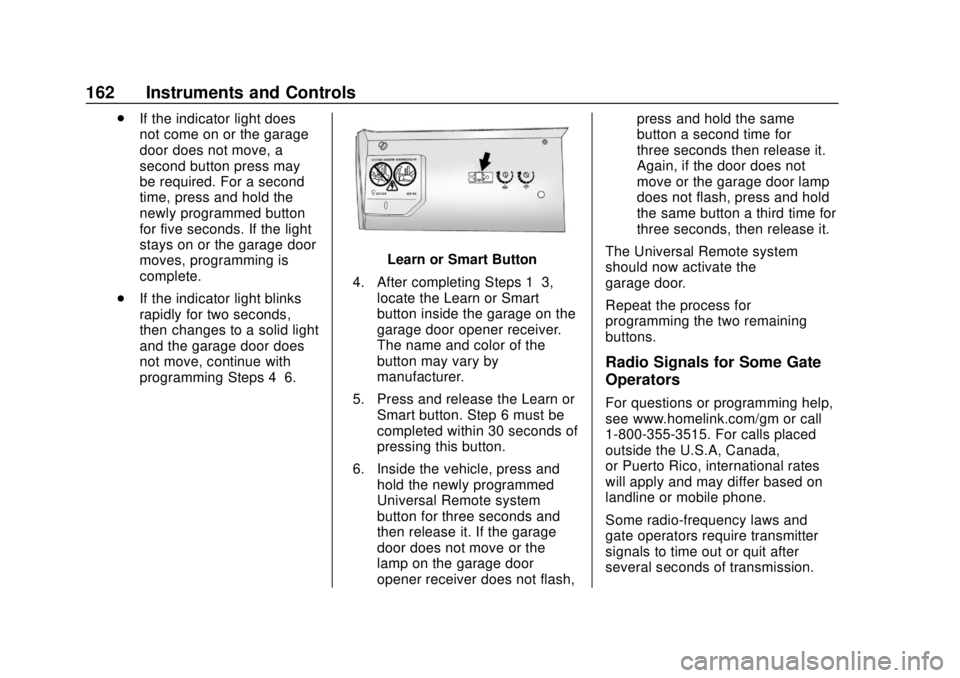
Learn or Smart Button
4. After completing Steps 1–3, locate the Learn or Smart
button inside the garage on the
garage door opener receiver.
The name and color of the
button may vary by
manufacturer.
5. Press and release the Learn or Smart button. Step 6 must be
completed within 30 seconds of
pressing this button.
6. Inside the vehicle, press and hold the newly programmed
Universal Remote system
button for three seconds and
then release it. If the garage
door does not move or the
lamp on the garage door
opener receiver does not flash, press and hold the same
button a second time for
three seconds then release it.
Again, if the door does not
move or the garage door lamp
does not flash, press and hold
the same button a third time for
three seconds, then release it.
The Universal Remote system
should now activate the
garage door.
Repeat the process for
programming the two remaining
buttons.
Radio Signals for Some Gate
Operators
For questions or programming help,
see www.homelink.com/gm or call
1-800-355-3515. For calls placed
outside the U.S.A, Canada,
or Puerto Rico, international rates
will apply and may differ based on
landline or mobile phone.
Some radio-frequency laws and
gate operators require transmitter
signals to time out or quit after
several seconds of transmission.
Page 164 of 434

GMC Yukon/Yukon XL/Denali Owner Manual (GMNA-Localizing-U.S./
Canada/Mexico-13566587) - 2020 - CRC - 4/15/19
Instruments and Controls 163
This may not be long enough for the
Universal Remote system to pick up
the signal during programming.
If the programming did not work,
replace Step 2 under“Programming
the Universal Remote System” with
the following:
Press and hold the Universal
Remote system button while
pressing and releasing the
hand-held transmitter button every
two seconds until the signal has
been successfully accepted by the
Universal Remote system. The
Universal Remote system indicator
light will flash slowly at first and then
rapidly. Proceed with Step 3 under
“Programming the Universal Remote
System” to complete.Universal Remote System
Operation
Using the Universal Remote
System
Press and hold the appropriate
Universal Remote system button for
at least one-half second. The
indicator light will come on while the
signal is being transmitted.
Erasing Universal Remote
System Buttons
Erase all programmed buttons when
vehicle ownership is terminated.
To erase:
1. Press and hold the two outside buttons until the indicator light
begins to flash. This should
take about 10 seconds.
2. Release both buttons.
Reprogramming a Single
Universal Remote System
Button
To reprogram any of the system
buttons: 1. Press and hold any one of the buttons. Do not release the
button.
2. The indicator light will begin to flash after 20 seconds. Without
releasing the button, proceed
with Step 1 under
“Programming the Universal
Remote System.”
Page 217 of 434

GMC Yukon/Yukon XL/Denali Owner Manual (GMNA-Localizing-U.S./
Canada/Mexico-13566587) - 2020 - CRC - 4/15/19
216 Driving and Operating
Manual Mode
Range Selection Mode
If equipped, Range Selection Mode
helps control the vehicle's
transmission and vehicle speed
while driving downhill or towing a
trailer by letting you select a desired
range of gears.
To use this feature:1. Move the shift lever to L (Manual Mode).
2. Press the plus/minus buttons on the shift lever to select the
desired range of gears for
current driving conditions.
Hold the plus/minus buttons on the
shift lever to select the highest or
lowest range available for the
current vehicle speed. When the shift lever is moved from
D (Drive) to L (Manual Mode), a
number displays next to the L,
indicating the current transmission
range.
This number is the highest gear that
the transmission will command while
operating in L (Manual Mode). All
gears below that number are
available. As driving conditions
change, the transmission can
automatically shift to lower gears.
For example, when 5 (Fifth) is
selected, 1 (First) through 5 (Fifth)
gears are automatically shifted by
the transmission, but 6 (Sixth)
cannot be used until the plus/minus
button on the shift lever is used to
change to the range.
When the shift lever is moved from
D (Drive) to L (Manual Mode), a
downshift may occur. The gear that
the transmission is operating in
when the shift lever is moved from
D (Drive) to L (Manual Mode)
determines if a downshift occurs.
See the following chart.