tow GMC YUKON 2022 User Guide
[x] Cancel search | Manufacturer: GMC, Model Year: 2022, Model line: YUKON, Model: GMC YUKON 2022Pages: 422, PDF Size: 8.2 MB
Page 53 of 422
GMC Yukon/Yukon XL/Denali Owner Manual (GMNA-Localizing-U.S./
Canada/Mexico-15555988) - 2022 - CRC - 12/3/21
52 Seats and Restraints
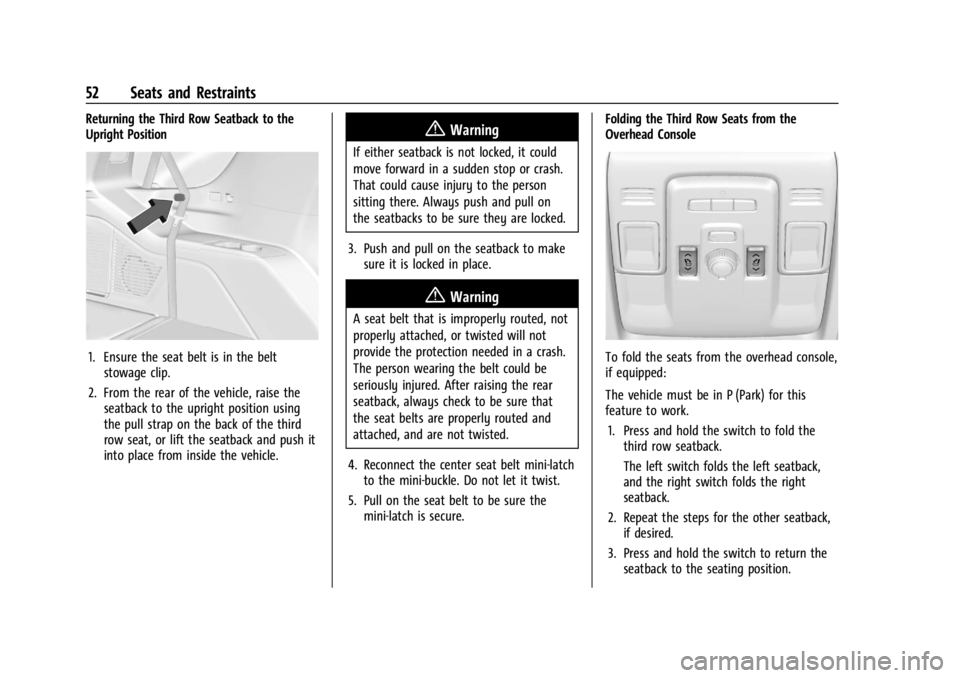
Returning the Third Row Seatback to the
Upright Position
1. Ensure the seat belt is in the beltstowage clip.
2. From the rear of the vehicle, raise the seatback to the upright position using
the pull strap on the back of the third
row seat, or lift the seatback and push it
into place from inside the vehicle.
{Warning
If either seatback is not locked, it could
move forward in a sudden stop or crash.
That could cause injury to the person
sitting there. Always push and pull on
the seatbacks to be sure they are locked.
3. Push and pull on the seatback to make sure it is locked in place.
{Warning
A seat belt that is improperly routed, not
properly attached, or twisted will not
provide the protection needed in a crash.
The person wearing the belt could be
seriously injured. After raising the rear
seatback, always check to be sure that
the seat belts are properly routed and
attached, and are not twisted.
4. Reconnect the center seat belt mini-latch to the mini-buckle. Do not let it twist.
5. Pull on the seat belt to be sure the mini-latch is secure. Folding the Third Row Seats from the
Overhead Console
To fold the seats from the overhead console,
if equipped:
The vehicle must be in P (Park) for this
feature to work.
1. Press and hold the switch to fold the third row seatback.
The left switch folds the left seatback,
and the right switch folds the right
seatback.
2. Repeat the steps for the other seatback, if desired.
3. Press and hold the switch to return the seatback to the seating position.
Page 58 of 422
GMC Yukon/Yukon XL/Denali Owner Manual (GMNA-Localizing-U.S./
Canada/Mexico-15555988) - 2022 - CRC - 12/3/21
Seats and Restraints 57
The lap-shoulder belt may lock if you
pull the belt across you very quickly.
If this happens, let the belt go back
slightly to unlock it. Then pull the belt
across you more slowly.
If the shoulder portion of a passenger
belt is pulled out all the way, the child
restraint locking feature may be
engaged. SeeChild Restraint Systems
0 74. If this occurs, let the belt go back
all the way and start again. If the
locking feature stays engaged after
letting the belt go back to stowed
position on the seat, move the seat
rearward or recline the seat until the
shoulder belt retractor lock releases.
Engaging the child restraint locking
feature in the front outboard seating
position may affect the passenger
sensing system. See Passenger Sensing
System 066.
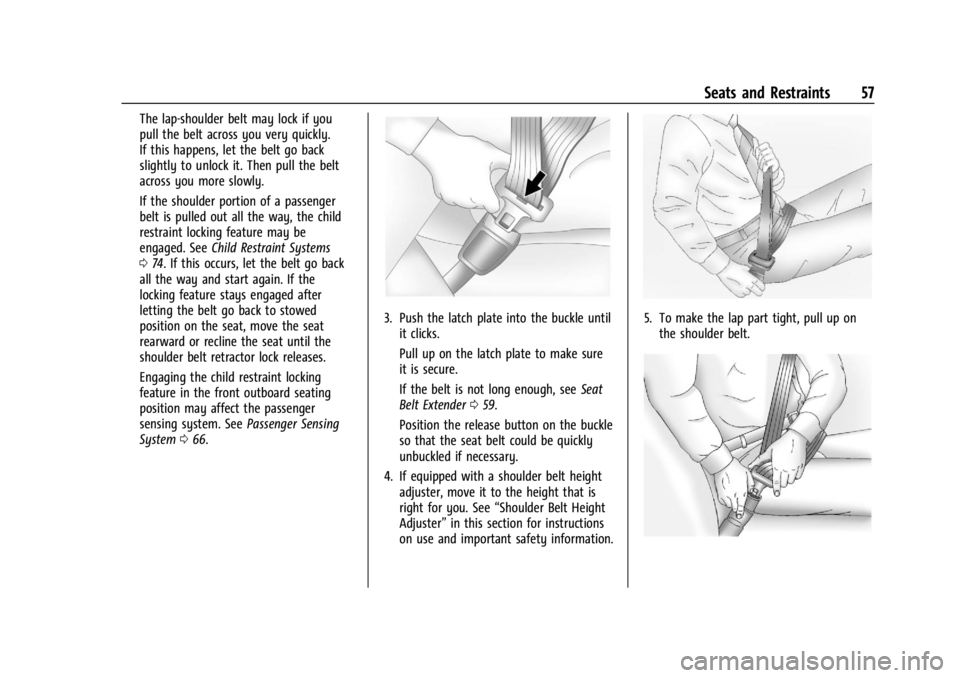
3. Push the latch plate into the buckle until
it clicks.
Pull up on the latch plate to make sure
it is secure.
If the belt is not long enough, see Seat
Belt Extender 059.
Position the release button on the buckle
so that the seat belt could be quickly
unbuckled if necessary.
4. If equipped with a shoulder belt height adjuster, move it to the height that is
right for you. See “Shoulder Belt Height
Adjuster” in this section for instructions
on use and important safety information.5. To make the lap part tight, pull up on the shoulder belt.
Page 59 of 422
GMC Yukon/Yukon XL/Denali Owner Manual (GMNA-Localizing-U.S./
Canada/Mexico-15555988) - 2022 - CRC - 12/3/21
58 Seats and Restraints
To unlatch the belt, push the button on the
buckle. The belt should return to its stowed
position.
Always stow the seat belt slowly. If the seat
belt webbing returns quickly to the stowed
position, the retractor may lock and cannot
be pulled out. If this happens, pull the seat
belt straight out firmly to unlock the
webbing, and then release it. If the webbing
is still locked in the retractor, see your
dealer.
Before a door is closed, be sure the seat belt
is out of the way. If a door is slammed
against a seat belt, damage can occur to
both the seat belt and the vehicle.
Shoulder Belt Height Adjuster
The vehicle has a shoulder belt height
adjuster for the driver and front outboard
passenger positions.
Adjust the height so the shoulder portion of
the belt is on the shoulder and not falling
off of it. The belt should be close to, but not
contacting, the neck. Improper shoulder belt
height adjustment could reduce the
effectiveness of the seat belt in a crash. See
How to Wear Seat Belts Properly054.
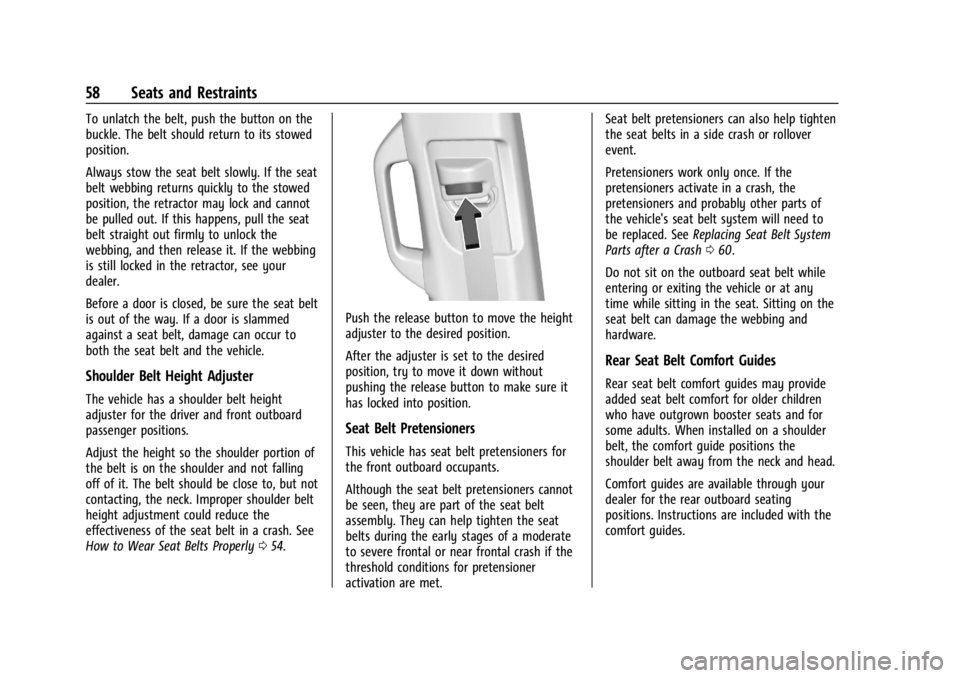
Push the release button to move the height
adjuster to the desired position.
After the adjuster is set to the desired
position, try to move it down without
pushing the release button to make sure it
has locked into position.
Seat Belt Pretensioners
This vehicle has seat belt pretensioners for
the front outboard occupants.
Although the seat belt pretensioners cannot
be seen, they are part of the seat belt
assembly. They can help tighten the seat
belts during the early stages of a moderate
to severe frontal or near frontal crash if the
threshold conditions for pretensioner
activation are met. Seat belt pretensioners can also help tighten
the seat belts in a side crash or rollover
event.
Pretensioners work only once. If the
pretensioners activate in a crash, the
pretensioners and probably other parts of
the vehicle's seat belt system will need to
be replaced. See
Replacing Seat Belt System
Parts after a Crash 060.
Do not sit on the outboard seat belt while
entering or exiting the vehicle or at any
time while sitting in the seat. Sitting on the
seat belt can damage the webbing and
hardware.
Rear Seat Belt Comfort Guides
Rear seat belt comfort guides may provide
added seat belt comfort for older children
who have outgrown booster seats and for
some adults. When installed on a shoulder
belt, the comfort guide positions the
shoulder belt away from the neck and head.
Comfort guides are available through your
dealer for the rear outboard seating
positions. Instructions are included with the
comfort guides.
Page 65 of 422
GMC Yukon/Yukon XL/Denali Owner Manual (GMNA-Localizing-U.S./
Canada/Mexico-15555988) - 2022 - CRC - 12/3/21
64 Seats and Restraints
the impact, when either side of the vehicle
is struck. In addition, the front center airbag
is designed to inflate when the sensing
system predicts that the vehicle is about to
roll over on its side. The front center airbag
is not designed to inflate in frontal impacts,
near frontal impacts, or rear impacts.
Seat-mounted side impact airbags are
designed to inflate in moderate to severe
side crashes, depending on the location of
the impact. Seat-mounted side impact
airbags are not designed to inflate in
rollovers or in rear impacts. The driver side
seat-mounted side impact airbag is not
designed to inflate in frontal impacts or in
near frontal impacts. The passenger side
seat-mounted side impact airbag is designed
to inflate in moderate to severe frontal
impacts or in near frontal impacts.
A seat-mounted side impact airbag is
designed to inflate on the side of the vehicle
that is struck.
Roof-rail airbags are designed to inflate in
moderate to severe side crashes depending
on the location of the impact. In addition,
these roof-rail airbags are designed to inflate
during a rollover or in a severe frontal
impact. Roof-rail airbags are not designed to
inflate in rear impacts. Both roof-rail airbagswill inflate when either side of the vehicle is
struck, if the sensing system predicts that
the vehicle is about to roll over on its side,
or in a severe frontal impact.
In any particular crash, no one can say
whether an airbag should have inflated
simply because of the vehicle damage or the
repair costs.
What Makes an Airbag Inflate?
In a deployment event, the sensing system
sends an electrical signal triggering a release
of gas from the inflator. Gas from the
inflator fills the airbag causing the bag to
break out of the cover. The inflator, the
airbag, and related hardware are all part of
the airbag module.
For airbag locations, see
Where Are the
Airbags? 062.
How Does an Airbag Restrain?
In moderate to severe frontal or near frontal
collisions, even belted occupants can contact
the steering wheel or the instrument panel.
In moderate to severe side collisions, even
belted occupants can contact the inside of
the vehicle. Airbags supplement the protection provided
by seat belts by distributing the force of the
impact more evenly over the
occupant's body.
Rollover capable roof-rail airbags are
designed to help contain the head and chest
of occupants in the outboard seating
positions in the first, second, and third rows.
The rollover capable roof-rail airbags are
designed to help reduce the risk of full or
partial ejection in rollover events, although
no system can prevent all such ejections.
But airbags would not help in many types
of collisions, primarily because the
occupant's motion is not toward those
airbags. See
When Should an Airbag Inflate?
0 63.
Airbags should never be regarded as
anything more than a supplement to seat
belts.What Will You See after an
Airbag Inflates?
After frontal and seat-mounted side impact
airbags inflate, they quickly deflate, so
quickly that some people may not even
realize the airbags inflated. The front center
airbag and roof-rail airbags may still be at
Page 70 of 422

GMC Yukon/Yukon XL/Denali Owner Manual (GMNA-Localizing-U.S./
Canada/Mexico-15555988) - 2022 - CRC - 12/3/21
Seats and Restraints 69
Additional Factors Affecting System
Operation
Seat belts help keep the passenger in
position on the seat during vehicle
maneuvers and braking, which helps the
passenger sensing system maintain the
passenger airbag status. See“Seat Belts”
and “Child Restraints” in the Index for
additional information about the importance
of proper restraint use.
A thick layer of additional material, such as
a blanket or cushion, or aftermarket
equipment such as seat covers, seat heaters,
and seat massagers can affect how well the
passenger sensing system operates. We
recommend that you not use seat covers or
other aftermarket equipment except when
approved by GM for your specific vehicle.
See Adding Equipment to the
Airbag-Equipped Vehicle 069 for more
information about modifications that can
affect how the system operates.
The ON indicator may be lit if an object,
such as a briefcase, handbag, grocery bag,
laptop, or other electronic device, is put on
an unoccupied seat. If this is not desired,
remove the object from the seat.
{Warning
Stowing articles under the passenger seat
or between the passenger seat cushion
and seatback may interfere with the
proper operation of the passenger
sensing system.
Servicing the Airbag-Equipped
Vehicle
Airbags affect how the vehicle should be
serviced. There are parts of the airbag
system in several places around the vehicle.
Your dealer and the service manual have
information about servicing the vehicle and
the airbag system. To purchase a service
manual, see Publication Ordering
Information 0397.
{Warning
For up to 10 seconds after the vehicle is
turned off and the battery is
disconnected, an airbag can still inflate
during improper service. You can be
injured if you are close to an airbag
when it inflates. Avoid yellow connectors.
They are probably part of the airbag
(Continued)
Warning (Continued)
system. Be sure to follow proper service
procedures, and make sure the person
performing work for you is qualified to
do so.
Adding Equipment to the
Airbag-Equipped Vehicle
Adding accessories that change the vehicle's
frame, bumper system, height, front end,
or side sheet metal may keep the airbag
system from working properly.
The operation of the airbag system can also
be affected by changing, including
improperly repairing or replacing, any parts
of the following:
.Airbag system, including airbag modules,
front or side impact sensors, sensing and
diagnostic module, airbag wiring, or front
center console
.Front seats, including stitching, seams or
zippers
.Seat belts
.Steering wheel, instrument panel,
overhead console, ceiling trim, or pillar
garnish trim
Page 84 of 422
GMC Yukon/Yukon XL/Denali Owner Manual (GMNA-Localizing-U.S./
Canada/Mexico-15555988) - 2022 - CRC - 12/3/21
Seats and Restraints 83
{Warning
Children can be seriously injured or
strangled if a shoulder belt is wrapped
around their neck. The shoulder belt can
tighten but cannot be loosened if it is
locked. The shoulder belt locks when it is
pulled all the way out of the retractor.
It unlocks when the shoulder belt is
allowed to go all the way back into the
retractor, but it cannot do this if it is
wrapped around a child’s neck. If the
shoulder belt is locked and tightened
around a child’s neck, the only way to
loosen the belt is to cut it.
Buckle any unused seat belts behind the
child restraint so children cannot reach
them. Pull the shoulder belt all the way
out of the retractor to set the lock, and
tighten the belt behind the child restraint
after the child restraint has been
installed.
Caution
Do not let the LATCH attachments rub
against the vehicle’s seat belts. This may
damage these parts. If necessary, move
buckled seat belts to avoid rubbing the
LATCH attachments.
Do not fold the rear seatback when the
seat is occupied. Do not fold the empty
rear seat with a seat belt buckled. This
could damage the seat belt or the seat.
Unbuckle and return the seat belt to its
stowed position, before folding the seat.
The vehicle is equipped with a front center
airbag in the inboard side of the driver seat.
Even with a front center airbag, a child
restraint can be installed in any second row
seating position.
If you need to secure more than one child
restraint in the rear seat, see Where to Put
the Restraint 076. 1. Attach and tighten the lower
attachments to the lower anchors. If the
child restraint does not have lower
attachments or the desired seating
position does not have lower anchors,
secure the child restraint with the seat
belt and top tether when recommended
by the child restraint manufacturer. Refer
to your child restraint manufacturer
instructions and the instructions in this
manual.
1.1. Find the lower anchors for the desired seating position.
1.2. Put the child restraint on the seat.
1.3. Attach and tighten the lower attachments on the child restraint
to the lower anchors.
2. If the child restraint manufacturer recommends that the top tether be
attached, adjust the top tether to its full
length and attach it to the anchor. Refer
to the child restraint instructions and the
following steps:
2.1. Find the top tether anchor.
2.2. Route, attach, and tighten the top tether according to your child
restraint instructions and the
following instructions:
Page 88 of 422
GMC Yukon/Yukon XL/Denali Owner Manual (GMNA-Localizing-U.S./
Canada/Mexico-15555988) - 2022 - CRC - 12/3/21
Seats and Restraints 87
6. For forward-facing child restraints, attachand tighten the top tether to the top
tether anchor (loop). Refer to the child
restraint instructions, the vehicle LATCH
anchor weight limits, and instructions
listed in Lower Anchors and Tethers for
Children (LATCH System) 078.
7. Before placing a child in the child restraint, make sure it is securely held in
place. To check, grasp the child restraint
at the seat belt path and attempt to
move it side to side and back and forth.
When the child restraint is properly
installed, there should be no more than
2.5 cm (1 in) of movement.
To remove the child restraint, unbuckle the
vehicle seat belt and let it return to the
stowed position. If the top tether is attached
to a top tether anchor, disconnect it.
If the head restraint was removed, reinstall
it before the seating position is used. See
"Head Restraint Removal and Reinstallation"
under Lower Anchors and Tethers for
Children (LATCH System) 078 for additional
information on installing the head restraint
properly.Securing Child Restraints (With
the Seat Belt in the Front
Passenger Seat)
This vehicle has airbags. A rear seat is a
safer place to secure a forward-facing child
restraint. See Where to Put the Restraint
0 76.
In addition, the vehicle has a passenger
sensing system which is designed to turn off
the front outboard passenger frontal airbag
under certain conditions. See Passenger
Sensing System 066 and
Passenger Airbag Status Indicator 0113 for
more information, including important
safety information.
Never put a rear-facing child restraint in the
front. This is because the risk to the
rear-facing child is so great, if the airbag
deploys.
{Warning
A child in a rear-facing child restraint can
be seriously injured or killed if the front
outboard passenger frontal airbag
inflates. This is because the back of the
rear-facing child restraint would be very
(Continued)
Warning (Continued)
close to the inflating airbag. A child in a
forward-facing child restraint can be
seriously injured or killed if the front
outboard passenger frontal airbag inflates
and the passenger seat is in a forward
position.
Even if the passenger sensing system has
turned off the front outboard passenger
frontal airbag, no system is fail-safe. No
one can guarantee that an airbag will not
deploy under some unusual circumstance,
even though it is turned off.
Secure rear-facing child restraints in a
rear seat, even if the airbag is off. If you
secure a forward-facing child restraint in
the front outboard passenger seat,
always move the seat as far back as it
will go. It is better to secure the child
restraint in a rear seat.
SeePassenger Sensing System 066 for
additional information.
If the child restraint uses a top tether, see
Lower Anchors and Tethers for Children
(LATCH System) 078 for top tether anchor
locations.
Page 90 of 422
GMC Yukon/Yukon XL/Denali Owner Manual (GMNA-Localizing-U.S./
Canada/Mexico-15555988) - 2022 - CRC - 12/3/21
Seats and Restraints 89
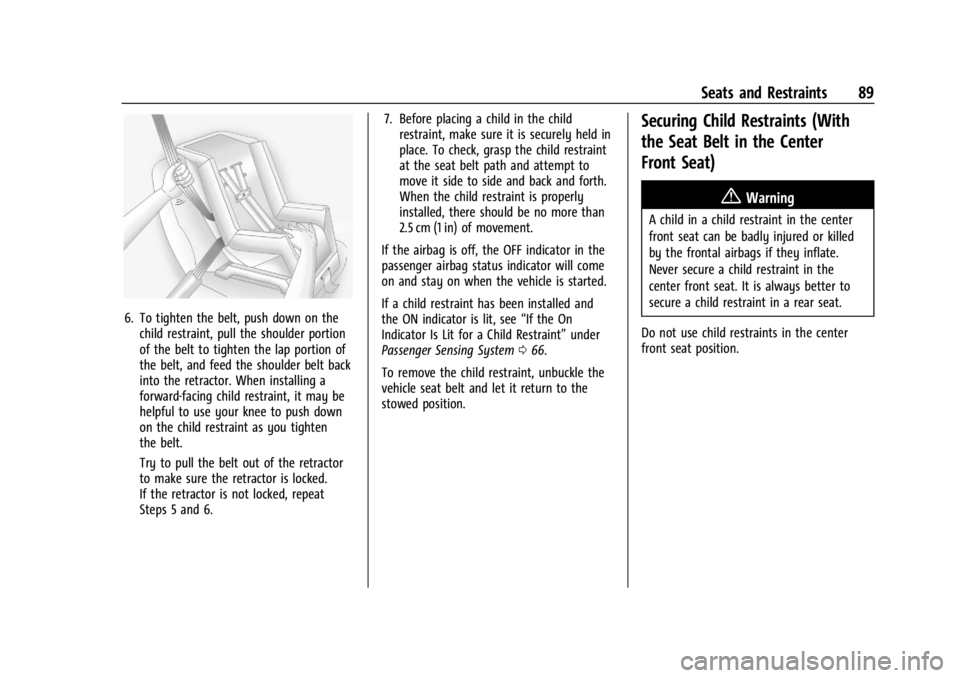
6. To tighten the belt, push down on thechild restraint, pull the shoulder portion
of the belt to tighten the lap portion of
the belt, and feed the shoulder belt back
into the retractor. When installing a
forward-facing child restraint, it may be
helpful to use your knee to push down
on the child restraint as you tighten
the belt.
Try to pull the belt out of the retractor
to make sure the retractor is locked.
If the retractor is not locked, repeat
Steps 5 and 6. 7. Before placing a child in the child
restraint, make sure it is securely held in
place. To check, grasp the child restraint
at the seat belt path and attempt to
move it side to side and back and forth.
When the child restraint is properly
installed, there should be no more than
2.5 cm (1 in) of movement.
If the airbag is off, the OFF indicator in the
passenger airbag status indicator will come
on and stay on when the vehicle is started.
If a child restraint has been installed and
the ON indicator is lit, see “If the On
Indicator Is Lit for a Child Restraint” under
Passenger Sensing System 066.
To remove the child restraint, unbuckle the
vehicle seat belt and let it return to the
stowed position.
Securing Child Restraints (With
the Seat Belt in the Center
Front Seat)
{Warning
A child in a child restraint in the center
front seat can be badly injured or killed
by the frontal airbags if they inflate.
Never secure a child restraint in the
center front seat. It is always better to
secure a child restraint in a rear seat.
Do not use child restraints in the center
front seat position.
Page 99 of 422

GMC Yukon/Yukon XL/Denali Owner Manual (GMNA-Localizing-U.S./
Canada/Mexico-15555988) - 2022 - CRC - 12/3/21
98 Instruments and Controls
If equipped with auto heated seats, the
heated steering wheel will turn on when the
auto heated seat is activated. The heated
steering wheel indicator will display the
state of the steering wheel heat.
SeeHeated and Ventilated Front Seats 043
and
Vehicle Personalization 0130.
Horn
To sound the horn, pressaon the
steering wheel.
Windshield Wiper/Washer
With the ignition on or in ACC/ACCESSORY,
move the windshield wiper lever to select
the wiper speed. 1X :
For a single wipe, briefly move the
wiper lever down. For several wipes, hold
the wiper lever down.
OFF : Use to turn the wipers off.
c:If equipped with Rainsense, use this
setting for intermittent wipes when
Rainsense is disabled, or Rainsense wipes
when Rainsense is enabled. For intermittent
wipes, move the windshield wiper lever to
AUTO, then turn the band up for more
frequent wipes or down for less frequent
wipes. If Rainsense is turned on, see
“Rainsense” later in this section.
LO : Use for slow wipes.
HI : Use for fast wipes.
f:Pull the windshield wiper lever
toward you to spray windshield washer fluid
and activate the wipers. The wipers will
continue until the lever is released or the
maximum wash time is reached. When the
windshield wiper lever is released, additional
wipes may occur depending on how long
the windshield washer has been activated.
See Washer Fluid 0311 for information on
filling the windshield washer fluid reservoir. Clear snow and ice from the wiper blades
and windshield before using them. If frozen
to the windshield, carefully loosen or thaw
them. Damaged blades should be replaced.
See
Wiper Blade Replacement 0316.
{Warning
In freezing weather, do not use the
washer until the windshield is warmed.
Otherwise the washer fluid can form ice
on the windshield, blocking your vision.
{Warning
Before driving the vehicle, always clear
snow and ice from the hood, windshield,
washer nozzles, roof, and rear of the
vehicle, including all lamps and windows.
Reduced visibility from snow and ice
buildup could lead to a crash.
Wiper Parking
If the ignition is turned off while the wipers
are on LO, HI, or AUTO with Rainsense
turned off, they will immediately stop.
Page 108 of 422
GMC Yukon/Yukon XL/Denali Owner Manual (GMNA-Localizing-U.S./
Canada/Mexico-15555988) - 2022 - CRC - 12/3/21
Instruments and Controls 107
pounds per square inch (psi). If the pressure
is low, the value for that tire is shown in
amber.
Average Fuel Economy :Displays average
fuel economy, the best fuel economy over
the selected distance, and a bar graph
showing instantaneous fuel economy
Press the thumbwheel to change the
selected distance. Press and hold the
thumbwheel while this display is active to
reset the best fuel economy and average
fuel economy. This display can also be reset
by selecting reset in the menu
Transmission Fluid Temperature : Shows the
temperature of the automatic transmission
fluid in either degrees Celsius (°C) or degrees
Fahrenheit (°F).
Drive Mode : Displays the state of the drive
mode, ride height, and transfer case. This
info is only available as a right side option
and is the default selection for the
right side.
None : Displays the info area as empty. Audio
Browse music, select from the favorites,
or change the audio source. Use the
thumbwheel to change the station or go to
the next or previous track.
Navigation
If there is an active route, the Turn-by-Turn
directions will appear on the Navigation
Page, if there is no active route a compass
will be displayed.
Phone
If there is no active phone call, view recent
calls, or scroll through contacts. During an
active call, mute the phone or switch to
handset operation.
Options
Use the thumbwheel to scroll through items
in the Options menu.
Display Layout :
Choose Classic, Progressive,
Digital, and Clean layout by pressing the
thumbwheel while the desired item is
highlighted. Exit the Layout menu by
pressing
o. Left/Right Side Info :
Press the thumbwheel
to select the items to be displayed in the
display areas. See "Left/Right Side Info"
previously in this section.
Lower Gauges : Choose one of three gauge
configurations by pressing the thumbwheel
while the desired item is highlighted. The
selected configuration will be displayed at
the bottom of the display.
Maximum displays fuel level, coolant
temperature, engine oil pressure, and
battery voltage. Transmission fluid
temperature displays instead of battery
voltage while in Tow Haul mode.
Medium displays fuel level, and coolant
temperature.
Minimum displays only the fuel level.
Info Page Options : Press the thumbwheel
to select the items to be displayed in the
Info app. See Driver Information Center (DIC)
0 123.
Units : Choose US or metric units by
pressing the thumbwheel while the desired
item is highlighted.
Speed Warning : Allows the driver to set a
speed that they do not want to exceed. To
set the Speed Warning press the