key GMC YUKON 2022 Service Manual
[x] Cancel search | Manufacturer: GMC, Model Year: 2022, Model line: YUKON, Model: GMC YUKON 2022Pages: 422, PDF Size: 8.2 MB
Page 135 of 422
GMC Yukon/Yukon XL/Denali Owner Manual (GMNA-Localizing-U.S./
Canada/Mexico-15555988) - 2022 - CRC - 12/3/21
134 Instruments and Controls
Remote Unlock Light Feedback
When on, the exterior lamps will flash when
unlocking the vehicle with the Remote Key.
Touch Off or Flash Lights.
Remote Lock Feedback
This allows selection of what type of
feedback is given when locking the vehicle
with the Remote Key.
Touch Off, Lights and Horn, Lights Only,
or Horn Only.
Remote Door Unlock
This allows selection of which doors will
unlock when pressing
Kon the
Remote Key.
Touch All Doors or Driver Door.
Remote Start Auto Cool Seats
If equipped and turned on, this feature will
turn on the ventilated seats when using
remote start on warm days. See Heated and
Ventilated Front Seats 043 and
Remote Vehicle Start 013.
Touch Off or On. Remote Start Auto Heat Seats
If equipped and turned on, this feature will
turn on the heated seats when using remote
start on cold days. See
Heated and
Ventilated Front Seats 043 and
Remote Vehicle Start 013.
If equipped with Auto Heated Steering
Wheel, this feature will turn on when the
Remote Start Auto Heated Seats turn on.
Touch Off or On.
Remote Window Operation
If equipped, this feature enables remote
operation of the windows with the Remote
Key. See Remote Keyless Entry (RKE) System
Operation 08.
Touch Off or On.
Passive Door Unlock
This allows the selection of what doors will
unlock when using the button on the driver
door to unlock the vehicle.
Touch Off, All Doors or Driver Door Only.
Passive Door Lock
This allows passive locking to be turned on
or off and selects feedback. See Remote
Keyless Entry (RKE) System Operation 08. Touch Off, On with Horn Chirp, or On.
Remote Left in Vehicle Alert
This feature sounds an alert when the
Remote Key is left in the vehicle.
Touch Off or On.
Remote Removed from Vehicle Alert
This feature beeps the horn 3 times when
exiting a running vehicle with the
Remote Key.
Touch Off or On.
Ride Height
Touch and the following may display:
.Easy Exit Vehicle Height
Easy Exit Vehicle Height
This feature specifies if the vehicle will
automatically lower to make it easier to
enter or exit the vehicle.
Touch Off or On.
Power Assist Steps
Touch and the following may display:
.Automatic Power Assist Steps
.Move Power Assist Steps
Page 144 of 422
GMC Yukon/Yukon XL/Denali Owner Manual (GMNA-Localizing-U.S./
Canada/Mexico-15555988) - 2022 - CRC - 12/3/21
Lighting 143
Interior Lighting
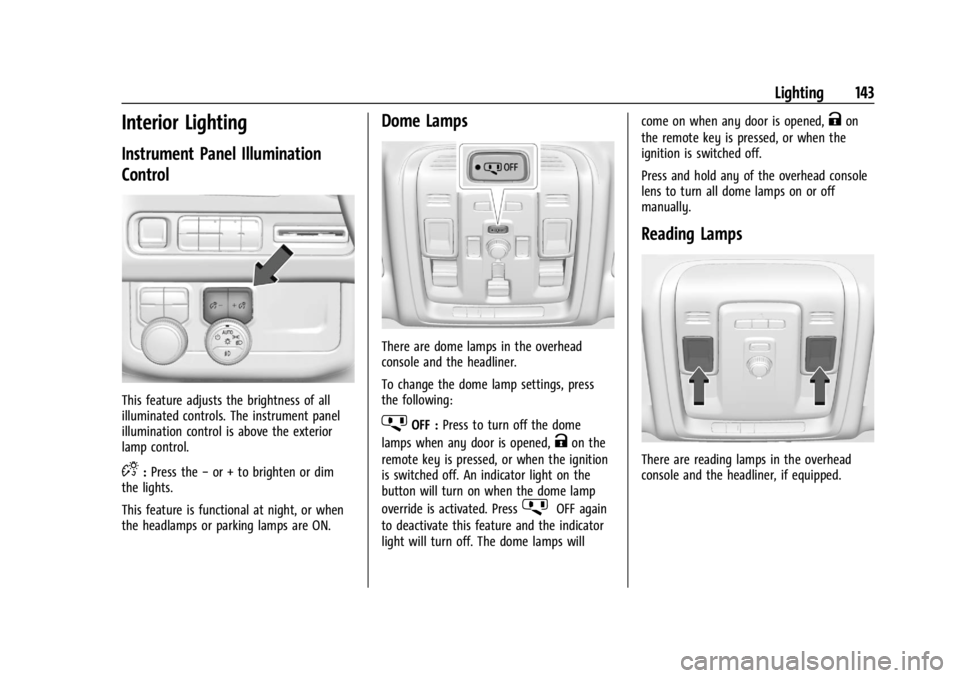
Instrument Panel Illumination
Control
This feature adjusts the brightness of all
illuminated controls. The instrument panel
illumination control is above the exterior
lamp control.
D:Press the −or + to brighten or dim
the lights.
This feature is functional at night, or when
the headlamps or parking lamps are ON.
Dome Lamps
There are dome lamps in the overhead
console and the headliner.
To change the dome lamp settings, press
the following:
jOFF : Press to turn off the dome
lamps when any door is opened,
Kon the
remote key is pressed, or when the ignition
is switched off. An indicator light on the
button will turn on when the dome lamp
override is activated. Press
jOFF again
to deactivate this feature and the indicator
light will turn off. The dome lamps will come on when any door is opened,
Kon
the remote key is pressed, or when the
ignition is switched off.
Press and hold any of the overhead console
lens to turn all dome lamps on or off
manually.
Reading Lamps
There are reading lamps in the overhead
console and the headliner, if equipped.
Page 145 of 422
GMC Yukon/Yukon XL/Denali Owner Manual (GMNA-Localizing-U.S./
Canada/Mexico-15555988) - 2022 - CRC - 12/3/21
144 Lighting
With Sunroof
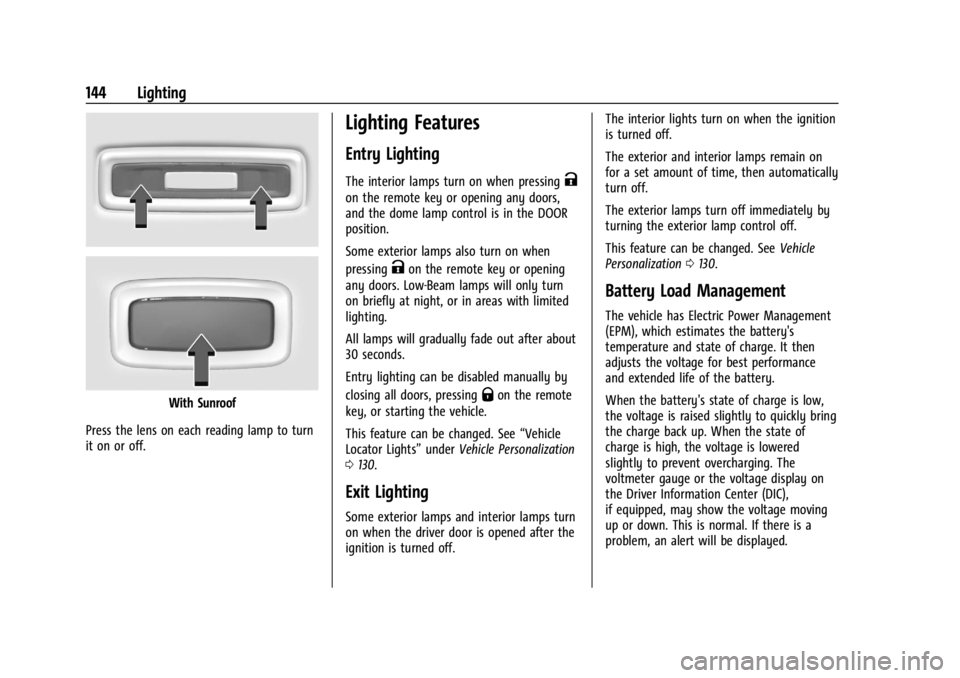
Press the lens on each reading lamp to turn
it on or off.
Lighting Features
Entry Lighting
The interior lamps turn on when pressingK
on the remote key or opening any doors,
and the dome lamp control is in the DOOR
position.
Some exterior lamps also turn on when
pressing
Kon the remote key or opening
any doors. Low-Beam lamps will only turn
on briefly at night, or in areas with limited
lighting.
All lamps will gradually fade out after about
30 seconds.
Entry lighting can be disabled manually by
closing all doors, pressing
Qon the remote
key, or starting the vehicle.
This feature can be changed. See “Vehicle
Locator Lights” underVehicle Personalization
0 130.
Exit Lighting
Some exterior lamps and interior lamps turn
on when the driver door is opened after the
ignition is turned off. The interior lights turn on when the ignition
is turned off.
The exterior and interior lamps remain on
for a set amount of time, then automatically
turn off.
The exterior lamps turn off immediately by
turning the exterior lamp control off.
This feature can be changed. See
Vehicle
Personalization 0130.
Battery Load Management
The vehicle has Electric Power Management
(EPM), which estimates the battery's
temperature and state of charge. It then
adjusts the voltage for best performance
and extended life of the battery.
When the battery's state of charge is low,
the voltage is raised slightly to quickly bring
the charge back up. When the state of
charge is high, the voltage is lowered
slightly to prevent overcharging. The
voltmeter gauge or the voltage display on
the Driver Information Center (DIC),
if equipped, may show the voltage moving
up or down. This is normal. If there is a
problem, an alert will be displayed.
Page 153 of 422

GMC Yukon/Yukon XL/Denali Owner Manual (GMNA-Localizing-U.S./
Canada/Mexico-15555988) - 2022 - CRC - 12/3/21
152 Infotainment System
Radio
AM-FM Radio
Playing the Radio
From the Home Page, touch the Audio icon
to display the active audio source page.
Touch the Source icon at the top left of the
now playing screen to select a new source.
Finding a Station
Seeking a Station
From the AM or FM screen, touch
sor\
on the infotainment display to search for
the previous or next strong station.Tune
TouchZon the infotainment display to
display the Tune screen. Enter a station
using the keypad.
The keypad will gray out entries that do not
contribute to a valid frequency and will
automatically place a decimal point within
the frequency number.
As digits are entered, a list of stations will
appear corresponding to your entry.
Touch
oto delete one number at a time.
Touch and hold
oto delete all numbers.
A valid AM or FM station will automatically
tune to the new frequency but not close the
Tune screen. Touch
Son the infotainment
display to exit. The list of all available stations are on the
right side of the Tune display to browse.
Touch to go to that station or touch
Hto
save the station as a favorite.
Storing Radio Station Favorites
Favorites show in the area at the bottom of
the display.
AM, FM, or SiriusXM : Favorites can be
stored by touching Hold to Set at the
bottom of the screen.
The number of favorites is displayed
automatically.
Audio Settings
From the AM or FM screen, touchkand
the following may display:
Equalizer : Touch to adjust Bass, Midrange,
or Treble using the options on the
infotainment display.
Fade/Balance : Touch to adjust by using the
controls on the infotainment display or by
tapping/dragging the crosshair.
Sound Mode : If equipped, touch to display
the following:
‐ Normal: Adjusts the audio to provide the
best sound for all seating positions.
Page 155 of 422
GMC Yukon/Yukon XL/Denali Owner Manual (GMNA-Localizing-U.S./
Canada/Mexico-15555988) - 2022 - CRC - 12/3/21
154 Infotainment System
Finding a Channel
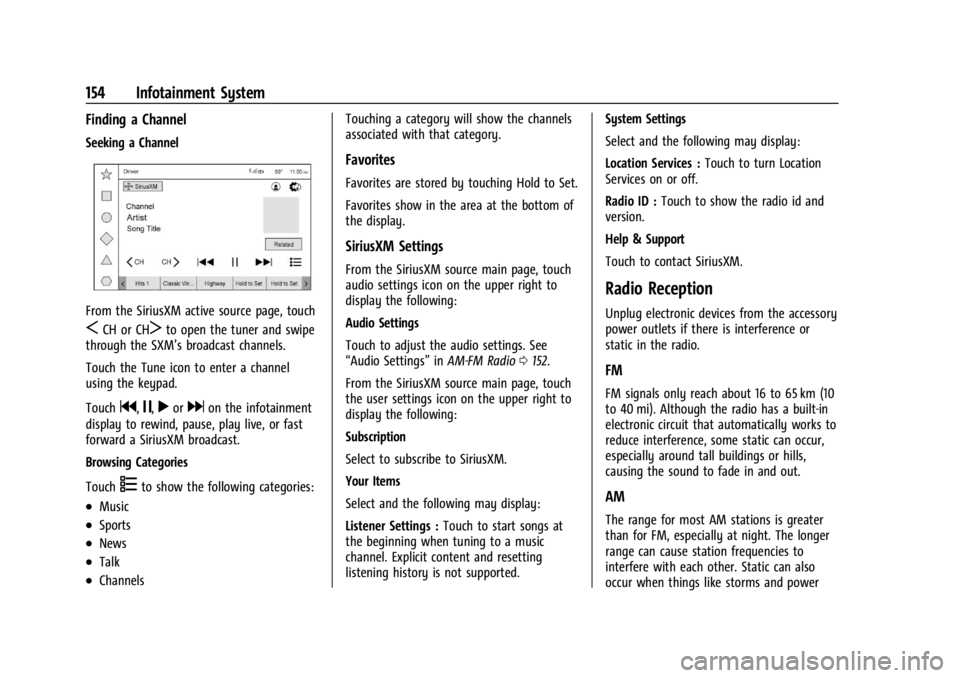
Seeking a Channel
From the SiriusXM active source page, touch
SCH or CHTto open the tuner and swipe
through the SXM’s broadcast channels.
Touch the Tune icon to enter a channel
using the keypad.
Touch
g,j,rordon the infotainment
display to rewind, pause, play live, or fast
forward a SiriusXM broadcast.
Browsing Categories
Touch
(to show the following categories:
.Music
.Sports
.News
.Talk
.Channels Touching a category will show the channels
associated with that category.
Favorites
Favorites are stored by touching Hold to Set.
Favorites show in the area at the bottom of
the display.
SiriusXM Settings
From the SiriusXM source main page, touch
audio settings icon on the upper right to
display the following:
Audio Settings
Touch to adjust the audio settings. See
“Audio Settings”
inAM-FM Radio 0152.
From the SiriusXM source main page, touch
the user settings icon on the upper right to
display the following:
Subscription
Select to subscribe to SiriusXM.
Your Items
Select and the following may display:
Listener Settings : Touch to start songs at
the beginning when tuning to a music
channel. Explicit content and resetting
listening history is not supported. System Settings
Select and the following may display:
Location Services :
Touch to turn Location
Services on or off.
Radio ID : Touch to show the radio id and
version.
Help & Support
Touch to contact SiriusXM.
Radio Reception
Unplug electronic devices from the accessory
power outlets if there is interference or
static in the radio.
FM
FM signals only reach about 16 to 65 km (10
to 40 mi). Although the radio has a built-in
electronic circuit that automatically works to
reduce interference, some static can occur,
especially around tall buildings or hills,
causing the sound to fade in and out.
AM
The range for most AM stations is greater
than for FM, especially at night. The longer
range can cause station frequencies to
interfere with each other. Static can also
occur when things like storms and power
Page 172 of 422
GMC Yukon/Yukon XL/Denali Owner Manual (GMNA-Localizing-U.S./
Canada/Mexico-15555988) - 2022 - CRC - 12/3/21
Infotainment System 171
To make a call using the Contacts menu:1. Touch the Phone icon on the Home Page or on the shortcut tray near the left of
the display.
2. Touch Contacts.
3. There are two methods to search for contacts:
.Search bar –Touch the search icon
on the top right of the Phones
window and type the name or
number of the contact on the
keyboard. Search results will be
displayed corresponding to the user
input. Touch the name to call.
.Scroll –Touch the list and scroll,
or use the scrollbar on the left side
of the Phones window. Touch the
name to call.
Making a Call Using the Recents Menu
The Recents menu accesses the recents call
list from your cell phone.
To make a call using the Recents menu:
1. Touch the Phone icon on the Home Page or on the shortcut tray near the left of
the display.
2. Touch Recents.
3. Touch the name or number to call.
Making a Call Using the Keypad
To make a call by dialing the numbers: 1. Touch the Phone icon on the Home Page or on the shortcut tray near the left of
the display.
2. Touch Keypad and enter a phone number.
3. Touch the phone icon on the infotainment display to start dialing the
number.
Searching Contacts Using the Keypad
To search for contacts using the keypad:
1. Touch the Phone icon on the Home Page.
2. Touch Keypad and enter partial phone numbers or contact names using the
digits on the keypad to search.
Results appear on the right side of the
display. Touch one to place a call.
Accepting or Declining a Call
When an incoming call is received, the
infotainment system mutes and a ring tone
is heard in the vehicle.
Accepting a Call
There are two ways to accept a call:
.Pressgon the steering wheel controls.
.Touch Answer on the infotainment
display.
Declining a Call
There are two ways to decline a call:
.Presscon the steering wheel controls.
.Touch Decline on the infotainment
display.
Call Waiting
Call waiting must be supported on the
Bluetooth cell phone and enabled by the
wireless service carrier to work.
Accepting a Call
Press
gto answer, then touch Switch on
the infotainment display.
Declining a Call
Press
cto decline, then touch Decline on
the infotainment display.
Switching Between Calls (Call Waiting
Calls Only)
To switch between calls, touch Phone on the
Home Page to display Call View. While in
Call View, touch the call information of the
call on hold to change calls.
Page 173 of 422

GMC Yukon/Yukon XL/Denali Owner Manual (GMNA-Localizing-U.S./
Canada/Mexico-15555988) - 2022 - CRC - 12/3/21
172 Infotainment System
Ending a Call
.Presscon the steering wheel controls.
.Touch#on the infotainment display,
next to a call, to end only that call.
Dual Tone Multi-Frequency (DTMF) Tones
The in-vehicle Bluetooth system can send
numbers during a call. This is used when
calling a menu-driven phone system. Use the
Keypad to enter the number.
Apple CarPlay and Android Auto
If equipped, Android Auto and/or Apple
CarPlay capability may be available through
a compatible smartphone. If available, the
Android Auto and Apple CarPlay icons will
change from gray to color on the Home
Page of the infotainment display.
To use Android Auto and/or Apple CarPlay:
For Wired Phone Projection
1. Download the Android Auto app to your smartphone from Google Play for phones
running Android 9 and below. There is
no app required for Apple CarPlay or
newer versions of Android. 2. Connect your Android phone or Apple
iPhone by using the factory-provided
phone USB cable and plugging into a
USB data port. For best performance, it is
highly recommended to use the device’s
factory-provided USB cable, which should
be replaced after significant wear to
maintain connection quality. Aftermarket
or third-party cables may not work.
3. When the phone is first connected to activate Apple CarPlay or Android Auto,
accept the terms and conditions on both
the infotainment system and the phone.
4. Follow the instructions on the phone.
The Android Auto and Apple CarPlay icons
on the Home Page will illuminate depending
on the smartphone. Android Auto and/or
Apple CarPlay may automatically launch the
next time the USB is connected. If not,
touch the Android Auto or Apple CarPlay
icon on the Home Page to launch.
Press
{on the center stack to return to the
Home Page.
For Wireless Phone Projection
Verify your phone is wireless compatible by
visiting the Android Auto or Apple CarPlay
support page. 1. Download the Android Auto app to your
smartphone from Google Play for phones
running Android 9 and below. There is
no app required for Apple CarPlay or
newer versions of Android.
2. For first time connection, there are two ways to set up wireless projection:
.Connect your Android phone or Apple
iPhone by using the factory-provided
phone USB cable and plugging into a
USB data port. For best performance,
it is highly recommended to use the
device’s factory-provided USB cable,
which should be replaced after
significant wear to maintain
connection quality. Aftermarket or
third-party cables may not work.
.Connecting the phone over Bluetooth.
See Bluetooth (Overview) 0167 or
Bluetooth (Pairing and Using a Phone)
0 168.
3. Make sure Wi-Fi and Bluetooth is turned on the phone for wireless projection
to work.
4. When the phone is first connected to activate Apple CarPlay or Android Auto,
agree to the terms and conditions on
both the infotainment system and the
phone.
Page 177 of 422
GMC Yukon/Yukon XL/Denali Owner Manual (GMNA-Localizing-U.S./
Canada/Mexico-15555988) - 2022 - CRC - 12/3/21
176 Infotainment System
.Pattern: Touch to choose an unlock
pattern to draw.
.PIN: Touch to create a PIN.
.Password: Touch to create a password
Trusted Device
Touch to set a phone as your trusted device.
Clear Credentials
Touch to remove all credentials.
Unlock profile with phone
System
The menu may contain the following:
Language
This will set the display language used on
the infotainment display. It may also use
the selected language for voice recognition
and audio feedback. Touch the preferred
language.
Keyboard & speech
Touch and the following may display:
.Autofill service: Touch to select None or
Google.
.Keyboard: Touch to select Google
Automotive Keyboard or Manage
keyboards.
.Text-to-speech output: Touch to select
Preferred engine, Speech Rate, Pitch,
or Reset.
Reset Options
Touch and the following may display:
.Reset Vehicle Settings: Resets all vehicle
settings for all users.
Touch Reset or Cancel.
.Reset App Preferences: Resets all
preferences for disabled apps, disabled
app notifications, default applications for
actions, background data restrictions for
apps, and any permission restrictions.
App data will not be lost.
Touch Reset or Cancel.
.Erase Infotainment Data: Erases
infotainment data.
TTY Mode
When on, OnStar calls are made as a series
of text exchanges. A keyboard is shown for
text entry and the phone audio is muted.
This feature can be turned off or on.
About
Touch to view the infotainment system
software information. Legal Information
Touch to view legal and license information.
Updates
Touch and the following may display:
.Check for Updates: Touch to see if the
software is up to date.
.Preferences: Touch to download new
updates in the background or download
updates via Wi-Fi when possible.
Touch Off or On.
Google
Touch and the following may display:
.Manage activity controls
.Autofill with Google
.Google Assistant
.Send feedback to Google
Teen Driver
If equipped, this allows multiple keys to be
registered for beginner drivers to encourage
safe driving habits. When the vehicle is
started with a Teen Driver key, it will
automatically activate certain safety
systems, allow setting of some features, and
limit the use of others. The Report Card will
record vehicle data about driving behavior
Page 178 of 422
GMC Yukon/Yukon XL/Denali Owner Manual (GMNA-Localizing-U.S./
Canada/Mexico-15555988) - 2022 - CRC - 12/3/21
Infotainment System 177
that can be viewed later. When the vehicle
is started with a Teen Driver key, the Driver
Information Center (DIC) displays a message
that Teen Driver is active.
To access:1. Touch Settings on the Home Page, then touch Vehicle, and then Teen Driver.
2. Create a Personal Identification Number (PIN) by choosing a four-digit PIN.
Re-enter the PIN to confirm. To change
the PIN, touch Change PIN.
The PIN is required to:
.Set up/Add or remove keys.
.Change Teen Driver settings.
.Change or clear the Teen Driver PIN.
.Access or delete Report Card data.
Set up/Add keys to activate Teen Driver and
assign restrictions to the key:
Any vehicle key can be registered, up to a
maximum of eight keys. Label the Teen
Driver key to tell it apart from the
other keys. For a pushbutton start system:
1. Start the vehicle.
2. For automatic transmissions, the vehicle must be in P (Park). For manual
transmissions, the vehicle must be
stopped with the parking brake set.
3. From the Settings menu, touch Vehicle and then Teen Driver.
4. Enter the PIN.
5. Place the remote key you wish to register in the transmitter pocket. The
key does not need to be the one that
started the vehicle. See Remote Keyless
Entry (RKE) System Operation 08for
transmitter pocket location.
6. From the Teen Driver menu, touch Setup Keys or Add/Remove Teen Driver Keys.
.If the remote key has not previously
been registered, the option to add
the key displays. Touch Add and a
confirmation message displays. Teen
Driver restrictions will be applied
whenever this remote key is used to
operate the vehicle.
.If the remote key has already been
registered, the option to remove the
key displays. If Remove is touched,
the remote key is no longer
registered. A confirmation message
displays, and Teen Driver restrictions
will not be applied if this remote key
is used to operate the vehicle.
In vehicles with a pushbutton start system,
if a Teen Driver and a non-Teen Driver
remote key are both present at start up, the
vehicle will recognize the non-Teen Driver
remote key to start the vehicle. The Teen
Driver settings will not be active.
For a keyed ignition system: 1. Start the vehicle.
2. For automatic transmissions, the vehicle must be in P (Park). For manual
transmissions, the vehicle must be
stopped with the parking brake set.
3. From the Settings menu, touch Vehicle and then Teen Driver.
4. Enter the PIN.
5. Touch Setup Keys or Add/Remove Teen Driver Keys. The system displays
instructions for registering or
unregistering a key. A confirmation
message displays.
Page 179 of 422
GMC Yukon/Yukon XL/Denali Owner Manual (GMNA-Localizing-U.S./
Canada/Mexico-15555988) - 2022 - CRC - 12/3/21
178 Infotainment System
Manage Settings or Teen Driver Settings
Depending on the options of your vehicle,
the following menu items may be displayed:
Buckle to Drive :When turned ON, Buckle to
Drive prevents the driver from shifting out
of P (Park) for a period of time after the
brake pedal is pressed if driver, or on some
vehicles the detected passenger, has not
buckled their seat belt. On some vehicles,
Buckle to Drive is always ON when Teen
Driver is active and is not configurable. See
Buckle To Drive 054.
Audio Volume Limit : Allows a maximum
audio volume to be set. Turn the audio
volume limit on or off. Use the arrows to
choose the maximum allowable level for the
audio volume. On some infotainment
systems, touch Set Audio Volume Limit to
choose the maximum allowable audio
volume level.
Set Audio Volume Limit : Use the arrows to
choose the maximum allowable level for the
audio volume.
Teen Driver Speed Limiter : Limits the
maximum speed of the vehicle. When the
speed limiter is turned on and the vehicle is started with a Teen Driver key, the DIC
displays a message that the top speed is
limited.
On certain vehicles, when the Speed Limiter
is turned ON, the vehicle’s maximum
acceleration will be limited. The DIC will
display a message that the acceleration is
limited.
Teen Driver Speed Warning :
Displays a
warning in the DIC when exceeding a
selectable speed. Turn the speed warning on
or off and choose the desired speed warning
level. The speed warning does not limit the
speed of the vehicle. On some infotainment
systems, touch Set Teen Driver Speed
Warning to set the warning speed.
Set Teen Driver Speed Warning : Choose the
desired speed warning level. The speed
warning does not limit the speed of the
vehicle.
SiriusXM Explicit Content Filter (if
equipped) : Allows the SiriusXM Explicit
Content Filter to be turned ON or OFF.
When ON, the teen driver will not be able
to listen to SiriusXM stations that contain
explicit content, and the Explicit Content
Filter selection in the Audio Settings will be
unavailable for change. When Teen Driver is Active:
.The radio will mute when the driver seat
belt, and in some vehicles the front
passenger seat belt, is not buckled. The
audio from any device paired to the
vehicle will also be muted.
.An object placed on the front passenger
seat, such as a briefcase, handbag,
grocery bag, laptop, or other electronic
device, could cause the passenger sensing
system to falsely sense an unbuckled
front passenger and mute the radio.
If this happens, remove the object from
the seat. See
Passenger Sensing System
0 66.
.Some safety systems, such as Automatic
Emergency Braking, if equipped, cannot
be turned off.
.The gap setting for Adaptive Cruise
Control and the alert timing setting for
Forward Collision Alert, if equipped,
cannot be changed.
.When trying to change a safety feature
that is not configurable in Teen Driver,
the DIC displays a message indicating
that Teen Driver is active and the action
is not available.
.Super Cruise, if equipped, is not available.